About PreProduct App
What is PreProduct App?
PreProduct lets brands capture pre-orders for upcoming product launches at any point in the new product cycle. Allowing you to pre-sell, gauge demand & recoup cash quicker. For ‘pay later’ & ‘deposit-based’ pre-orders, payment links are only sent out when you trigger them, so you’re completely in control.
Install PreProduct App
Before using this element, you have to install the PreProduct app to your store and configure options in the app and then come back to PageFly to use the element(s) on all of your PageFly product pages. Only one PreProduct element is allowed per each product page.
How To Access PreProduct Element
In page editor, follow these steps to access PreProduct element:
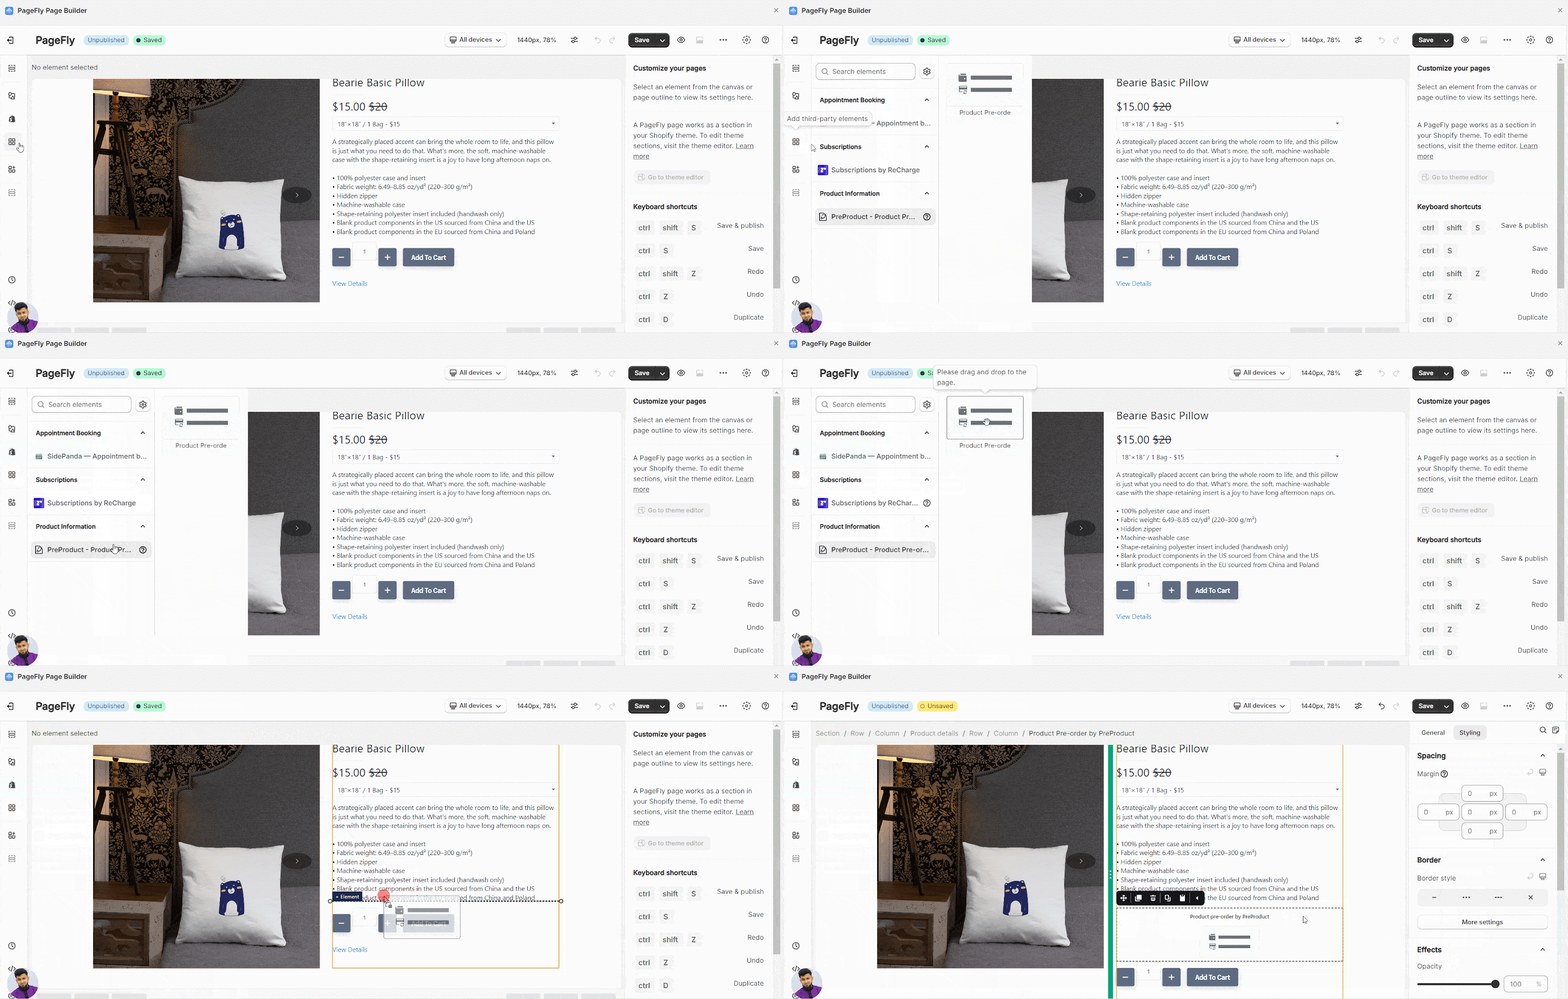
- Step 1: In the PageFly editor, click “Add third-party element” on the left menu.
- Step 2: Click “Manage integrations” or the gear icon on top.
- Step 3: Search for “PreProduct next-gen pre-order” and enable it.
- Step 4: Click “Close” and the element will appear in the “Add third-party element” menu.
How To Configure PreProduct Element
From PageFly
Step 1: Add PreProduct Element
Before starting to set up for the PreProduct element, you will need to add this element onto your page canvas:
- Step 1: Click “Add third party element” on the left menu bar
- Step 2: Look for “PreProduct” element
- Step 3: Click on the element to see its variants
- Step 4: Drag and drop the variant onto the page canvas
Step 2: Configure PreProduct Element
After adding the element, you can adjust for it by clicking on the element.
- From the “General” tab, there is a widget configuration giving you a short explanation of the PreProduct app, its link to the app listing.
- For styling options like margins, borders, and effects, go to the “Styling” tab. You can find more details about the available options here.
From PreProduct App
In the Dashboard of PreProduct, head to the New Listing section. Here you will see the list of your Products. Choose the product that you want to set as a Pre-Order product.
Here you can set for the time that the product will be ready to ship, then set up an Early Bird discount (if there is one), Pay Later mode.
Next, click “Create Listing”.
After products are set up successfully, they will display on the Dashboard: Current Listings
Back to your PageFly Editor > Choose the product page of that product you set up above > Drag and drop the Pre-Product element into the Product Details section.
Frequently Asked Questions
What’s Included In PreProduct App?
A free plan from Pre-Product includes 5 posts per month, Automated social media content catalog, Share on FB, IG, TikTok & Pinteres and customizable logo and brandings.


