Summary: Shopify Contact Form Button allows you to add a button to your contact forms, making it easy for customers to submit their inquiries. This element is essential for enhancing user interaction and can be customized to match your store’s design.
In this article, we will guide you through steps to effectively use the Contact Form Button element in PageFly.
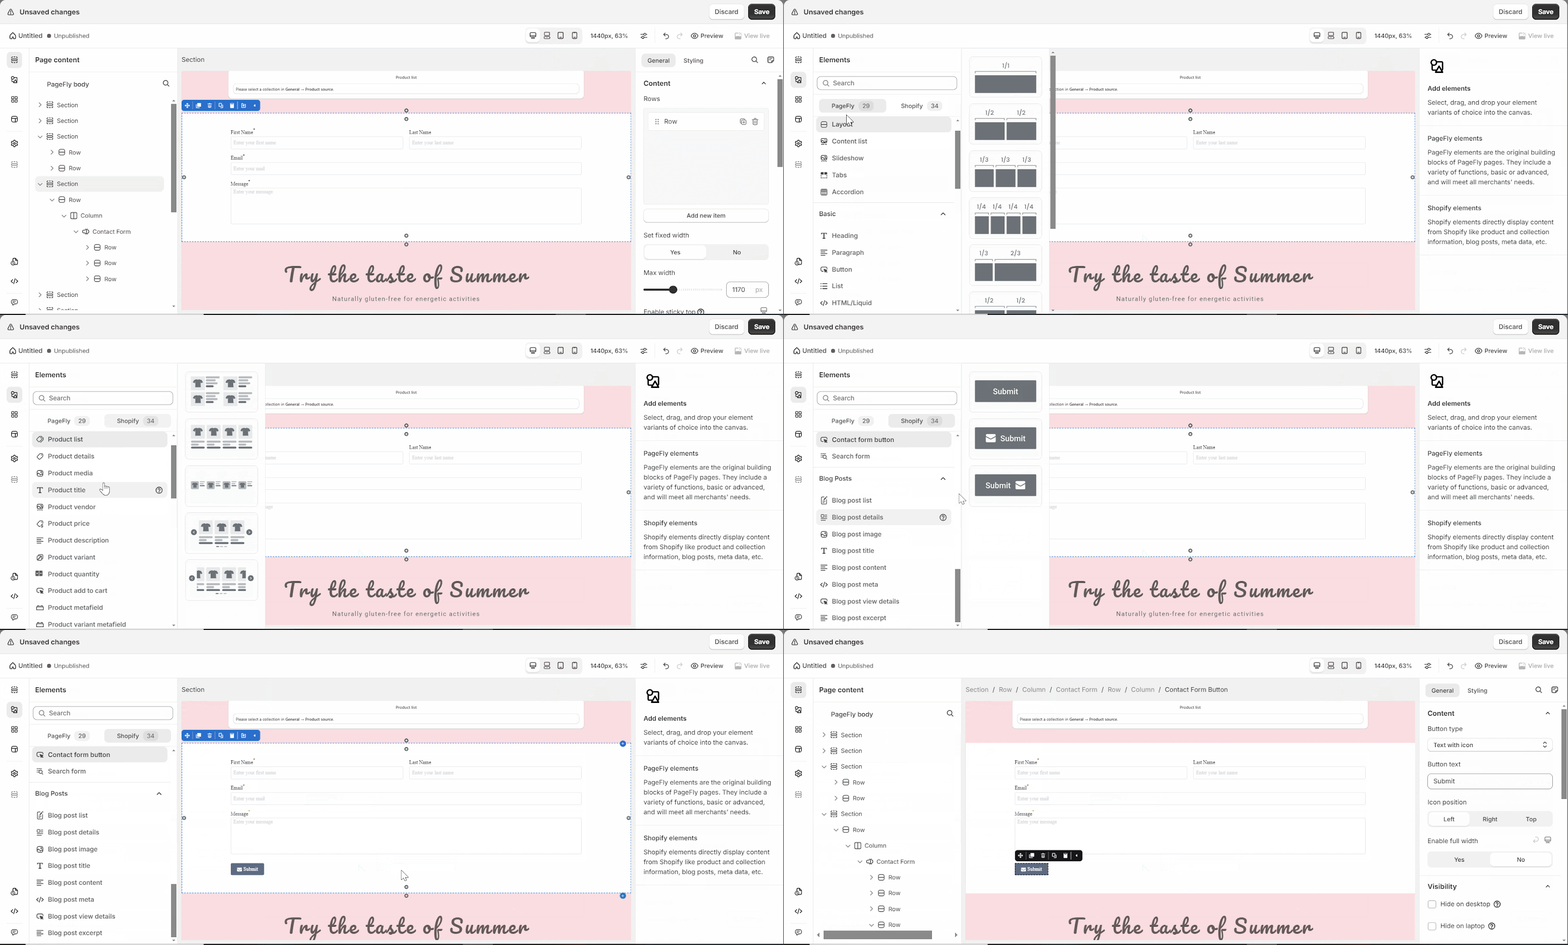
- Step 1: Click on the Elements icon in the left menu
- Step 2: Navigate to the Shopify tab, which include elements from Shopify.
- Step 2: Scroll down to find the Contact Form Button element or use the search bar.
- Step 3: Drag and drop the desired variant of the Contact Form Button element into the page canvas.
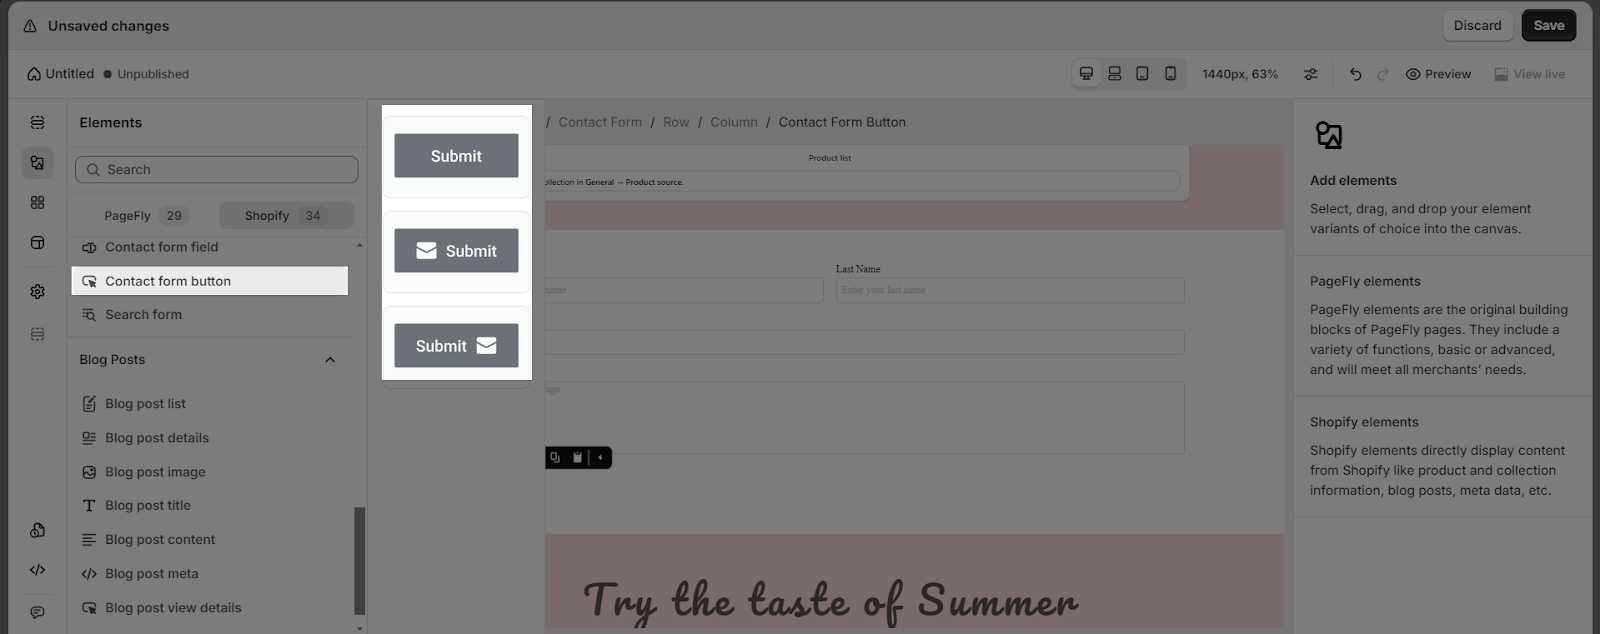
The Contact Form Button element comes with three variations to cover most of your needs. These variations include:
- Text only
- Text and icon
- Icon and text
We will continue to add more variations to help you save time.
The Contact Form Button element comes with various parameters to adjust its functionality and appearance.
Click on the Contact Form Button element you’ve added to your page. Then, go to the General and Styling tabs to access and adjust the available parameters.
General Settings
Legacy Editor
In the General tab, you can configure the essential settings for the Contact Form Button element. Here are the main parameters:
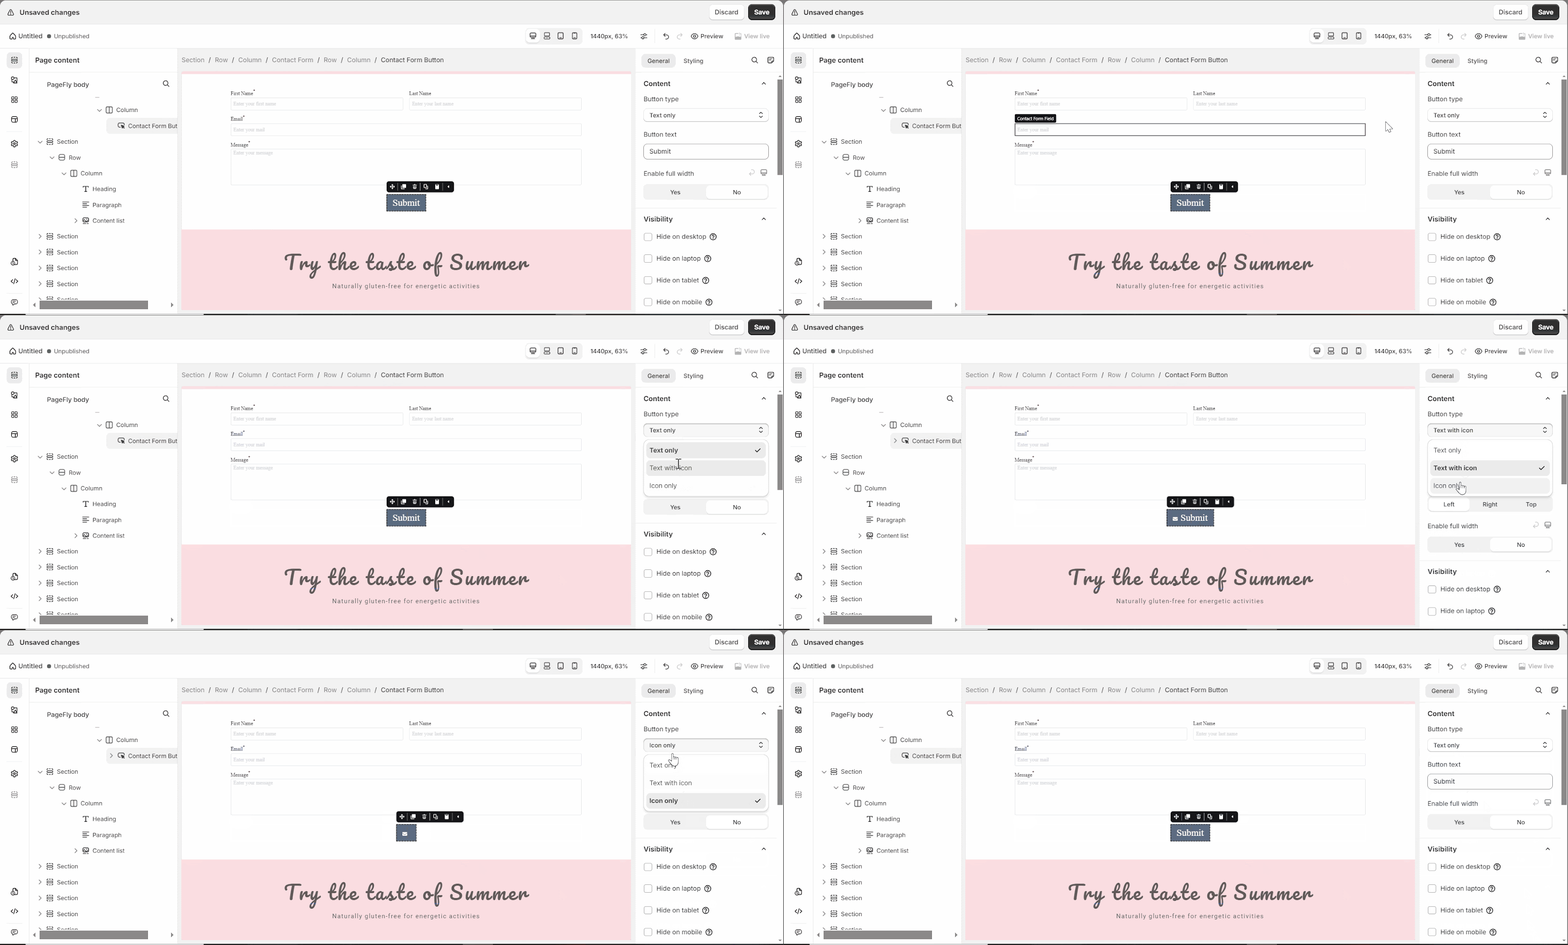
Button Type
There are three options available:
- Text only
- Text with icon
- Icon only
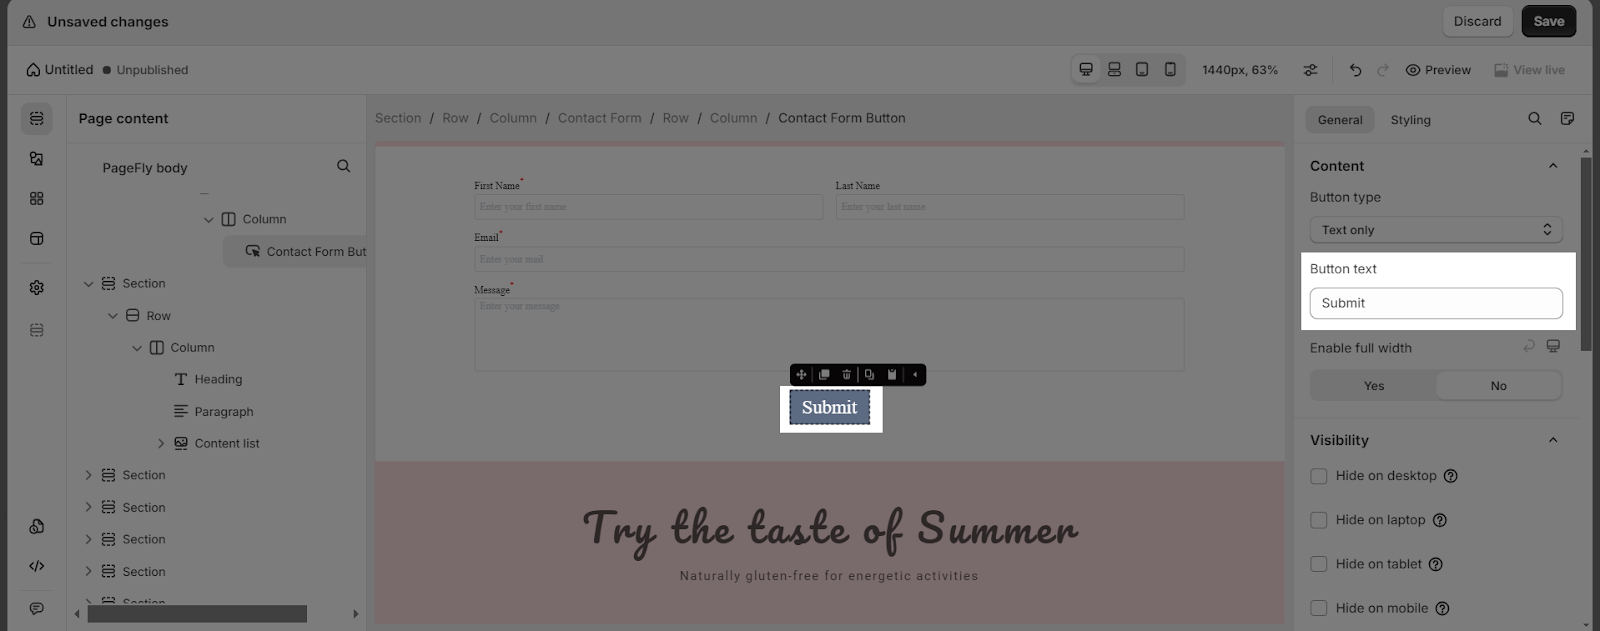
Button Text
Enter the text that will appear on the button. If you select the “Icon only” button type, you can still edit this field, but the text won’t appear on your button.
Icon Position
If the button type you select includes an icon, you can choose its position. Options include:
- Left of the button text
- Right of the button text
- Top of the button text
- Enable Full Width
This option allows you to make the button span the full width of its container.
Tracking
There are 3 tracking options available:
- PageFly events: Track user interactions with the button within the PageFly analytics dashboard, giving you insights into how often the button is clicked.
- Google analytics: Integrate with Google Analytics to track button clicks as events, helping you measure user engagement and conversion rates.
- Facebook pixel: Use Facebook Pixel to track button clicks, enabling you to monitor and optimize your Facebook ad campaigns based on user interactions with the button.
You can get information about ATTRIBUTES, VISIBILITY, ANIMATION parameters in this article.
Gen 2 Editor
- Gen 2 Editor Beta is now closed. Pages and sections created with Gen 2 Editor will remain fully functional. Enhanced version will be coming soon.
- Gen 2 Layout will be available exclusively for Pay-as-you-go pricing model (slot plans).
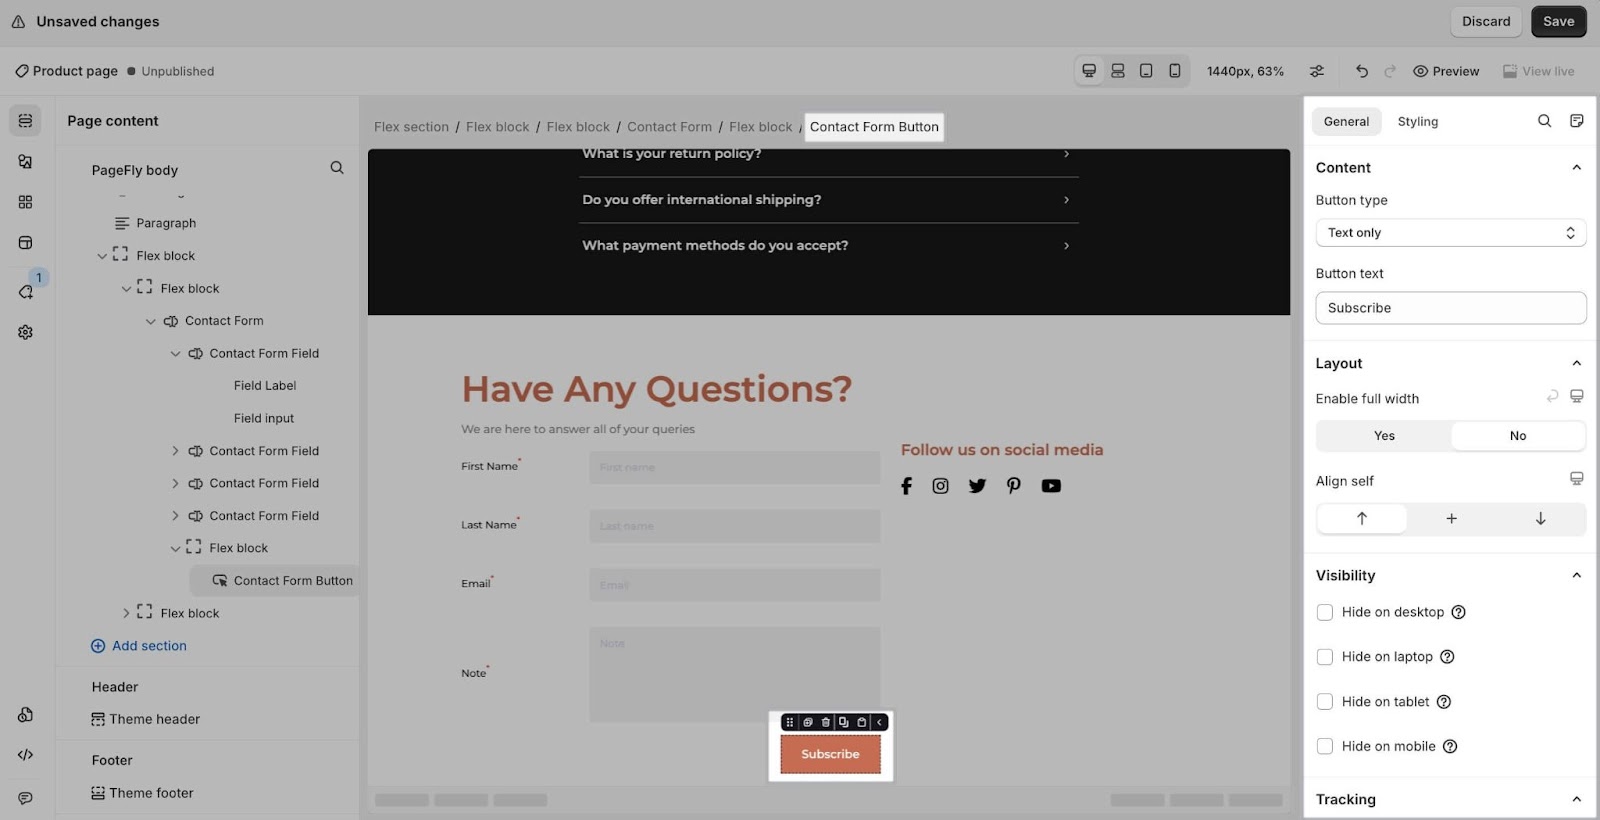
In addition to the settings available in the Basic section, when using the Contact Form button in a Flex section, you can choose the “Align Self” option with three styles to align the content:
- Top
- Center
- Bottom
Styling Settings
The Styling tab allows you to customize the appearance of the Contact Form Button element to ensure it aligns with your brand’s design.
Legacy Editor
For more detailed information, refer to the Styling tab guide. Below are two noteworthy settings in the Styling tab for the Contact Form Button element:
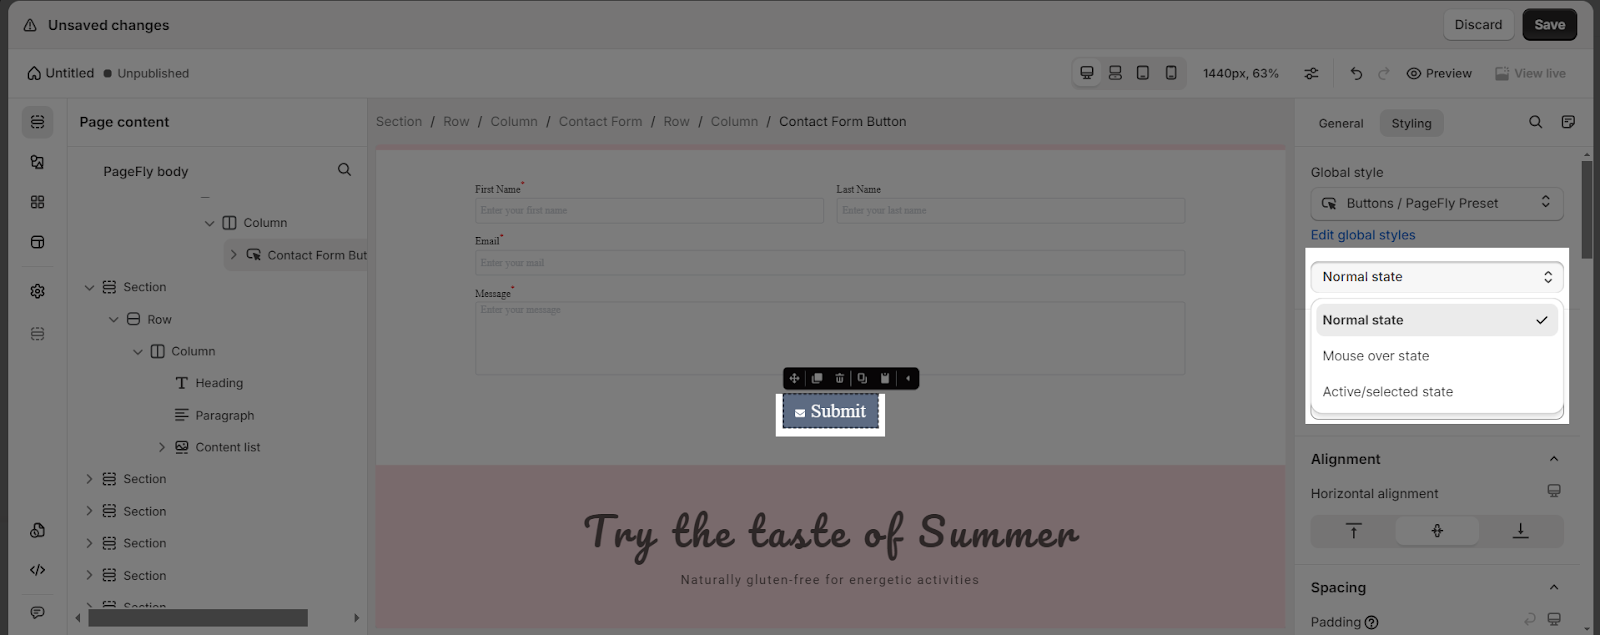
Button State: You can choose the Button State, which contains three options:
- Normal: The default appearance of the button.
- Mouse Over: The appearance of the button when a user hovers over it.
- Active/Selected: The appearance of the button when it is clicked or selected.
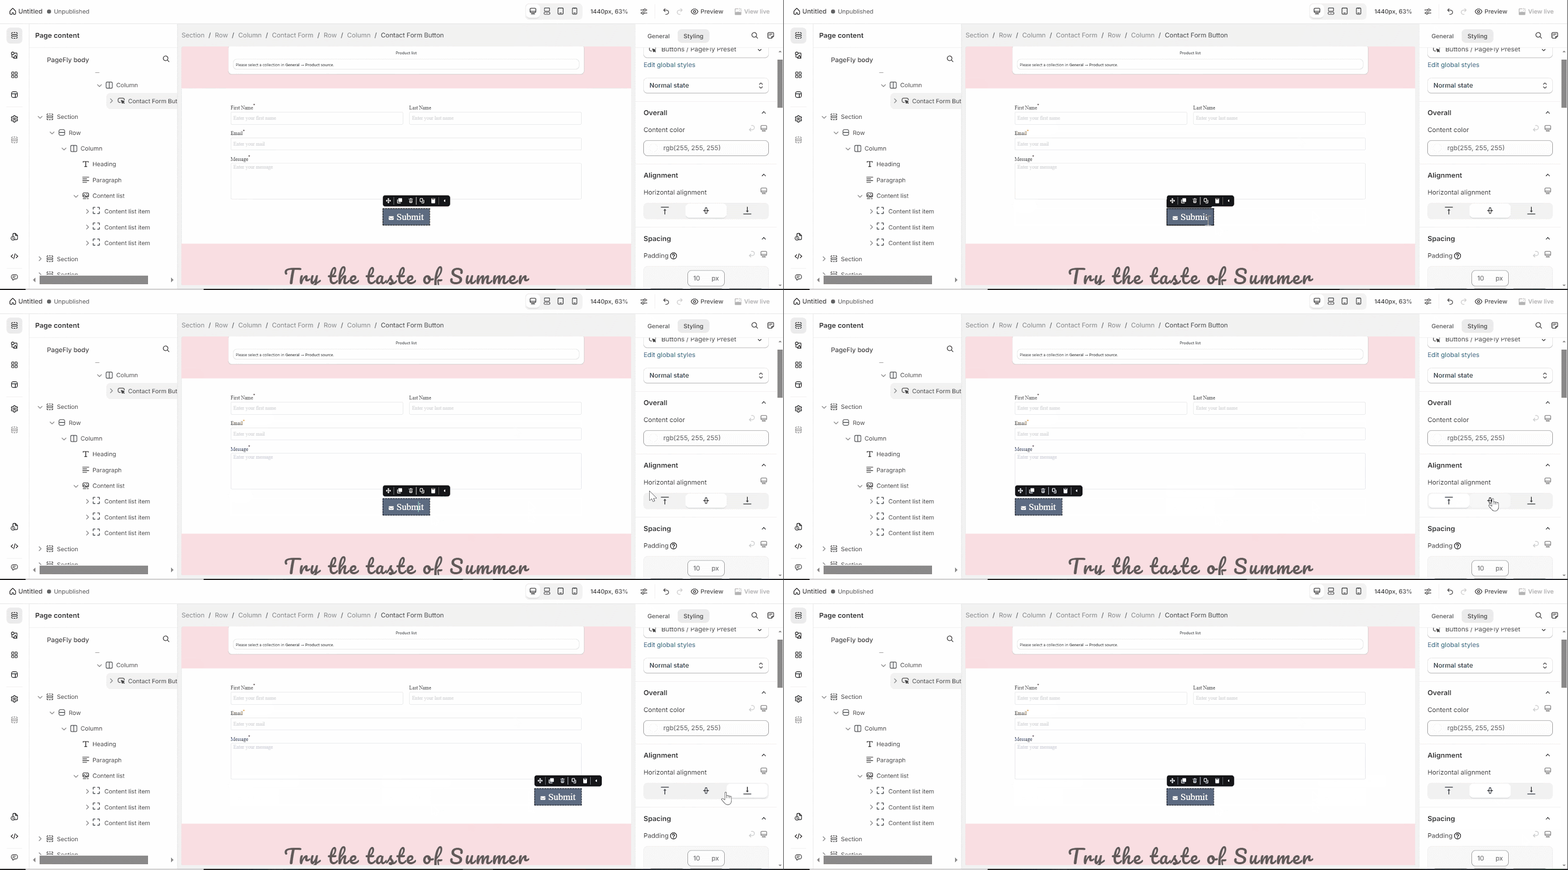
Horizontal Alignment: Set the horizontal alignment of the button with options:
- Right
- Left
- Center
Gen 2 Editor
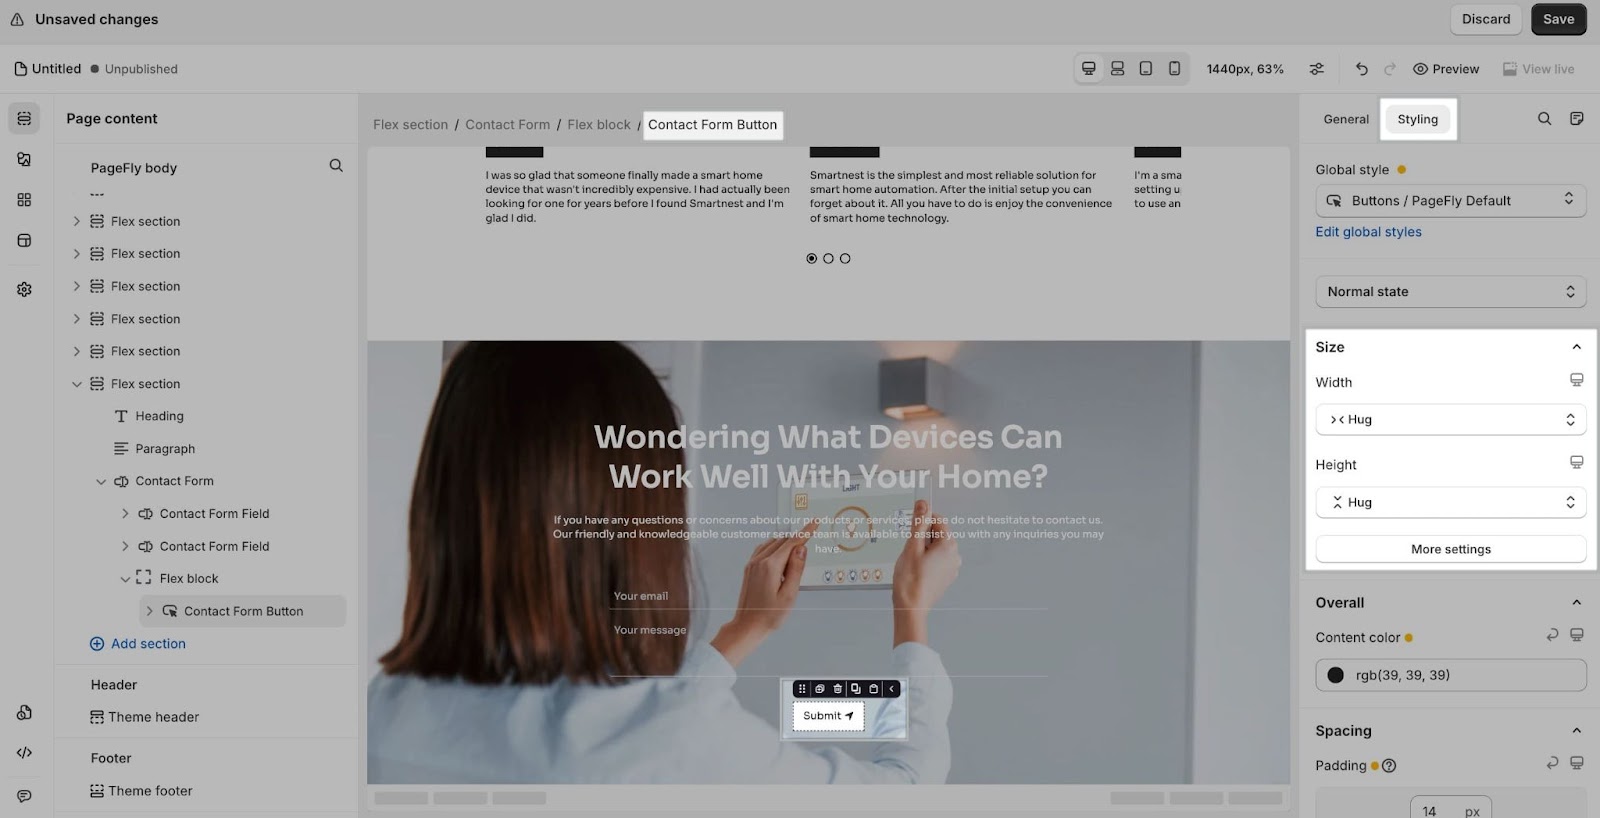
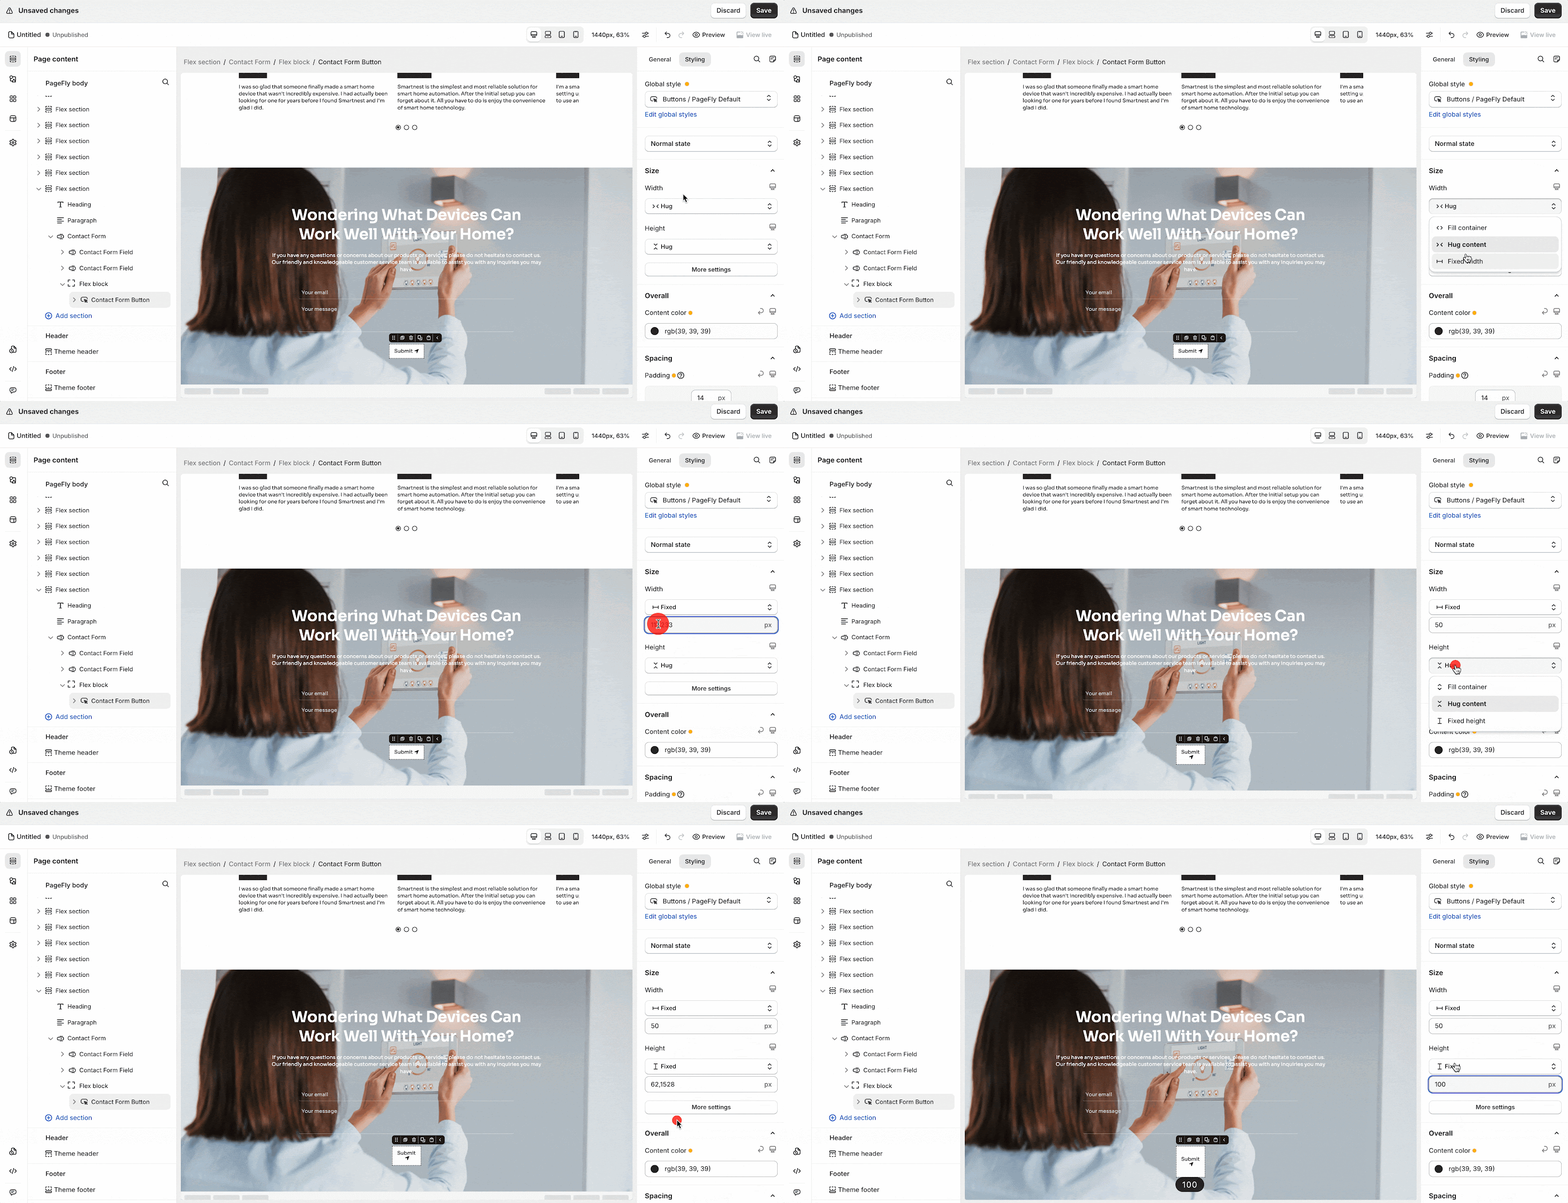
When using the Contact Form Button element in a Flex section, you can control its width and height in the Styling tab with these three options:
- Fill Container: The Contact Form Button will expand to fill the entire space of its parent container.
- Hug Content: The Contact Form Button will resize to fit the content inside it.
- Fixed Width / Fixed Height: Set a specific width and/or height for the Contact form button. You can define the exact dimensions below this option.
Click on “More settings” to set the minimum and maximum width and height for the Contact form button.
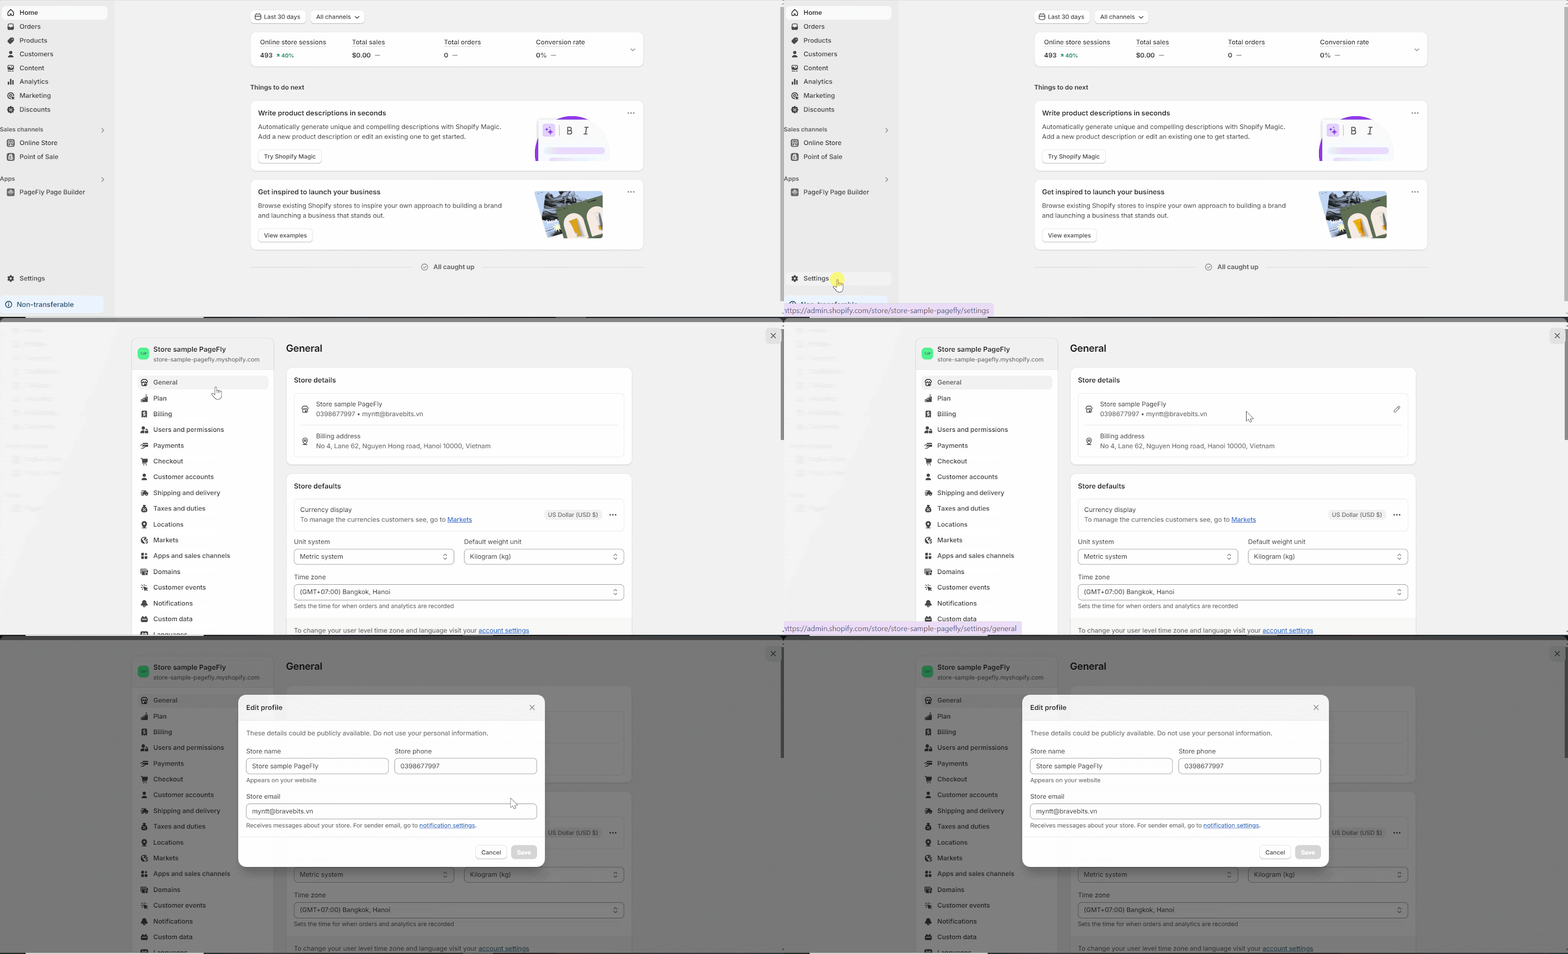
After a customer hits Submit, their messages will go directly to your Store Email, which is set up in Shopify admin > Settings > General > Store details.
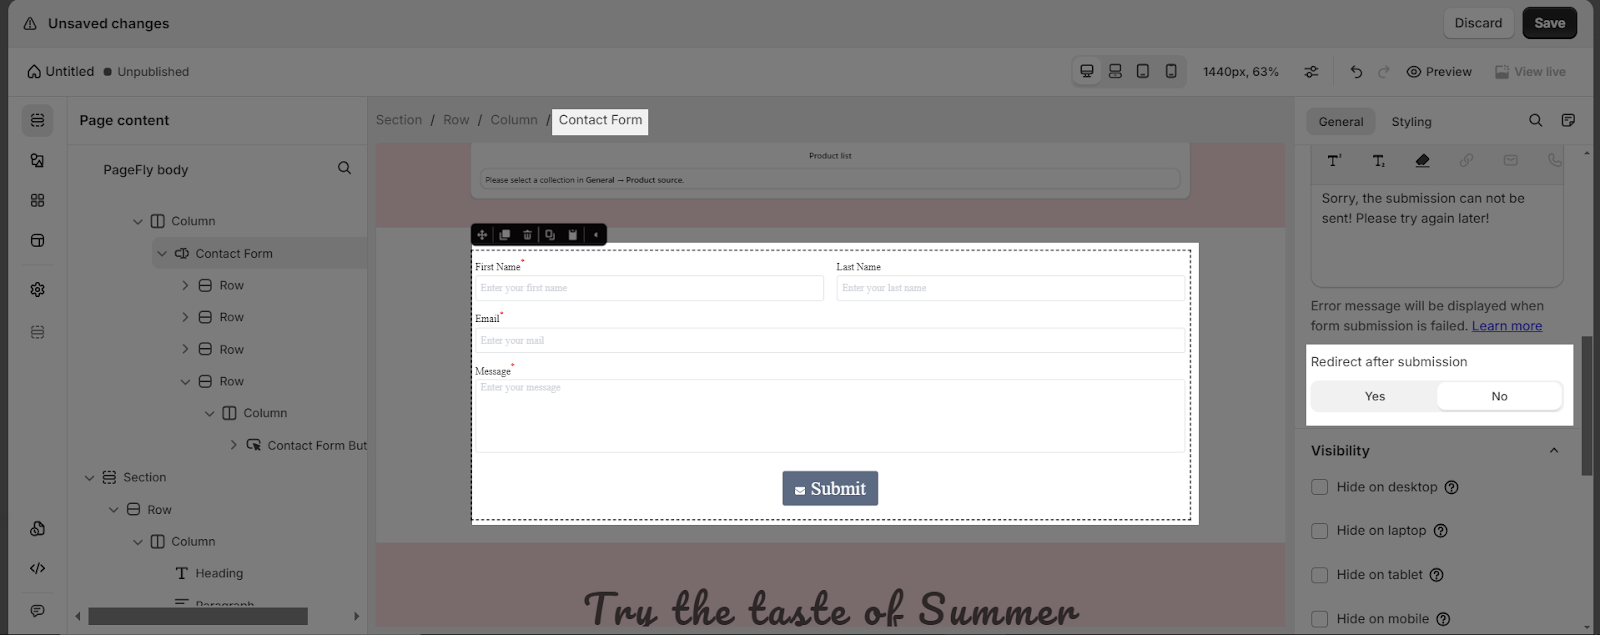
If you want to redirect customers after submission, please select the whole Contact form element and enable Redirect after submission.
We have another choice, you can use the Klaviyo element. For detailed instructions, refer to the Klaviyo integration article.
Common Cases
Form Not Submitting
If you find that your form isn’t submitting when the Contact Form Button is clicked, it’s likely because the button isn’t properly linked to the form. Make sure the Contact Form Button is placed inside the Contact Form element. Additionally, double-check that all required fields in the form are filled out correctly.
Redirect After Submission Not Working
If your form isn’t redirecting to the specified URL after submission, the issue could be with the redirect settings. Verify that you’ve enabled the Redirect after submission option for the entire Contact Form element. Also, ensure that the URL you’ve entered for redirection is correct and properly formatted.
Frequently Asked Questions
What makes a good Contact Form Button?
A good Contact Form Button should be visually appealing, easy to read, and aligned with your brand’s design. It should stand out on the page, use a clear and concise call-to-action (CTA), and be positioned prominently within the form to encourage submissions.
What should the CTA text on the Contact Form Button be?
The CTA text on the Contact Form Button should be clear and action-oriented. Common examples include Submit, Send Message, Contact Us, or Get in Touch. The text should clearly indicate the action that will be taken when the button is clicked.
How do I ensure the Contact Form Button is accessible?
To ensure accessibility, use high-contrast colors for the button and text, make sure the button is large enough to be easily clickable, and include descriptive alt text for any icons. Additionally, ensure the button can be navigated and activated using a keyboard.
