About Sender Email Marketing & SMS App
What Is Sender Email Marketing & SMS?
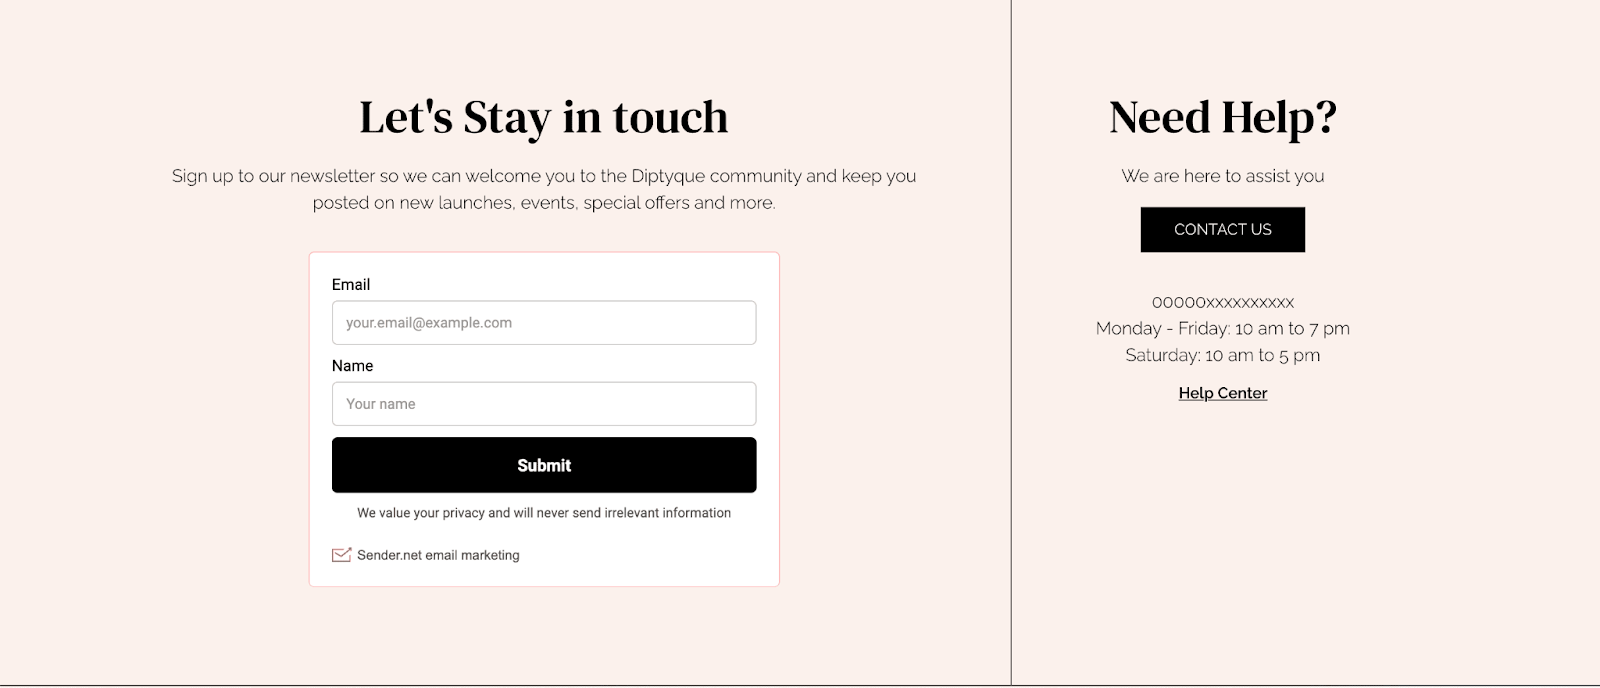
Sender Email Marketing & SMS is an application that allows easy design of email campaigns using an intuitive drag-and-drop builder. Target specific subscriber groups and automate tasks like welcome emails and SMS notifications in just a few clicks.
Install Sender Email Marketing & SMS
Before using this element in PageFly, you’ll need to install the Sender Email Marketing & SMS app to your store and configure all its options.
- Install Sender Email Marketing & SMS
- Install PageFly
How To Access Sender Email Marketing & SMS
In page editor, follow these steps to access Sender Email Marketing & SMS element in PageFly:
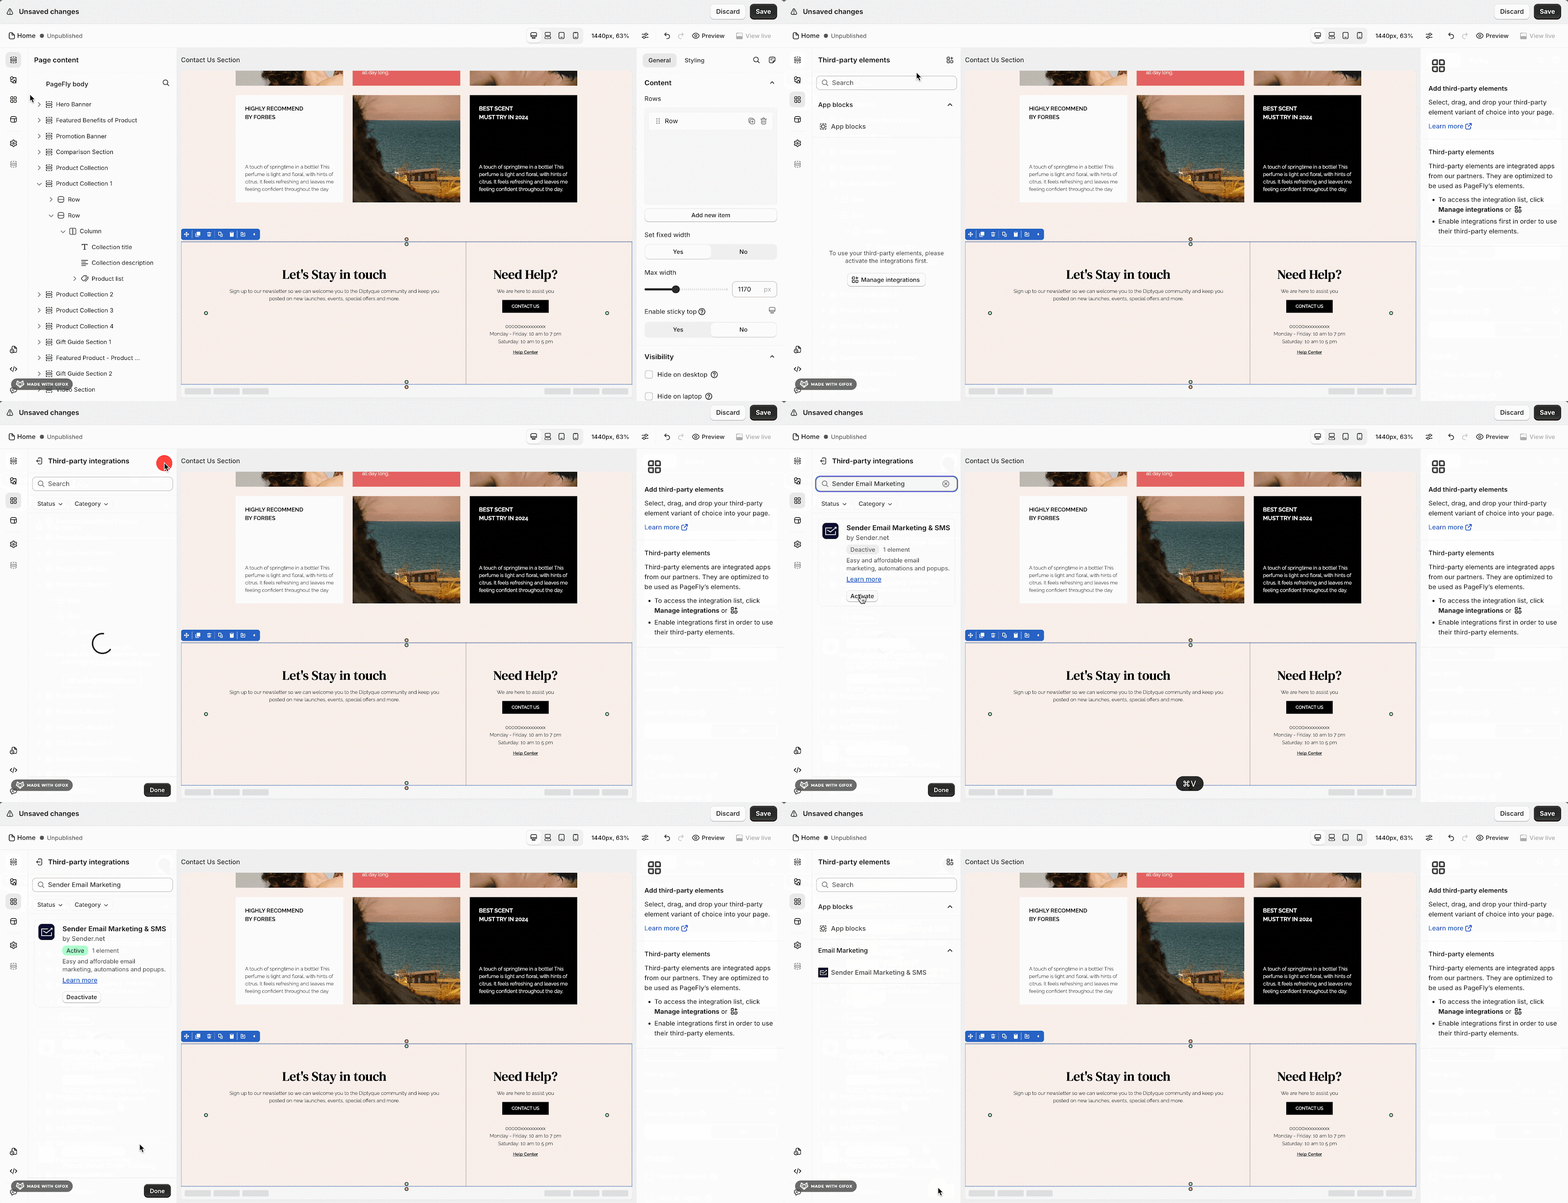
- Step 1: In the PageFly editor, click “Third-party element” on the left menu
- Step 2: Click “Manage integrations” or the icon on top
- Step 3: Search for “Sender Email Marketing” and enable it
- Step 4: Click “Done” and the element will appear in the “Third-party element” menu
How To Configure Sender Email Marketing & SMS the element
From PageFly
Add Sender Email Marketing & SMS Element
Before starting to set up for the Sender Email Marketing & SMS element, you will need to add this element onto your page canvas:
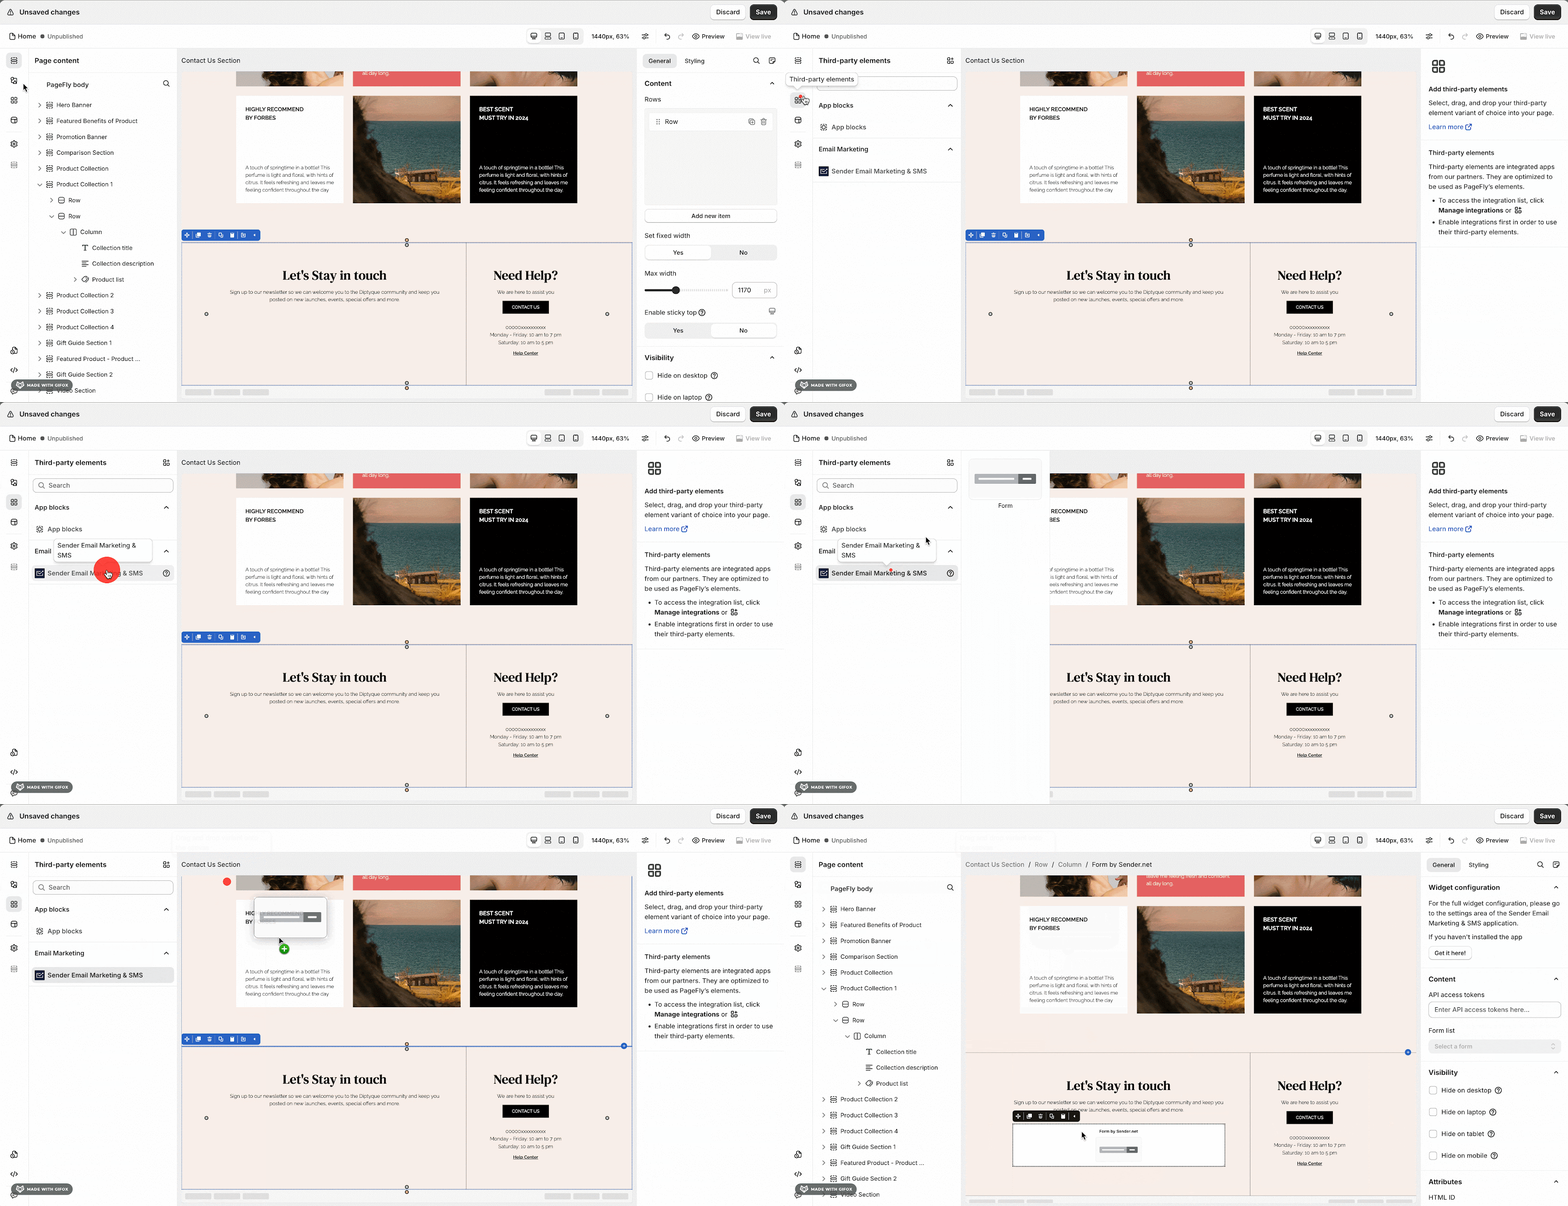
- Step 1: Click “Third party element” on the left menu bar
- Step 2: Look for “Sender Email Marketing & SMS” element
- Step 3: Click on the element to see its variant
- Step 4: Drag and drop the variant onto the page canvas
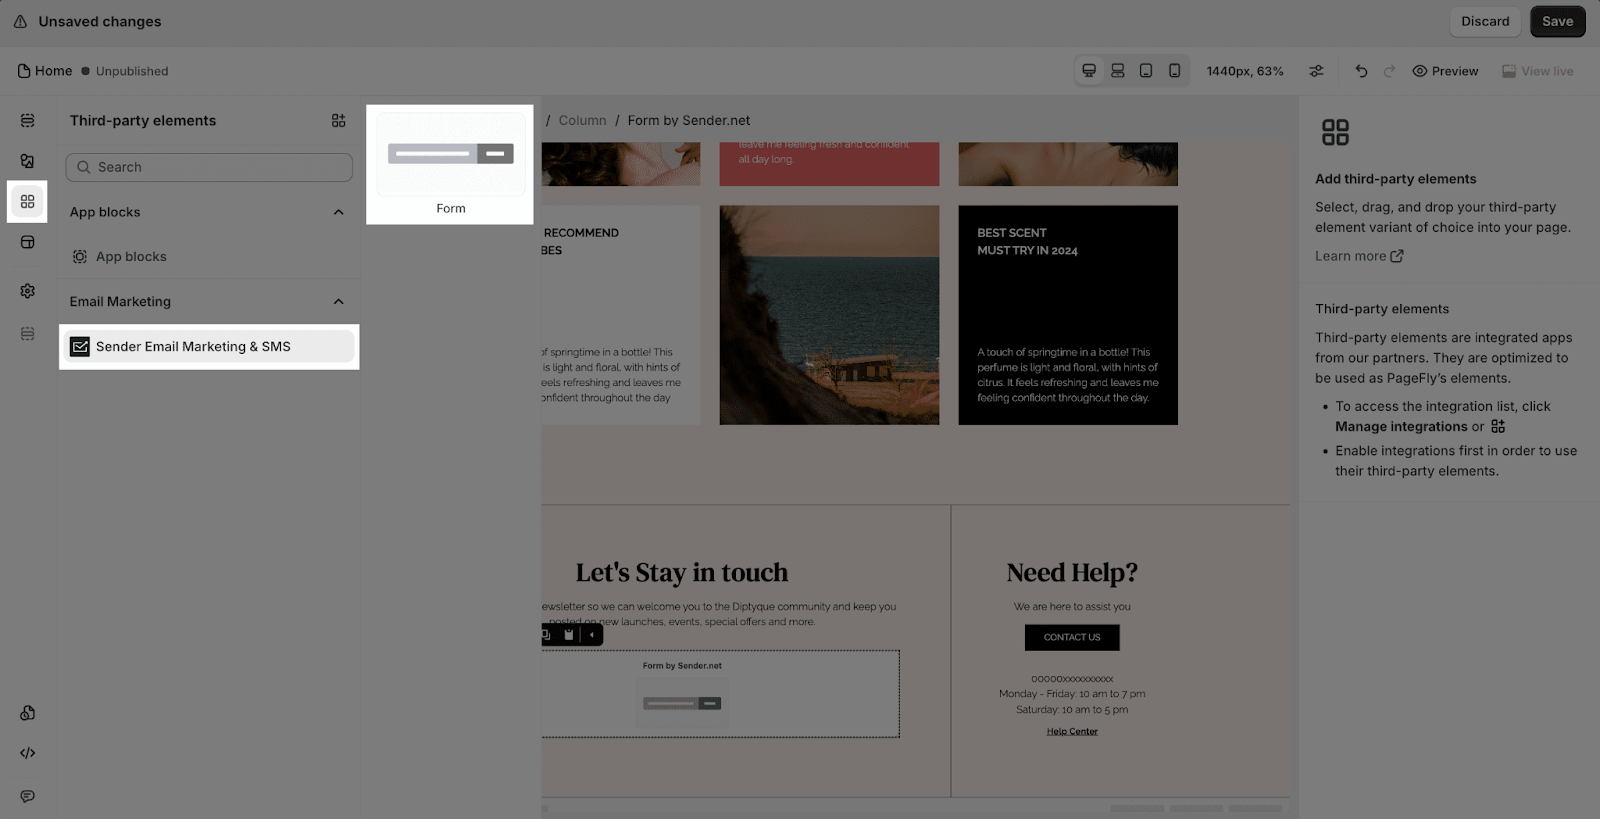
The Sender Email Marketing & SMS element has 1 variant which is “Form”.
Configure Sender Email Marketing & SMS Element
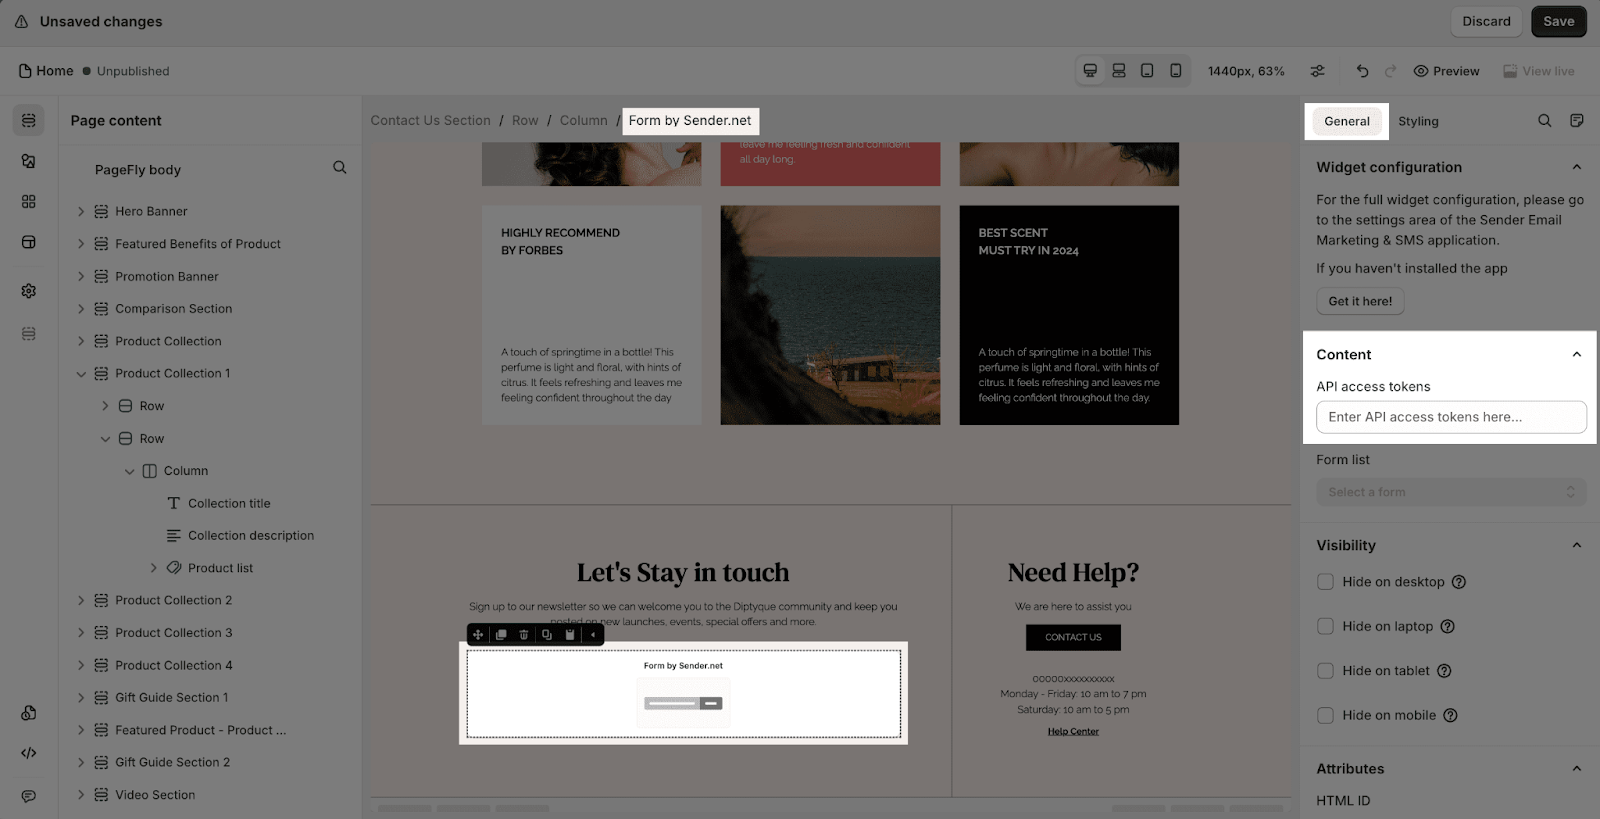
- API access tokens: After entering the token here, we can access embeddable forms from the “Sender Email Marketing & SMS” app you’ve created.
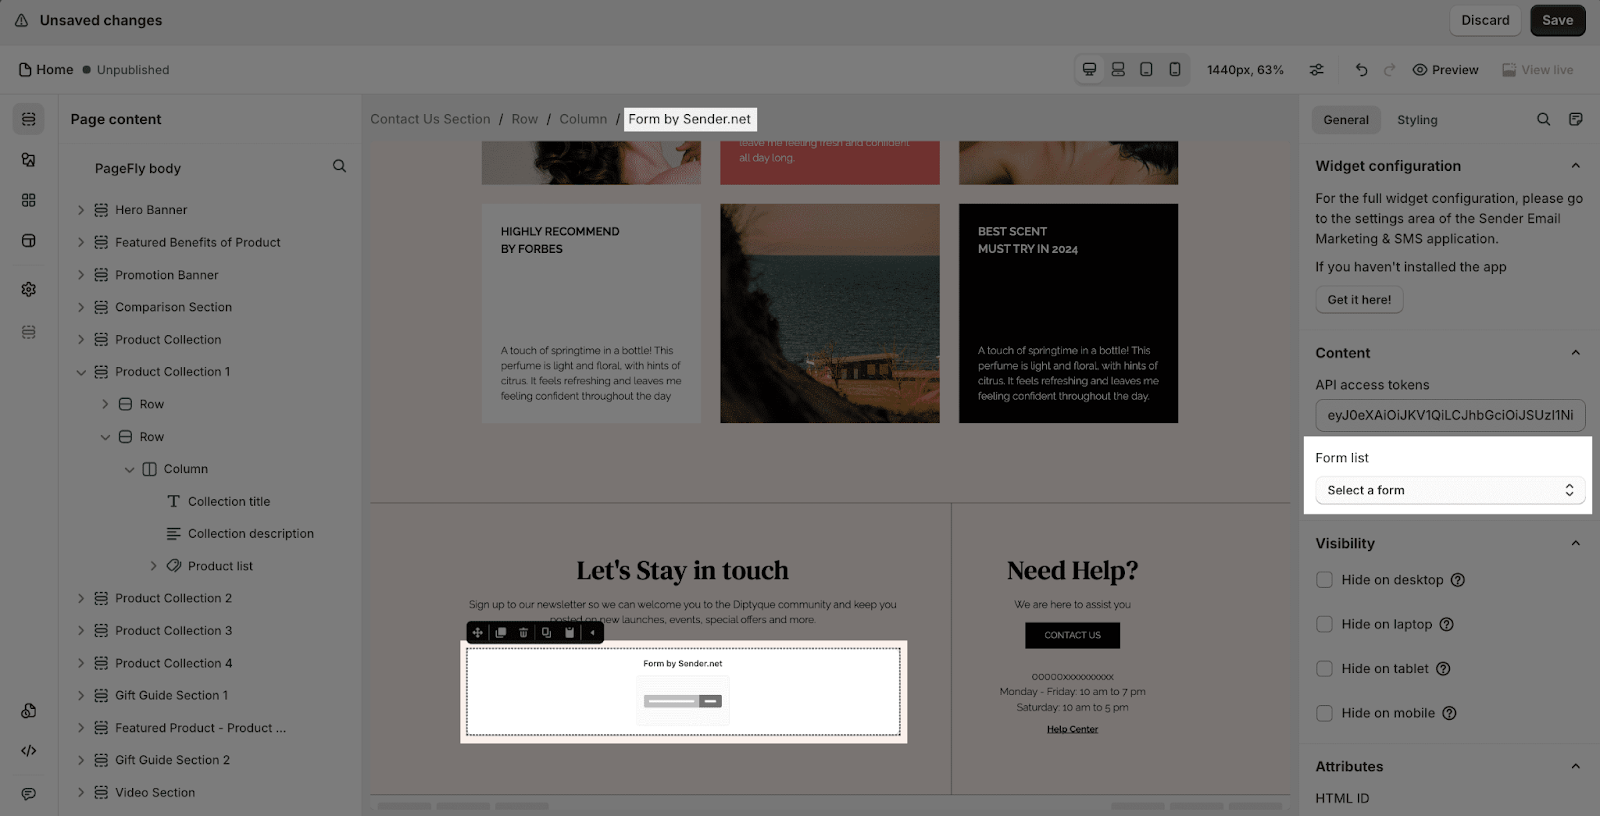
- Form list: Select the form you have created.
- After adding the element, click on it to see different ways to change how it looks, like adjusting the space around it, changing its border, or adding special effects. Use the “Styling” tab in PageFly to explore your options.
From Sender Email Marketing & SMS App
Before using the Sender Email Marketing & SMS elements in PageFly, you’ll need to create and configure your embed form in the Sender Email Marketing & SMS app:
Step 1: Activate “Sender.net” In The Theme Customize
Go to your Shopify admin, then navigate to Online Store > Theme > Current theme > Customize > App embeds.
Please find the Sender.net app and activate it, then save it. You can also search for “Sender.net”.
Step 2: Create An Embed Form
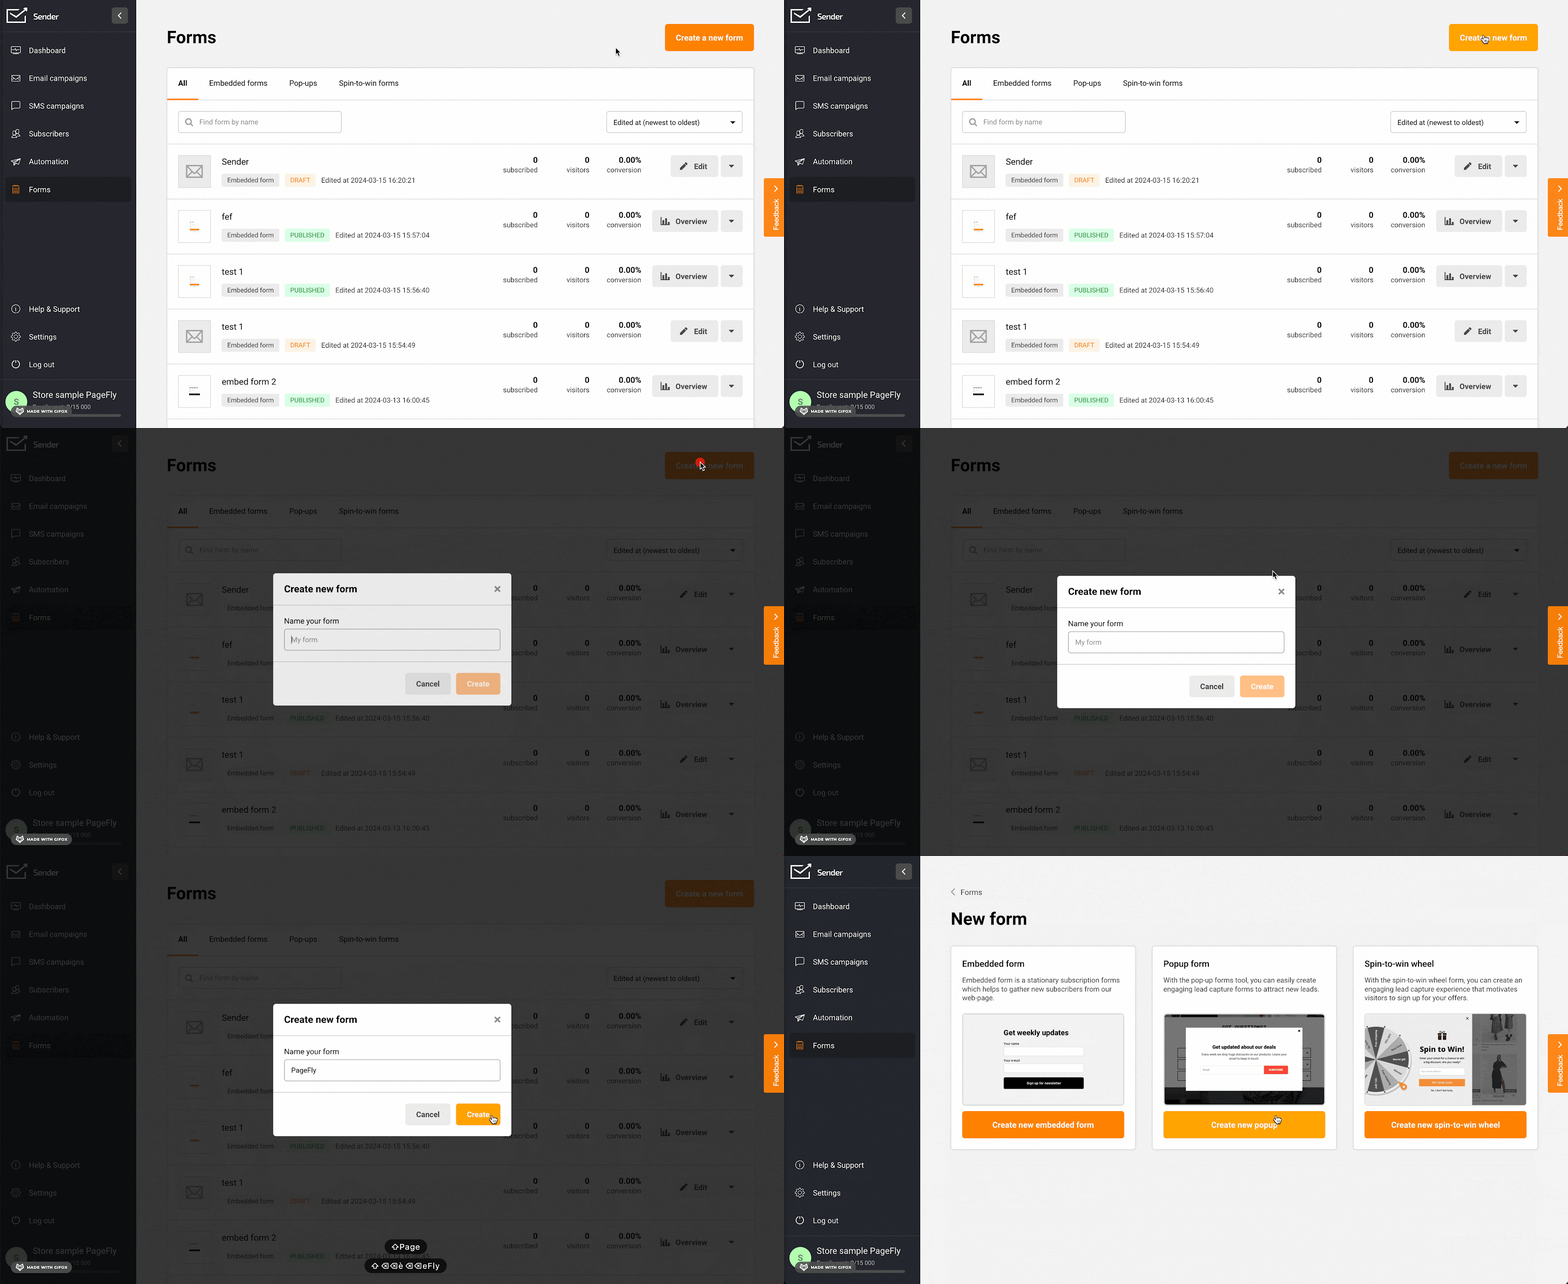
Please click on “Form” in the left navigation, then click on the “Create a new form” button.
After you have entered the name of the form, you need to select the correct type as “Embed form” and click on the “Create new embedded form” button.
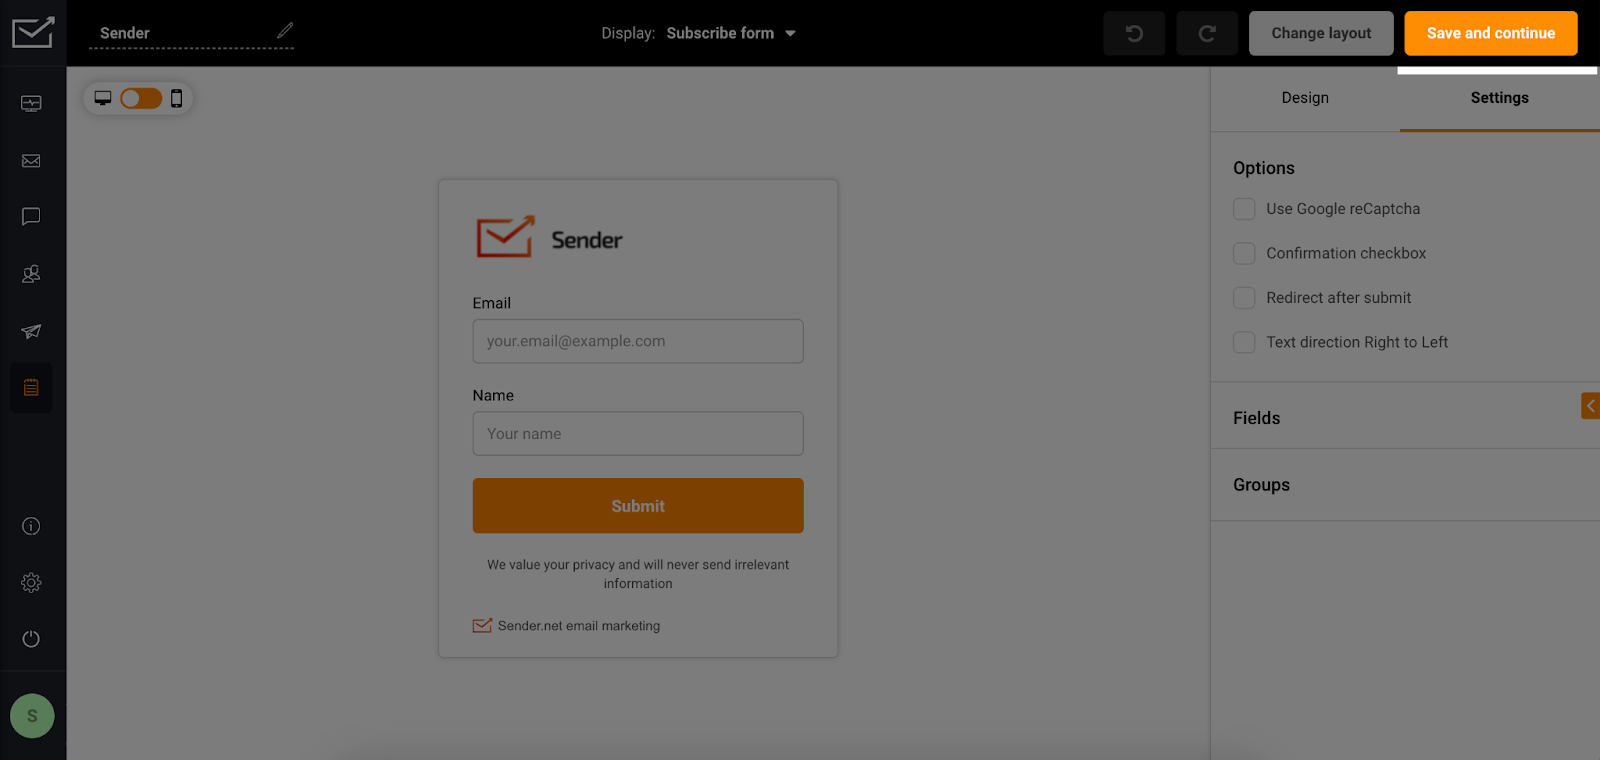
Then, choose “Embedded form layout”’ and customize as needed, then proceed to “Save and continue” to publish the form.
Step 3: Create An API Token And Copy The Token To Use In The PageFly App.
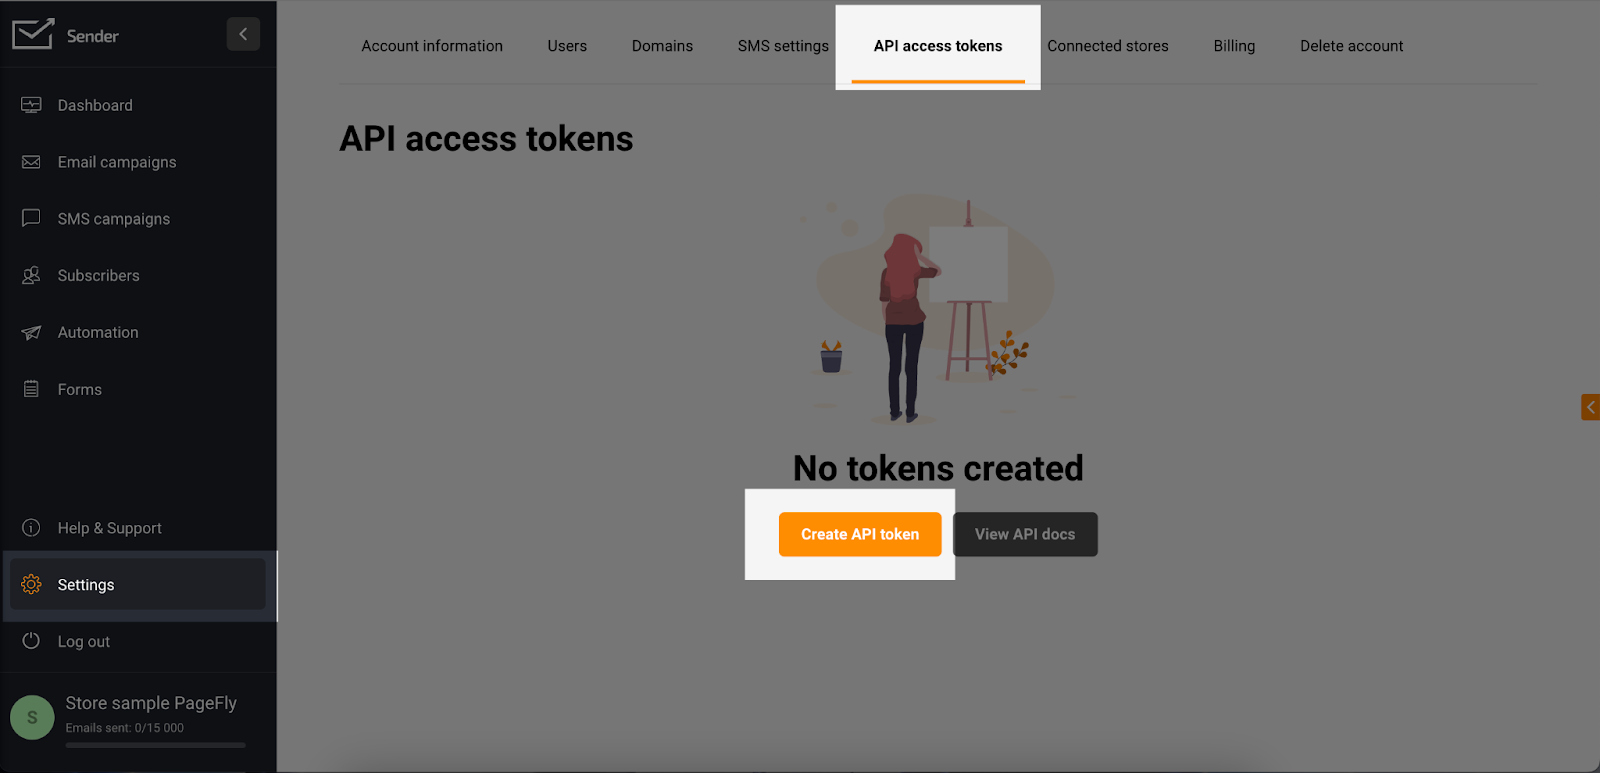
Please click on “Settings” in the left navigation, then access the “API access tokens” section where you will see the “Create API token” button. Click on it and proceed to select the validity period for the API token.
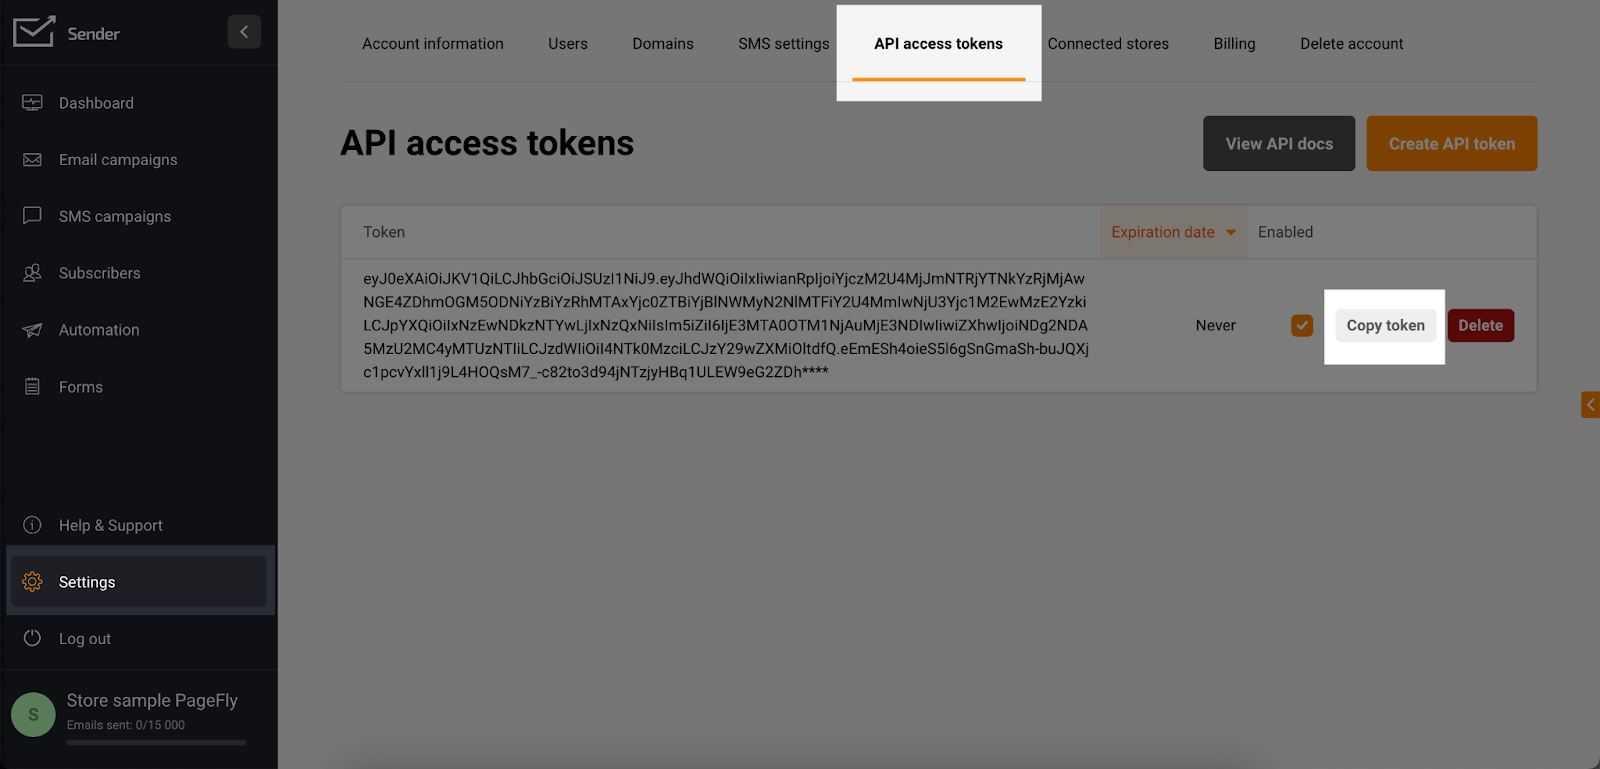
After you have created the API token, a list of the API tokens you have created will be displayed. Next, you need to click on the “Copy token” button to copy the API token and paste it into the “API access tokens” section in PageFly as mentioned above.
And the Sender Email Marketing & SMS app is ready for use on PageFly!
Tips & Best Practices
We strongly recommend using the Shopify App Block Element for Sender Email Marketing & SMS integration. Available for Shopify theme OS 2.0, this feature simplifies adding Sender Email Marketing & SMS functionality to your PageFly pages or sections. It offers greater flexibility, easier updates, and an improved user experience. While limited to one per page, the App Block is a valuable tool to enhance your store’s capabilities.
For detailed setup guidance, refer to our App Block article. This simple change can substantially improve your Sender Email Marketing & SMS integration and overall store performance.
Frequently Asked Questions
1. Is Sender Email Marketing & SMS app free?
Yes. The free-forever plan offers up to 2500 subscribers and 15,000 emails monthly. It never expires and has all the features the paid plans have.
2. What are Sender Email Marketing & SMS supported interface languages?
Sender Email Marketing & SMS have English, Lithuanian, Polish, and Spanish interface languages.
