About Inkybay – Product Personalizer
What Is Inkybay – Product Personalizer?
Summary: Inkybay – Product Personalizer element provides merchants with a powerful product personalization tool that helps them to create and visualize their own, perfect products. Inkybay Product Personalizer is a feature-rich web application to make personalized products selling business easy, especially in these industries of Apparel/T-shirts, Mugs, Laptop/mobile cases, Mask Personalizer, etc. The Inkybay – Product Personalizer works with ANY printing methods like – Screen Print, DTG, Sublimation, Embroidery, etc. with full integration to your shop.
Install Inkybay – Product Personalizer
Before using this element, you have to install the Inkybay – Product Personalizer App to your store, configure all options in the app, and then come back to PageFly to use the element on your PageFly product pages.
- Install Inkybay – Product Personalizer
- Install PageFly
How To Access Inkybay – Product Personalizer Element
In the page editor, follow these steps to access Inkybay element:
- Step 1: In the PageFly editor, click “Add third-party element” on the left menu.
- Step 2: Click “Manage integrations” or the icon on top.
- Step 3: Search for “Inkybay – Product Personalizer” and activate it.
- Step 4: Click “Done” and the element will appear in the “Third-party element” menu.
How To Configure Inkybay – Product Personalizer
Important Note:
- The Inkybay – Product Personalizer element works on all page types and one page can have multiple elements.
- The Inkybay – Product Personalizer element must stay inside the Product Details element, if you drag and drop the element outside the Product Details, a warning message will appear.
From PageFly
Step 1: Add Inkybay Element
Before starting to set up the Inkybay element, you will need to add this element onto your page canvas:
- Step 1: Click “Third party elements” on the left menu bar
- Step 2: Look for “Inkybay – Product Personalizer” element
- Step 3: Click on the element to see its variant
- Step 4: Drag and drop the variant onto the page canvas
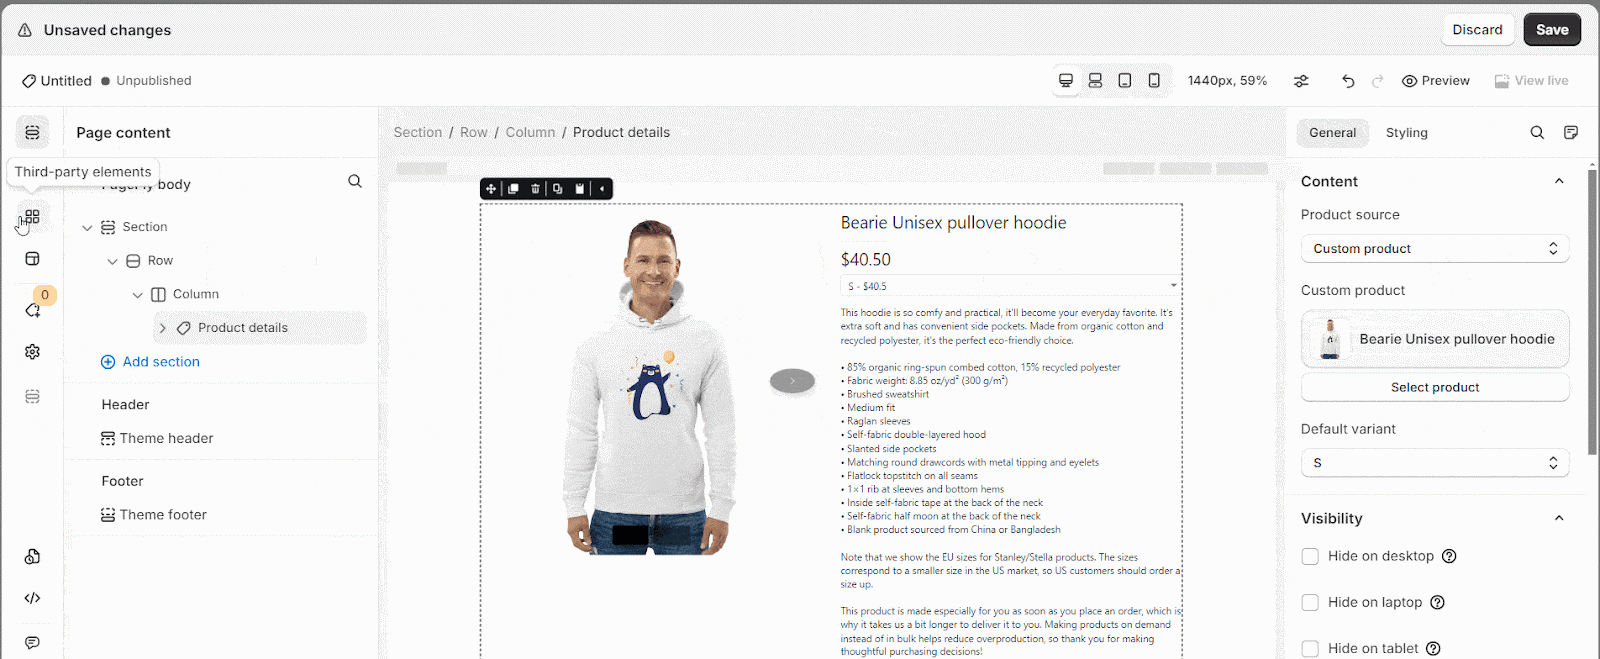
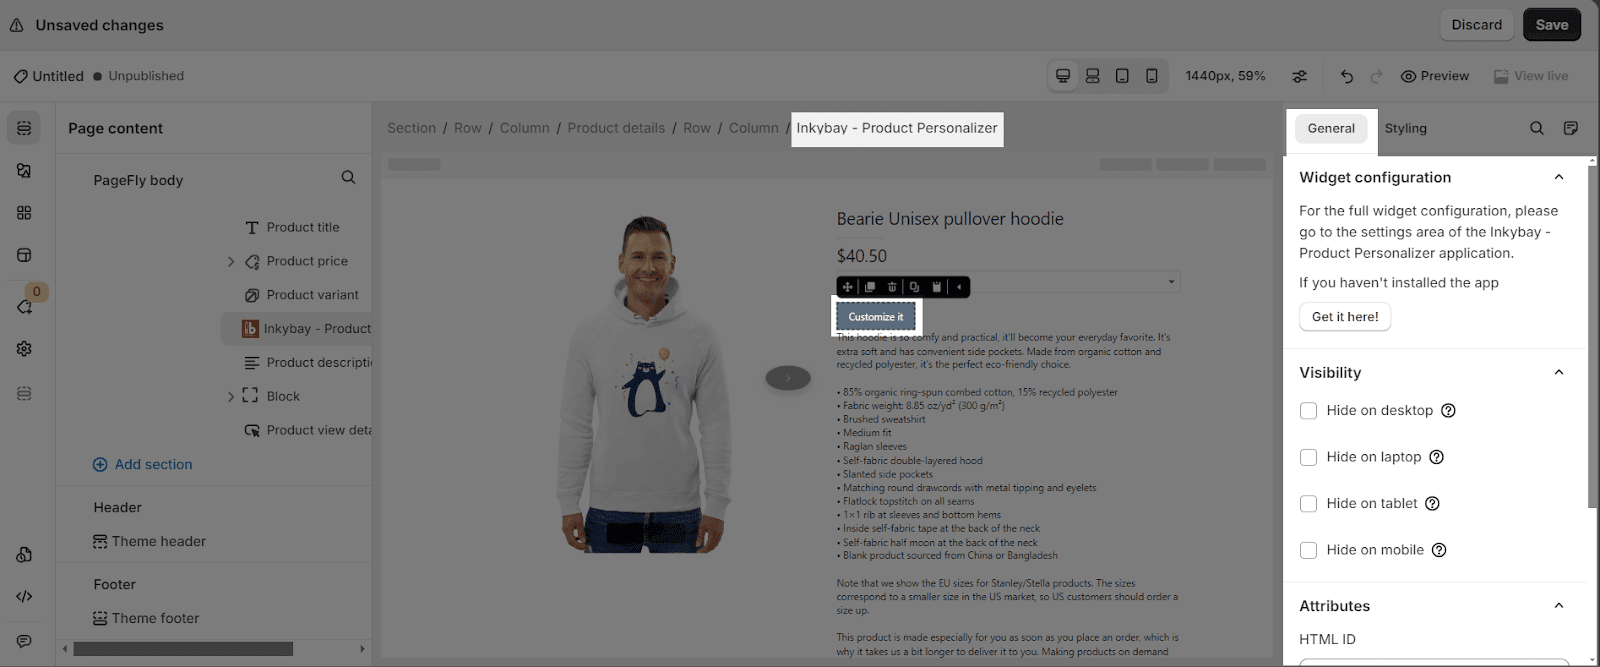
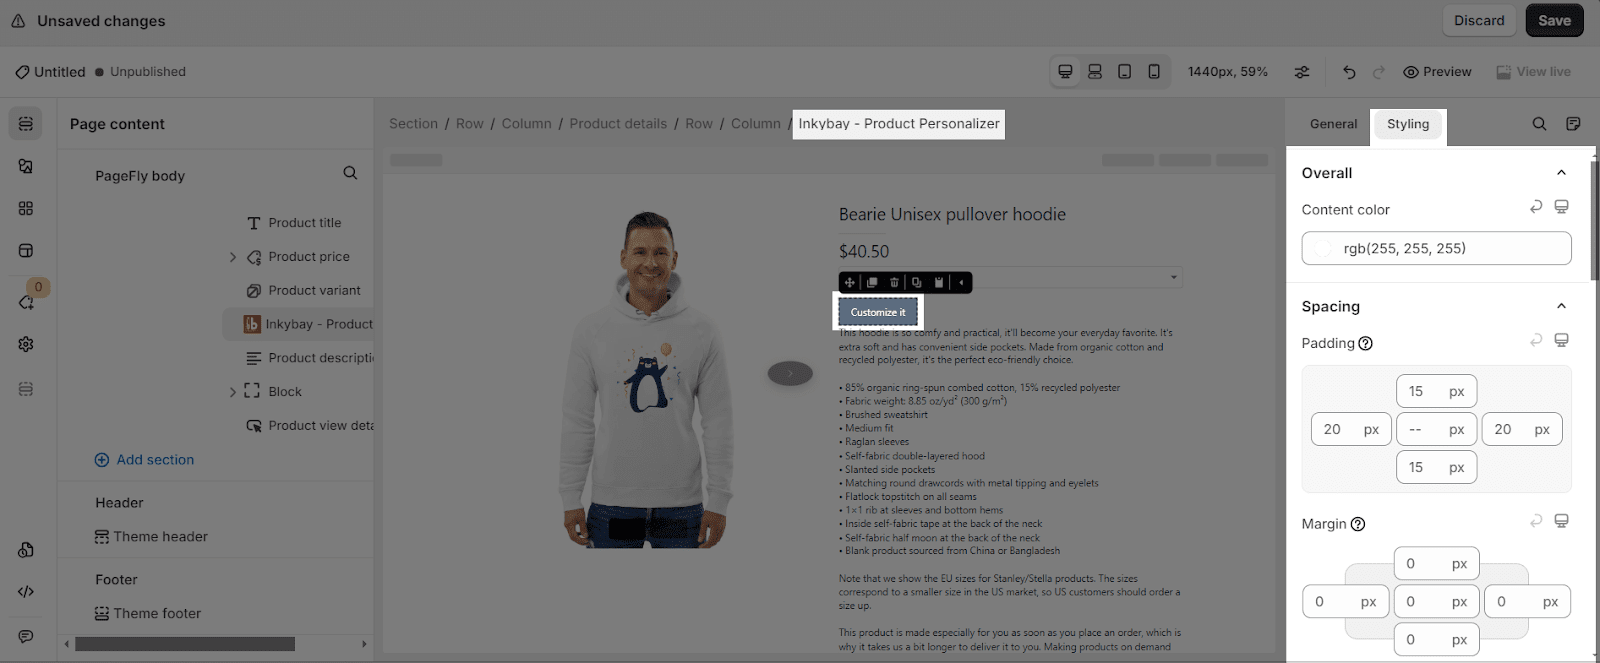
Step 2: Configure Inkybay Element
After adding the element, you can adjust for it by clicking on the element.
- From the “General” tab, there is a widget configuration giving you a short explanation of the Inkybay app, and its link to the app listing.
- For styling options like margins, borders, and effects, go to the “Styling” tab. You can find more details about the available options here.
From Inkybay – Product Personalizer App
Before using the Inkybay element in PageFly, you’ll need to create and configure your widget in the Inkybay app. Here’s how:
-
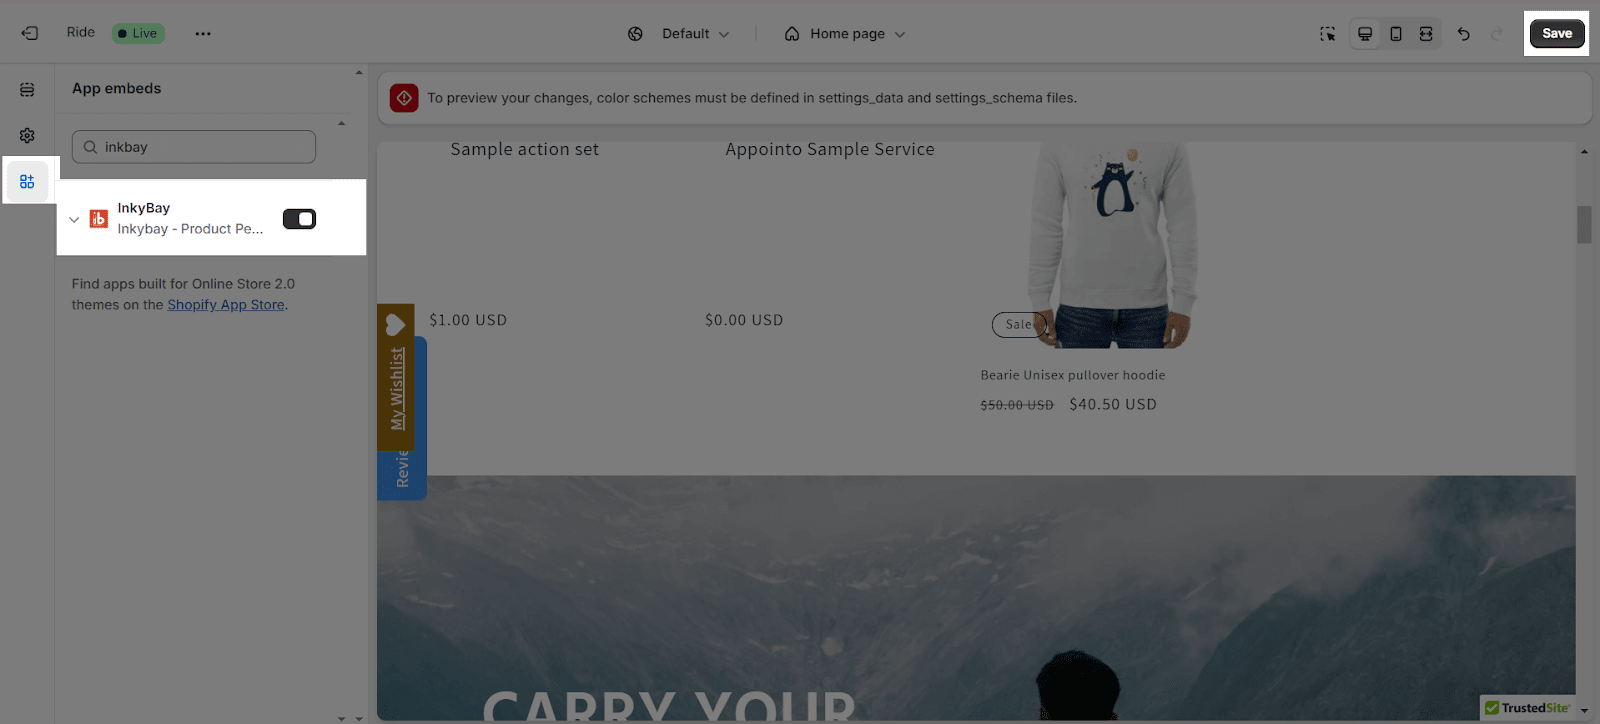
Step 1: Activate “Inkybay – Product Personalizer” in the Theme Customize
Go to your Shopify admin, then navigate to Online Store > Theme > Current theme > Customize > App embeds. Search for “Inkybay – Product Personalizer” and activate it.
-
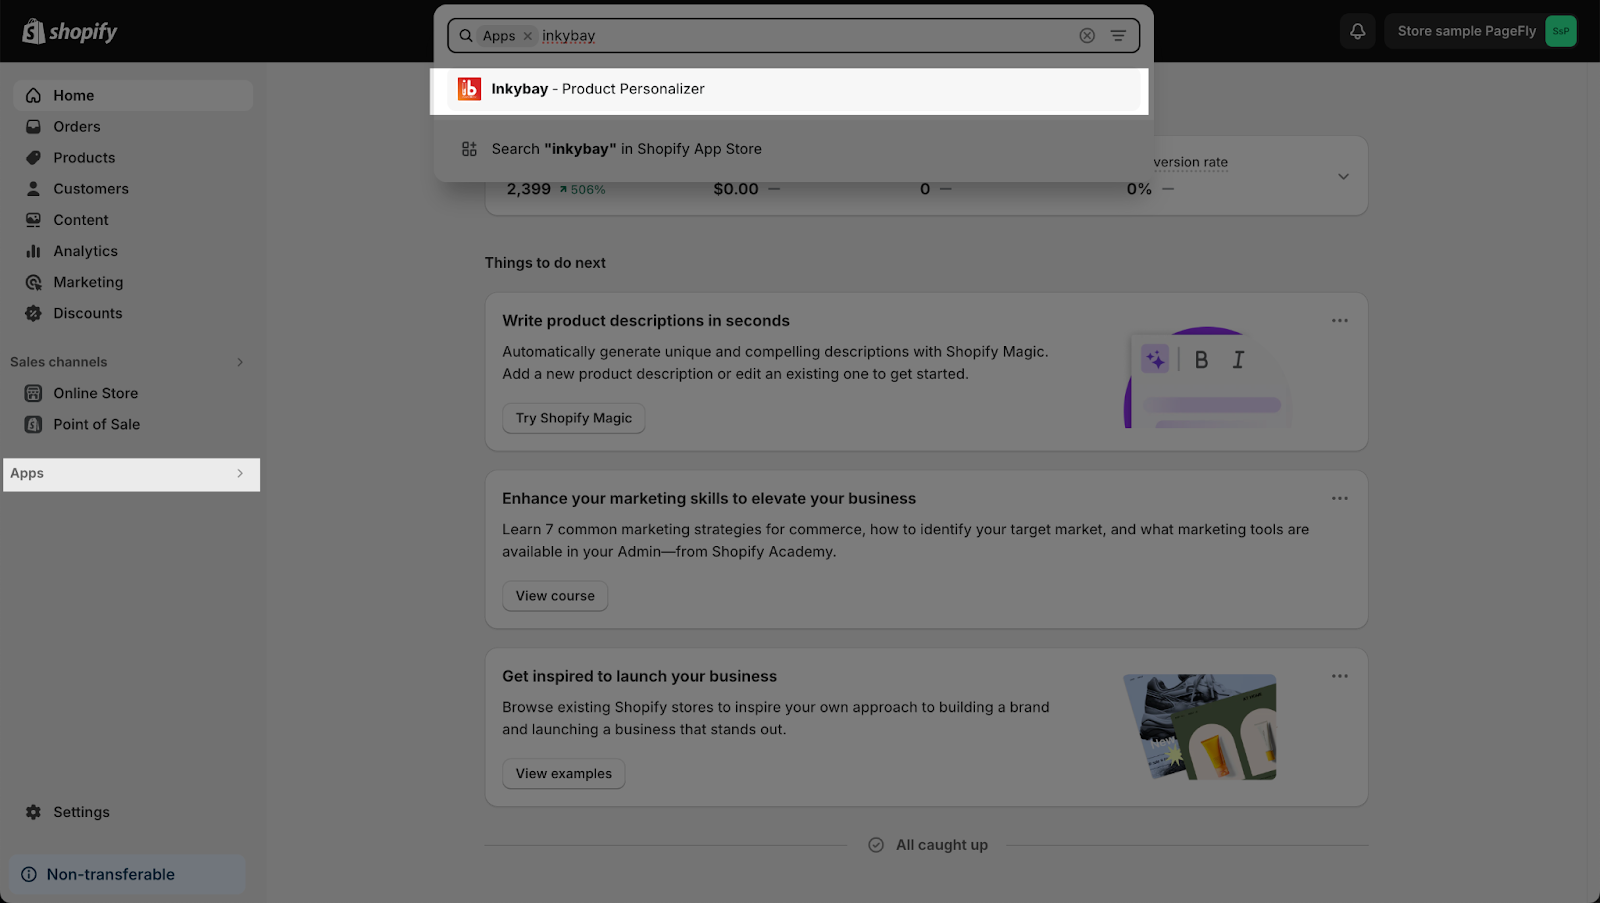
Step 2: Set Up Inkybay – Product Personalizer App In Shopify Account.
Go to your Shopify Admin > Apps > Choose Inkybay – Product Personalizer App to set it up.
Set Up The Inkybay – Product Personalizer App
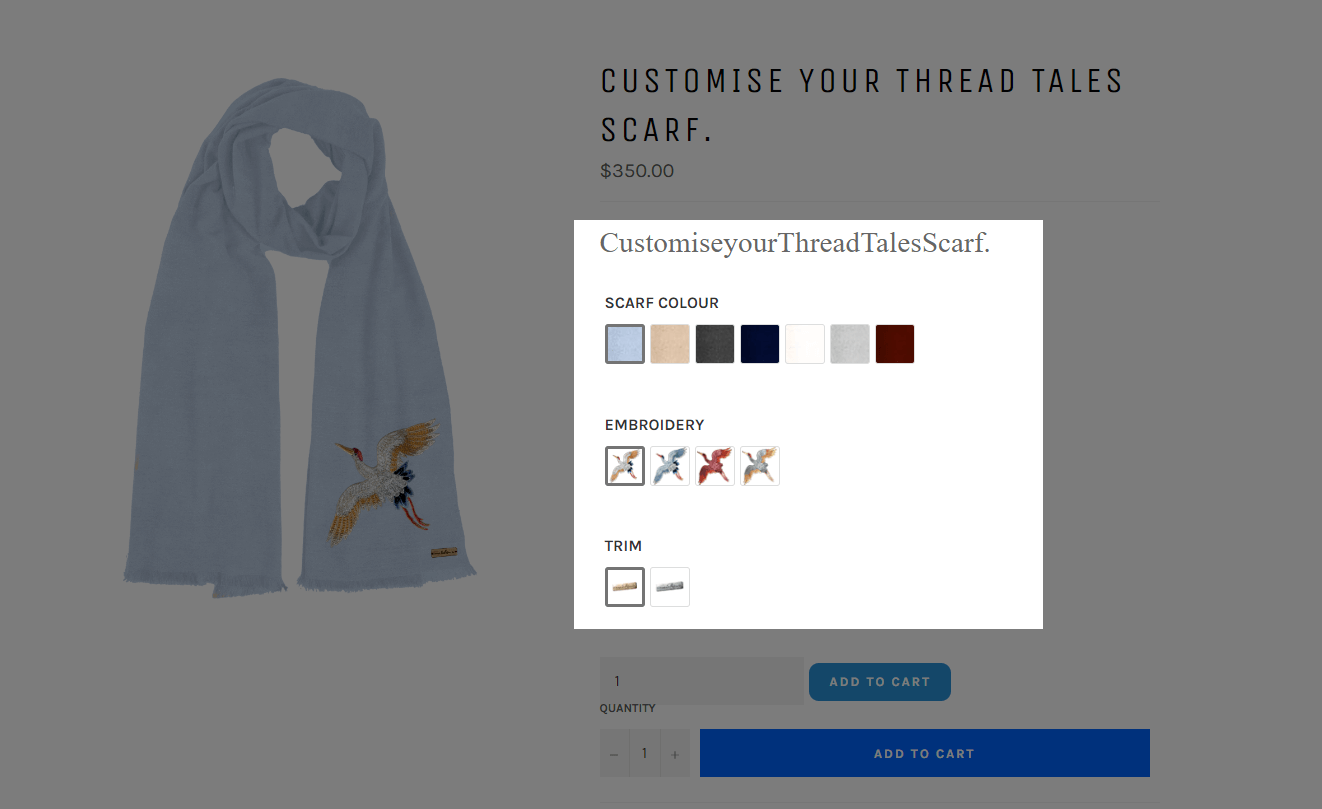
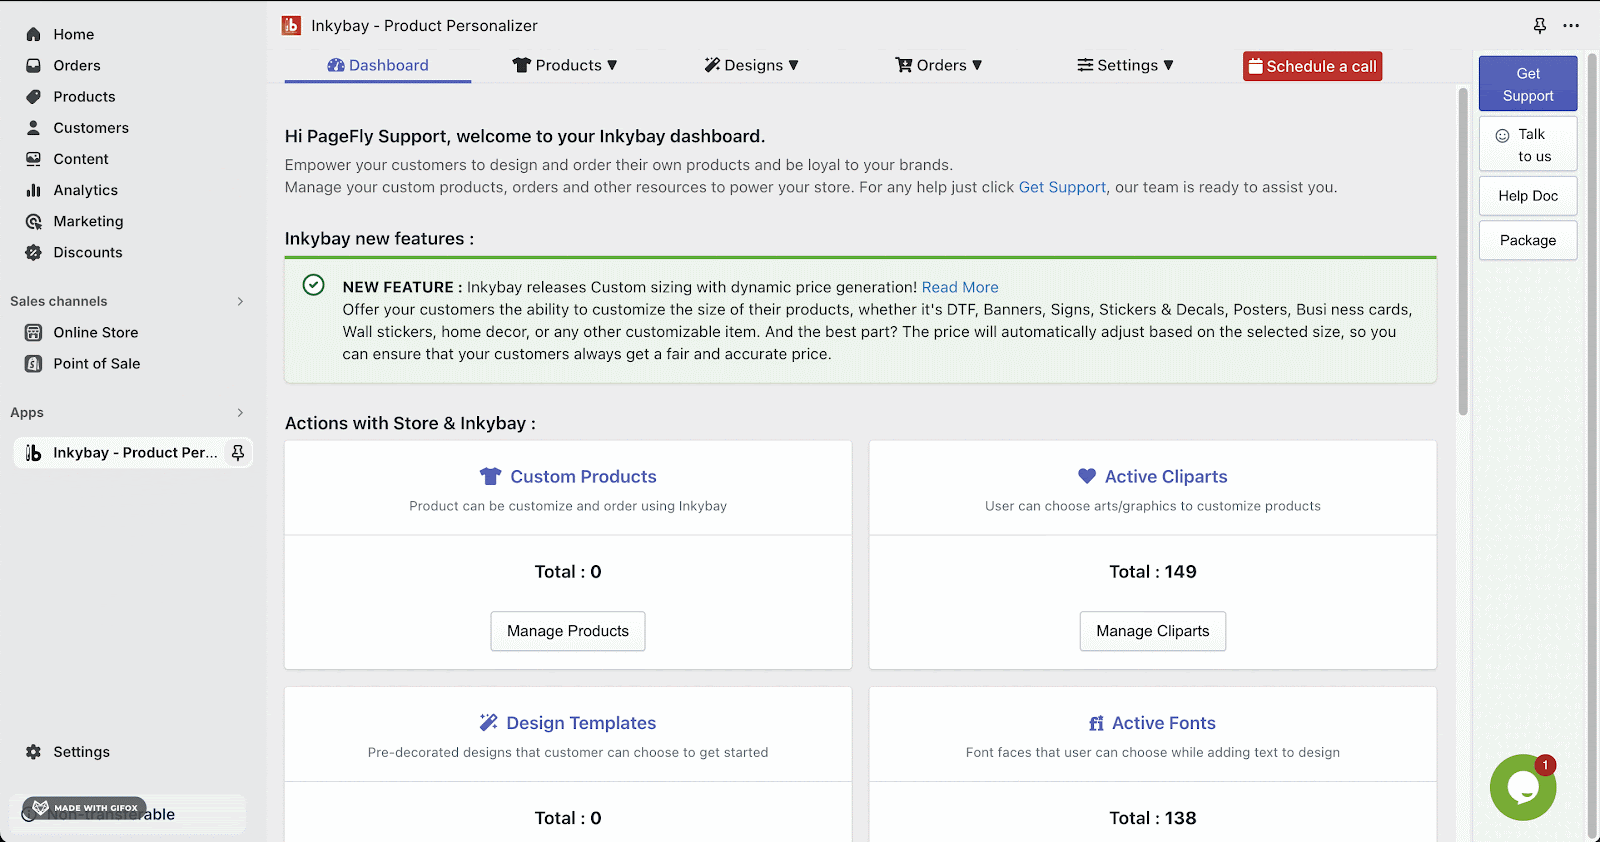
In the Inkybay – Product Personalizer app, you can create Custom Products, then customize colors, sizes, types and pricing, product options, quantity discounts.
From the dashboard, scroll down to Custom Products > Manage Products > Select a product and click Make it customizable
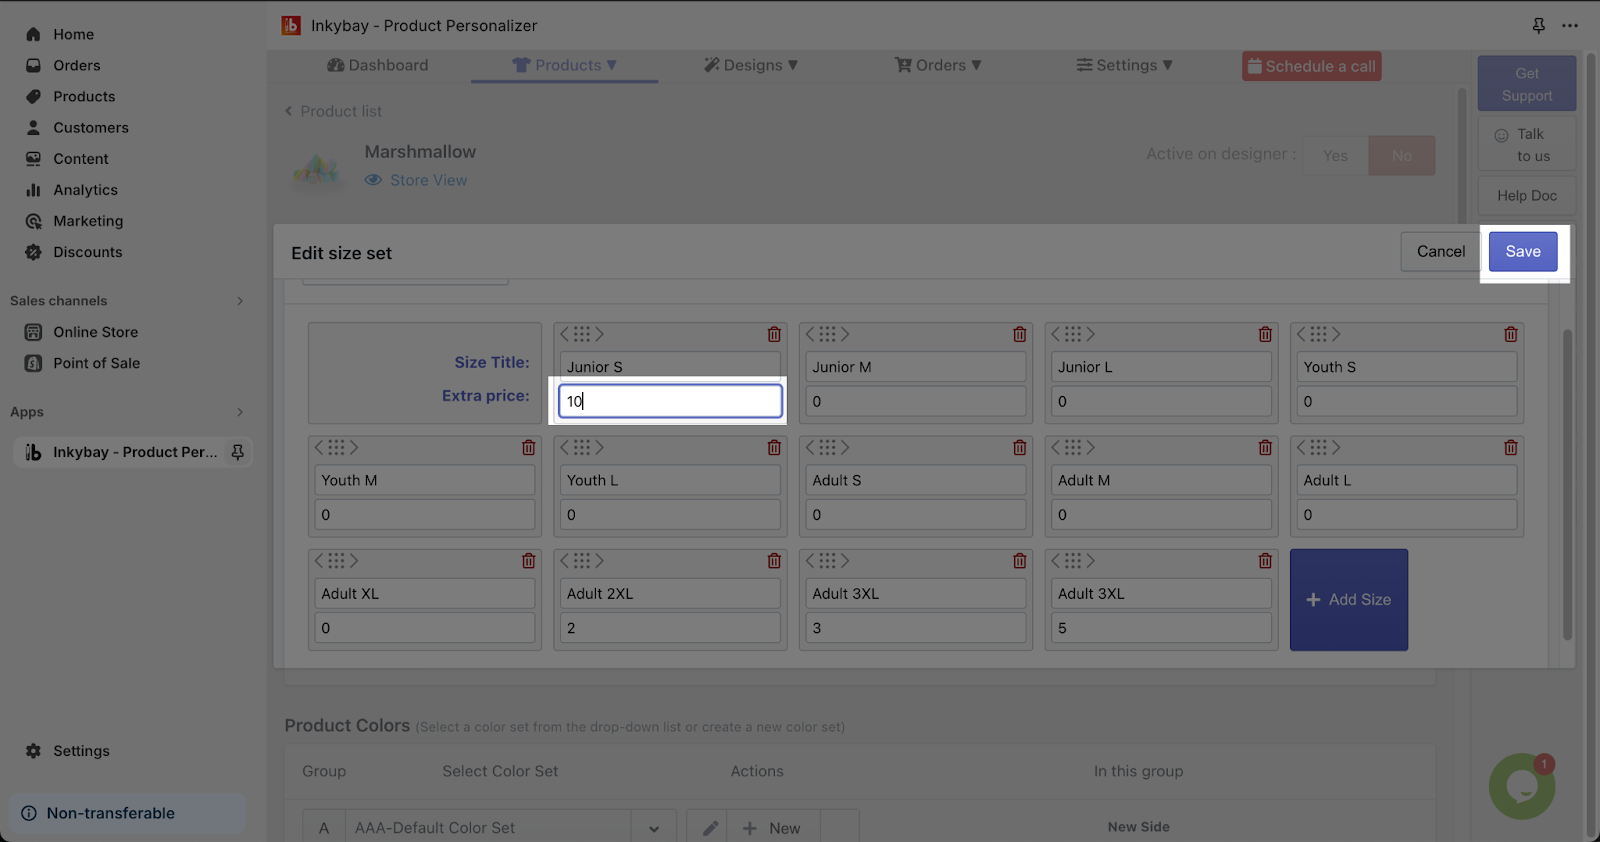
Customize Product Size:
- Select the desired size set
- Click Edit Set
In the Product Size, you can define an extra price for each size by in the Extra price field. Click Save to apply the changes.
You can also choose the Printing Types and Quantity Discounts in Printing Types and Pricing section. At least one printing type must be selected and you can add or edit these types with the Edit/ Add Printing Types button.
Quantity Discount and Tiered Pricing can be done with the same flow in the Quantity Discount tab.
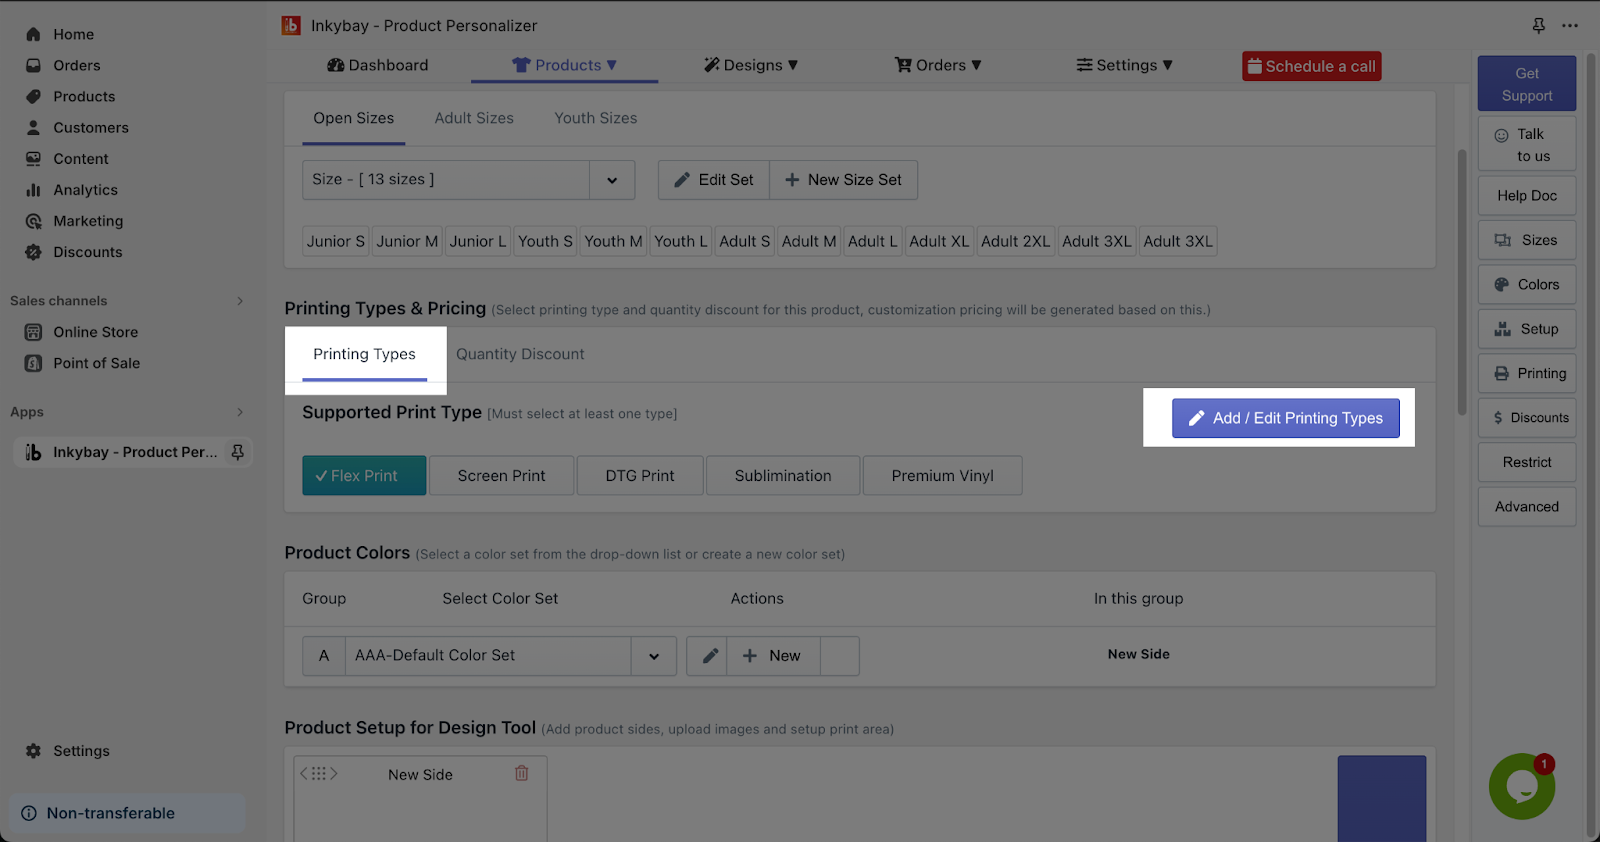
You can choose a color set for the product from the Color Set dropdown in the Product Colors as well.
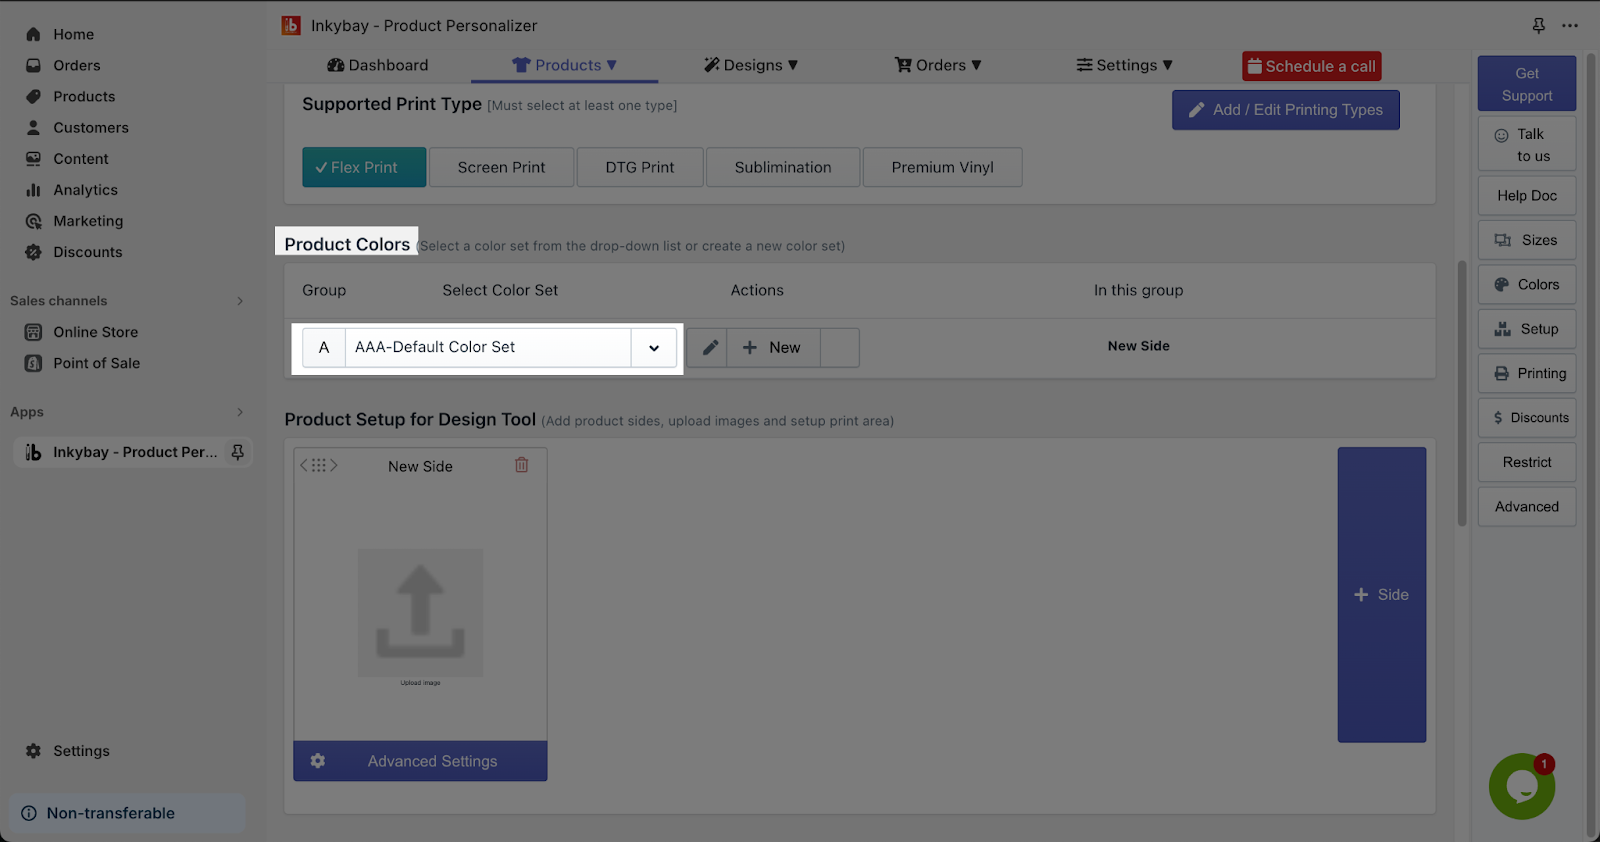
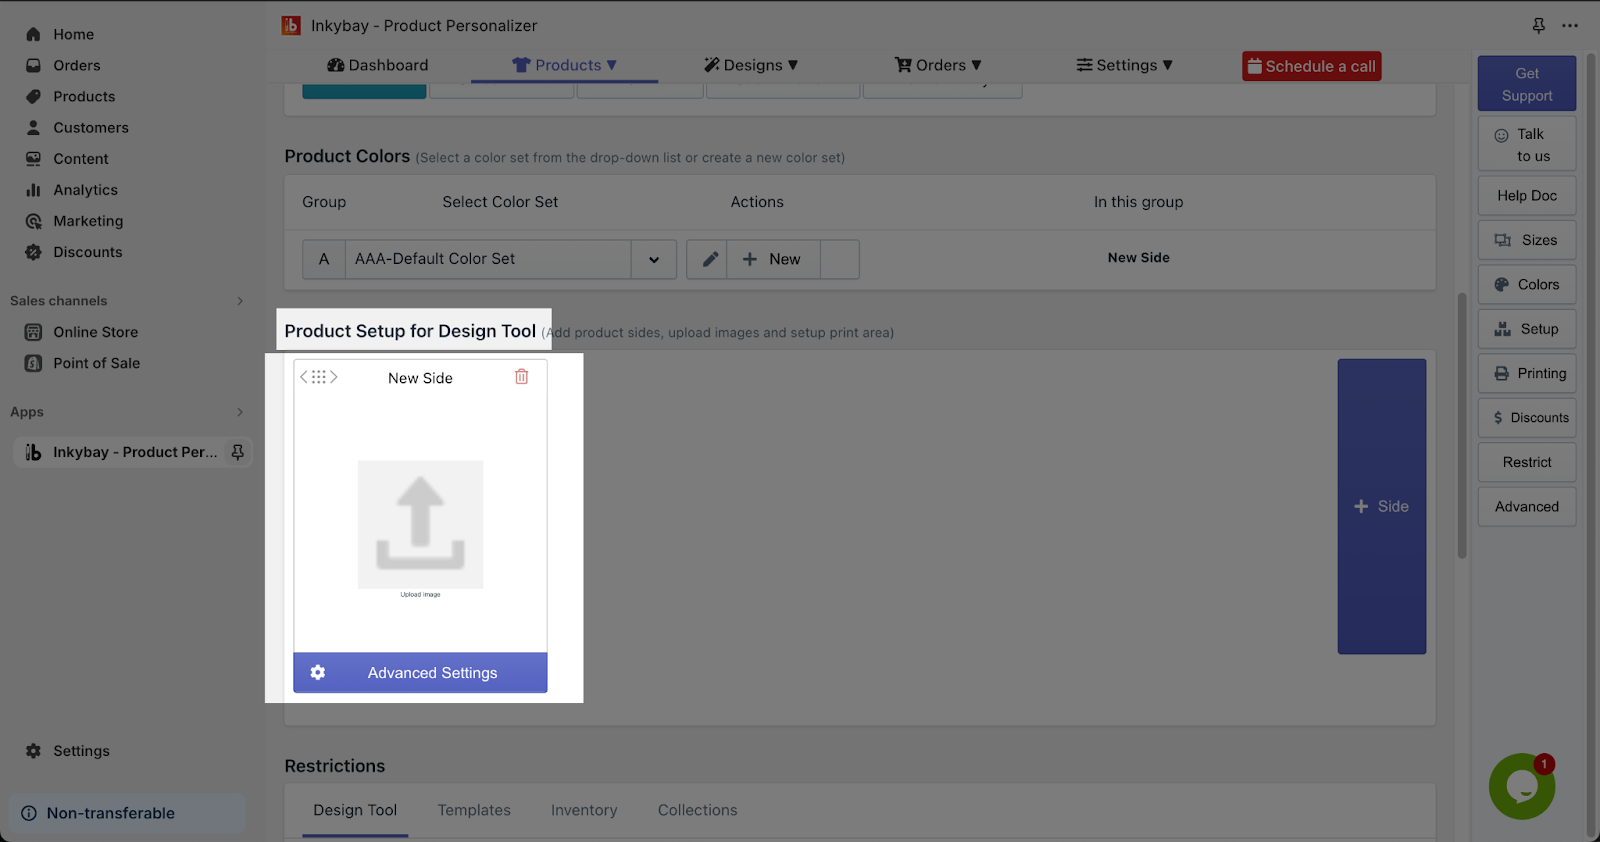
In the Product Setup for Design Tool, you can add product sides, upload images and set up the print area at your desire. All design tool restrictions are enabled by default, you can choose all or disable any of them by unselecting the box.
You can see how to set Inkybay – Product Personalizer in detail via their Help Center in this article.
Tips And Best Practices
- Within PageFly, design the Inkybay product customizer element with a user-friendly interface. Make customization options clear and easy to interact with.
- Ensure the Inkybay product customizer element visually integrates seamlessly with your overall PageFly design and your brand aesthetic.
- Prominently place the Inkybay product customizer element near the product image on the product page. This makes it easy for users to find and engage with the customization options.
- We strongly recommend using the Shopify App Block Element for Inkybay app integration. Available for Shopify theme OS 2.0, this feature simplifies adding Inkybay app functionality to your PageFly pages or sections. It offers greater flexibility, easier updates, and an improved user experience. While limited to one per page, the App Block is a valuable tool to enhance your store’s capabilities.
For detailed setup guidance, refer to our App Block article. This simple change can substantially improve your Inkybay app integration and overall store performance.
Frequently Asked Questions
1. What is Inkybay – Product Personalizer?
Inkybay is a powerful product personalization tool that enables merchants to offer customized products in their online store. It supports various printing methods and integrates seamlessly with your shop.
2. Can I use multiple Inkybay elements on one page?
Yes, the Inkybay element works on all page types, and you can have multiple elements on a single page. However, it must stay inside the Product Details element.