About Wishlist Engine
What Is Wishlist Engine
The Wishlist Engine app allows customers to save multiple favorites at once, simplifying product tracking and reducing search time.
For merchants, it empowers your Shopify store with features designed to nurture leads and convert wishlists into sales:
- Allow customers to save their favorite products for later purchase, reducing cart abandonment and keeping them engaged.
- Automatically send personalized email reminders about saved items, prompting customers to revisit their wishlists and potentially complete their purchases.
- Allow visitors to save products anonymously and convert them into registered customers later.
Install Wishlist Engine
Before using this element in PageFly, you have to install the Wishlist Engine app to your store, and configure all options in the app.
- Install Wishlist Engine
- Install PageFly
How To Access Wishlist Engine Element On PageFly
In the page editor, follow these steps to access the Wishlist Engine element:
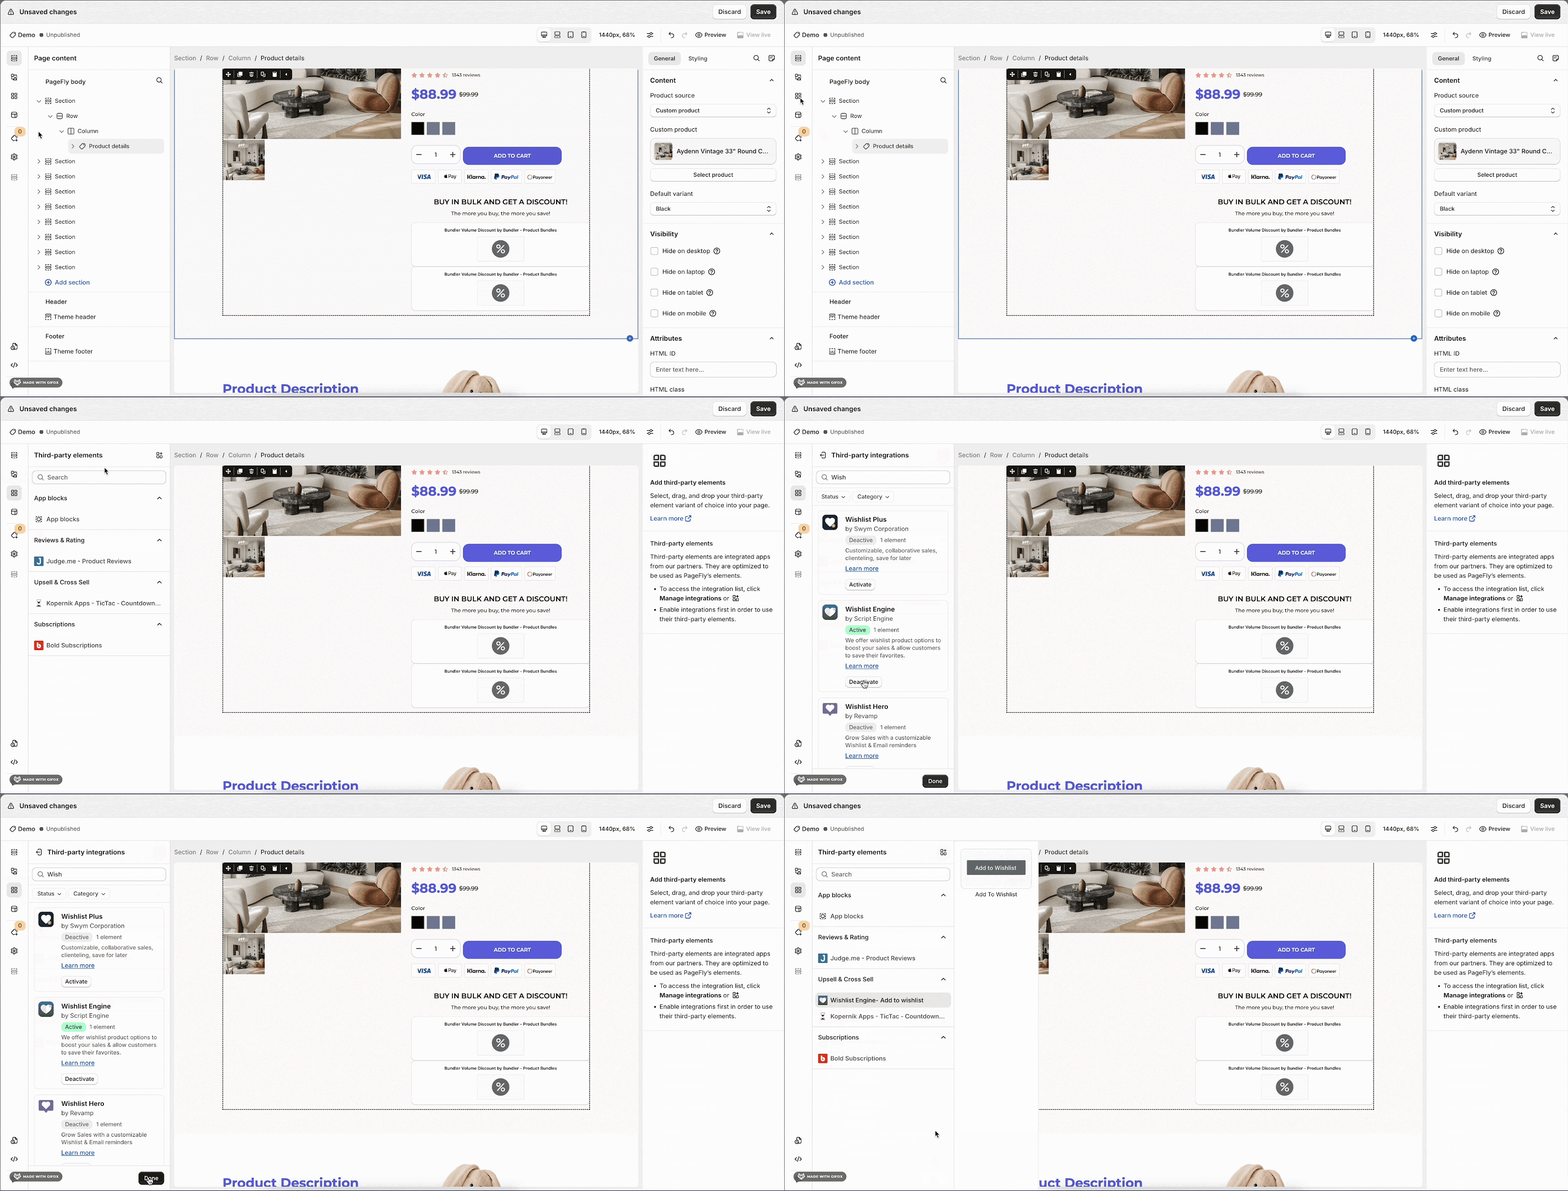
- Step 1: In the PageFly editor, click “Third-party element” on the left menu
- Step 2: Click “Manage integrations” or the gear icon on top
- Step 3: Search for “Wishlist Engine” and activate it
- Step 4: Click “Close” and the element will appear in the “Third-party element” menu
How To Configure Wishlist Engine Element
Important note:
- The elements can be used anywhere on the Product Page.
- Each page can have multiple elements
- If the element is on other page types, it must be nested inside the Product Details.
- All styling and configuration must be done in the Wishlist Engine app.
From PageFly
Step 1: Add Wishlist Engine Element
Before starting to set up the Wishlist Engine element, you will need to add this element onto your page canvas:
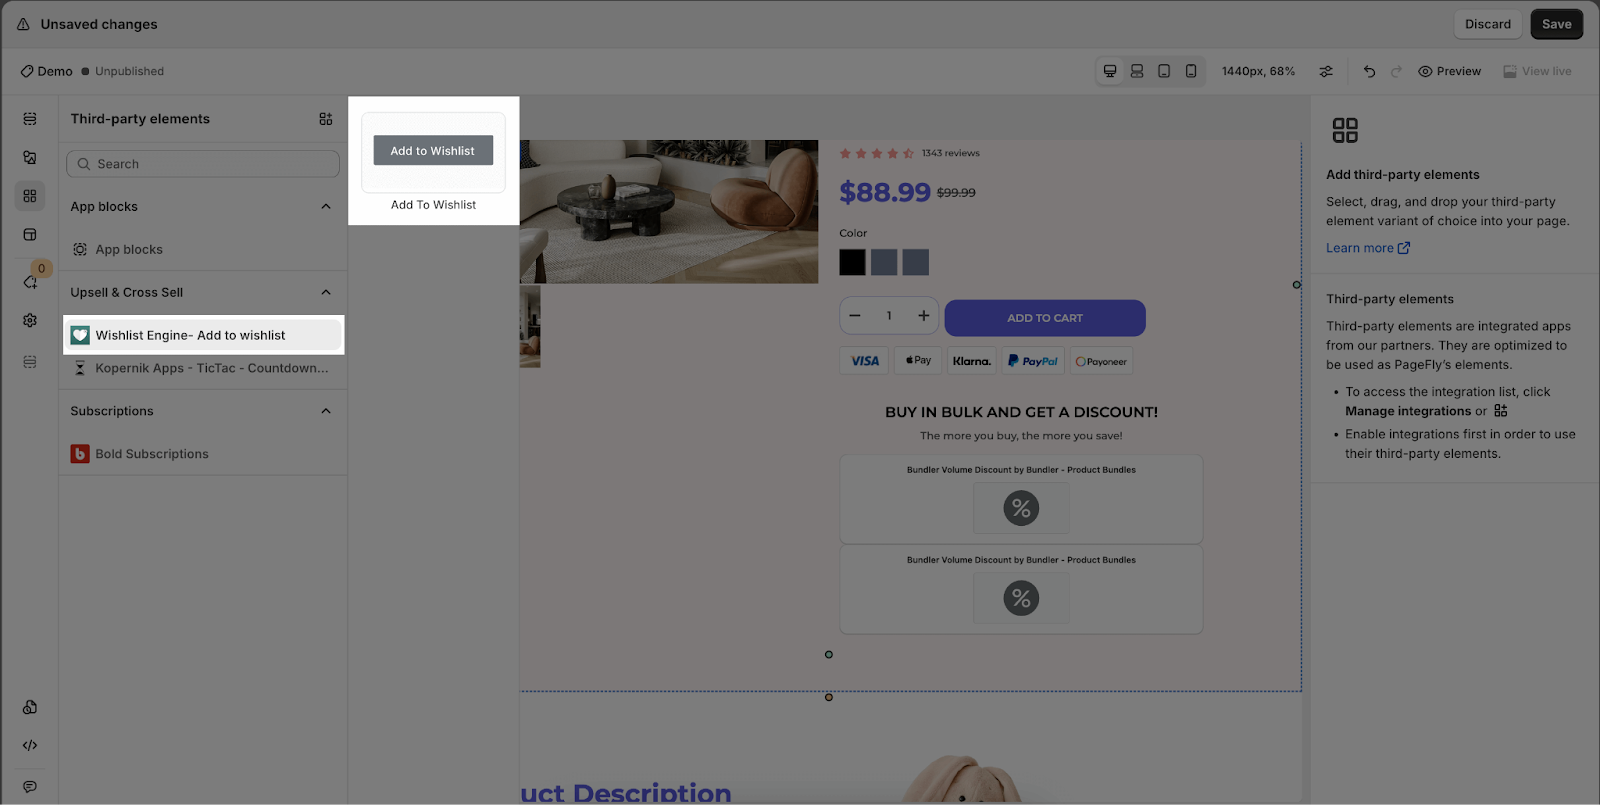
- Step 1: Click “Third-party element” on the left menu bar
- Step 2: Look for “Wishlist Engine” element
- Step 3: Click on the element to see its variant
- Step 4: Drag and drop the variant onto the page canvas
Step 2: Configure Wishlist Engine Element
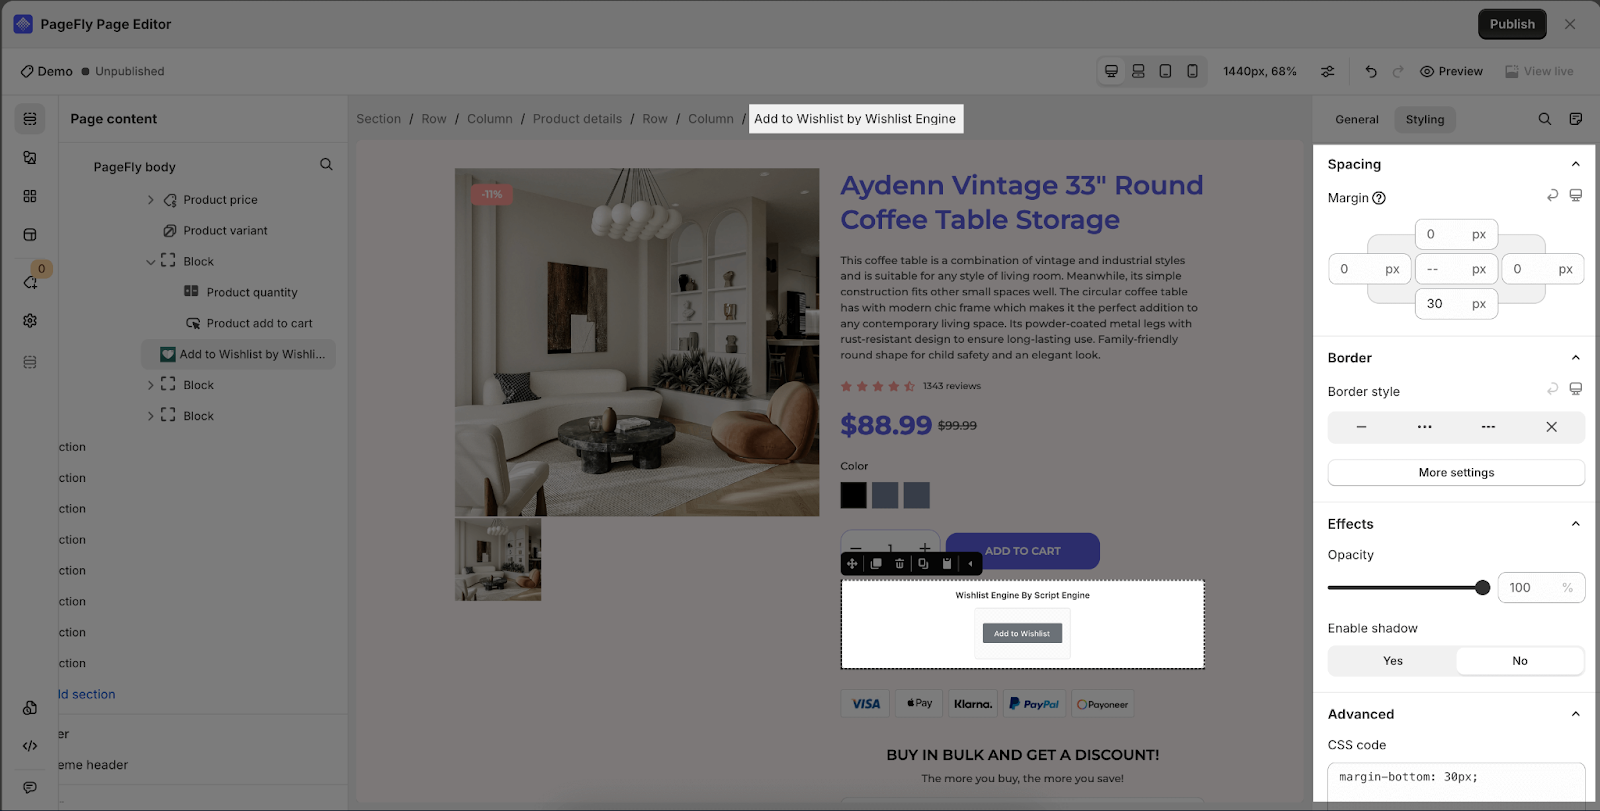
On the General tab, you can adjust the general settings such as Visibility, Animation, and Attributes.
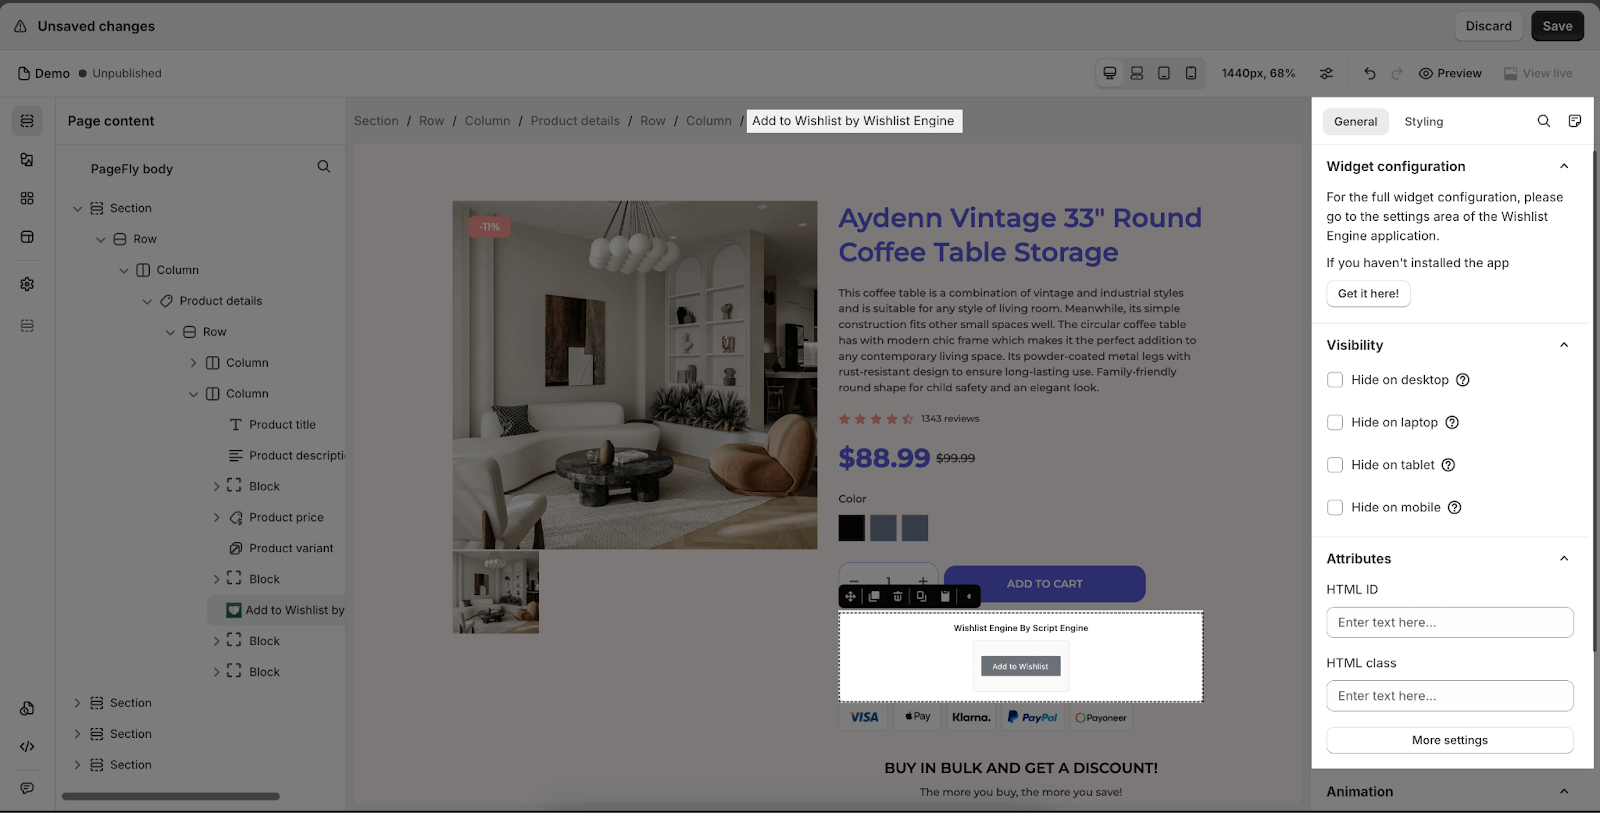
For styling options like margins, borders, and effects, go to the Styling tab. You can find more details about the available styling options.
From Wishlist Engine App
Before using the Wishlist Engine element in PageFly, you’ll need to create and configure your announcement in the Wishlist Engine app. Here’s how:
Step 1: Activate “Wishlist Engine” in the Theme Customize
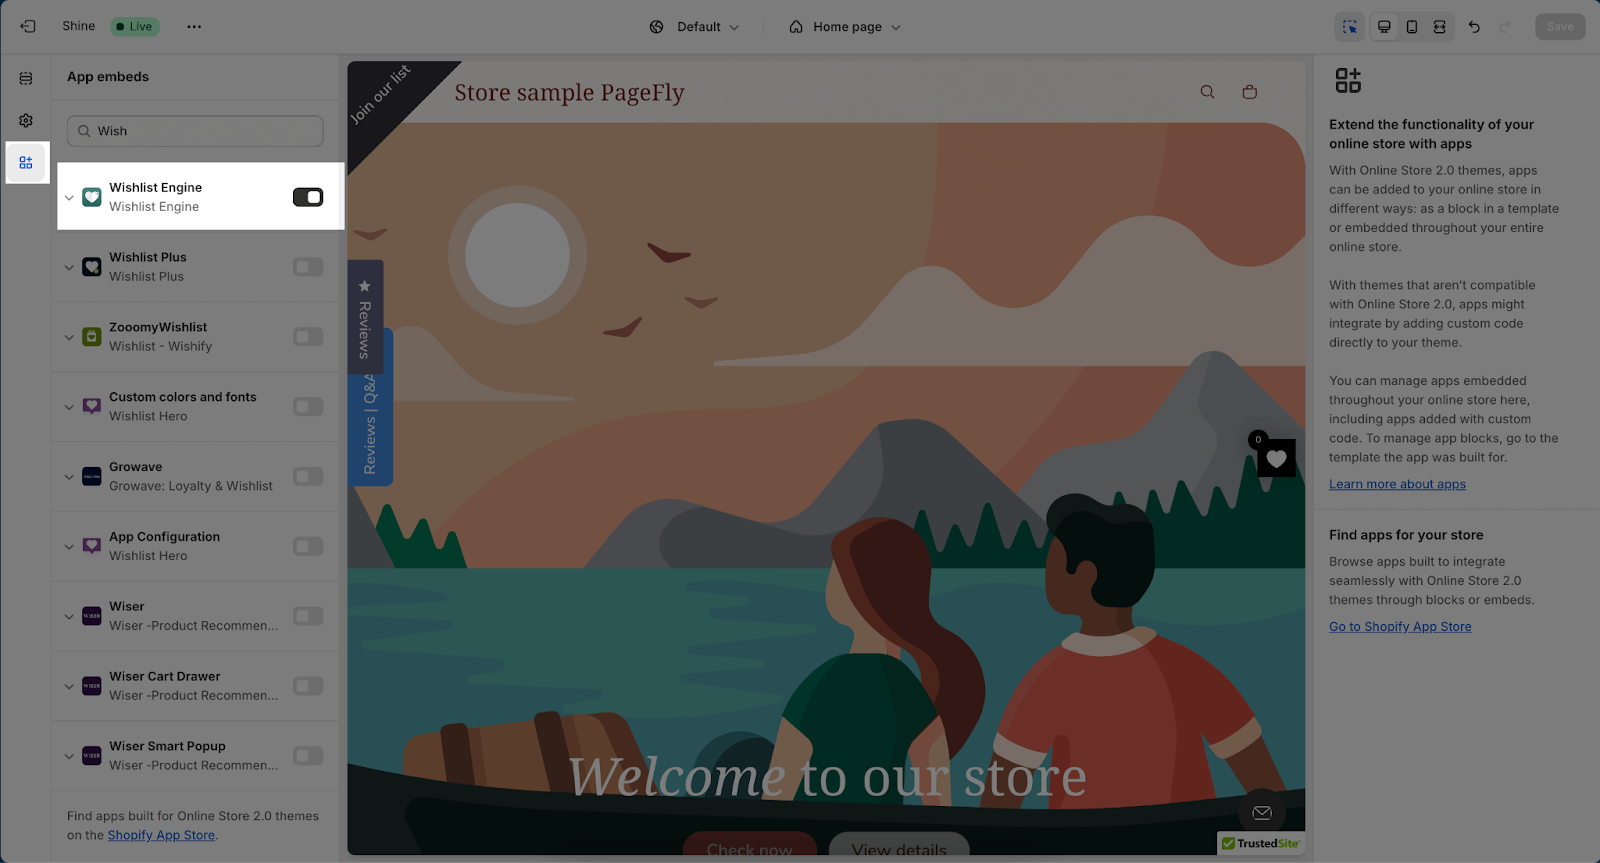
Go to Online Store > Themes > Current Theme > Customize > App Embeds. Then, search for “Wishlist Engine” and enable it.
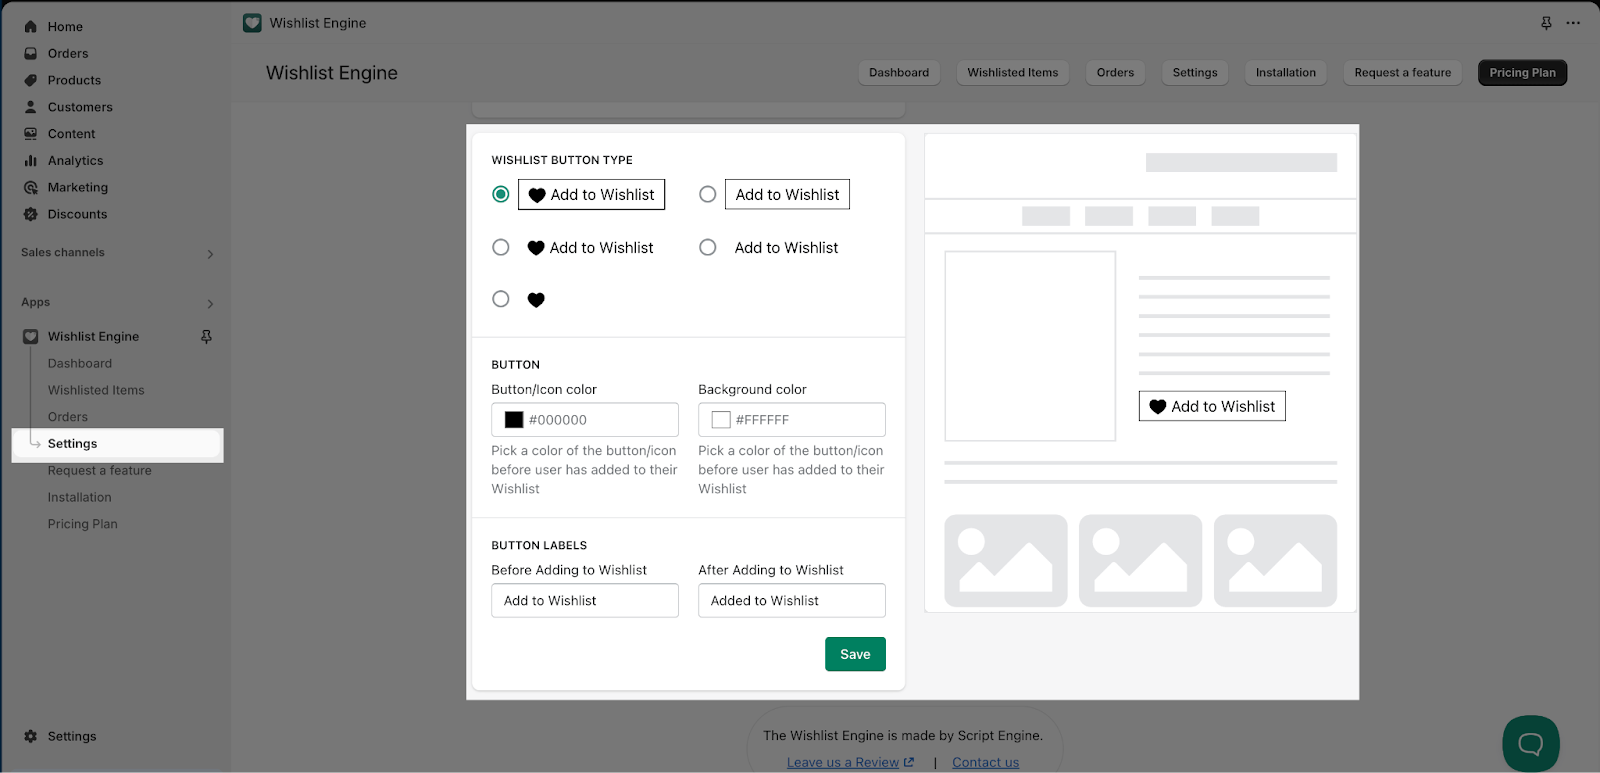
Go back to the Wishlist Engine app > Click on Settings > Button Settings. Here, you can change how the Wishlist button looks and works.
Frequently Asked Questions
1. Why Can’t I See The Add To Wishlist Button From Wishlist Engine On My PageFly Page?
Ensure the app is installed and the App embed is properly enabled to display the element on your PageFly page.
2. On Which Page Types Can I Use The Wishlist Engine Element?
You can place the Wishlist Engine element on any part of the product page. For other types of pages, it works only within the Product Details element.
3. Is The Wishlist Engine App Free?
Yes, the Wishlist Engine app has a free plan. If you need more features, paid plans start at $4.49/month.
