About UploadKit – Upload Fields App
What Is UploadKit – Upload Fields App?
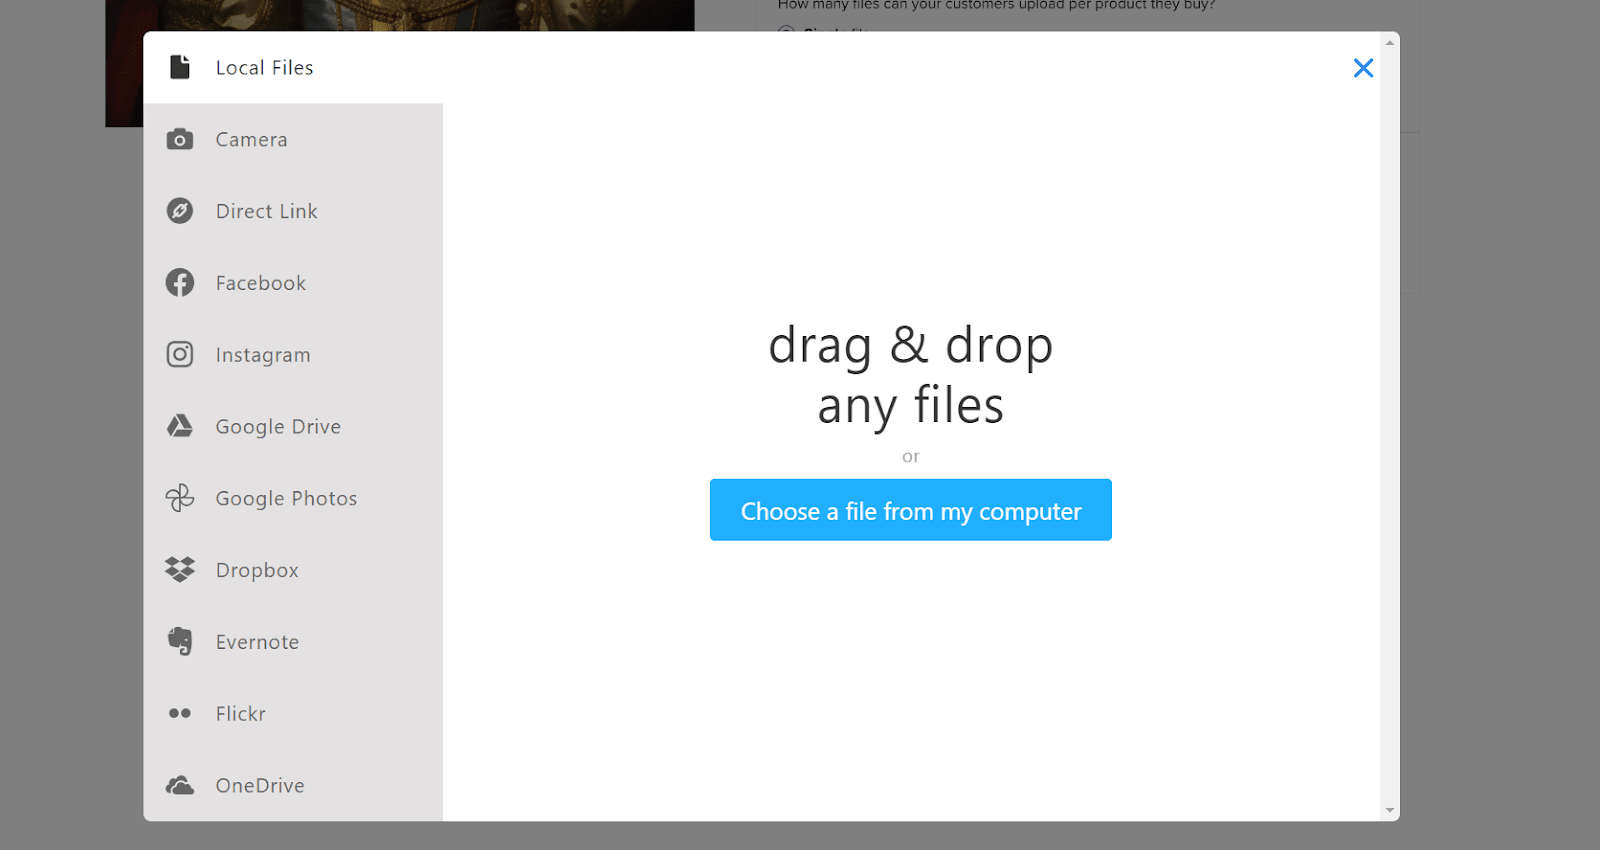
The UploadKit element is designed to let customers upload files when adding products to their cart so they can capture a photo from their webcam, add files from the web, or from other sources. You can use the UploadKit – Upload Fields element for a specific product, or for all of your products.
Install UploadKit – Upload Fields
Before using this element, you have to install the Upload Fields by UploadKit app and set up all options for the product(s) you want in the Upload Fields by UploadKit app then come back to add the element on the corresponding product(s).
How To Access UploadKit – Upload Fields Element
In page editor, follow these steps to access UploadKit – Upload Fields element:
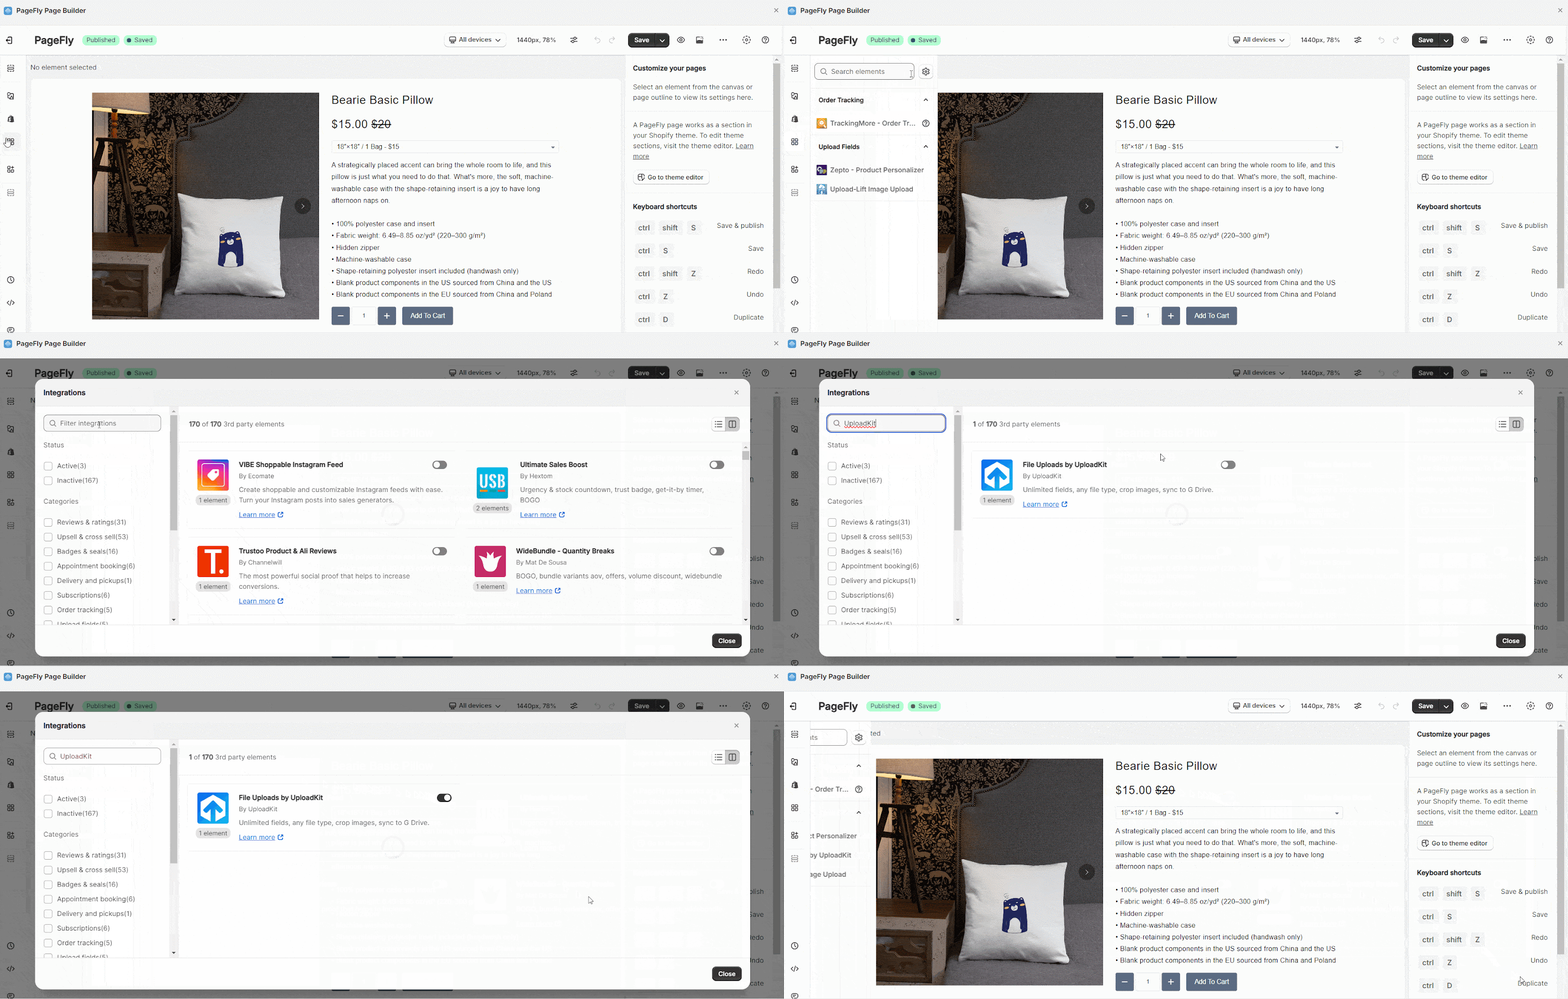
- Step 1: In the PageFly editor, click “Add third-party element” on the left menu
- Step 2: Click “Manage integrations” or the gear icon on top
- Step 3: Search for “UploadKit – Upload Fields” and enable it
- Step 4: Click “Close” and the element will appear in the “Add third-party element” menu
How To Configure UploadKit – Upload Fields Element
- In the Product page, the Upload Fields element will depend on the selected products in your Page Settings modal.
- For the other pages, you can select a specific product with the parameters in the General tab of the Upload Fields element.
- The Upload Fields element can be displayed on any page such as your homepage, regular page, collection or product pages.
- You can use the Upload Fields element as many times as you want on a particular page. However, you can only use one Upload Fields element in a Product Details element.
- Upload Fields element must stay inside the Product Details element.
From PageFly
Step 1: Add UploadKit – Upload Fields Element
Before starting to set up for the UploadKit – Upload Fields element, you will need to add this element onto your page canvas:
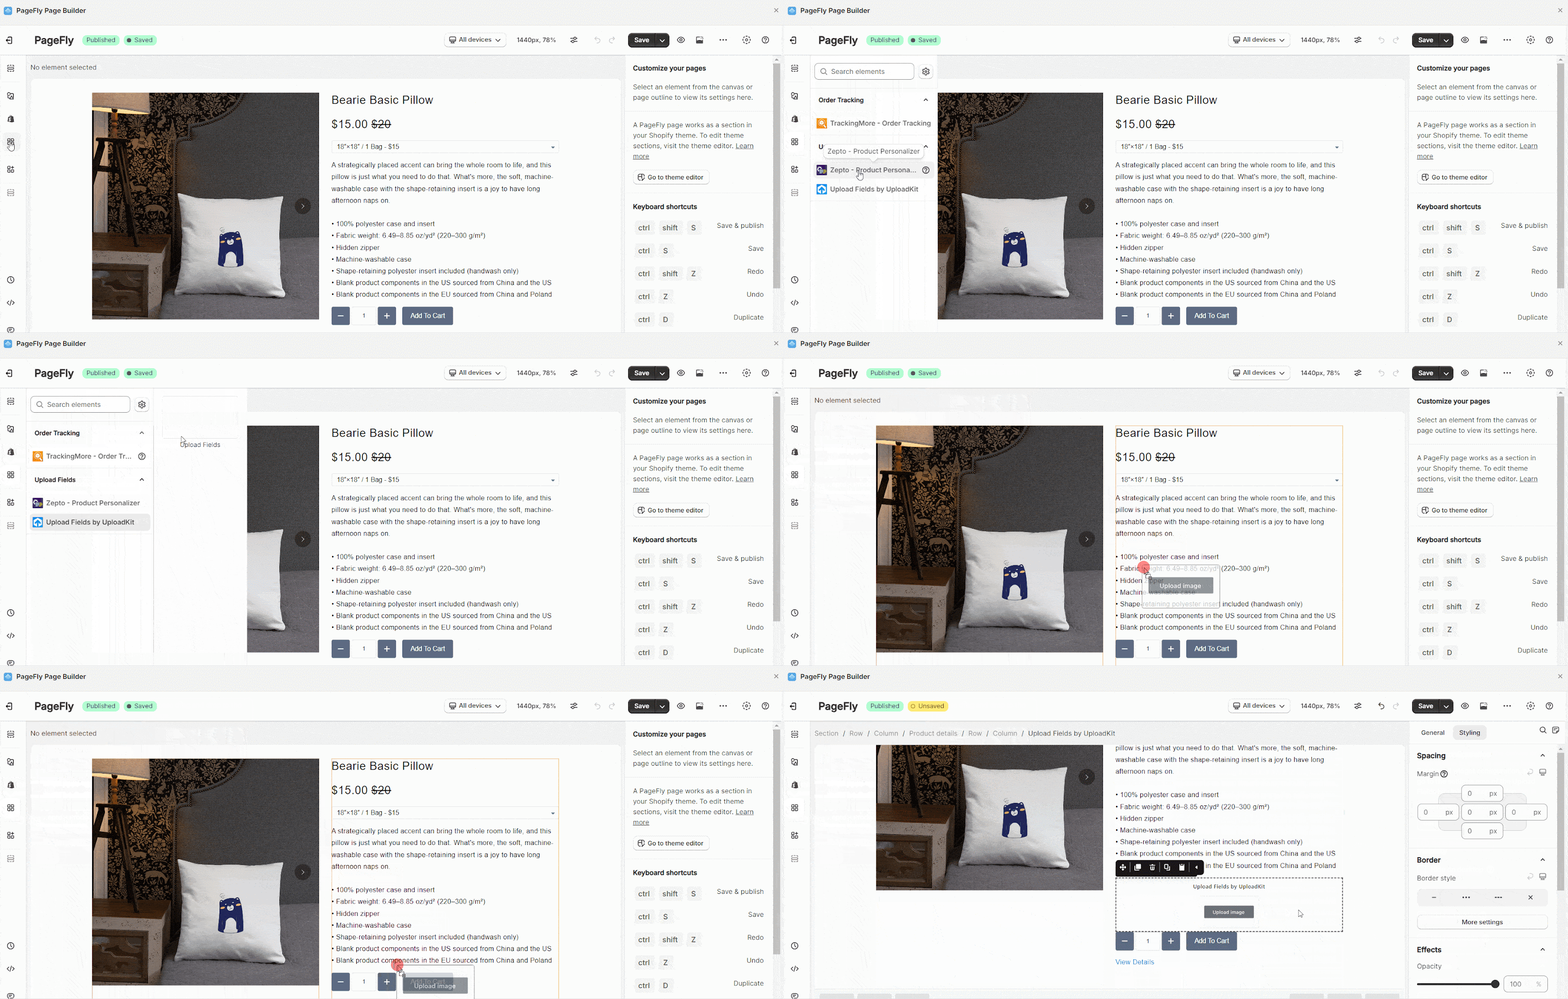
- Step 1: Click “Add third party element” on the left menu bar
- Step 2: Look for “UploadKit – Upload Fields” element
- Step 3: Click on the element to see its variants
- Step 4: Drag and drop the variant onto the page canvas
Step 2: Configure UploadKit – Upload Fields Element
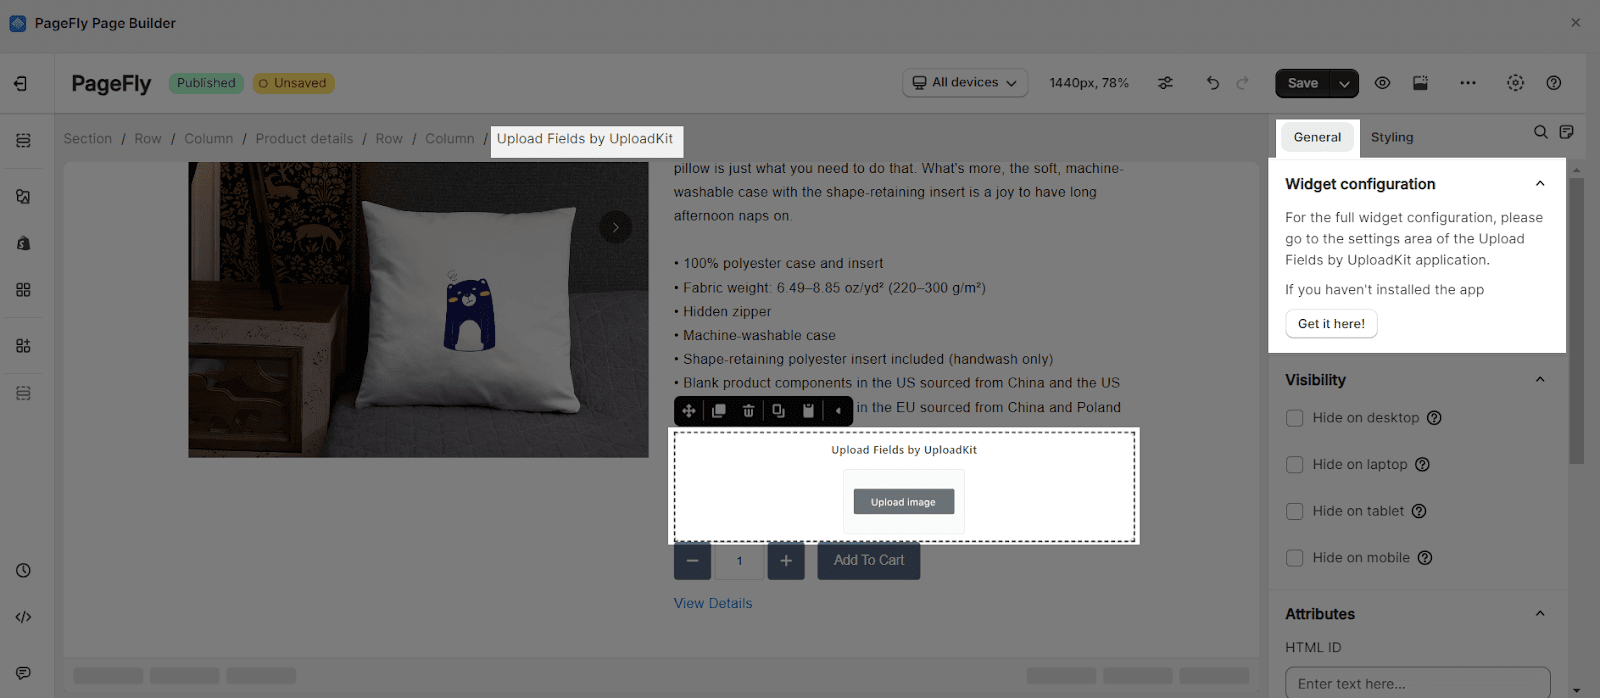
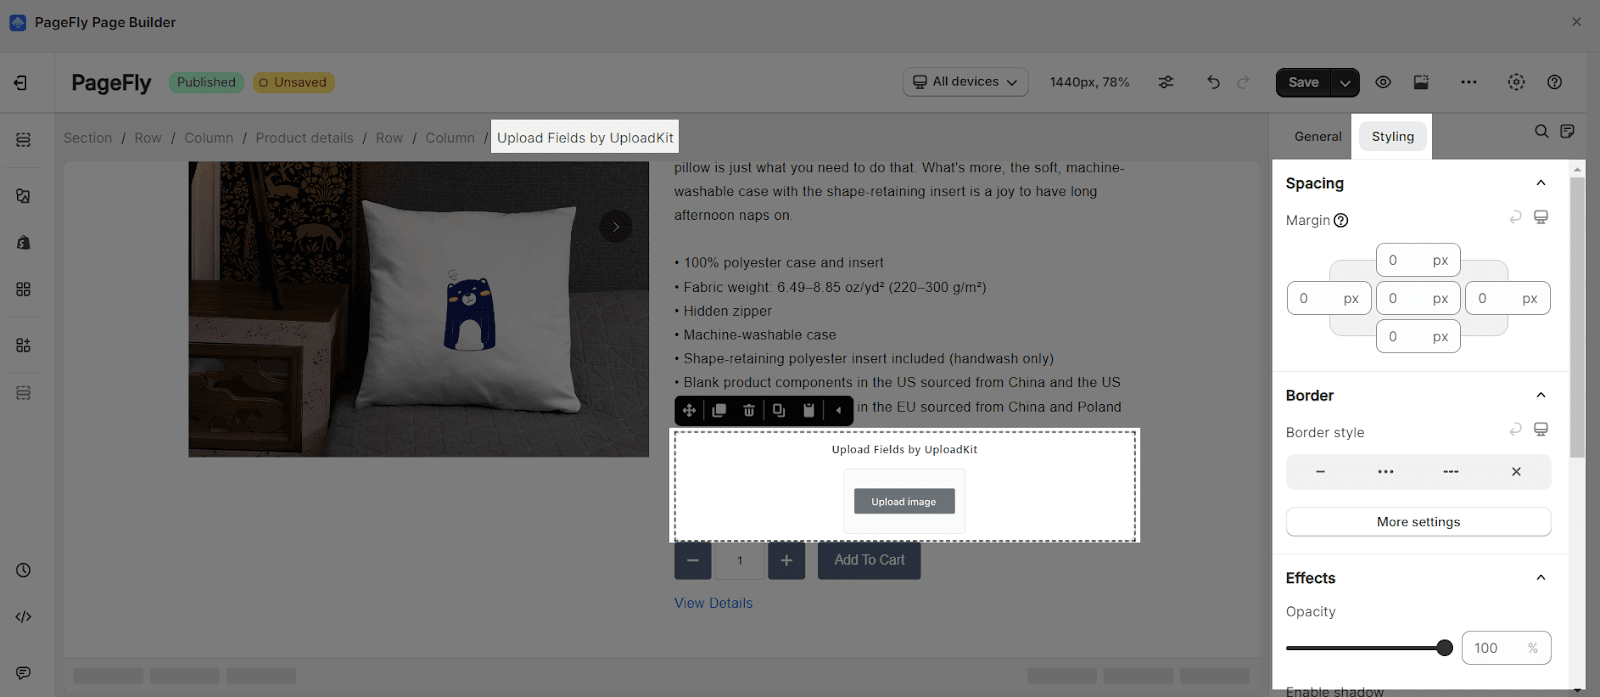
After adding the element, you can adjust for it by clicking on the element.
- From the “General” tab, there is a widget configuration giving you a short explanation of the UploadKit – Upload Fields app, its link to the app listing.
- For styling options like margins, borders, and effects, go to the “Styling” tab. You can find more details about the available options here.
From UploadKit – Upload Fields App
Before using the UploadKit – Upload Fields element in PageFly, you’ll need to create and configure your widget in the UploadKit – Upload Fields app. Here’s how:
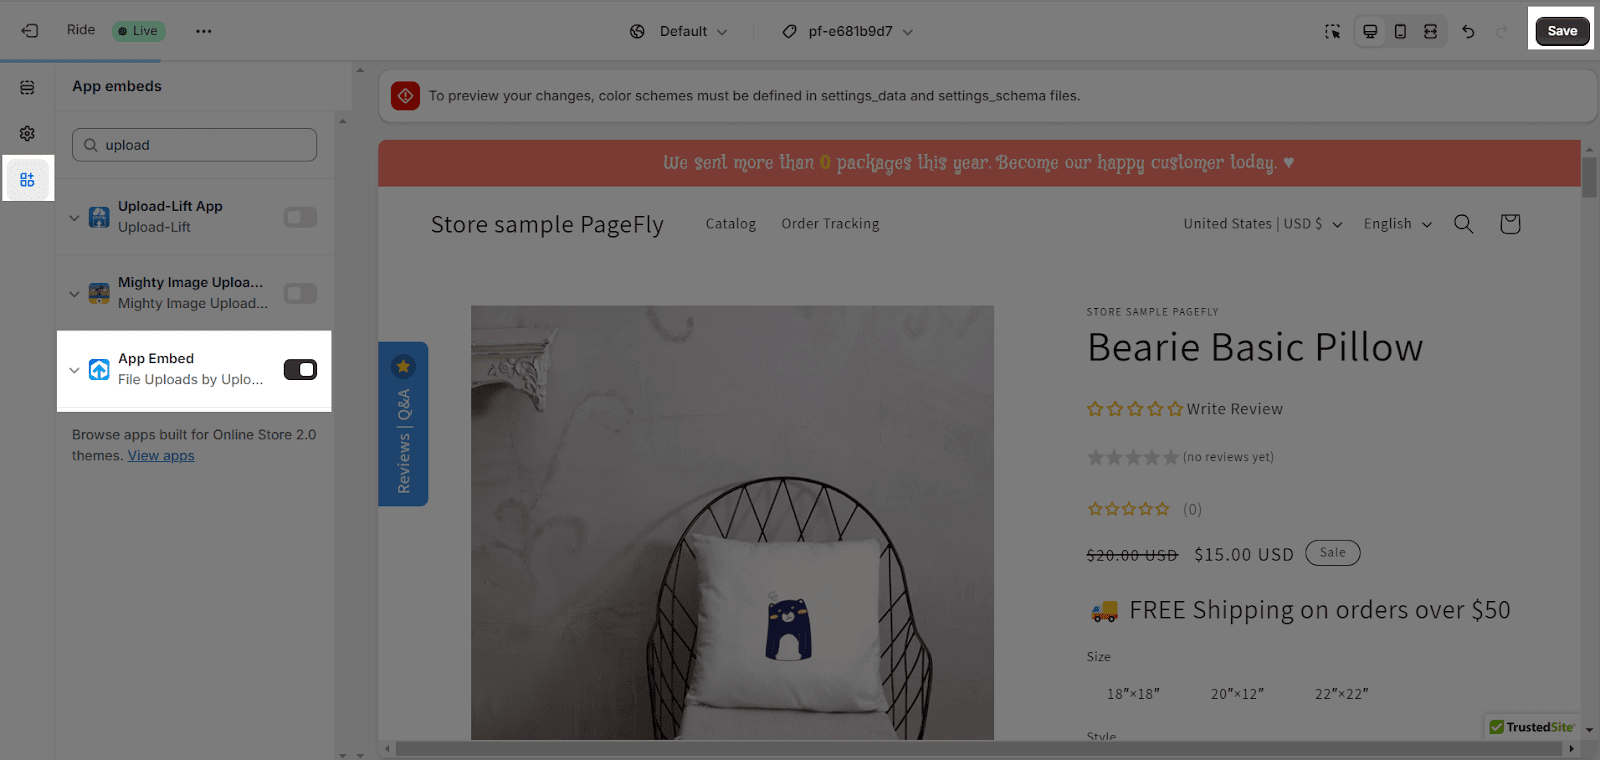
Go to your Shopify admin, then navigate to Online Store > Theme > Current theme > Customize > App embeds. Search for “UploadKit – Upload Fields” and activate it.
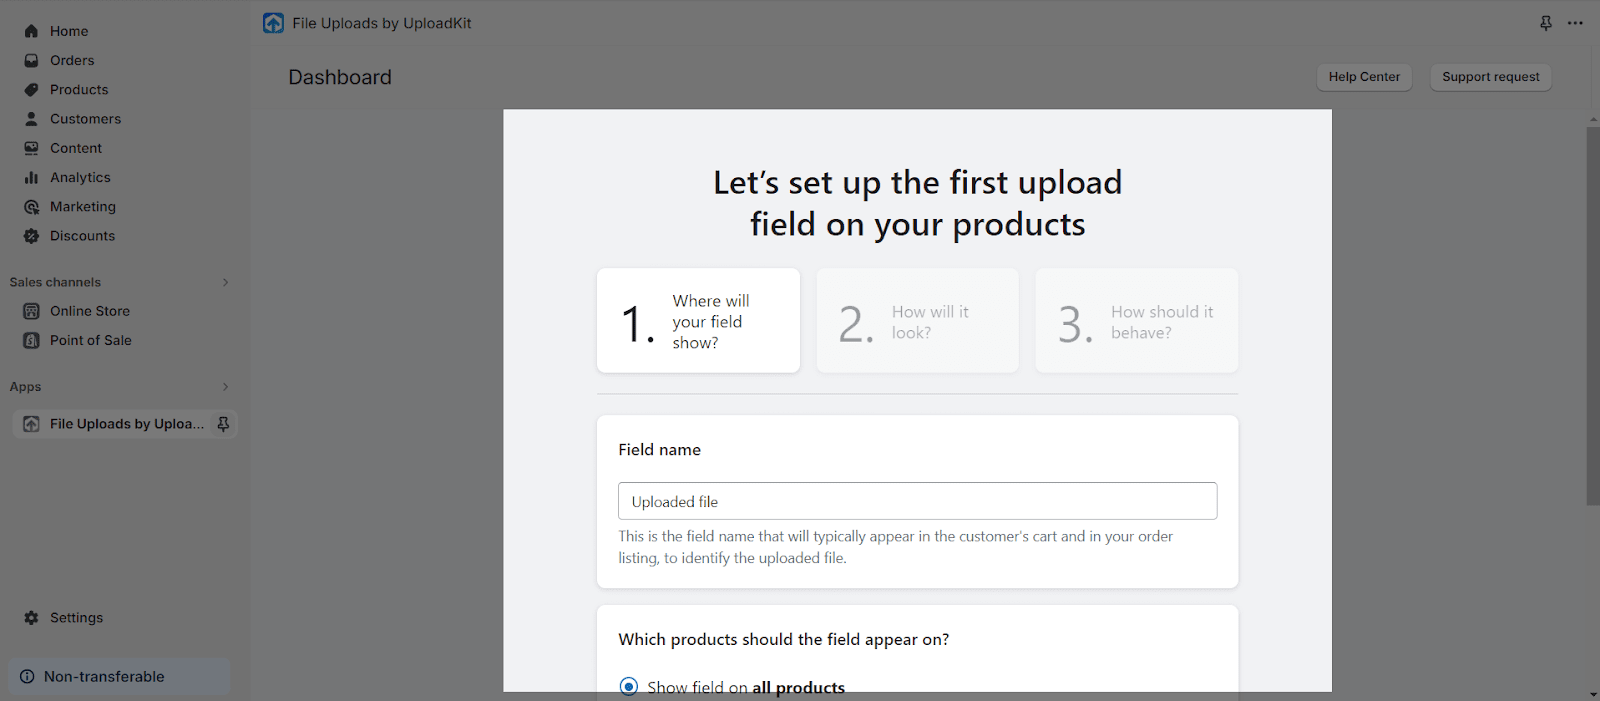
From the File Uploads by UploadKit app dashboard, follow 3 steps to set up the upload field.
You can visit their Help Center to learn more about how to configure the app settings.
Finally, hit Publish to see the result on your live page.
Frequently Asked Questions
A 9.95$/ month plan starts with Unlimited fields, All upload sources, Automatic malware scanning, Up to 200MB file size and Retention period up to 3 months.
A UploadKit Element includes Accept files from phones, computers, Facebook, Instagram and more; customers preview, auto-enhance, rotate, sharpen and crop images; automatically syncing uploaded files to your Google Drive for faster order handling, Attach file fields to collections, products or even individual variants and automatically scans all files for malware and blocks viruses and trojans.


