About Shopify LookBook With PageFly
What Is Shopify LookBook?
Shopify LookBook is an image gallery element, to help merchants boost sales by creating photo galleries to enhance customers’ shopping experiences. You can create as many lookbook galleries as you want with just a few clicks.
Install Shopify LookBook
In order to use this element, Shoppable Galleries by Expert Village Media has to be installed on your Shopify store.
Install LookBook – Shoppable Galleries
Install PageFly
How To Access Shopify LookBook Element In PageFly
- Each Product Page can only have one LookBook element.
- Other page types can contain more than one LookBook Image Galleries.
- LookBook element cannot be used inside the Product List.
In the page editor, follow these steps to access the Look-Shoppable galleries element:
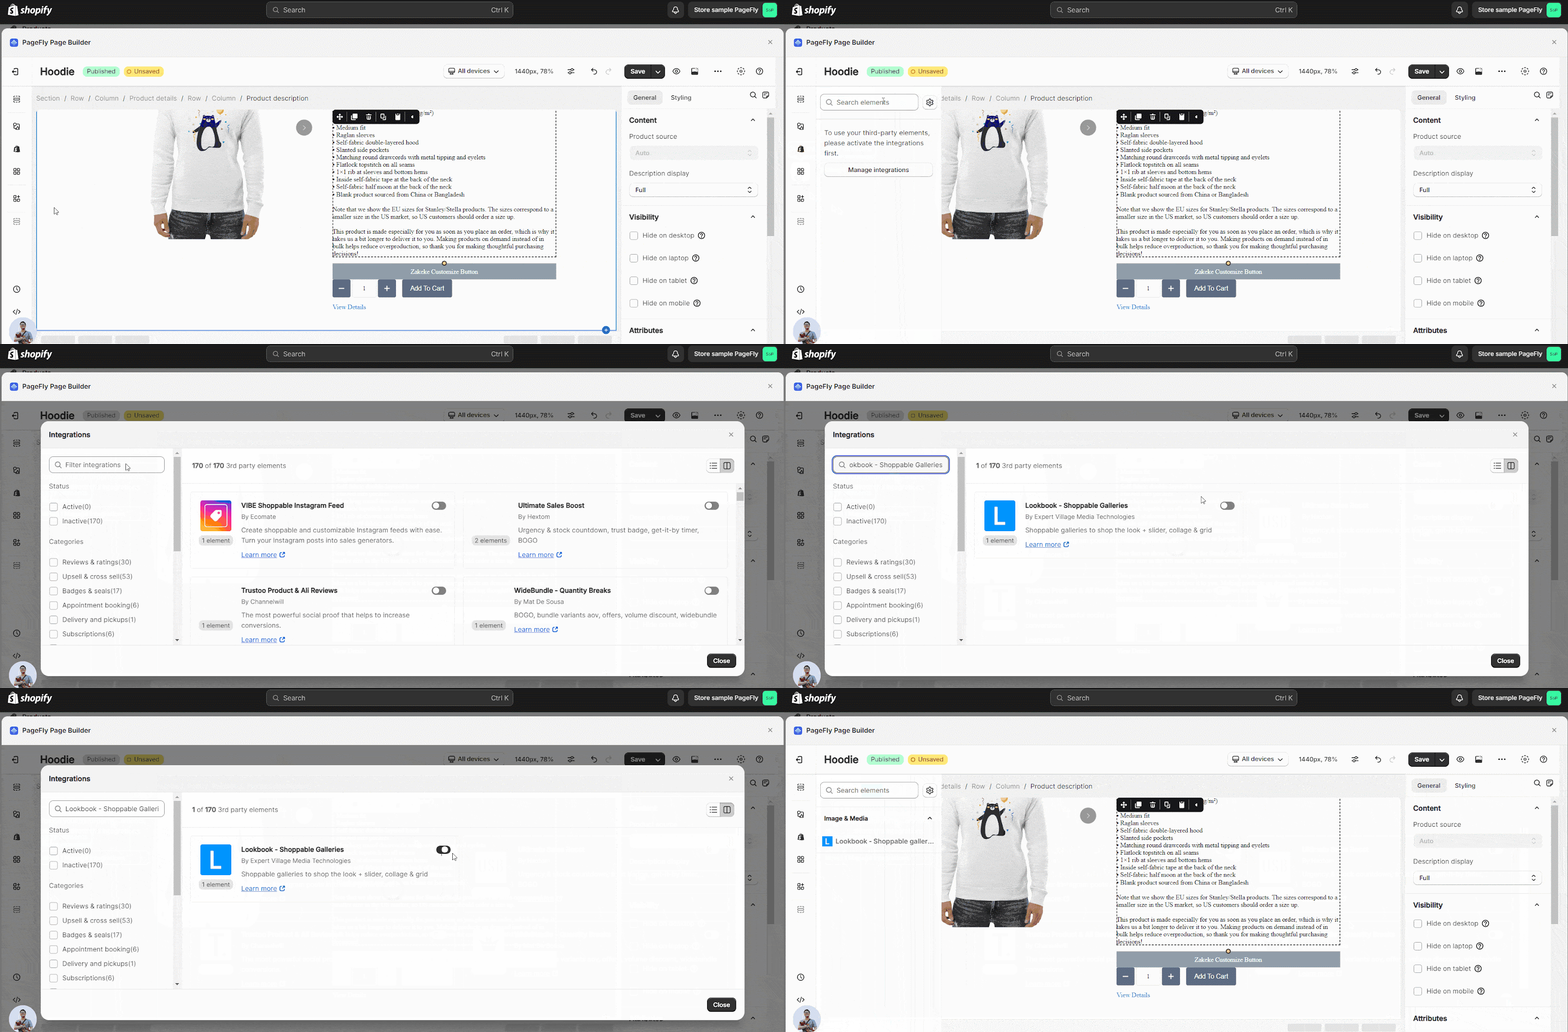
- Step 1: In the PageFly editor, click “Add third-party element” on the left menu
- Step 2: Click “Manage integrations” or the gear icon on top
- Step 3: Search for “Lookbook – Shoppable galleries” and enable it
- Step 4: Click “Close” and the element will appear in the “Add third-party element” menu
How To Configure the Shopify LookBook With PageFly Element
From PageFly
Step 1: Add Shopify LookBook With PageFly Element
Before starting to set up the Shopify LookBook element, you will need to add this element to your page canvas:
- Step 1: Click “Add third party element” on the left menu bar
- Step 2: Look for the “LookBook – Shoppable galleries” element
- Step 3: Click on the element to see its variant
- Step 4: Drag and drop the variant onto the page canvas
Step 2: Configure Shopify LookBook With PageFly Element
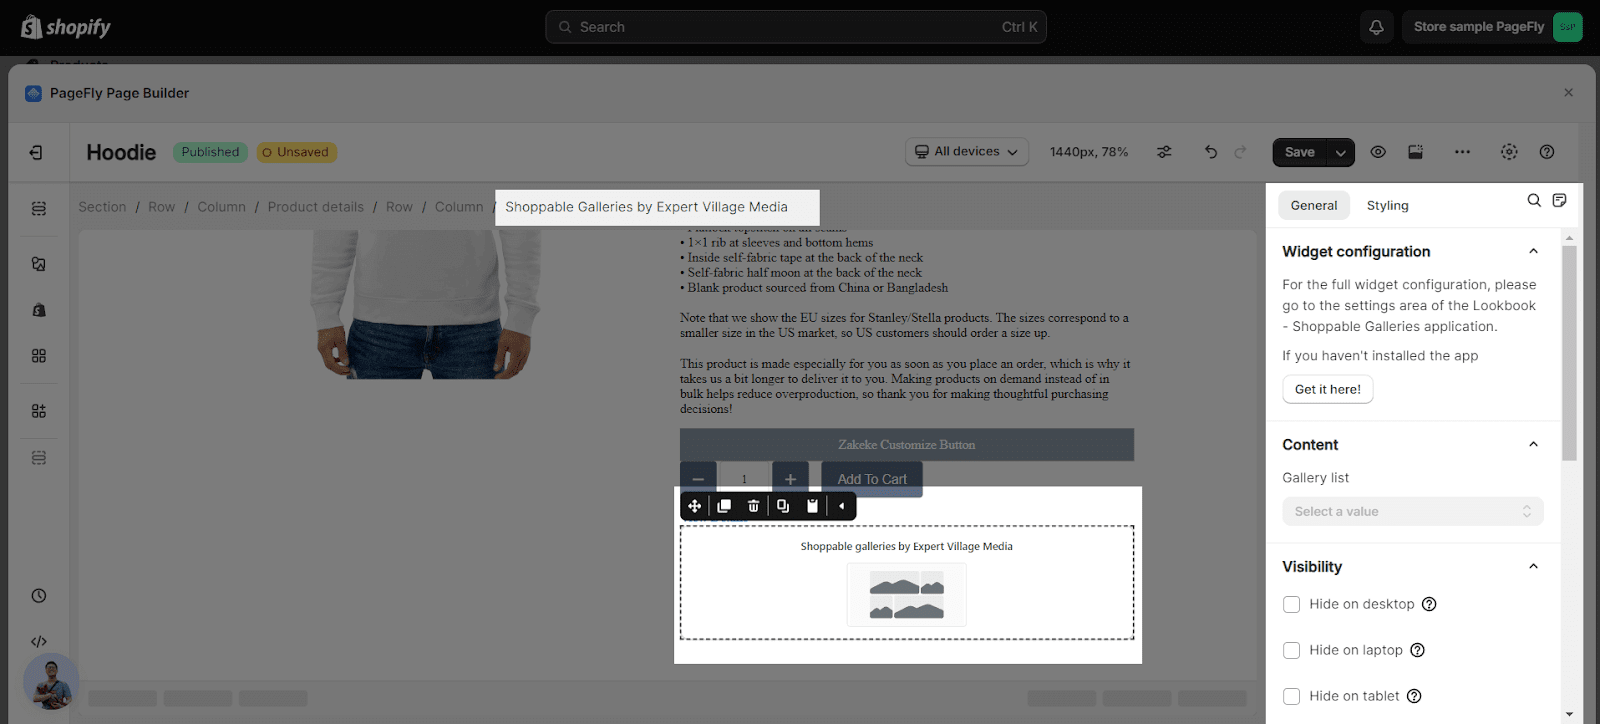
After adding the element, you can adjust it by clicking on the element.
- In the General tab, there is a widget configuration giving you a short explanation of the LookBook app and its link to app listing, and you can edit the Content, Visibility, Tracking, Attributes, and Animation of the product.
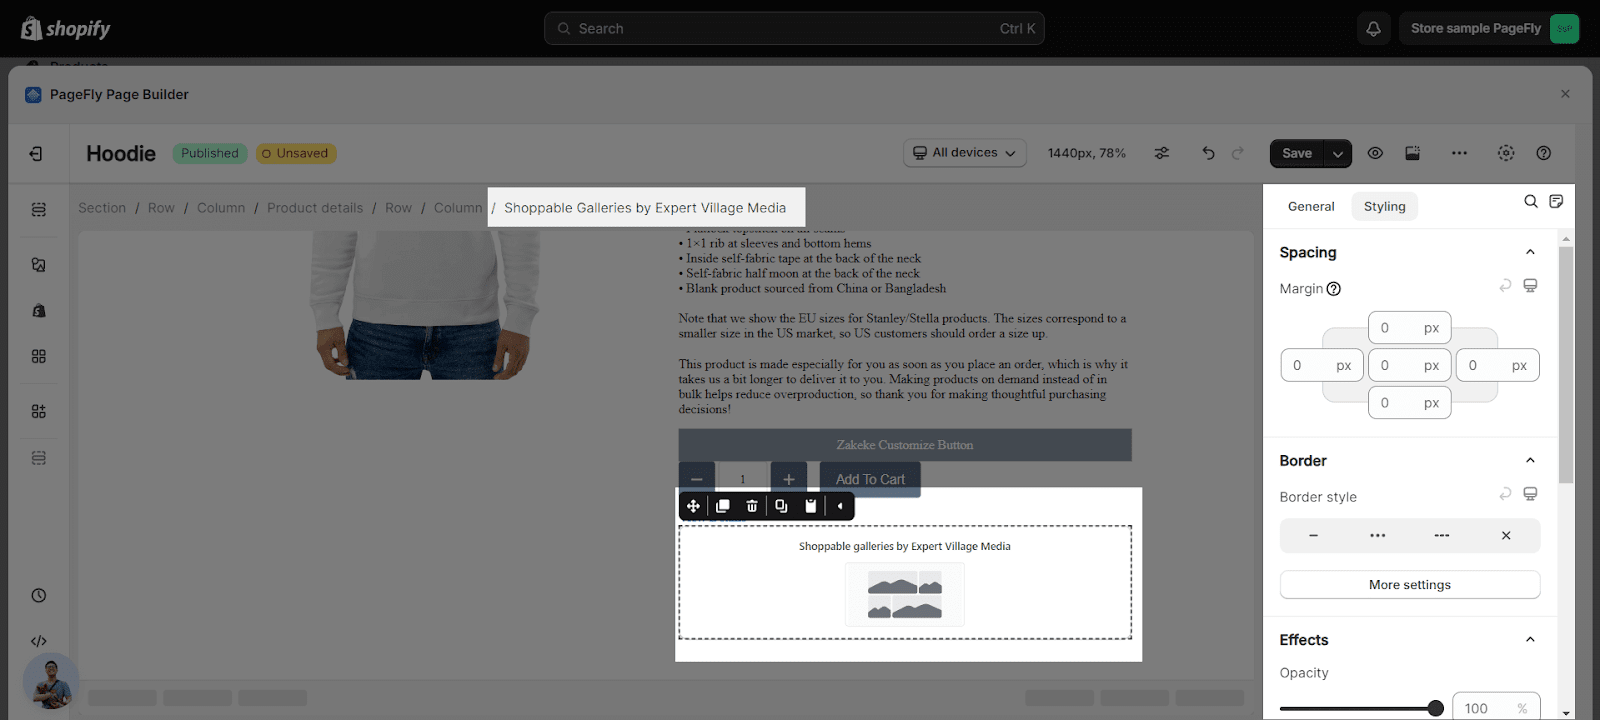
- In the Styling tab, you can edit the Margin, Border, and Effect of Opacity for the element.
From LookBook App
Step 1: Install Shoppable Galleries element from your Shopify App Store.
Go to your Shopify Admin > Apps > Choose LookBook – Shoppable Galleries
Step 2: Set up LookBook – Shoppable Galleries for your store
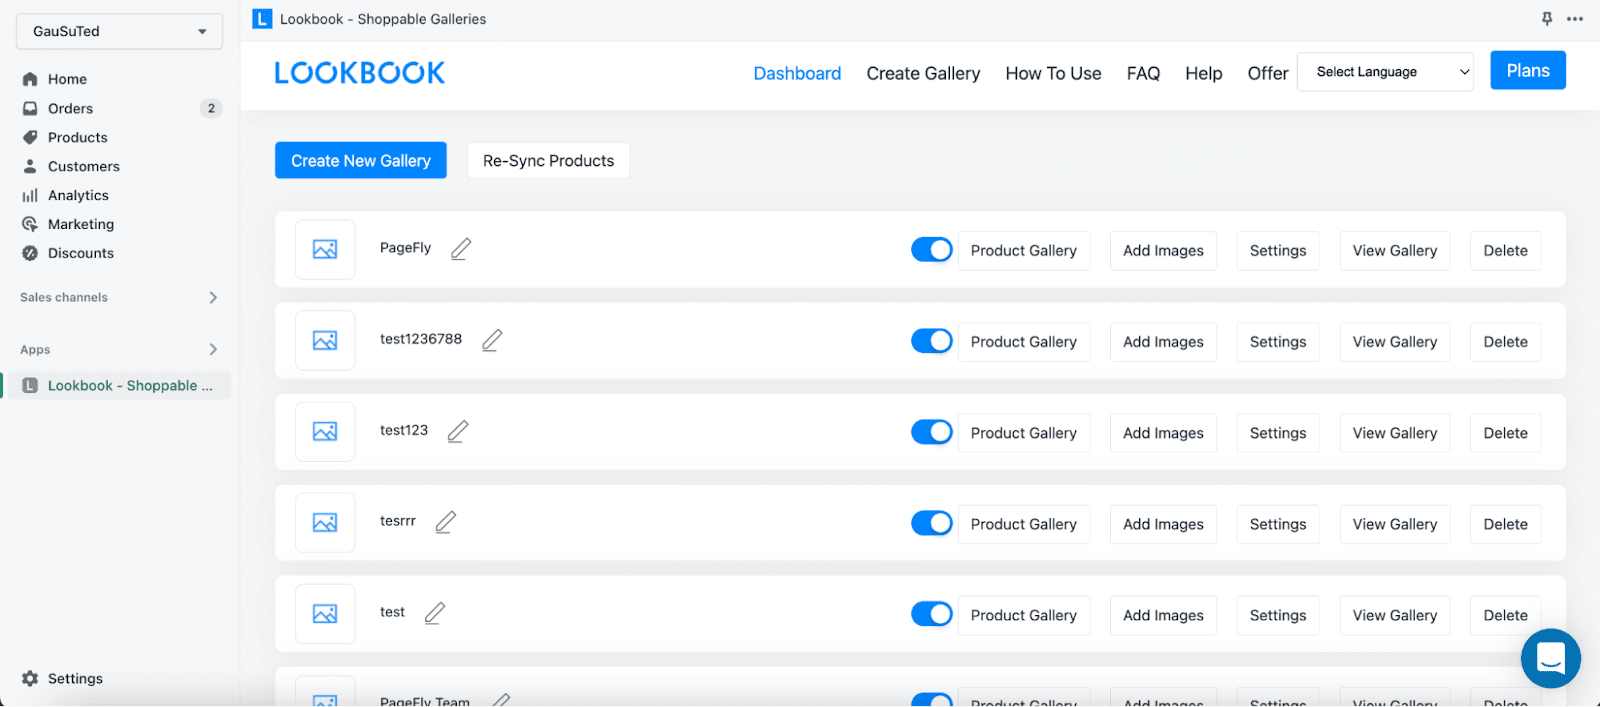
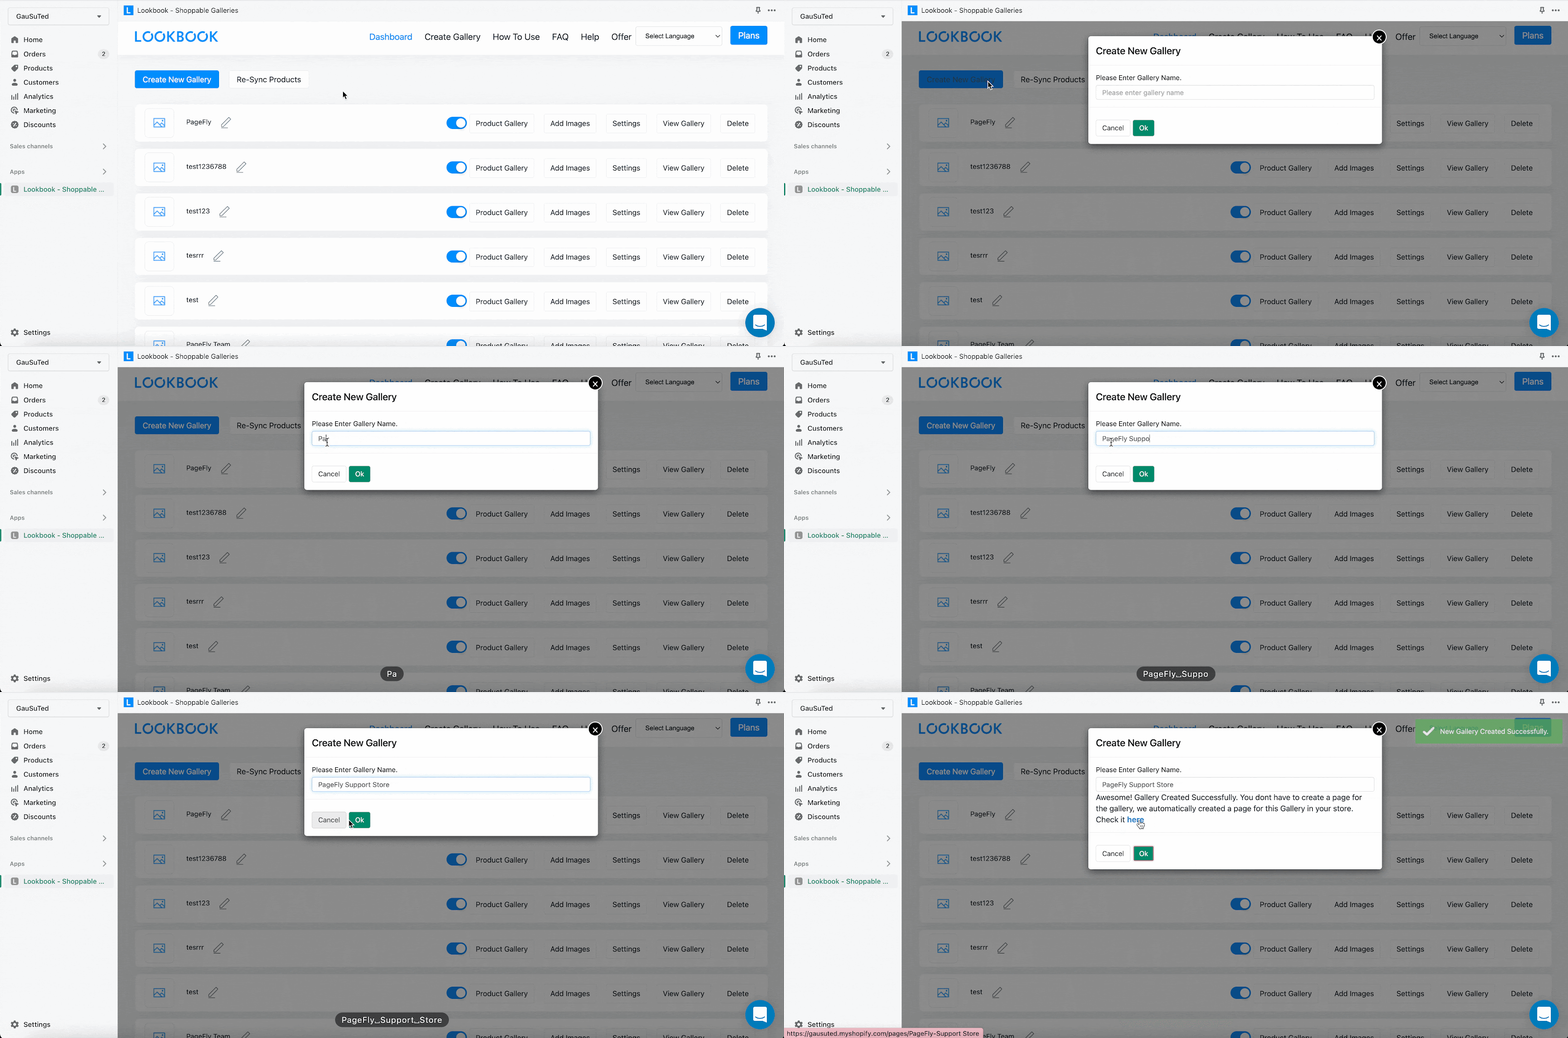
This is the Dashboard of LookBook.
To start configuring your lookbook image gallery, from the Dashboard of Shoppable Galleries, choose Create New Gallery > insert Gallary name > click Ok.
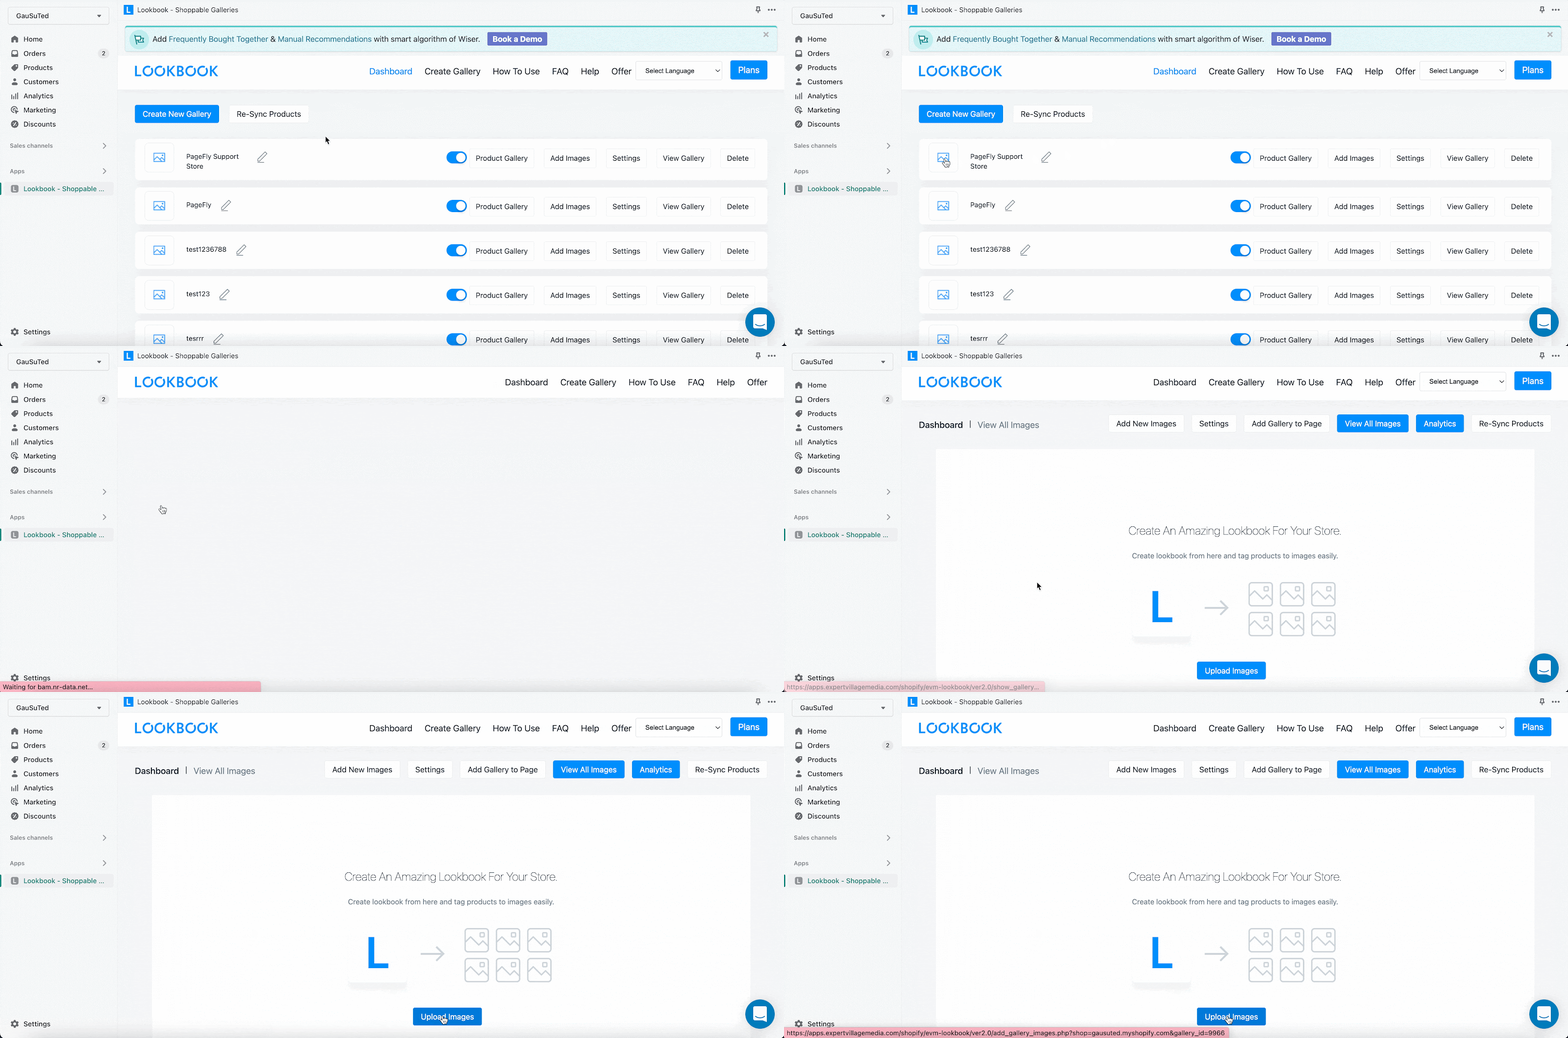
After that, open the lookbook image gallery to start configuring.
Click in Upload Images and select relevant product images. The lookbook galleries app allows you with multiple image uploads.
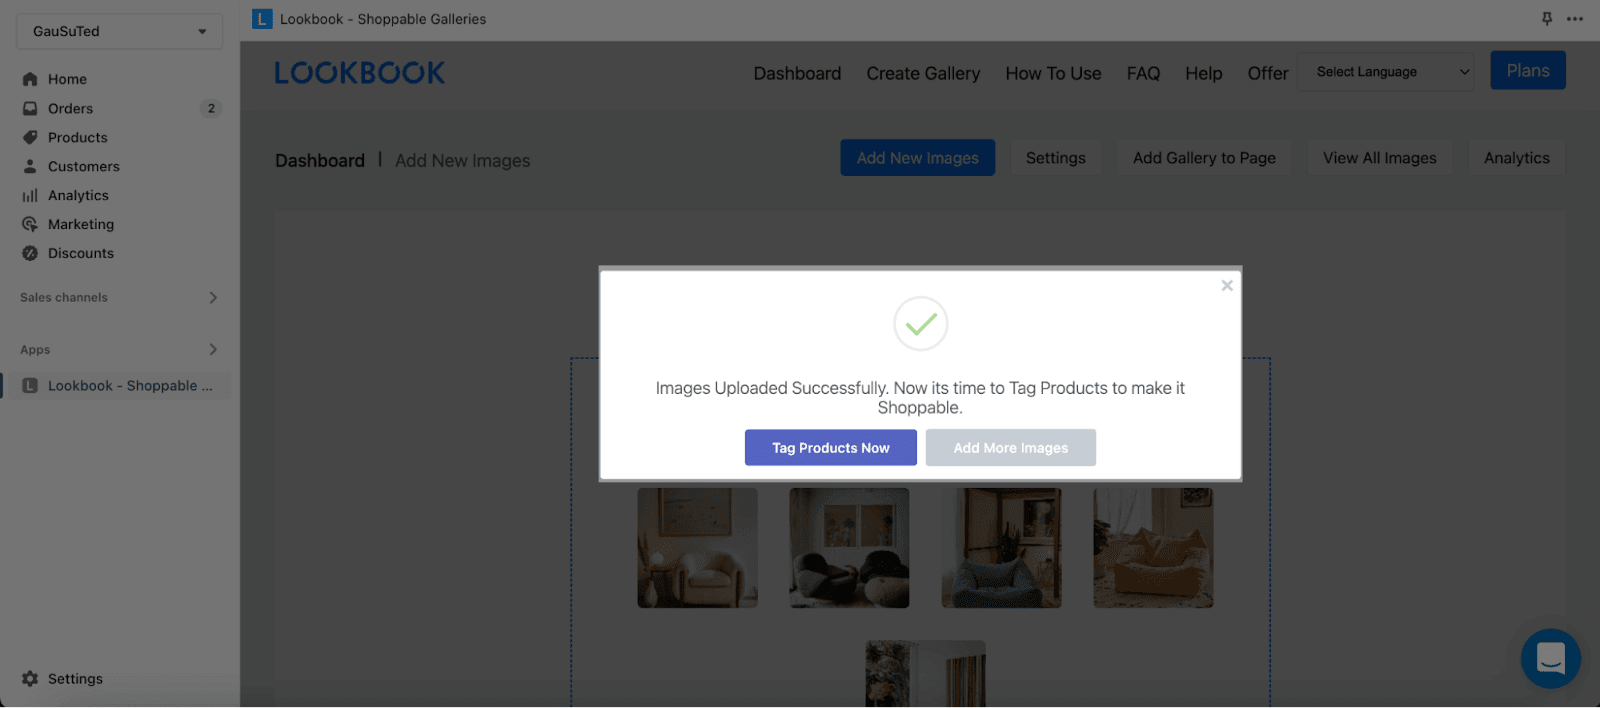
After completing uploading images, a popup will show up allowing you to either go on to tag your products or upload more images. Click in Tag Products Now.
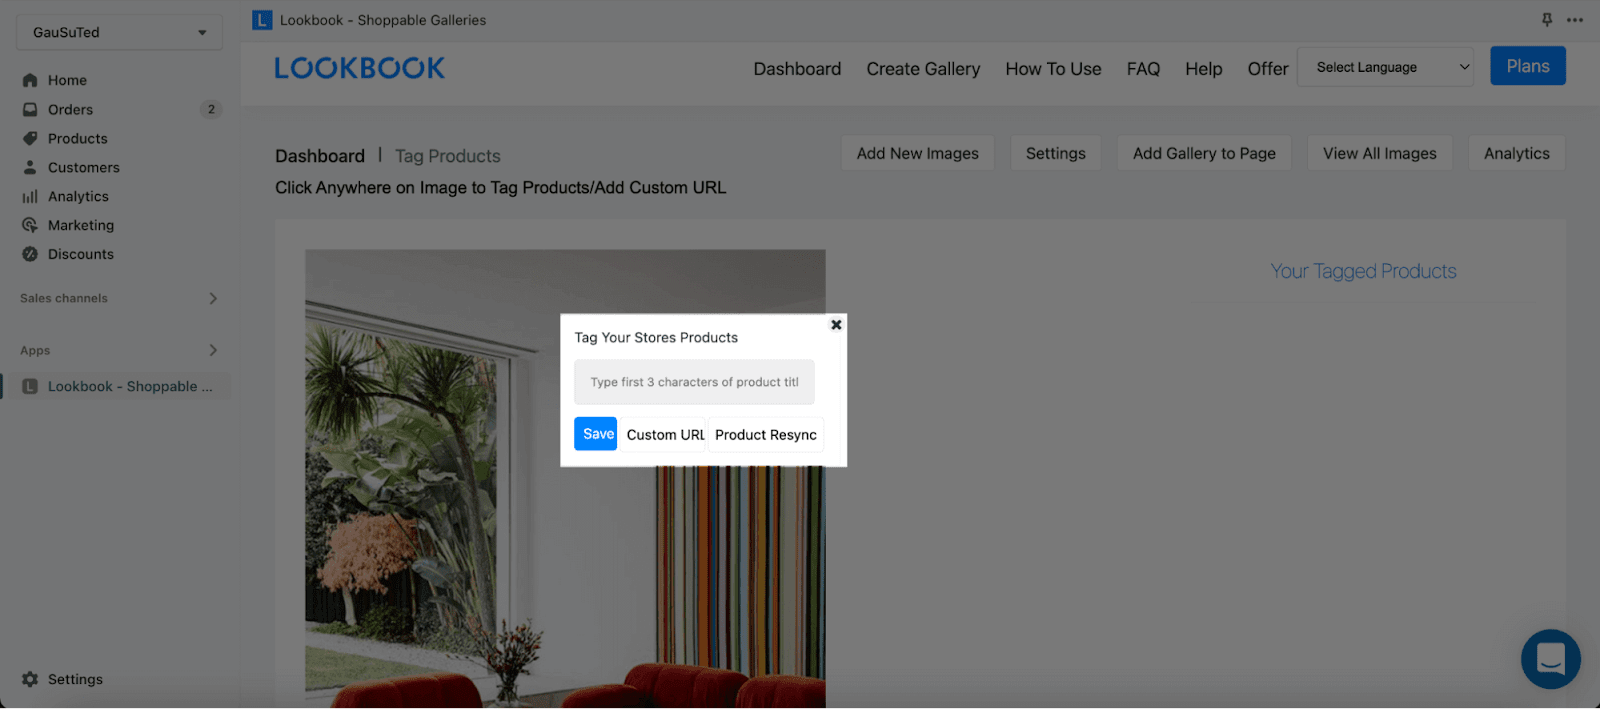
After that, you can use the app’s product tagging system to tag or link products from Shopify. Click the button Tag Products on each image to start.
To tag products, there are two ways:
1. Tag products by typing the first 3 characters of your product titles. Then click Save.
2. Use Custom URL: Tag products using the live view URL.
Tag products on gallery images allow customers to easily purchase products from the lookbook gallery.
After tagging all your products to the images, go to Settings to adjust the image layout. There are 5 layout types: Slider, Grid, List, Collage, Masonry (be noted that Masonry layout is currently not available for use).
When finished with the most suitable layout, scroll down to the bottom of the page. You will see tons of parameters to adjust your lookbook gallery.
When you finish styling the look, click Save.
Learn more about how to configure the LookBook – Shoppable Galleries element right here.
Key Takeaways
EVM Lookbook Shopify allows sellers to create stunning galleries, as you can place it anywhere on your Shopify Store.
Frequently Asked Questions
Overview
| When was LookBook App Created? | 2016 |
| How much is Shopify LookBook? | From $4.99/month |
| Can I use Shopify LookBook on PageFly? | Yes |
What Is Shopify LookBook?
EVM Lookbook Shopify is here to create beautiful Shoppable Lookbook galleries, where sellers can tag products to each and every image!
What’s Included In The Shopify LookBook Plan?
A free plan from Shopify LookBook includes Up to one gallery, Bulk Image Uploader, Multiple display styles, Multiple Animation with Email & Live Chat Support
What Are Benefits Of Using LookBook App?
It’s super easy to use, sellers bulk-upload images, as well in one go and simply tag products on images as hotspots. This is a way to show lifestyle images beautifully on store pages.


