About OneTick Checkbox Upsell App
What Is OneTick Checkbox Upsell App?
With OneTick, you can easily create and adjust checkboxes designed to upsell and cross-sell your offerings. Use these checkboxes to suggest add-ons to your customers, prompting them to increase their cart size before they check out. These checkboxes can be applied to any product and featured on multiple pages, including the homepage, product pages, and collection pages.
Install OneTick Checkbox Upsell
Before using this element in PageFly, you have to install the OneTick Checkbox Upsell app to your store and configure all options in the app.
- Install OneTick Checkbox Upsell
- Install PageFly
How To OneTick Checkbox Upsell Element
In page editor, follow these steps to access OneTick Checkbox Upsell element:
- Step 1: In the PageFly editor, click “Add third-party element” on the left menu
- Step 2: Click “Manage integrations” or the gear icon on top
- Step 3: Search for “OneTick Checkbox Upsell” and enable it
- Step 4: Click “Close” and the element will appear in the “Add third-party element” menu
How To Configure OneTick Checkbox Upsell element
- The element can only work inside the Product details element on the Product page and one page can have many elements.
- All styling and configuration must be done in the OneTick Checkbox Upsell app.
From PageFly
Step 1: Add OneTick Checkbox Upsell Element
Before starting to set up for the OneTick Checkbox Upsell element, you will need to add this element onto your page canvas:
- Step 1: Click “Add third party element” on the left menu bar
- Step 2: Look for “Checkbox by Ecomate” element
- Step 3: Click on the element to see its variant
- Step 4: Drag and drop the variant onto the page canvas
Step 2: Configure OneTick Checkbox Upsell Element
After adding the element, you can adjust it by clicking on the element.
- After adding the OneTick Checkbox Upsell element to the Editor, on the right sidebar, you’ll see the General tab.

- For styling options like margins, borders, and effects, go to the “Styling” tab. You can find more details about the available options here.

From OneTick Checkbox Upsell App
Before using the OneTick Checkbox Upsell element in PageFly, you’ll need to create and configure your announcement in the OneTick Checkbox Upsell app. Here’s how:
-
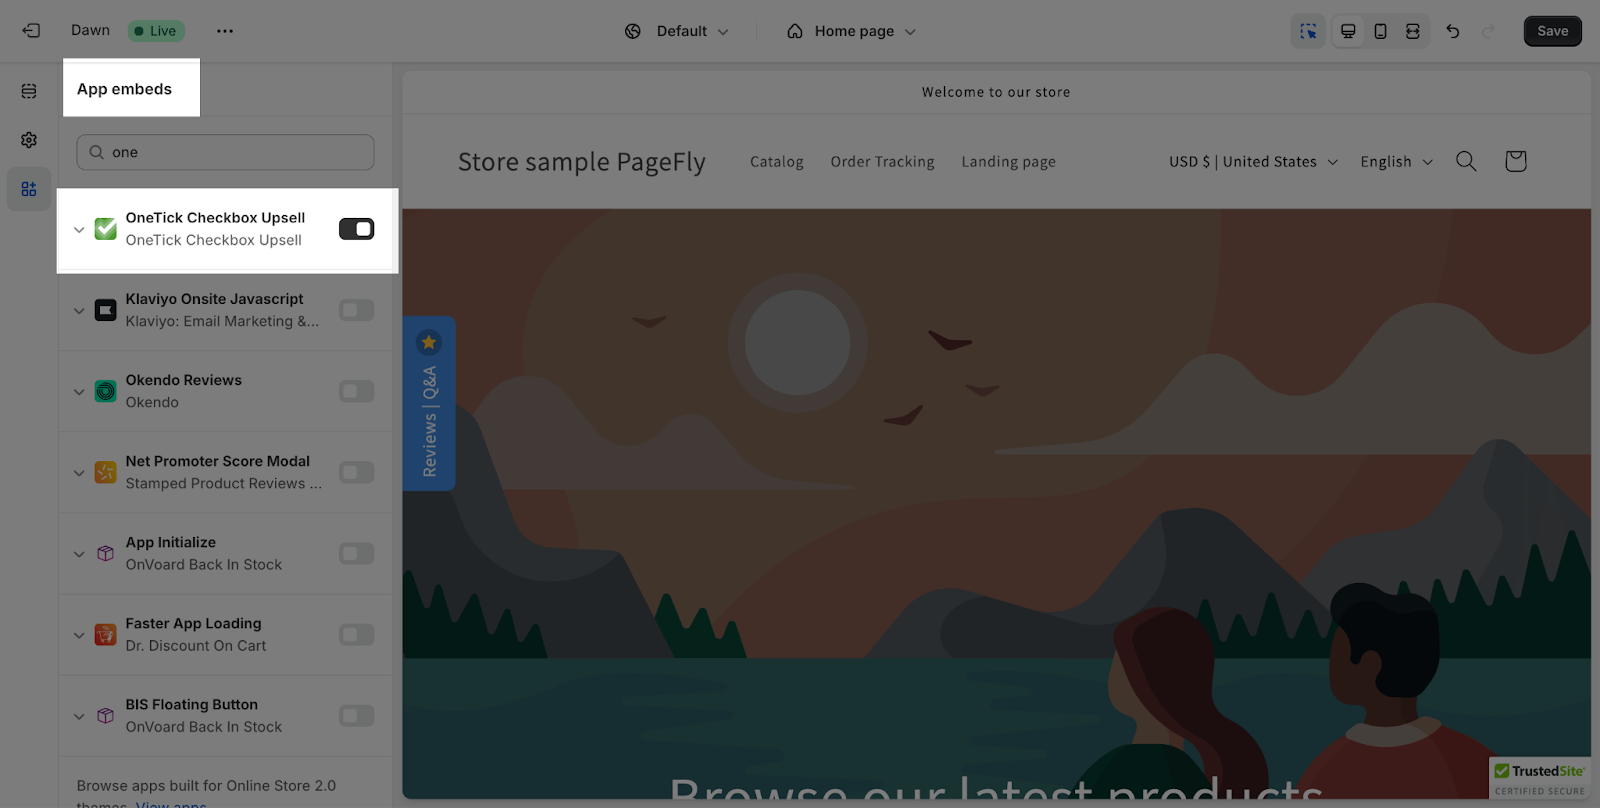
Step 1: Activate “OneTick Checkbox Upsell” in The Theme Customize
Go to your Shopify admin, then navigate to Online Store > Theme > Current theme > Customize > App embeds. Search for “OneTick Checkbox Upsell” and activate it.
-
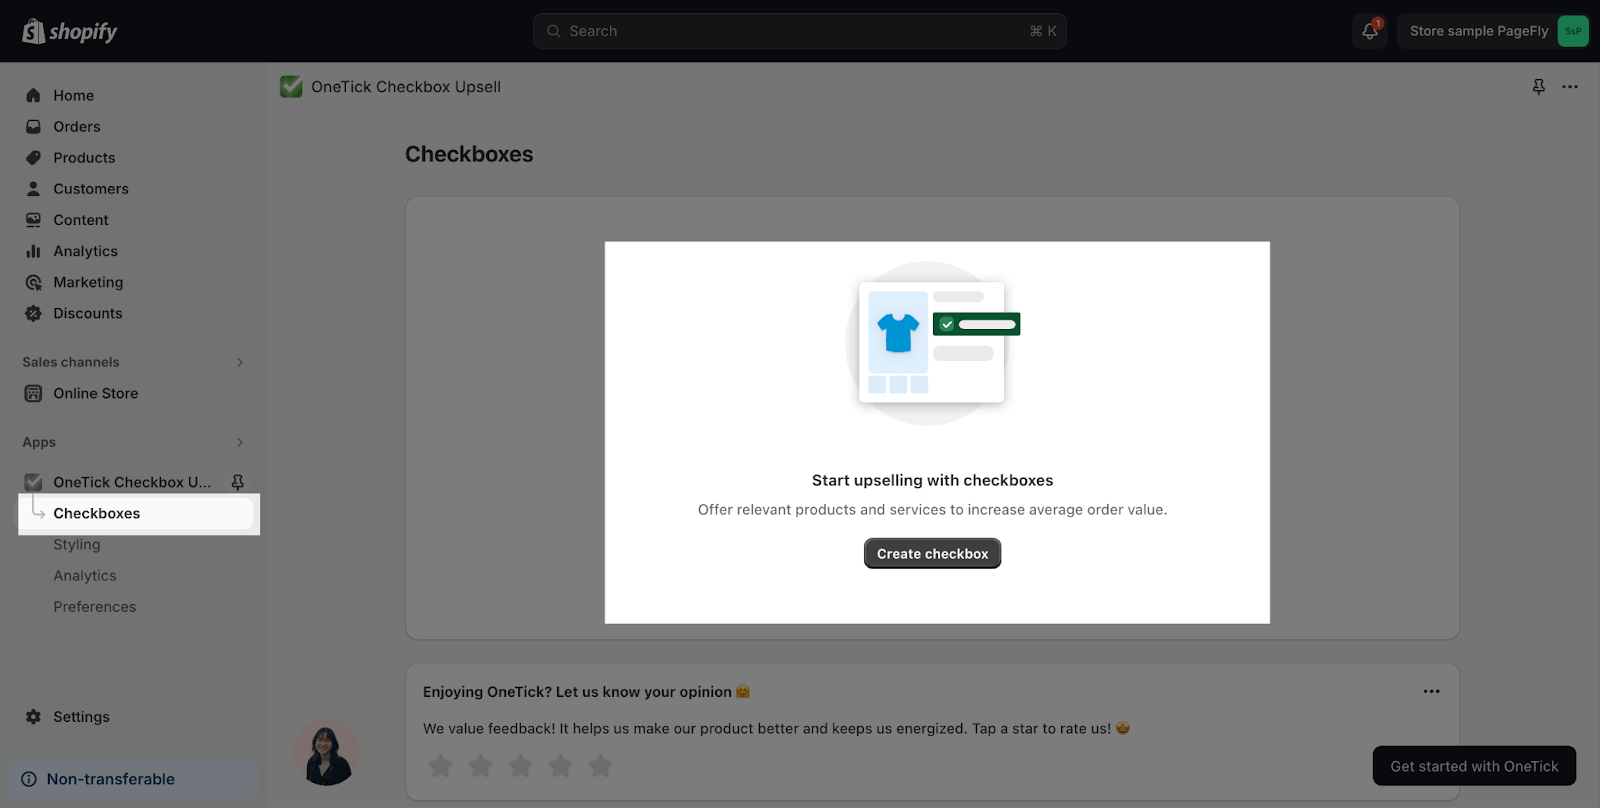
Step 2: Create Checkbox
In the OneTick Checkbox Upsell app dashboard > Access Checkboxes, click the “Create checkbox” button.
-
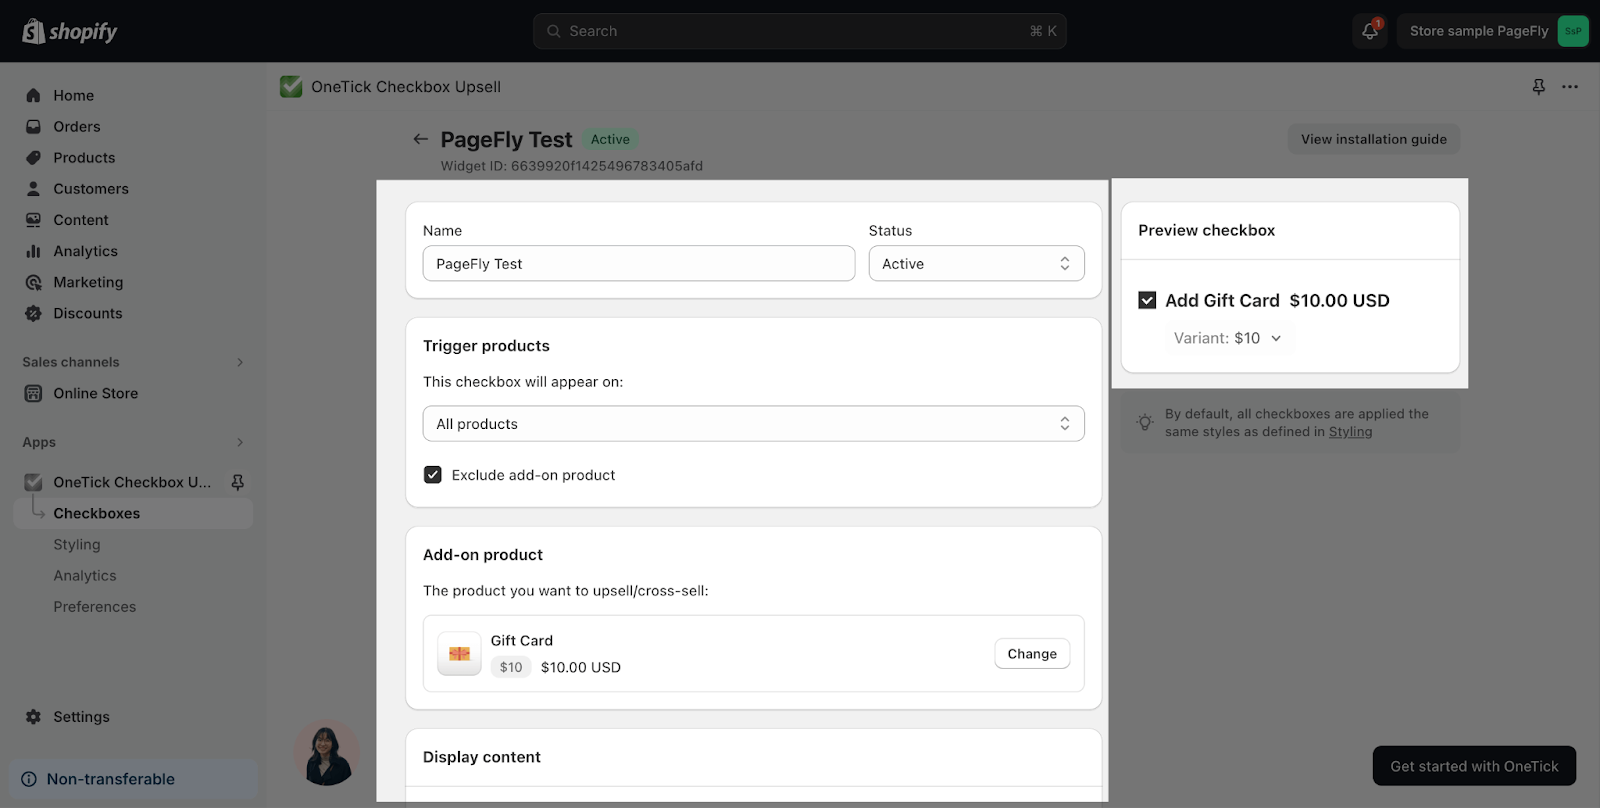
Step 3: Configure Your Checkbox
Finish settings for the checkbox by adjust all the information: Name, Trigger products, Add-on product, Display content:
For more information, please refer to this article: How to create a checkbox with OneTick Checkbox Upsell.
Frequently Asked Questions
Is The OneTick Checkbox Upsell App Free?
Yes, currently, It is free for all users.
Can I Add Checkbox Upsell Element Anywhere On The Page?
No, the element can only work inside the Product details element on the Product page.
Additional Resources
- PageFly Styling tab
- What apps does PageFly integrate with?