About Integrations Between PageFly And Partners
Upsell & Cross-sell apps can significantly boost average order value and encourage customers to discover additional products, leading to higher sales.
We’ll provide a quick guide on how to use Upsell & Cross-sell apps with PageFly, making it easy for you to increase the effectiveness of your store’s marketing strategies and improve customer satisfaction.
How To Access And Use Upsell And Cross sell Apps With PageFly
There are 2 ways to access and enable each Upsell & Cross sell apps that PageFly is integrated with:
- From editor page
- From Integrations page
Please check on this article to learn more on how to access and use third party apps with PageFly.
What Upsell And Cross Sell Apps Does PageFly Integrate With?
First of all, before using these 3rd party app elements, please make sure that you install PageFly in your store. Here is a list of all Upsell and Cross-sell third-party apps that have integrated with PageFly:
OneTick Upsell Cross Sell
Effortlessly increase your AOV with OneTick, a beginner-friendly upsell app featuring customizable checkboxes, personalized recommendations, and detailed analytics. Before using this element in PageFly, you must install the Ecomate – OneTick Upsell Cross Sell app on your store and configure all its options.
Important note:
- This element offers 2 variants: Checkboxes and Product offers.
- Elements can ONLY work on the Product page type. Checkboxes can only work inside the Product details element.
- Each product page can have multiple elements.
Hey! Scarcity Low Stock Counter
Before using this element in PageFly, you must install the Hey! Scarcity Low Stock Counter app on your store and configure all its options.
Important note:
- One element can be used one time on a page.
- The elements can be used on Product Page
- The elements can be used inside a Product Detail.
Rebuy Personalization Engine
To use Rebuy with PageFly, you first need to install the Rebuy Personalization Engine app on your Shopify store:
Important note:
- Recently Viewed, Top Sellers, Buy It Again and Feature Items element can be used on Homepage and Product page type
- AI Recommendations, Product Add-Ons and Dynamic Bundle element can only be used on Product page
- All Rebuy elements can only be used one time on a page
- All configuration must be done in Rebuy app before adding to PageFly
- The Rebuy Personalization Engine comes with 7 elements under Upsell & cross sell category: AI Recommendations, Recently Viewed, Top Sellers, Buy It Again, Feature Items, Product Add-Ons, Dynamic Bundle.
BOLD Bundles ‑ Product Bundles
Before using this element in PageFly, you have to install the BOLD Bundles app to your store and configure all options in the app.
Important note:
- One element can be used multiple times on a page.
- The elements can be used on product page type only.
- The elements can be used anywhere on the page.
- All styling and configuration must be done in the Bundle Offer app.
- This element comes in only one variation, which is the Bundle Offer.
Wiser Product Recommendations
To use this element, the Wiser Product Recommendations app has to be installed on your Shopify store.
Important note:
- One page allows only one element of each type.
- When you finish configuring options in the Wiser Personalize Recommendations app, you can go to a PageFly page and use this element.
- Wiser Personalized Recommendations elements come in 8 variations:
- Related Products (only available for Product Detail page)
- Recommended Products (only available for Product Detail page)
- Also bought (only available for Product Detail page)
- Recently Viewed Products
- Trending Products
- Top Selling Products
- New Arrivals
- Featured Products
LimeSpot Personalizer
Before using this element in PageFly, you have to install the LimeSpot Personalizer app to your store and configure all options in the app.
Important note:
- One element can be used once on a page.
- The elements almost can be used on all page types.
- The elements can be used anywhere on the page.
- All styling and configuration must be done in the LimeSpot Personalizer app.
- Personalizer by LimeSpot elements come in 12 variations: Most Popular, You May Like, Recently Viewed, Trending, New Arrivals, Featured Collection (4), Cross-sell, Bought Together, Related Items.
- Some of the element variations only work on Product Pages type: Cross-sell, Bought Together, Related Items.
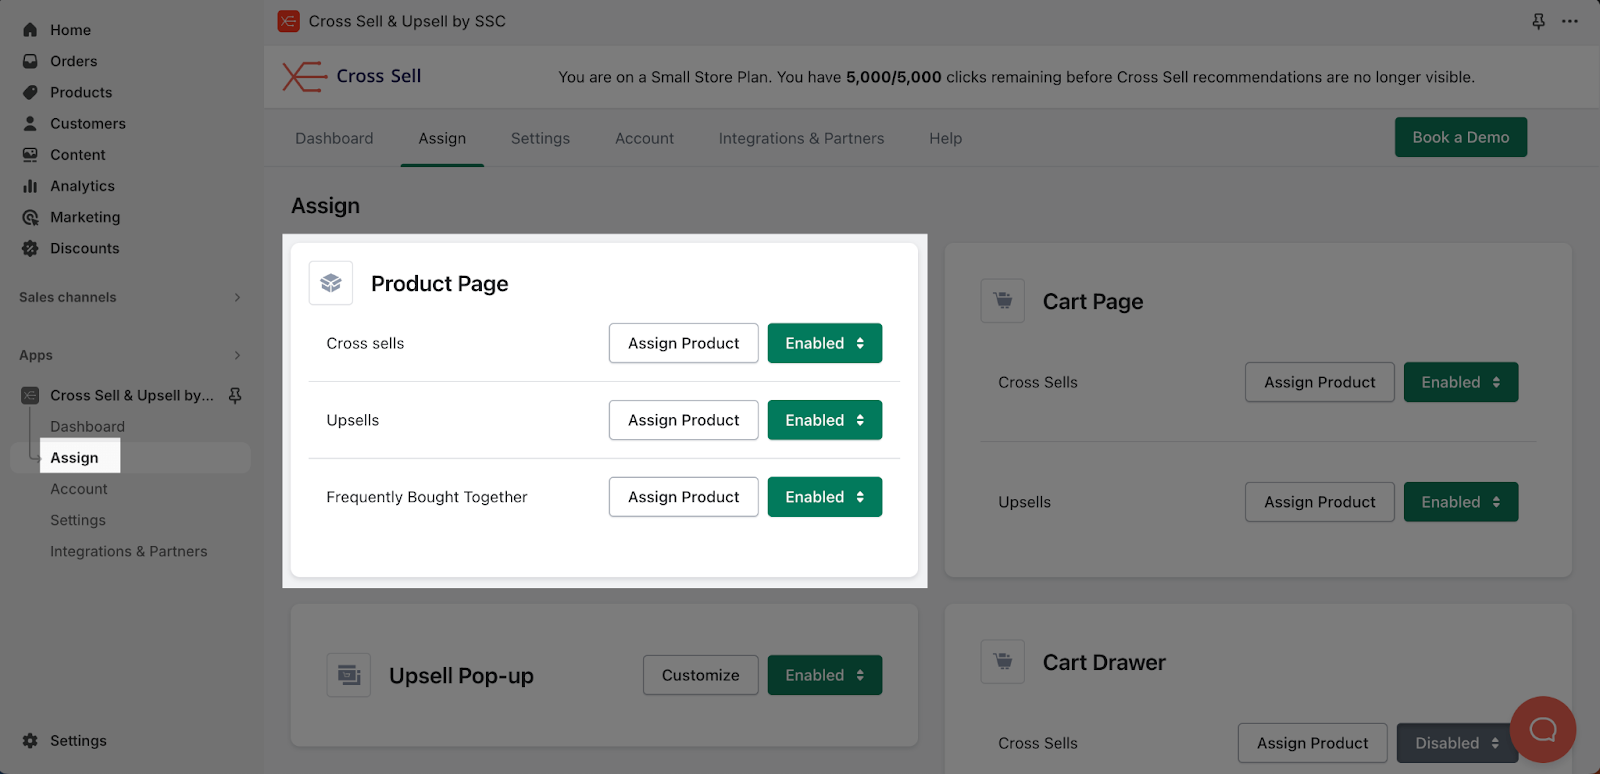
Cross Sell & Upsell
Before using this element in PageFly, you have to install the Cross Sell & Upsell app to your store and configure all options in the app.
Important note:
- The Cross Sell & Upsell Section variant is only available on Product Pages.
- The Cross Sell & Upsell element on the Product page is determined by the products you pick in the Page Settings modal.
- To display the correct elements in PageFly pages, you need to change the section’s settings in the Cross Sell & Upsell app.
Vitals
Before using these elements, you have to install the Vitals app to your store and configure/enable them inside the app, then come back to PageFly to use the element(s) for the corresponding product(s) you want.
Important note:
- The Review Widget element can be used in any page type, dragged and dropped to any position of a page.
- For Product Page: it can be placed in any position of your pages; the widget only shows the reviews of the assigned product in Live View.
- For other page types: it can be placed in any position of your pages; the widget only shows Featured Reviews you have set in the Vitals app in the Live View.
- The Product Bundles, Volume Discounts, Stock Scarcity must have one product that is the same as the assigned product(s) of the current page in order to showcase Bundles in the live view.
Growave: Loyalty & Wishlist +
Before using this element, you have to install the Growave app to your store and configure all options in the app.
Important note:
- You can use Growave elements only once on a page.
- All Growave elements need to be used on the PageFly Product page or used inside the Product Details element on other page types.
- All the settings you have to configure in the Growave – Reviews, Wishlist app.
SWYM Shopify – Wishlist Plus | Add to Wishlist element
To use this element, you will need to install Wishlist Plus app from Shopify Store and go to PageFly to use the element.
Bundles & Upsell | PickyStory
To use this element, you need to install the Bundles & Upsell | PickyStory app on your Shopify store.
Important Note: PageFly supports 4 variants of the Bundle & Upsell app:
- Frequently bought together
- Build your own bundle
- Tiered discount
- Shop the look
Ultimate Special Offers
To use this element, you must install the Ultimate Special Offers app on your Shopify store.
Important note:
- One element can be used multiple timers on a page, BUT the timers need to differ.
- The elements can be used on ALL page types
- The elements can be used anywhere on the page.
- PageFly supports 3 variants of the Ultimate Special Offers app: Announcement Bar, Product Bundles, Volume Tier Discount Table.
Hextom: Ultimate Sales Boost
To use this element, you must install the Hextom: Ultimate Sales Boost app on your Shopify store.
Important note:
- All configurations must be set up in the Ultimate Sales Boost app.
- Some features might not be ready-to-use in Development stores. Please check with Ultimate Sales Boost app for more details.
- All elements are available for use on Product Page and can be used once per page only. If there are more than 2 elements of the same type on 1 page, it will render the first widget and neglect all the ones below.
- Some elements are only available in a paid plan.
Frequently Bought Together
To use this element, you must install the Frequently Bought Together app on your Shopify store.
Unlimited Bundles & Discounts
To use this element, you must install the Unlimited Bundles & Discounts app on your Shopify store.
Zoorix Bundle Kit & Cross Sell
Before using this element, you have to install the Zoorix Bundle Kit & Cross Sell app to your store:
Wishlist Hero
To use this element, you must install the Wishlist Hero app on your Shopify store.
Important note:
- Revamp – Add to Wishlist element can only be activated in the Product details section with the Product variant element on a Product page.
- Select the element in the layout to see its parameters.
- The Wishlist Hero element comes with plenty of parameters allowing you to fine-tune its content and appearance to reach the best possible conversion rate.
Fast Simon AI Search & Filters
To use Fast Simon AI Search & Filters with PageFly, you first need to install this app on your Shopify store:
Important note:
- You can only use this element once per page.
- PageFly supports 1 variant of theFast Simon AI Search & Filter app: Product recommendation.
Wide Bundles ‑ Quantity Breaks
To learn how to use Wide Bundles Quantity Breaks App Elements, firstly, you need to install this app to your Shopify store.
Important note:
- The Wide Bundles App only works on the Product Page and Product details page. You can use more than one WideBundle element on each page.
- All configuration must be done in the Wide Bundle app.
Bundle Bear ‑ Volume Discounts
Before using this element in PageFly, you have to install the Bundle Bear ‑ Volume Discounts app to your store and configure all options in the app.
Important note:
- One element can be used one time on a page.
- The element can be used on the Product page.
- The elements can be used anywhere on the page.
- All styling and configuration must be done in the Bundle Bear ‑ Volume Discounts app.
Upsell & Cross Sell — Selleasy
Before using this element in PageFly, you have to install the Upsell & Cross Sell — Selleasy app to your store and configure all options in the app.
Important note:
- One element can be used one time on a page.
- The element can be used on all page types.
- The elements must be nested on the Product Details element.
MaxBundle ‑ Product Bundles
Before using this element in PageFly, you have to install the MaxBundle ‑ Product Bundles app to your store and configure all options in the app.
Important note:
- One element can be used one time on a page.
- The elements can only be used on the Product Page.
- The elements can be used anywhere on the page.
Lantern ‑ Product Quiz Builder
Before using this element in PageFly, you’ll need to install the Lantern ‑ Product Quiz Builder app to your store and configure all its options.
Essential Announcement Bar
Before using this element in PageFly, you have to install the Essential Announcement Bar app to your store and configure all options in the app.
Important note:
- One element can be used multiple times on a page.
- The elements can be used on ALL page types.
- The elements can be used anywhere on the page.
Wizio Bundle: Quantity Breaks
Before using this element in PageFly, you’ll need to install the Wizio Bundle: Quantity Breaks app to your store and configure all its options.
Important note: The Wizio Bundle element has 3 variants:
- Product Bundle
- Quantity Bundle
- Frequently Bought Together Bundle
Shop Quiz: Product Recommender
In order to use this element, the Shop Quiz: Product Recommender app has to be installed on your Shopify store.
Qikify Upsell BOGO & Free Gift
Before using this element in PageFly, you have to install Qikify ‑ Upsell BOGO & Free Gift app to your store, and configure all options in the app.
Important note:
- One element can be used one time on a page.
- The elements can be only used on the Product Page.
Quicky—Announcement Bar Banner
Before using this element in PageFly, you have to install the Quicky—Announcement Bar Banne rapp to your store, and configure all options in the app.
Important note:
- One element can be used multiple times on a page.
- The elements can be used on all page types.
- The elements can be used anywhere on the page.
Urgency Bear Countdown Timer
Before using this element in PageFly, you have to install the Urgency Bear Countdown Timer app to your store and configure all options in the app.
Important note:
- One element can be used multiple times on a page.
- The elements can be used on the Product Page.
- The elements can be used anywhere on the page.
Wishlist Engine
Before using this element in PageFly, you have to install the Wishlist Engine app to your store, and configure all options in the app.
Important note:
- The elements can be used anywhere on the Product Page.
- Each page can have multiple elements
- If the element is on other page types, it must be nested inside the Product Details.
Octane AI: Advanced Quiz Maker
Before using this element in PageFly, you have to install the Octane AI: Advanced Quiz Maker app to your store and configure all options in the app.
Important note:
- One element can be used one time on a page.
- The element can be used on all page types.
- The elements can be used anywhere on the page.
Pumper Bundle Quantity Breaks
Before using this element in PageFly, you have to install the Pumper Bundle Quantity Breaks app to your store and configure all options in the app.
Important note:
- One element can be used one time on a page.
- The element can be used on the Product page.
- The elements can be used anywhere on the page.
Recomatic Related Products App
Before using this element, you have to install the Recomatic Related Products app to your store, configure all options in the app, and then return to PageFly to use the element(s) for the corresponding product(s) you want.
Presidio: Quiz Kit
Before using this element, you have to install the Presidio: Quiz Kit app to your store, configure all options in the app, and then return to PageFly to use the element(s) for the corresponding product(s) you want.
Essential Free Shipping Upsell
Before using this element, you have to install the Essential Free Shipping Upsell app to your store, configure all options in the app, and then return to PageFly to use the element(s) for the corresponding product(s) you want.
Important Note:
- The Free Shipping Bar element can be used on the cart page, product page, and announcement bar.
- This element can be used multiple times and anywhere on a page.
- The free shipping bar is updated based on the current value of the Cart.
Quizify ‑ Product Quiz Builder
Before using this element, you have to install the Quizify ‑ Product Quiz Builder app to your store, configure all options in the app, and then return to PageFly to use the element(s) for the corresponding product(s) you want.
All-in-on Discount On Cart App
Before using this element, you have to install the All-in-one Discount On Cart app to your store, configure all options in the app, and then return to PageFly to use the element(s) for the corresponding product(s) you want.
Important note:
- The Discount Field element can be used multiple times on a page.
- This element can be used on all page types and anywhere on the page.
Assortion ‑ Upsell & Bundles
Before using this element, you have to install the Assortion ‑ Upsell & Bundles app to your store, configure all options in the app, and then return to PageFly to use the element(s) for the corresponding product(s) you want.
Important note: This app supports 5 variants, which are:
- Frequently Bought Together
- Product Add-ons
- Volume Discount
- Product Recommendations
- Recently Viewed
Wishlist ‑ Wishify App
Before using this element, you have to install the Wishlist ‑ Wishify Apps to your store and configure all options in the app and then come back to PageFly to use the element for the corresponding product you want.
Avada Boost Sales Trust Badges
Before using this element, you have to install the Avada Trust Badges & Upsell app to your store, configure all options and activate the widget(s) you want to use in the app. Then, you can come back to PageFly to use the element(s) on your pages.
Important note:
- The Countdown Timer element can only work inside the product details or collection details element. You can use this element on any page types, but you can only use this element once on each page.
- The Stock Countdown element can only work inside the product details element on the Product pages. You can only use this element once on each page.
- Trust Badges Element can work on any page types, and you can add it anywhere on a page.
- Free Shipping Bar Element can work on any page types, and you can add it anywhere on a page. You can only use this element once on each page.
- Announcement Bar Element can work on any page types, and you can add it anywhere on a page. You can only use this element once on each page.
Orichi – Quantity Breaks
Before using this element, you have to install the Orichi – Quantity Breaks app to your store and configure all options in the app, and then come back to PageFly to use the element(s) on your product pages.
Important note:
- One element can be used multiple times per page.
- This element works on any page type.
Simple Bundles & Kits
Before using this element, you have to install the Simple Bundles & Kits app to your store and configure all options in the app, and then come back to PageFly to use the element(s) on your product pages.
Important note:
- One element can be used once on a page.
- The element can be used on the product page and anywhere on the page.
EasySell COD Form & Upsells
Before using this element, you have to install the EasySell COD Form & Upsells by Tyslo to your store and configure all options in the app.
Important note:
- One element can be used one time on a page and on ALL page types.
- The elements can be used anywhere on the page.
Fast Bundle | Product Bundles
In order to use this third-party element, it has to be installed the Fast Bundle | Product Bundles app on your Shopify store.
Important Note:
- Fast Bundle has 4 variations:
- Related Bundles Position element: you only can add ONE element into one product page.
- Frequently Bought Together element: this element works only ONE time per page.
- Specific Bundles element: this element can work on ALL page types and can be used multiple times on a page.
- All Your Bundles element: this element can work on ALL page types and can be used multiple times on a page.
Rebolt ‑ Bundle Products App
Before using this element in PageFly, you have to install the Rebolt ‑ Bundle Products app to your store and configure all options in the app.
Important note:
- The product assigned from the Rebolt app must be set up in order for it to work well on PageFly.
- You can only use the variants once on a page. This element can work on all page types, but it must stay inside the Product Details element.
VolumeBoost ‑ Volume Discounts
In order to use this element, the VolumeBoost – Volume Discount by HulkApps needs to be installed on your Shopify Store and configure all options within the app and return to PageFly to use the element.
Kaching Bundle Quantity Breaks
Before using this element, you have to install the Kaching Bundle Quantity Breaks app to your store and configure all options in the app.
Important note:
- The Kaching App – Bundle deals element can work on all page types, and you can use it multiple times on a page.
- On all the other page types, except for Product pages, it must stay in the Product Details element.
Attrac: Bars, Banners, Pop ups
To use the element, you must first install the Attrac: Bars, Banners, Pop ups app in your Shopify store and configure all of its options.
Important note:
- PageFly only works with Bar banner type
- One element can be used multiple times on a page
- These elements can work on all page types
- Attrac Announcement Bar Banne comes with 3 different variants: Announcement banner, Free Shipping banner, Multi Announcements banner.
Essential Countdown App
In order to use this element, the Essential Countdown Timer Bar app needs to be installed on your Shopify Store and configure all options within the app.
Releasit COD Form & Upsells
To use this element, you must first install the Releasit COD Form & Upsells app in your Shopify store and configure all of its options.
Important note:
- The element can be used multiple times on a page.
- The element can be used on ALL page types.
- The element can be used anywhere on the page.
Bundler- Product Bundles
In order to use this element, the Bundler – Product Bundles app needs to be installed on your Shopify Store.
Important Note:
- The Bundler – Product Bundles element works on every page and can be used multiple times on each page.
- It must stay inside the Product Details element, if you drag and drop the element outside the Product Details, a warning message will appear.
- Product Details are contained in Product List, so the Bundler – Product Bundles element can be used for the Product List as well.
All In One Automatic Discount
In order to use this element, the All In One Automatic Discount app has to be installed on your Shopify store.
MBC Bundle App ◕‿◕ Buy X Get Y
Before using this element, you have to install the MBC Bundle app to your store and configure all options in the app.
LeadForm Order Form & Upsells
Before using this element in PageFly, you have to install the LeadForm Order Form & Upsells app to your store and configure all options in the app.
Important note:
- The element can work on all page types.
- One page can have one element.
- The element can be anywhere on the page.
GLO Related Products, Upsell
Before using this element in PageFly, you have to install the GLO Related Products, Upsell app to your store, and configure all options in the app.
Important note:
- One element can be used multiple times on a page.
- The elements can be used on the Product Page, Home Page, and Collection Page.
- The elements can be used anywhere on the page.
TicTac ‑ Countdown Timer bar
Before using this element in PageFly, you’ll need to install the TicTac ‑ Countdown Timer bar app to your store and configure all its options.
Important note:
- One element can be used multiple timers on a page, BUT the timers need to differ.
- The elements can be used on ALL page types
- The elements can be used anywhere on the page.
Fast Conversion Bar
Before using this element in PageFly, you’ll need to install the Fast Conversion Bar app to your store and configure all its options.
Important note:
- One element can be used once on a page
- The element can be used on all page types
- The element can be used anywhere on the page.
AiTrillion – Product Recommendations
In order to use this element, AiTrillion – Product Recommendations has to be installed on your Shopify store. All the main setup must be executed in the Aitrillion App settings.
BOGOS.io Free Gift Buy X Get Y
Before using this element in PageFly, you’ll need to install the BOGOS.io Free Gift Buy X Get Y app to your store and configure all its options.
Important note:
- The “BOGOS.io Free Gift Buy X Get Y” item will have 2 elements: Classic bundle & Quantity break
- One element can be used various times on a page
- The element works on product page only
Profy Banner & Countdown Timer
Before using this element in PageFly, you’ll need to install the Profy Banner & Countdown Timer app to your store and configure all its options.
Important note:
- Profy Banner & Countdown Timer item has 3 elements: Apps Jar – Countdown, Apps Jar – Announcement Banner & Apps Jar – Coupon Code Banner
- One element can be used multiple times on a page.
- The elements can be used on ALL page types
- The elements can be use anywhere on the page.
Tips & Best Practices
We strongly recommend using the Shopify App Block Element for third-party app integration. Available for Shopify theme OS 2.0, this feature simplifies adding third-party app functionality to your PageFly pages or sections. It offers greater flexibility, easier updates, and an improved user experience. While limited to one per page, the App Block is a valuable tool to enhance your store’s capabilities.
For detailed setup guidance, refer to our App Block article. This simple change can substantially improve your third-party app integration and overall store performance.