


About Wishlist Hero
Revamp – Add to Wishlist element by Wishlist Hero is designed to enable customers to bookmark their favorite products and pick up where they left off when they return. Wishlist Hero works on product, collection and quick views.
This will improve the buying experience and bring customers back to your store with one-minute setup, mobile-friendly design, multilingual support, data export, and social sharing.
To use this element, you will need to install the Wishlist Hero app from Shopify Store and go to PageFly to use the element.
- Install Wishlist Hero
- Install PageFly
How To Access Wishlist Hero
- Step 1: Go to Add third party element in the left toolbar > Click on the Edit your 3rd party elements button.
- Step 2: In the Integrations popup page, you search “Wishlist Hero” on the search bar
- Step 3: Click on the Revamp – Add to Whishlist in the Add third-party elements
- Step 4: Select the variant you want then Drag and Drop the Hero Wishlist element on the canvas
How To Configure For Wishlist Hero
The Wishlist Hero element comes with plenty of parameters allowing you to fine-tune its content and appearance to reach the best possible conversion rate.
Note that the Revamp – Add to Wishlist element can only be activated in the Product details section with the Product variant element.
Select the element in the layout to see its parameters.

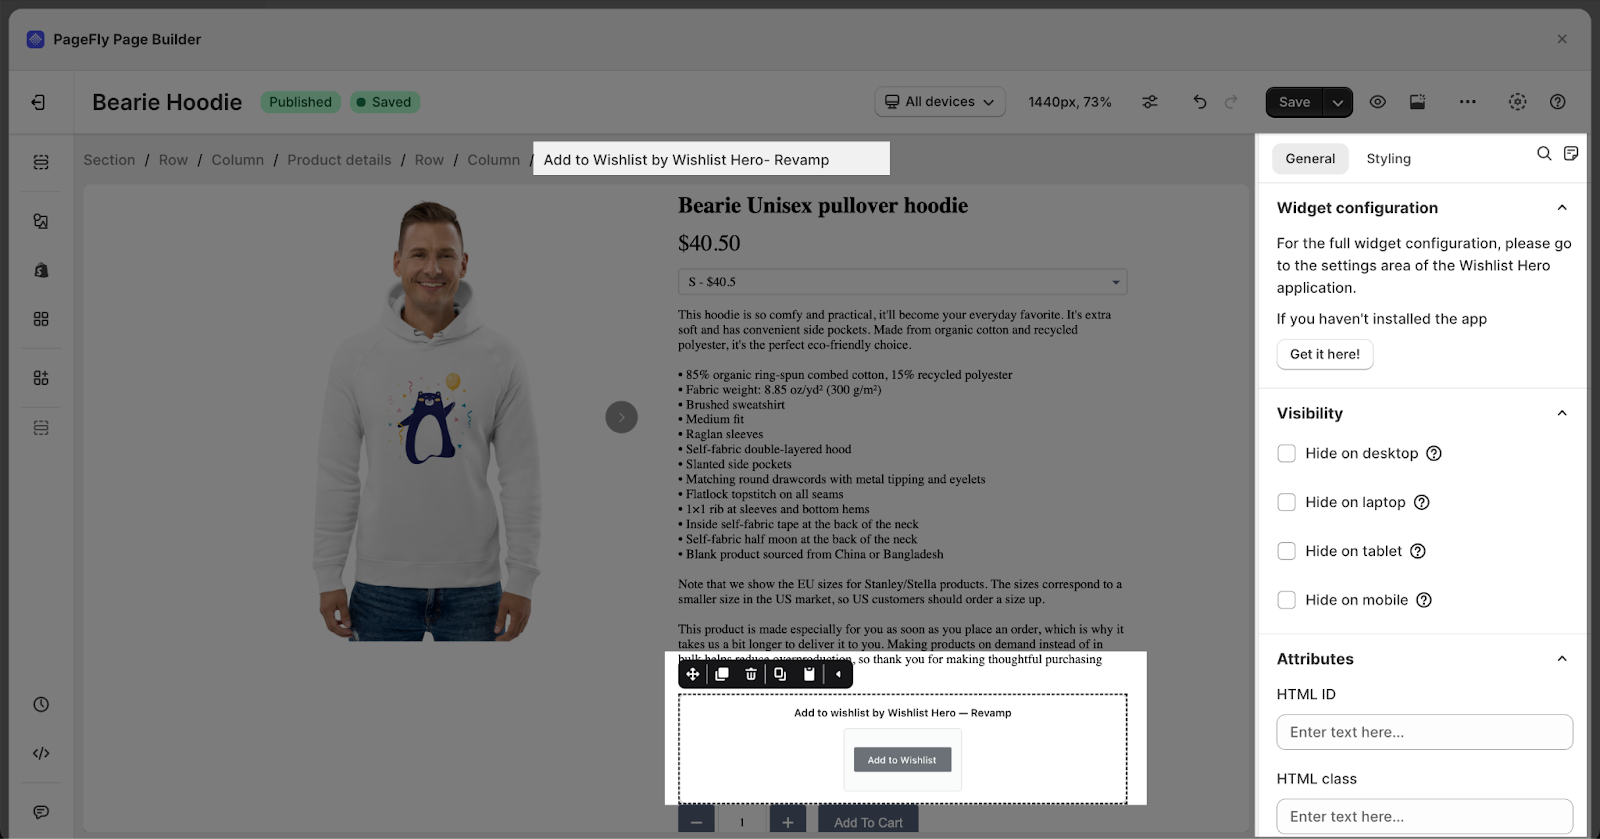
General Settings
In the General tab, there is a widget configuration giving you a short explanation of the Hero Wishlist app and its link to app listing, and you can edit the Visibility, Tracking, Attributes, and Animation of the product
Styling Settings
In the Styling tab, you can edit the Margin, Border, Effect of Opacity for the element.
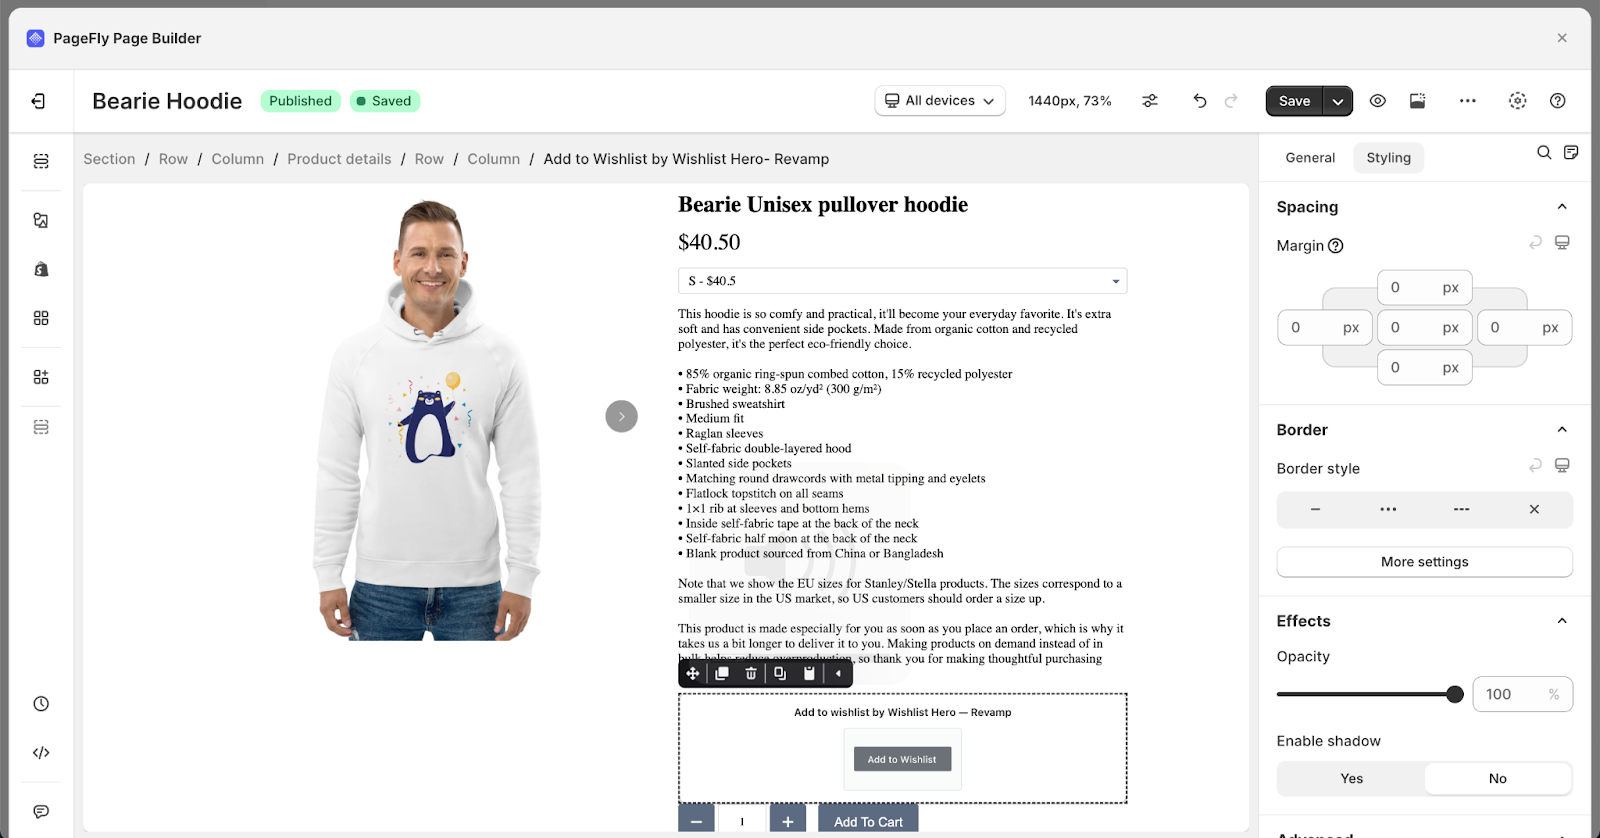
You can check more information about the Styling tab here.
How To Customize Wishlist Hero Element?
Step 1: Log in to Hero Wishlist by using your Shopify store account
Firstly, access to your Shopify store.
Then, go to the Apps page in the left toolbar > Click on the Wishlist Hero app to open the app.
Step 2: Configure Wishlist appearance
Go to Settings tab > Scroll down for Customize Wishlist Appearance > Hit Configure
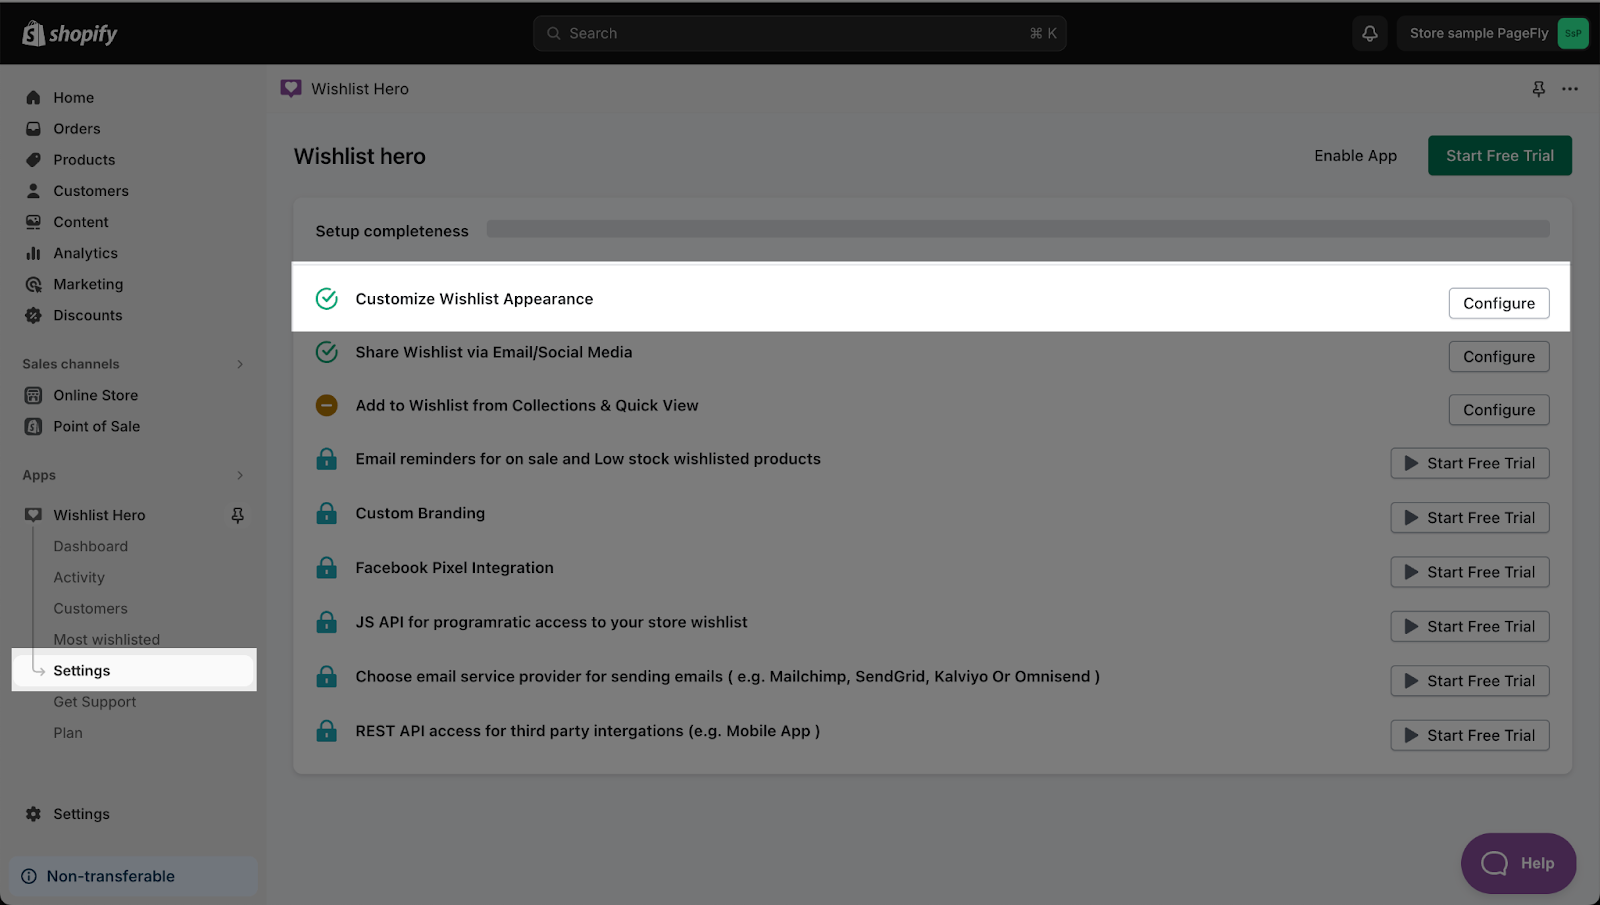
You can set for Launch point Type, Display the Wishlist module, Button Details.
After you finish setting up your plan, click the Save button.
Use Cases
How To Change Launch Point Type Of Wishlist Hero?
Firstly, access to your Shopify store.
Then, go to the Apps page in the left toolbar > Click on the Wishlist Hero app to open the app
Go to Settings tab > Scroll down for Customize Wishlist Appearance > Hit Configure

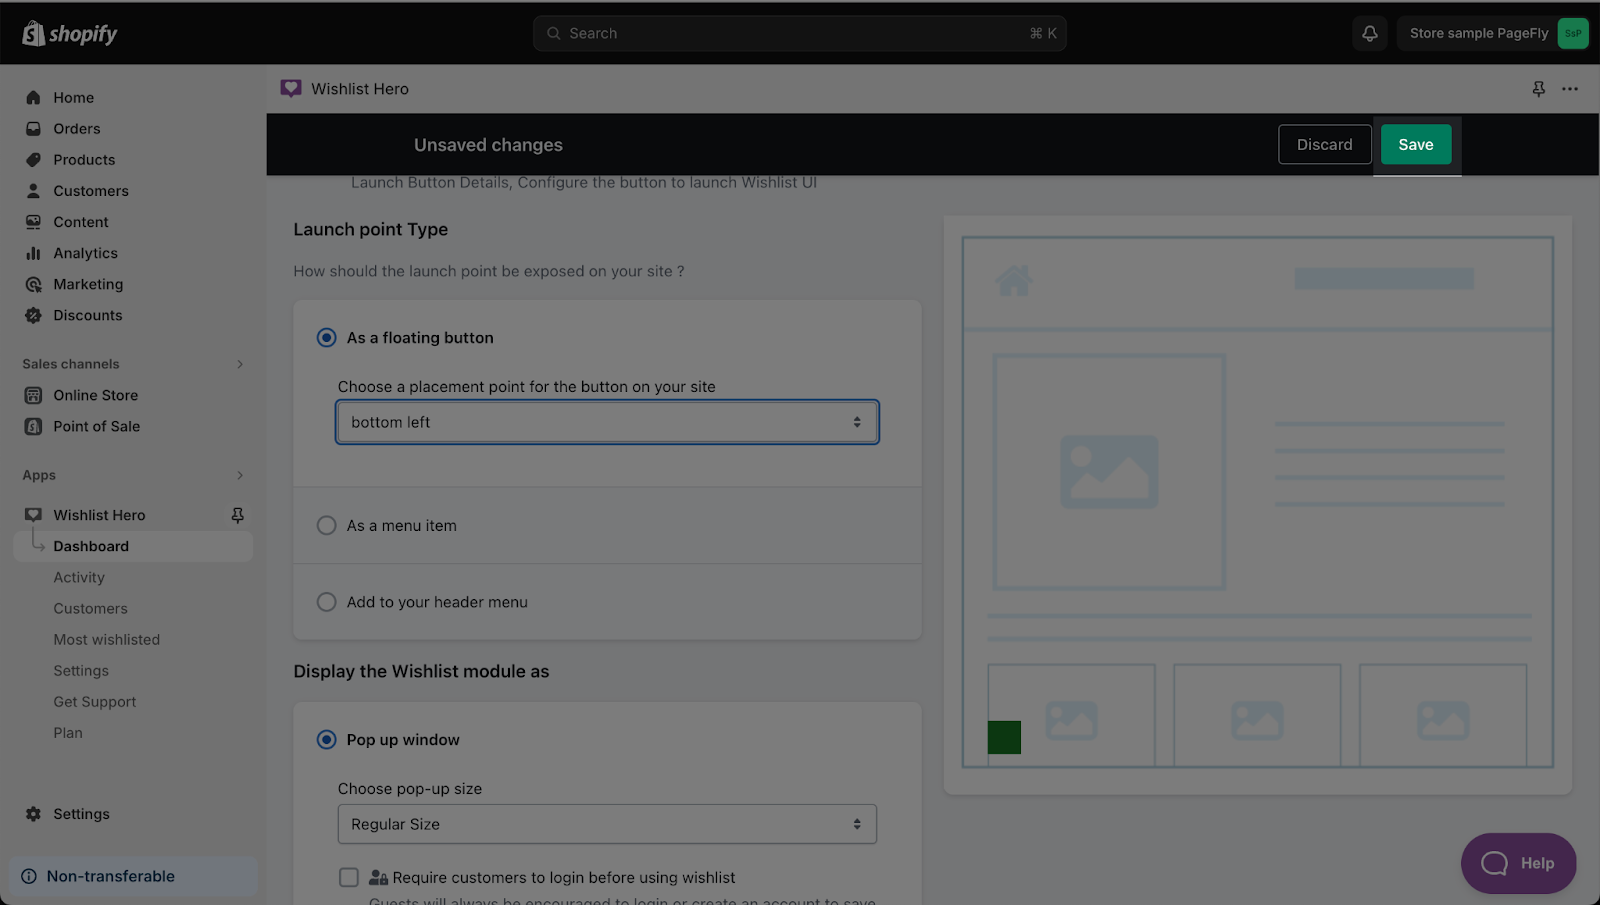
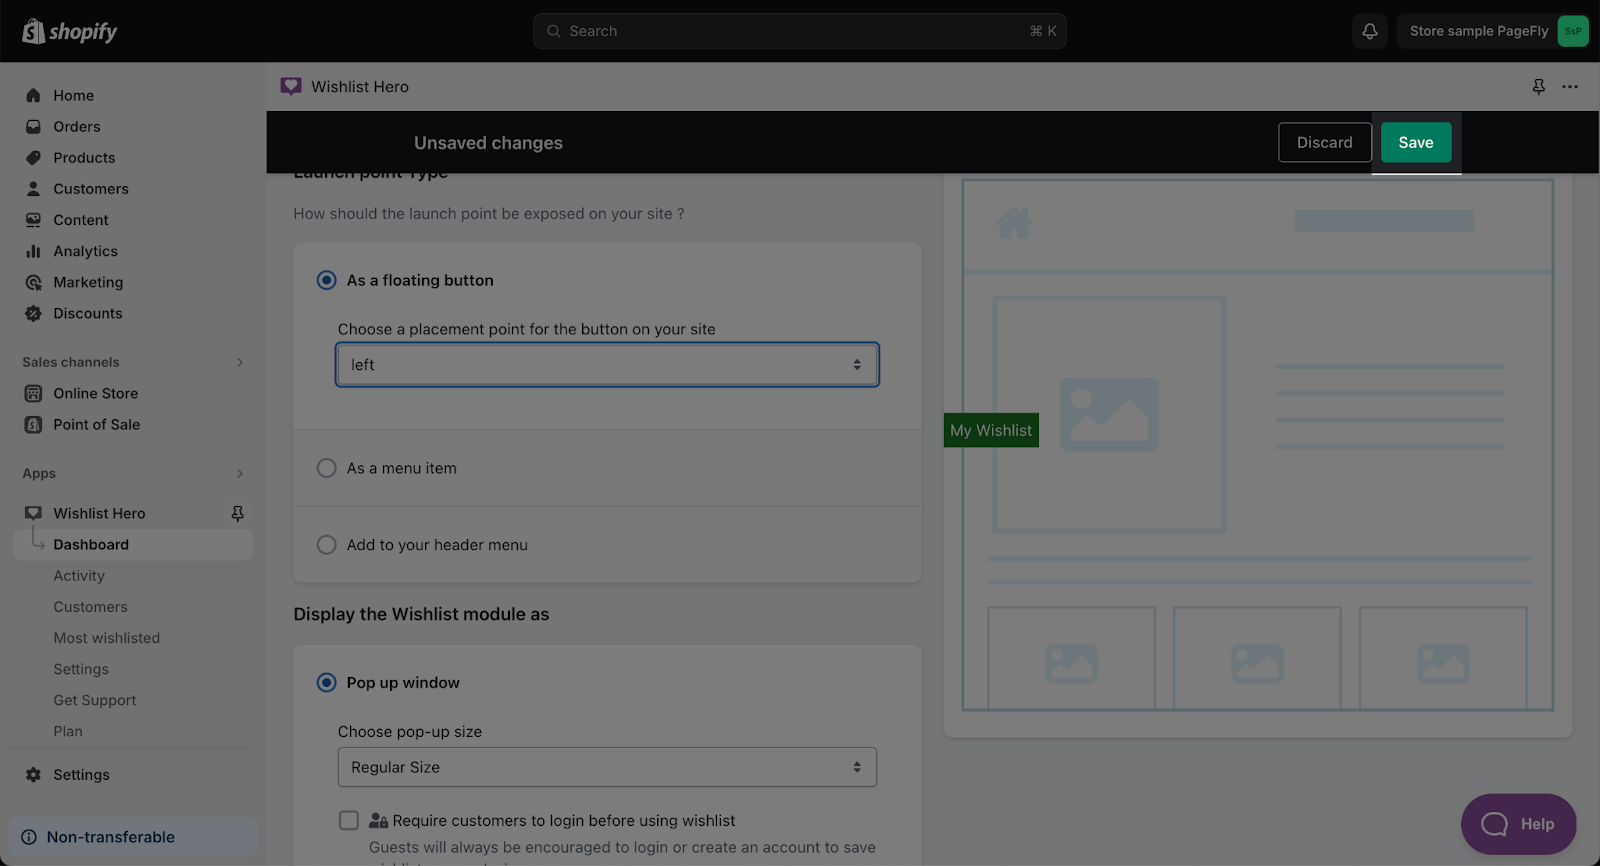
Scroll down to the Launch point Type section. There are three options available:
| As a floating button | The Wishlist Hero element will appear as a floating button |
| As a menu item | The Wishlist Hero element will appear as a menu item |
| Add to your header menu | The Wishlist Hero launch point will be added in your header menu beside the cart icon. |
Select the desired launch point type and click “Save”
How To Change The Appearance Of Wishlist
Firstly, access to your Shopify store.
Then, go to the Apps page in the left toolbar > Click on the Wishlist Hero app to open the app
Go to Settings tab > Scroll down for Customize Wishlist Appearance > Hit Configure
Scroll down to the Appearance section. Select the desired button type and pick a color of your liking and click Save.
Best Practices For Using Wishlist Hero Element
- Product Pages are the prime real estate for the Wishlist Hero element. Make it easily accessible near the “Add to Cart” button on individual product pages
- Utilize clear and concise CTAs like “Add to Wishlist” or “Save for Later” next to the Wishlist Hero button
- Ensure the Wishlist Hero element displays and functions flawlessly on mobile devices, where a significant portion of your traffic might come from
Frequently Asked Questions
How much is Wishlist Hero?
The monthly subscription fee of Wishlist Hero is $4-$29.
Who Owned Wishlist Hero?
The owner of Wishlist Hero is Revamp.
What does a free plan from Wishlist Hero cover?
500 wishlist items/ month, non english-support, can share the list via email and social media. No coding required, with detailed data report.
What does “add to wishlist” mean?
A wishlist allows buyers to create a personal collection of products they ‘wish’ to buy, as they can save those items to their account, for future use.
Does Wishlist Hero work with PageFly?
Yes, simply you just have to drag and drop Wishlist Hero items to the Product Details element on the Product page to start using.