About Essential Countdown Timer Bar
What Is Essential Countdown App
TheEssential Countdown by Essential Apps is a Shopify app that lets you add customizable countdown timers to your online store. It creates a sense of urgency and helps promote limited-time offers, flash sales, and product launches. You can easily customize the timer’s appearance to match your store’s branding and schedule timers to start and stop automatically. The app also provides analytics to track performance and maximize promotional effectiveness.
Install Essential Countdown App
In order to use this element, the Essential Countdown Timer Bar app needs to be installed on your Shopify Store and configure all options within the app and return to PageFly to use the element.
Install Essential Countdown Timer Bar
Install PageFly
How To Access Essential Countdown Timer Bar Element
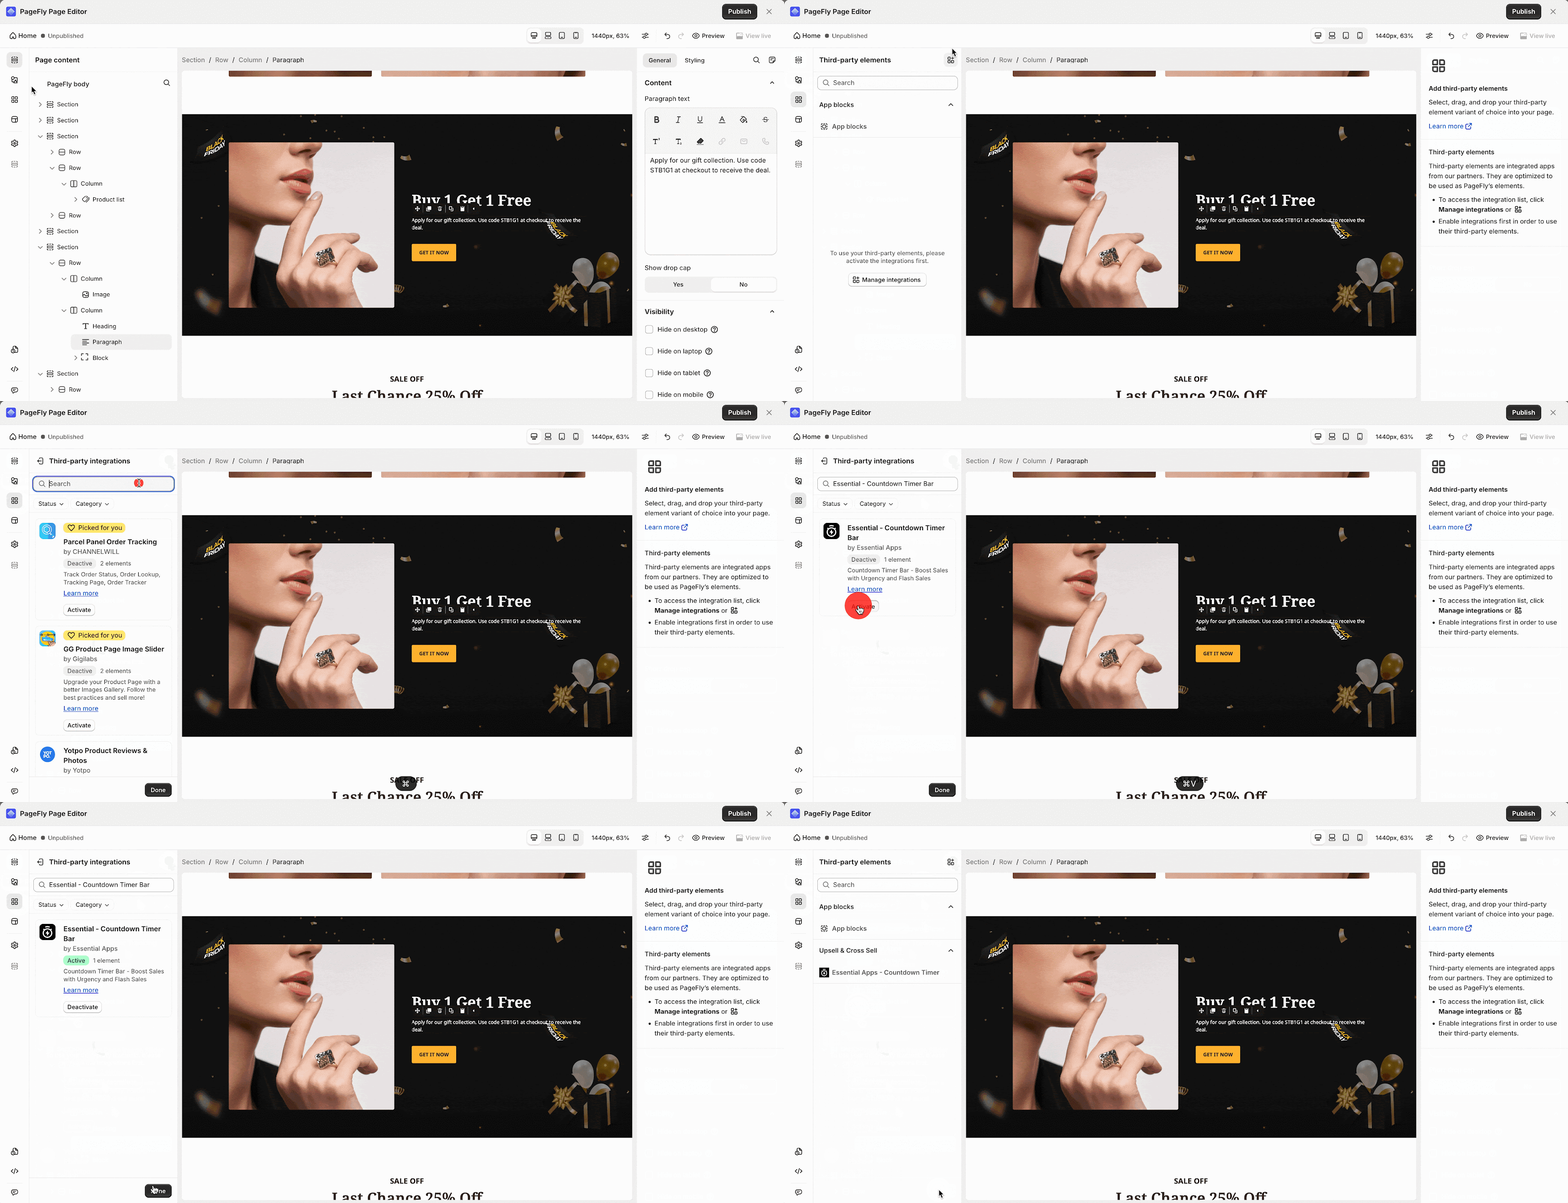
- Step 1: Go to Third-party elements in the left toolbar > Click on the Edit your 3rd party elements button.
- Step 2: In the Integrations, you can search “Essential – Countdown Timer Bar” on the search bar.
- Step 3: Click on the “Activate” button to show the Essential Countdown Timer Bar element in the catalog.
How To Configure Essential Countdown Timer Bar Element
From PageFly
Add Essential Countdown Timer Bar Element
Once you finish configuring options in the Essential Countdown Timer Bar app, you can go to a PageFly page and use this element.
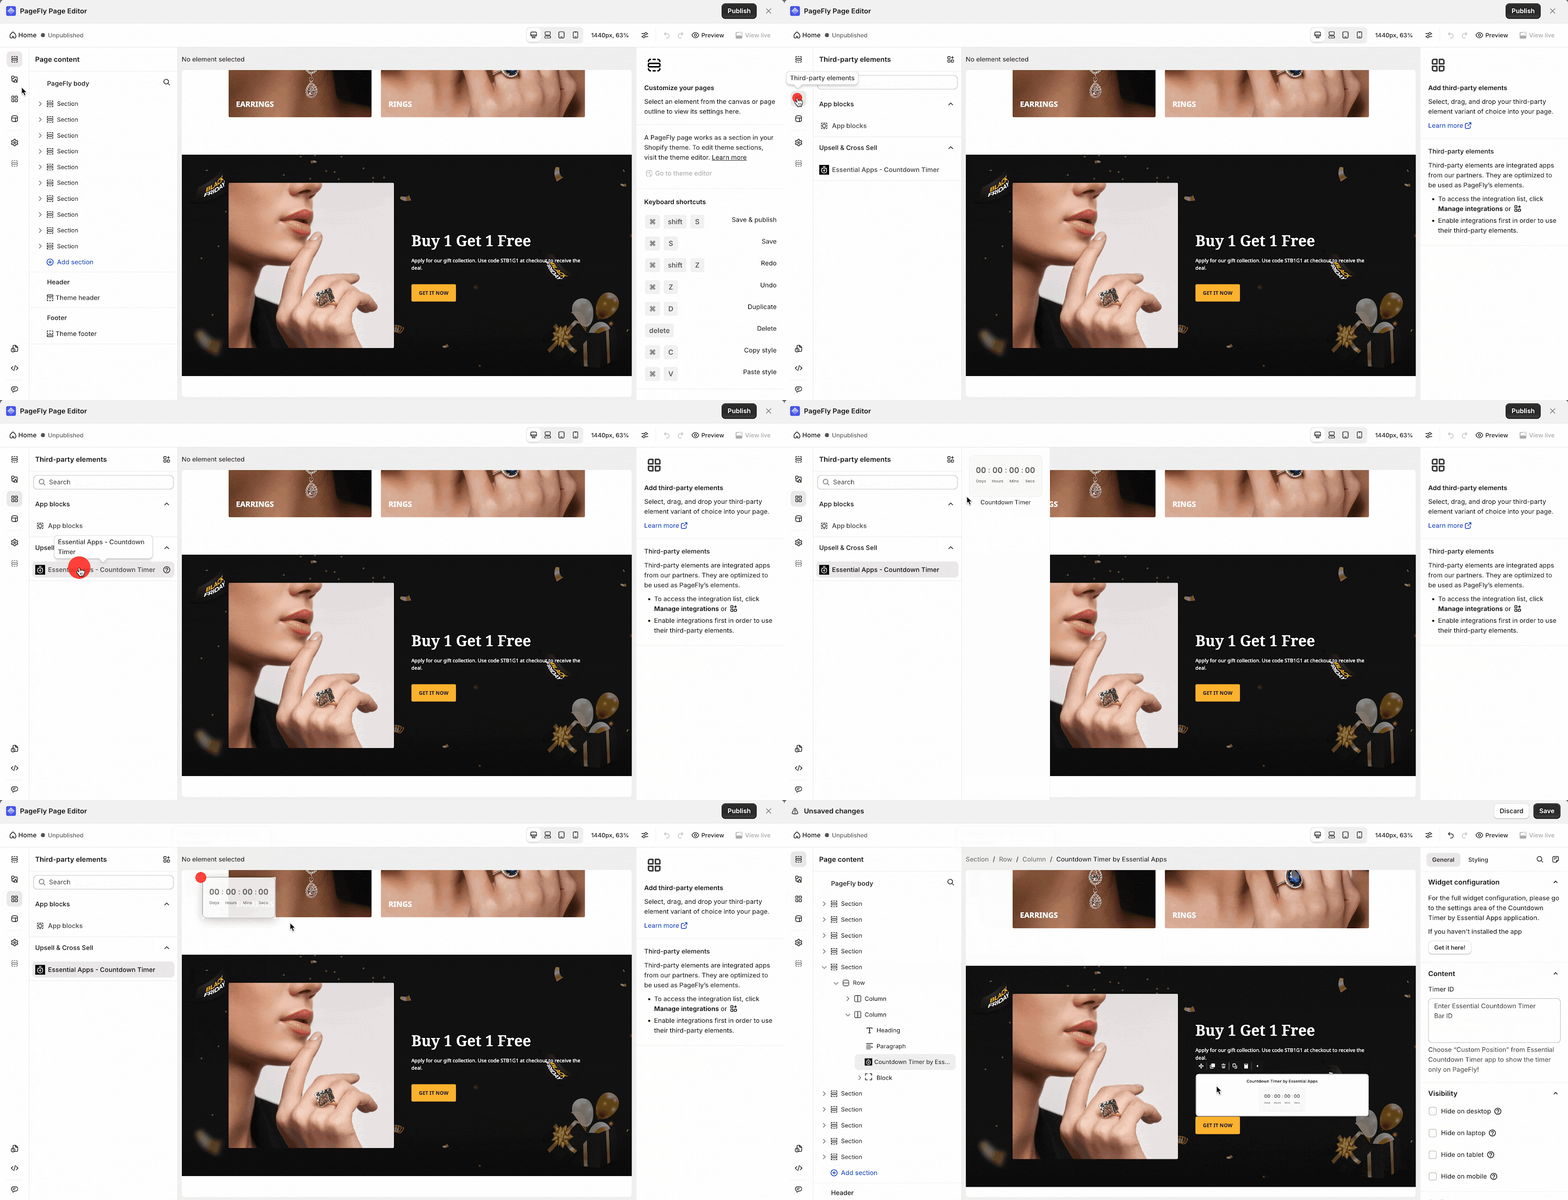
- Step 1: Click “Third-party elements” on the left menu bar
- Step 2: Look for “Essential apps – Countdown timer” element
- Step 3: Click on the element to see it variant
- Step 4: Drag and drop the variant onto the page canvas
General Settings
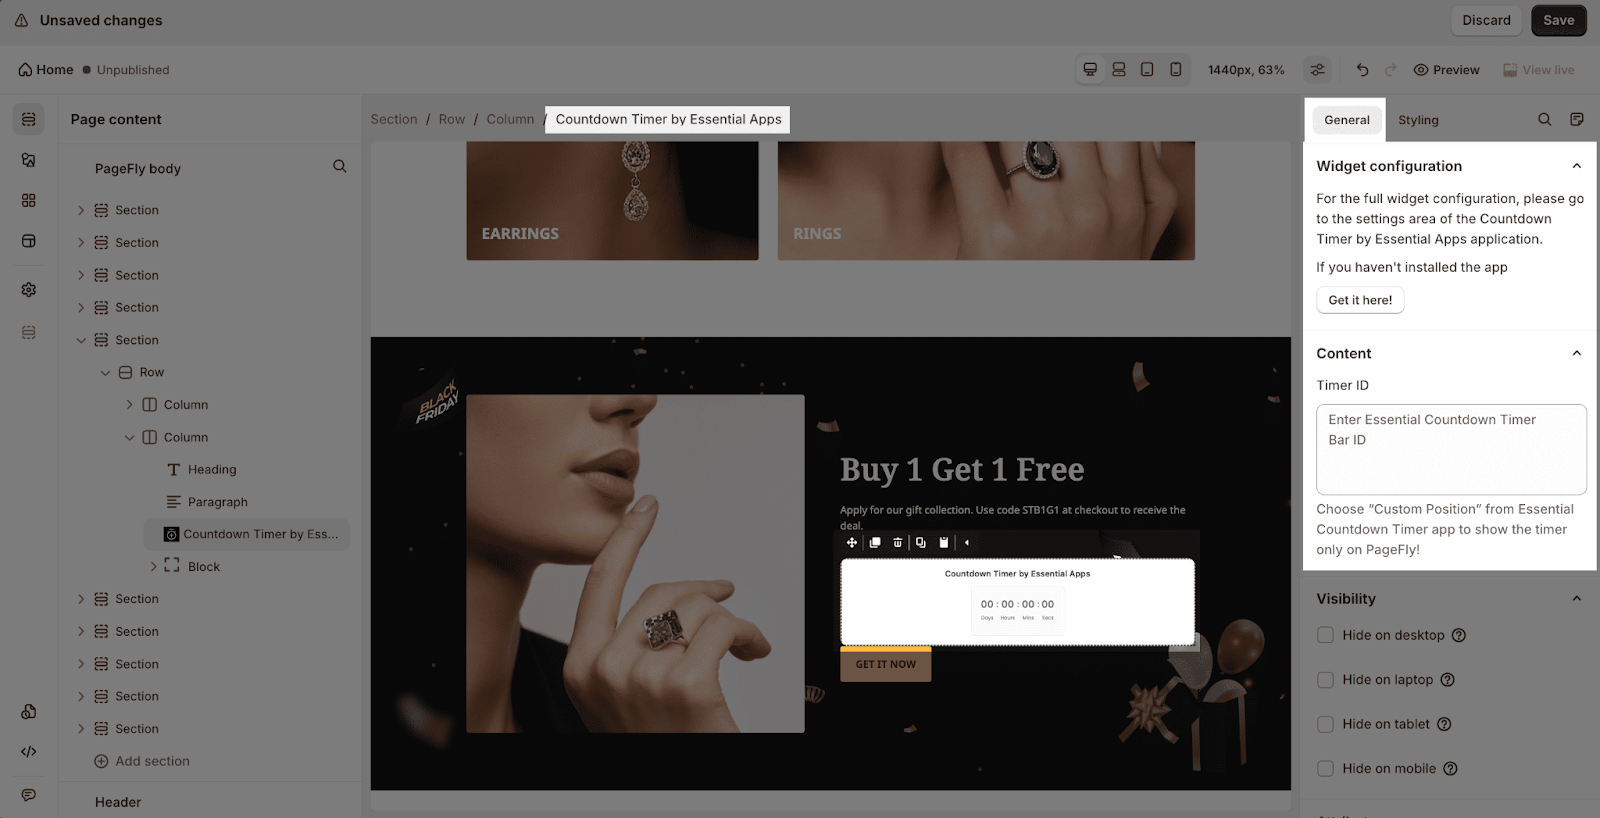
In the General tab, there is a widget configuration giving you a short explanation of the Essential Countdown Timer app and its link to app listing, and an Essential Timer ID box where you can paste the ID of the timer you have created in the Essential Countdown Timer Bar.
Styling Settings
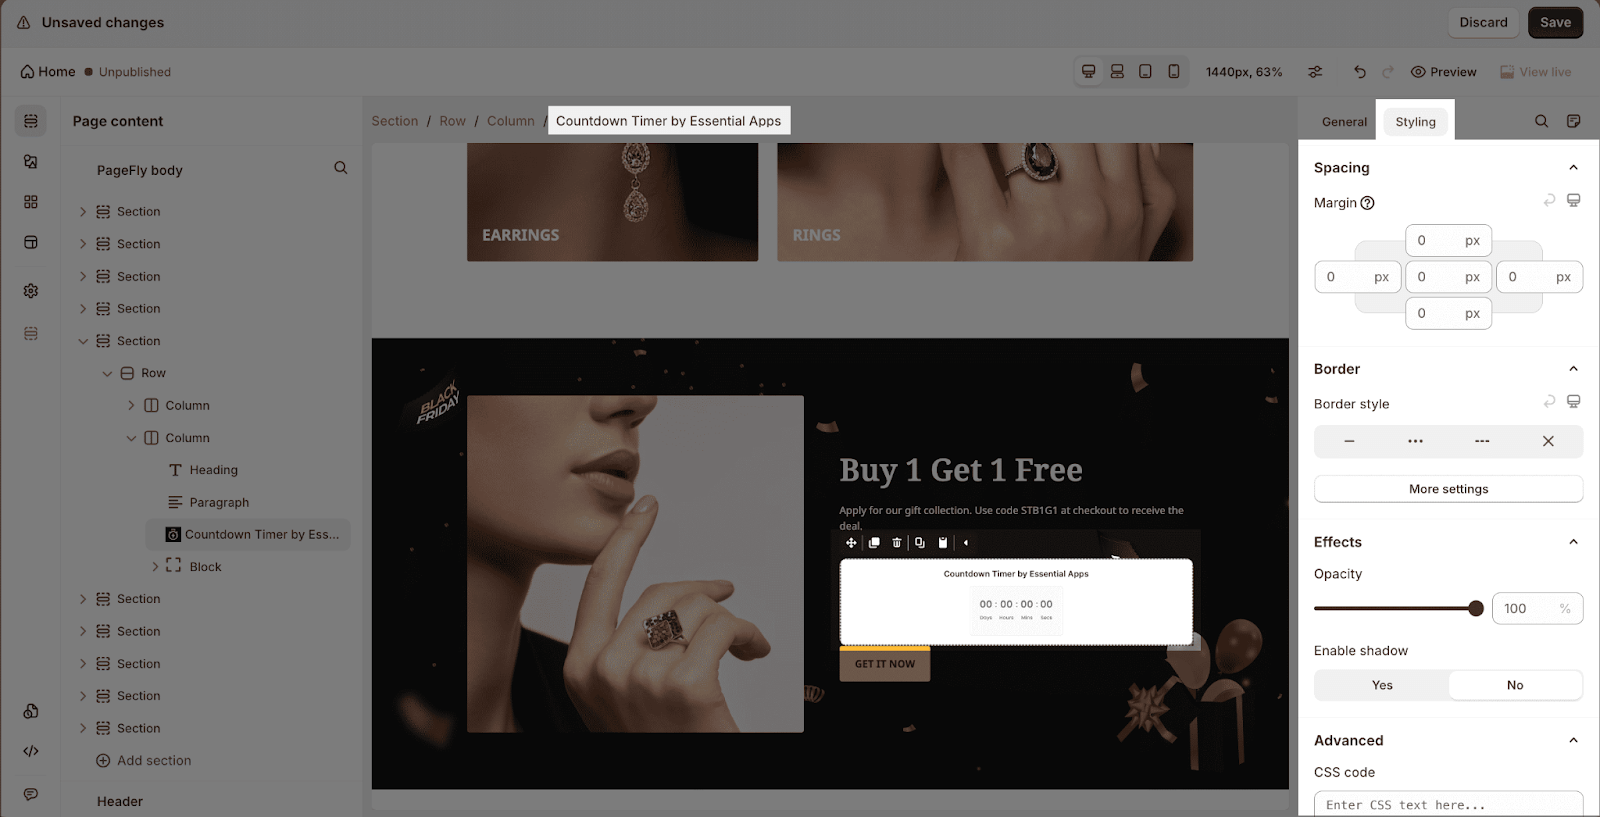
In the Styling tab, you can edit the Margin, Border, Effect of Opacity for the element.
From Essential Countdown Timer Bar App
You can see how to set the Essential Countdown Timer Bar in detail via their FAQ section at the bottom.
Step 1 : Access The Essential Countdown App
Go to your Shopify Admin > Apps > Choose Essential Countdown to set it up.
Step 2: Activate Essential Countdown App In Theme Customize
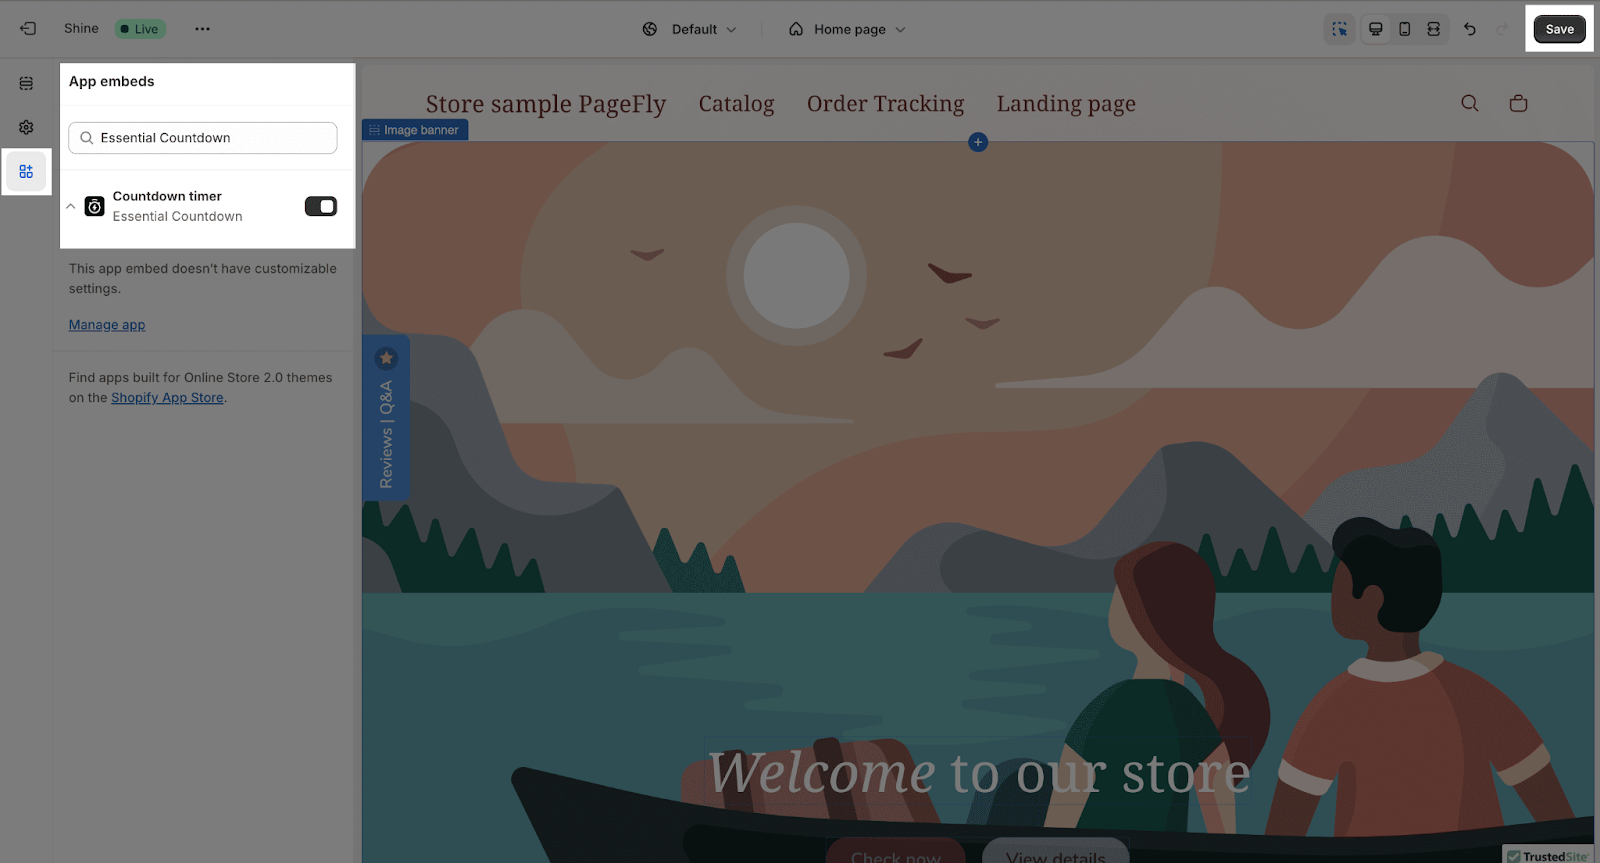
Remember to activate the app in Shopify admin > Online store > Themes > Customize > App embeds by enable the button here:
Step 3: Create A New Timer
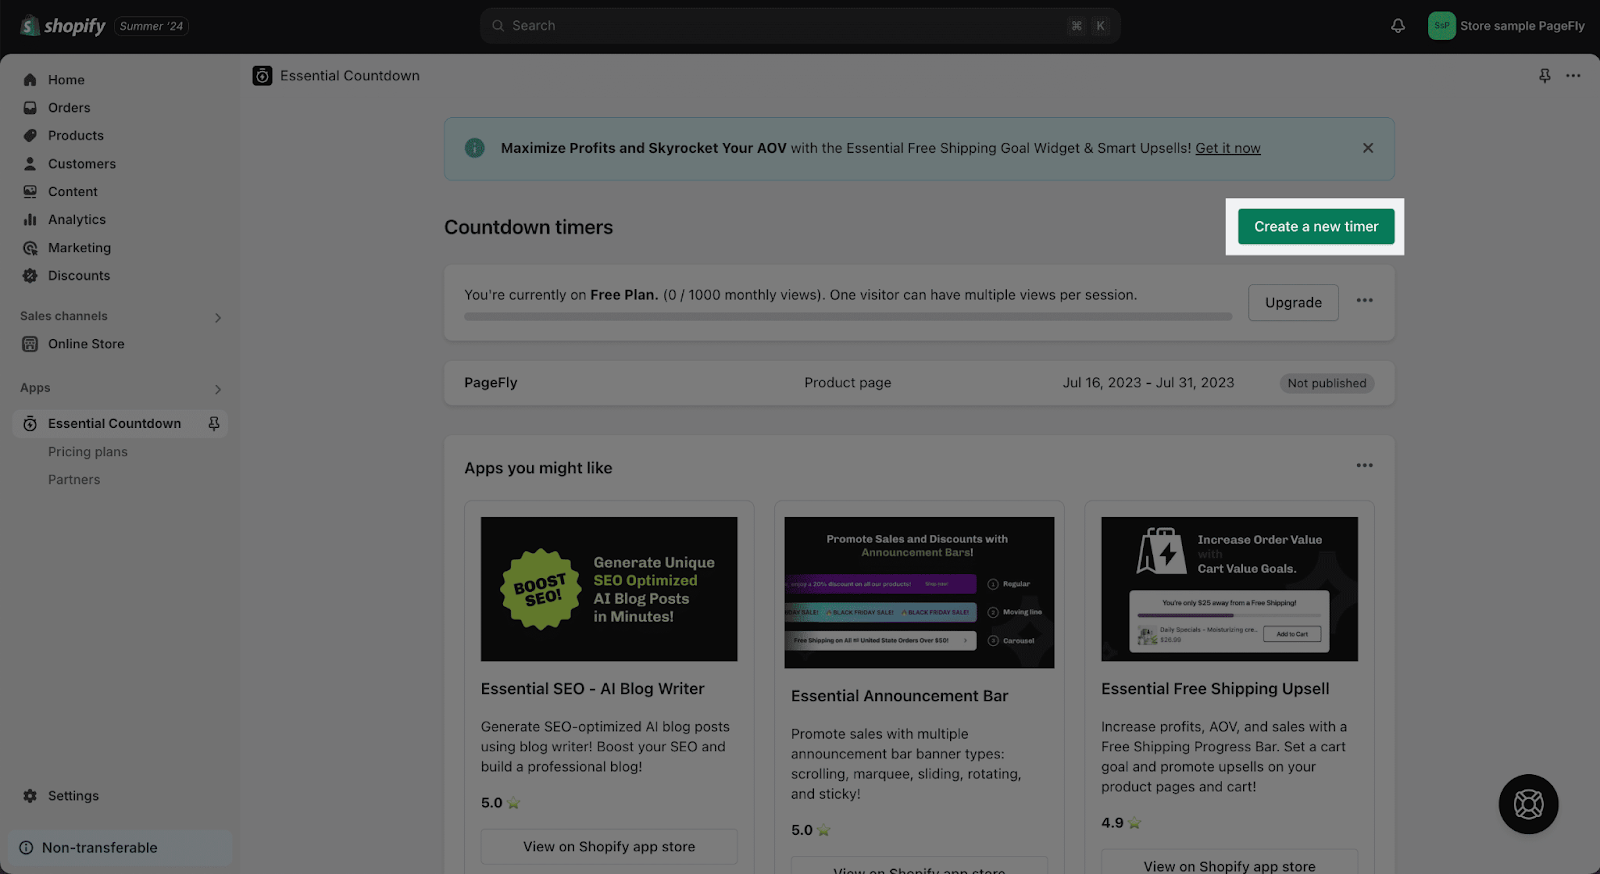
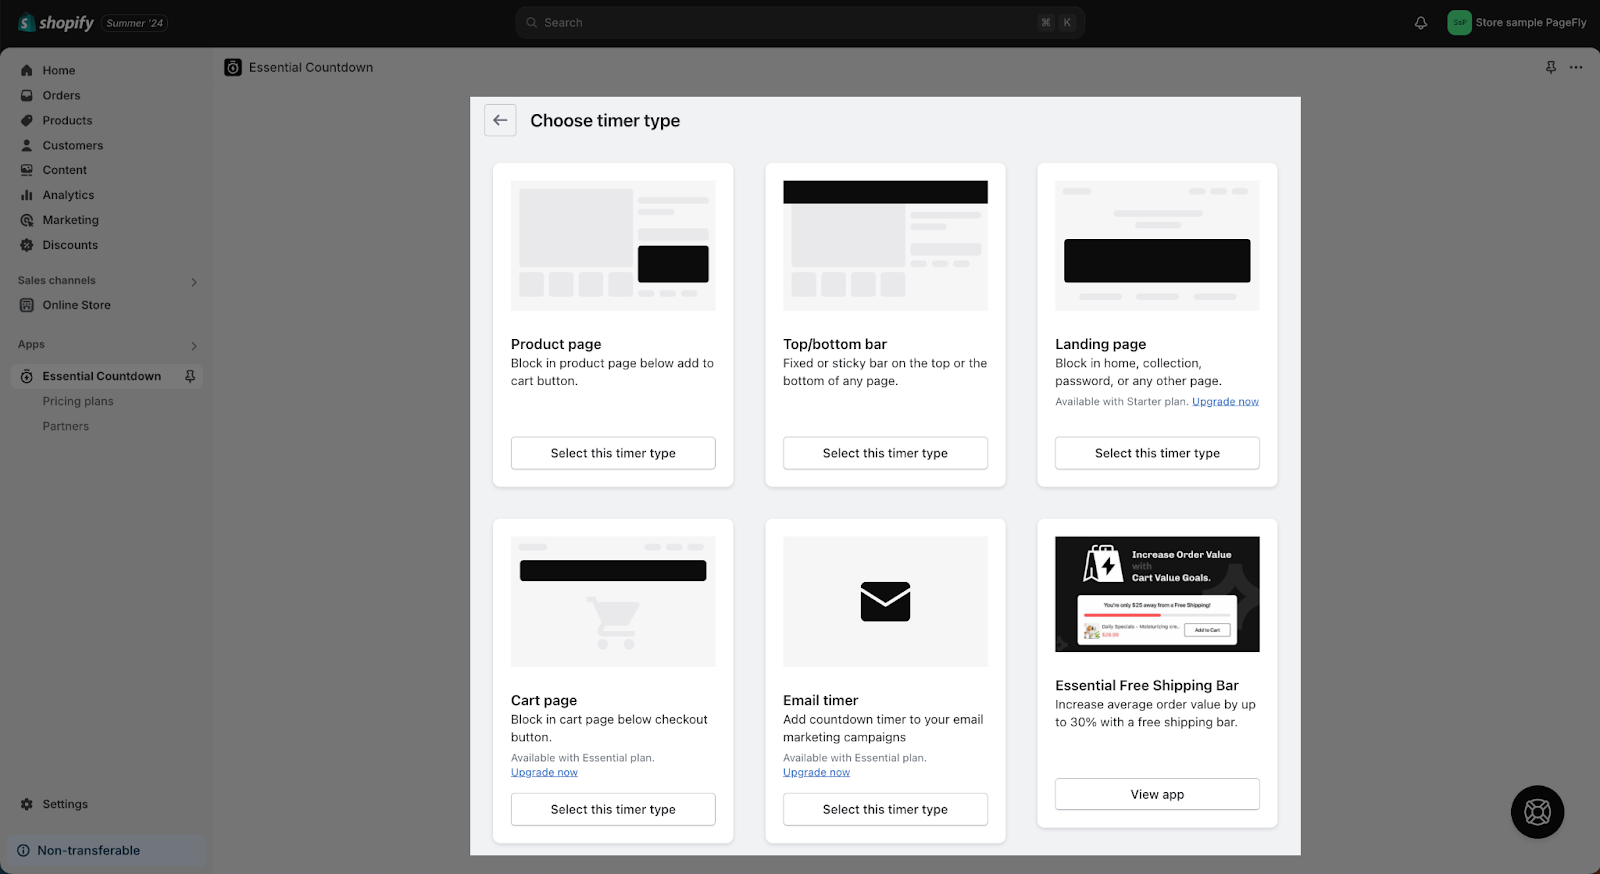
To start with, click on “Create a new timer” on the top right and select the time types that you want:
There are 4 types of timers: Product page timer, Top/ bottom bar timer, Landing page timer, Cart page timer.
Step 4: Configure For The Countdown
Once you have selected a timer type, you will need to configure the Content, Design, and Placement for each countdown timer. In the Essential Countdown app, all timer types share the same settings for Content and Design, with the only variation being the Placement of the countdown timer.
1. Content
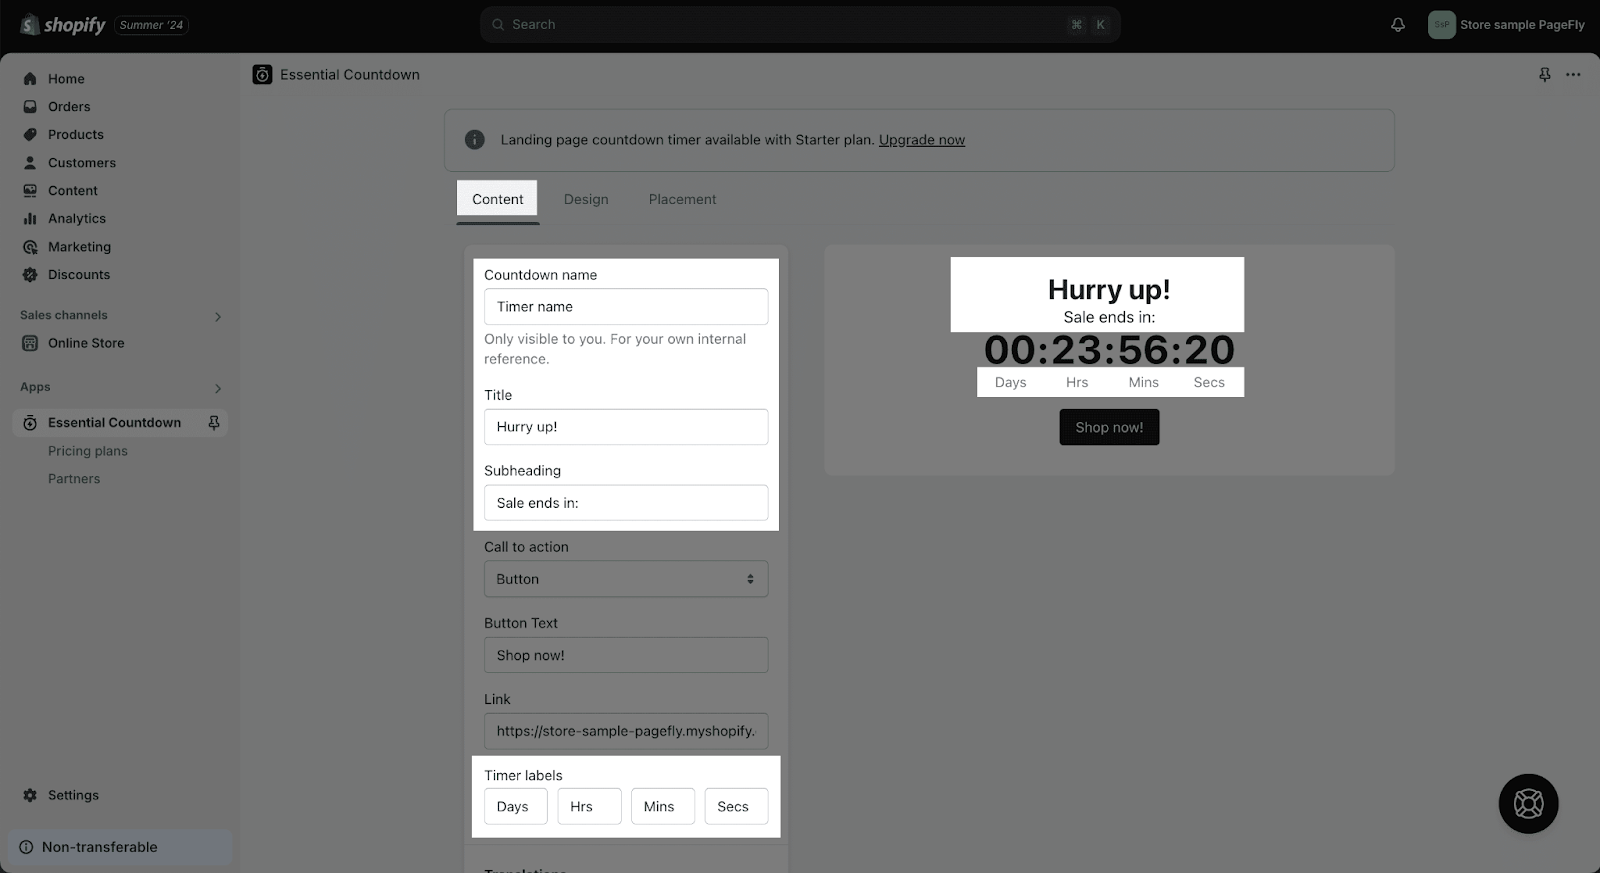
To begin, you can assign a name to each countdown timer for your own reference, reminding you of which pages or products they are associated with. This name will only be visible to you.
Then you can set the Title, Subheading and Timer labels for the timers. All of this configuration will be reflected in the preview on the right panel.
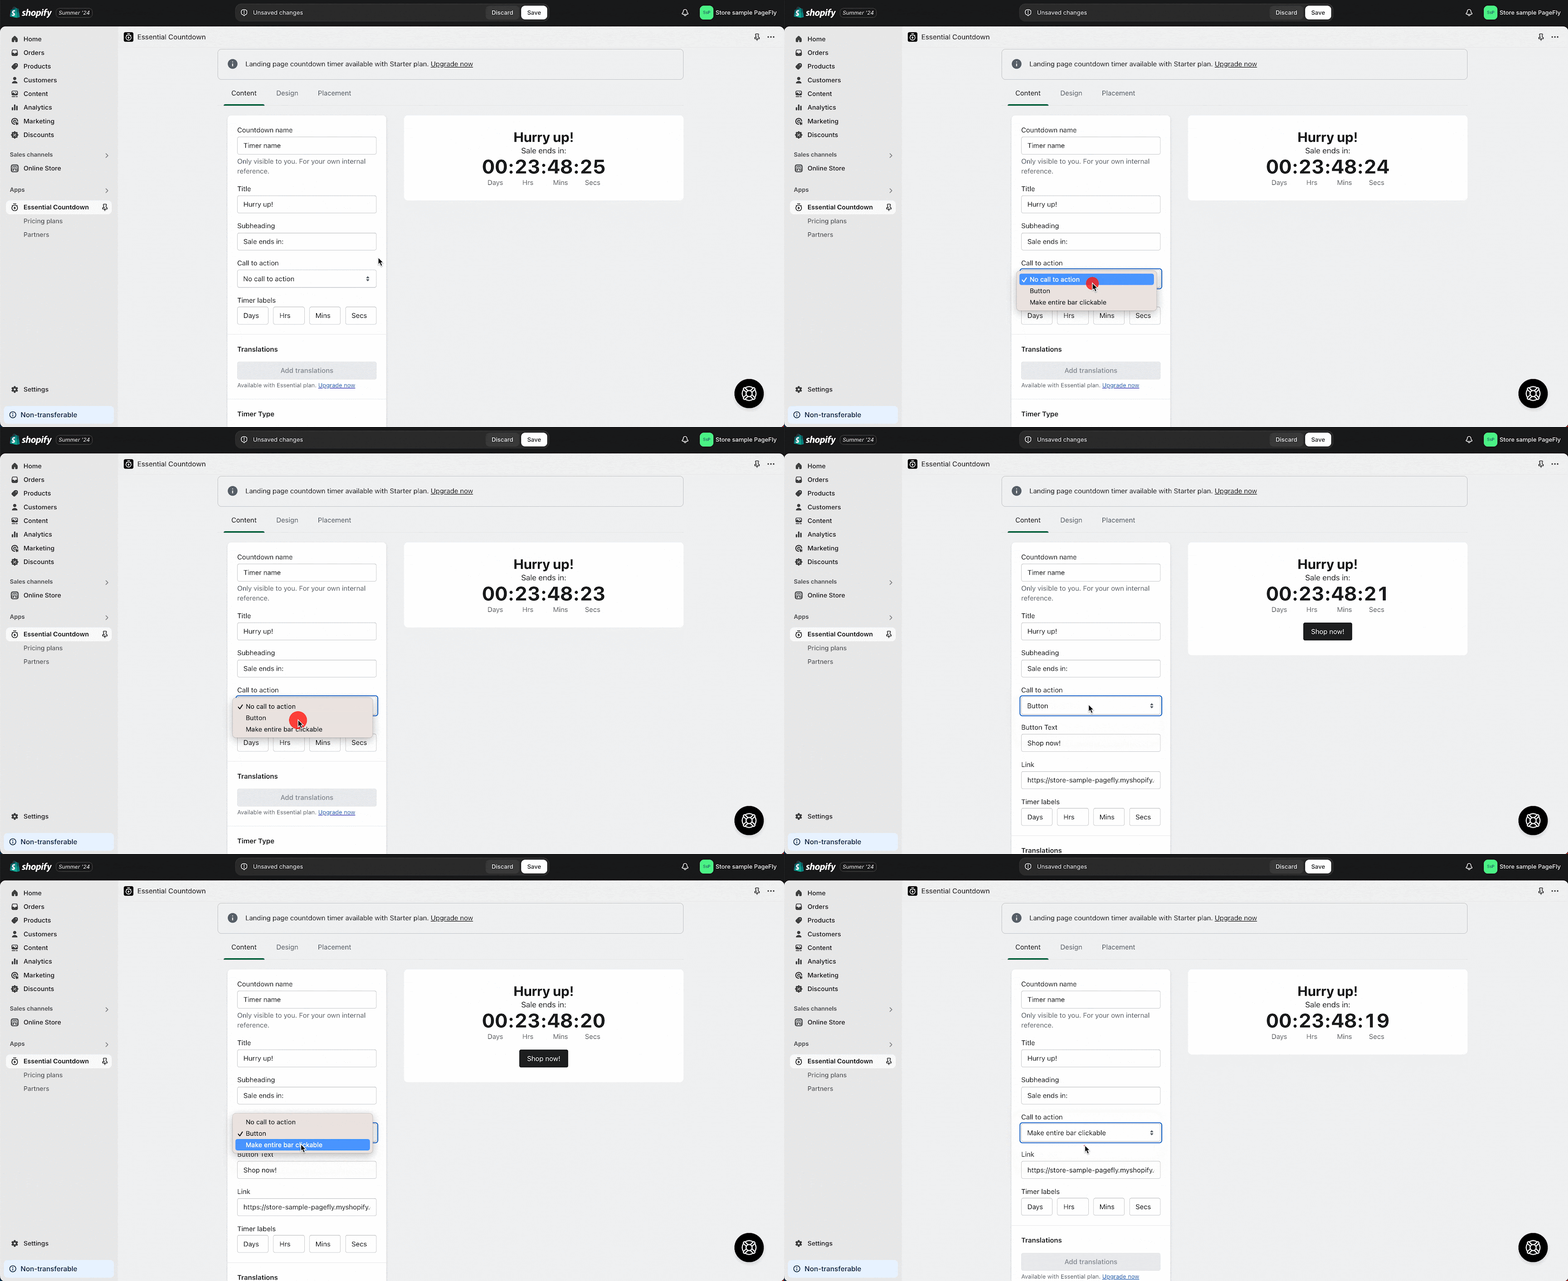
You can choose the display type for the Call to Action (CTA) button. There are three types:
- No call to action: The CTA button will not appear in the live view, and the ‘Button text‘ and ‘Link‘ parameters will not show up in the settings.
- Button: The CTA button will appear in the live view, and you can set up the ‘Button text‘ and ‘Link‘ in the settings.
- Make entire bar clickable: With this type, customers can click anywhere on the countdown timer bar to go to the redirect link. You can set up the ‘Link‘ in the settings.
Below those is the translation section. This will provide you with 2 other options of French and Japanese besides English. This feature is a great tool for you to reach customers globally especially who are not native English speakers. However, this translation option is only available for the Essential paid plan.
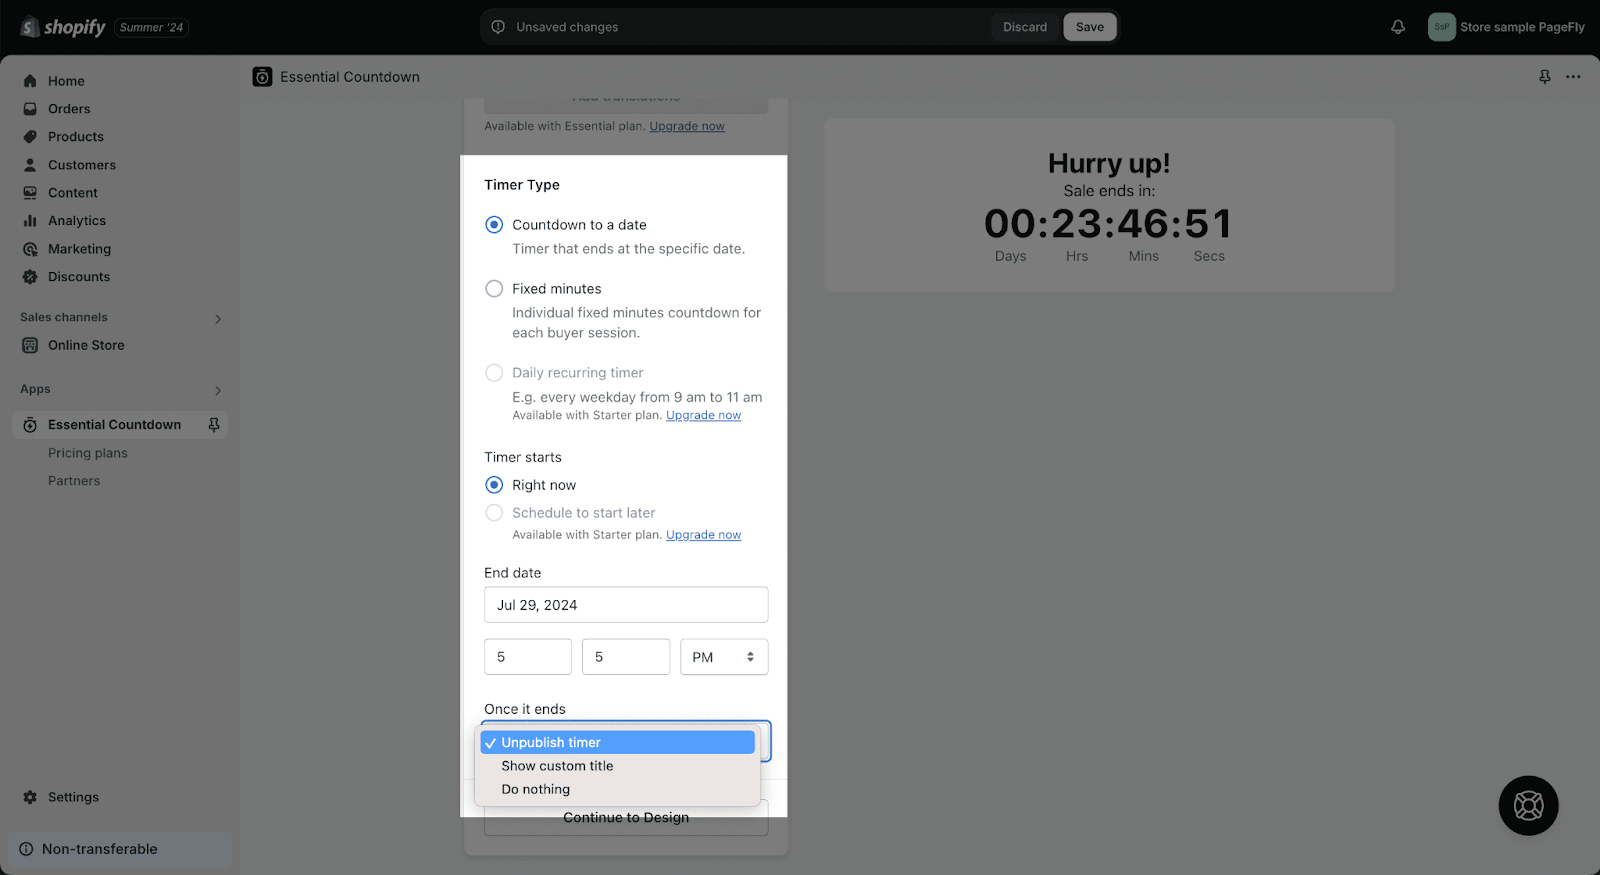
The very next feature is Timer types giving you three options respectively: Countdown to a date, Fixed minutes, and Daily recurring time.
- Countdown to a date: as the name, the timer automatically ends at a chosen date. You can choose to start now by adding information like time and day you want to end the timer and also what will follow up once it ends among 3 options: do nothing, unpublish timer and show custom title then add the custom title for this option.
- Fixed minutes: a fixed minutes countdown is displayed for each buyer session.
- Daily recurring time: It works exactly like an alarm which allows you to choose any weekday you want to repeat the timer also your daily timer starts and daily timer ends. Please be noted that the last option of daily recurring time is currently offered only to customers in our starter plan.
Right below, you can choose the start timer “Right now” or “Schedule to start later” and set the end date by selecting the date from the calendar.
Once the countdown ends, there are also several options to choose: do nothing, hide the timer for the buyer, repeat the countdown and show a custom title.
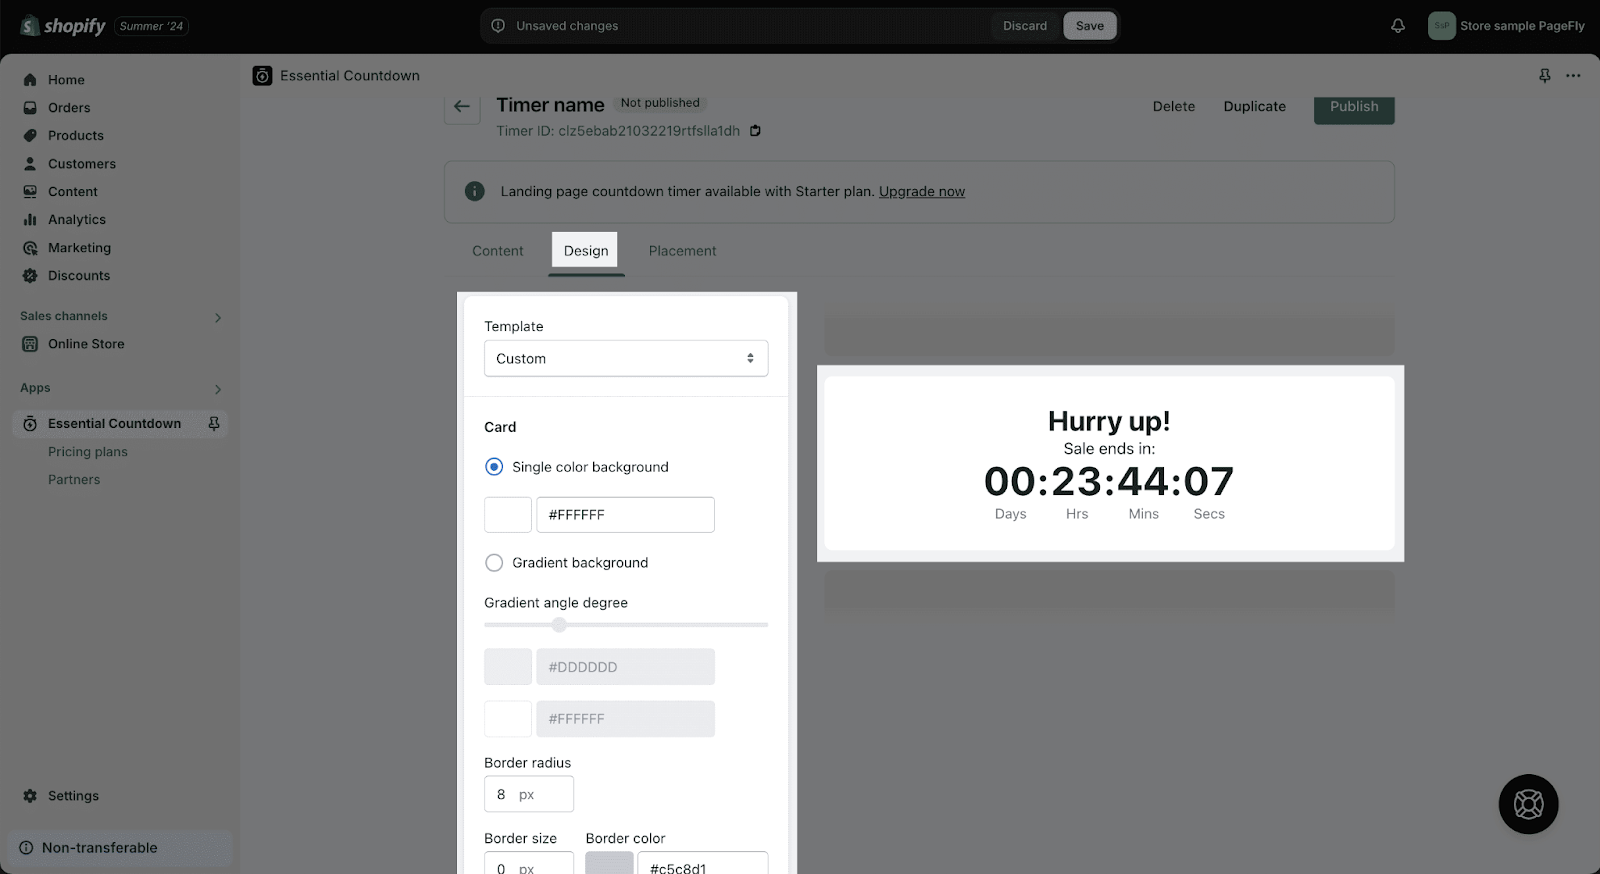
2. Design
In the design tab, you can choose a pre-made template for the timer style or customize your own timer.
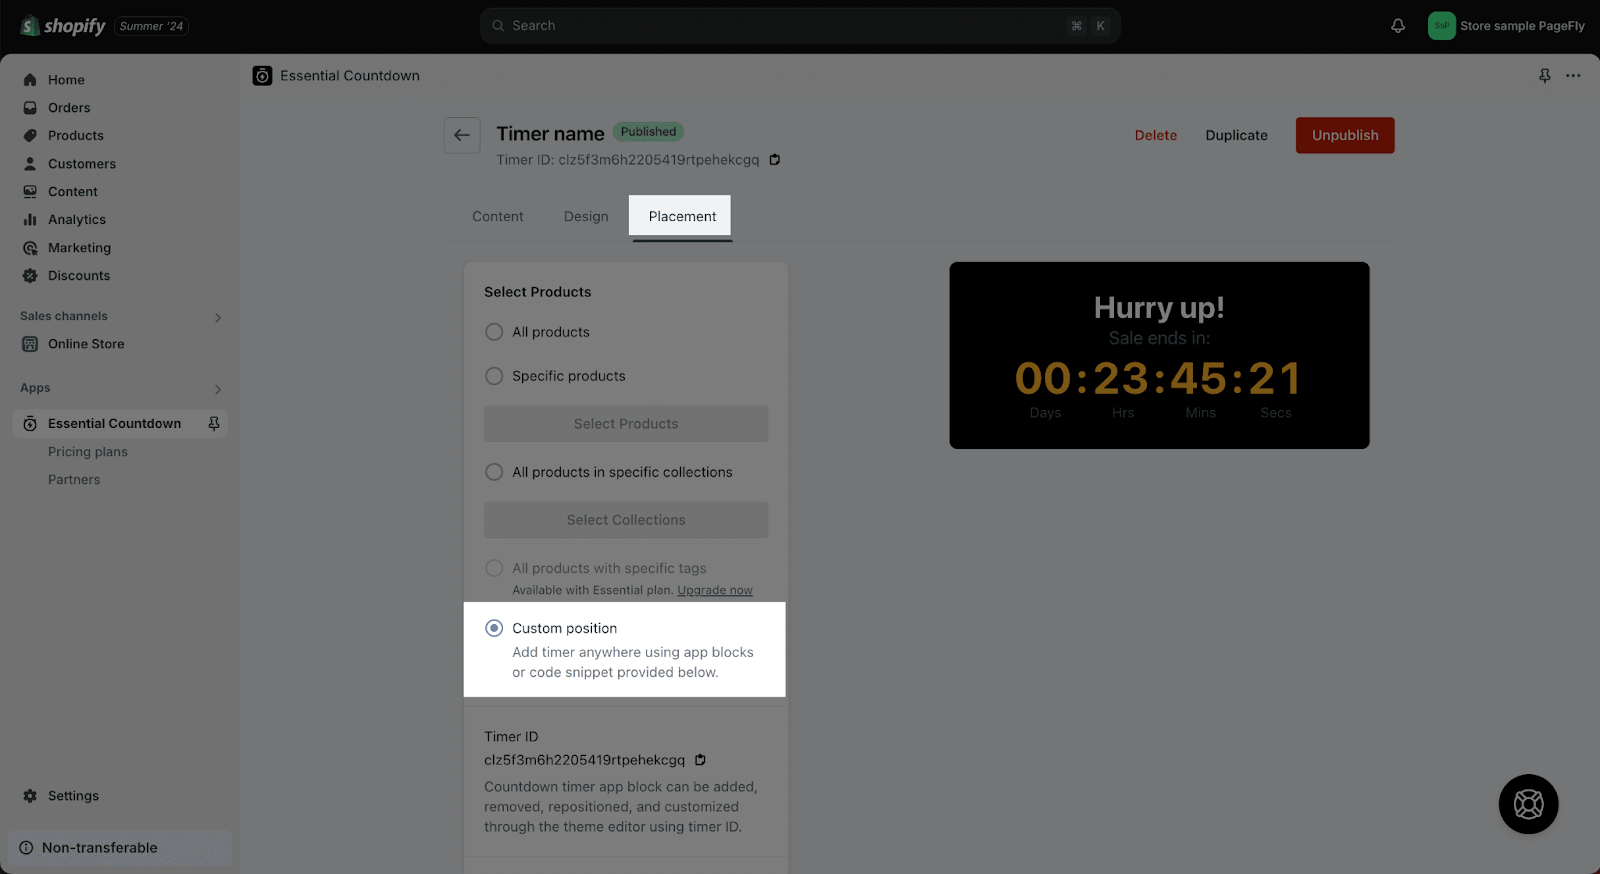
3. Placement
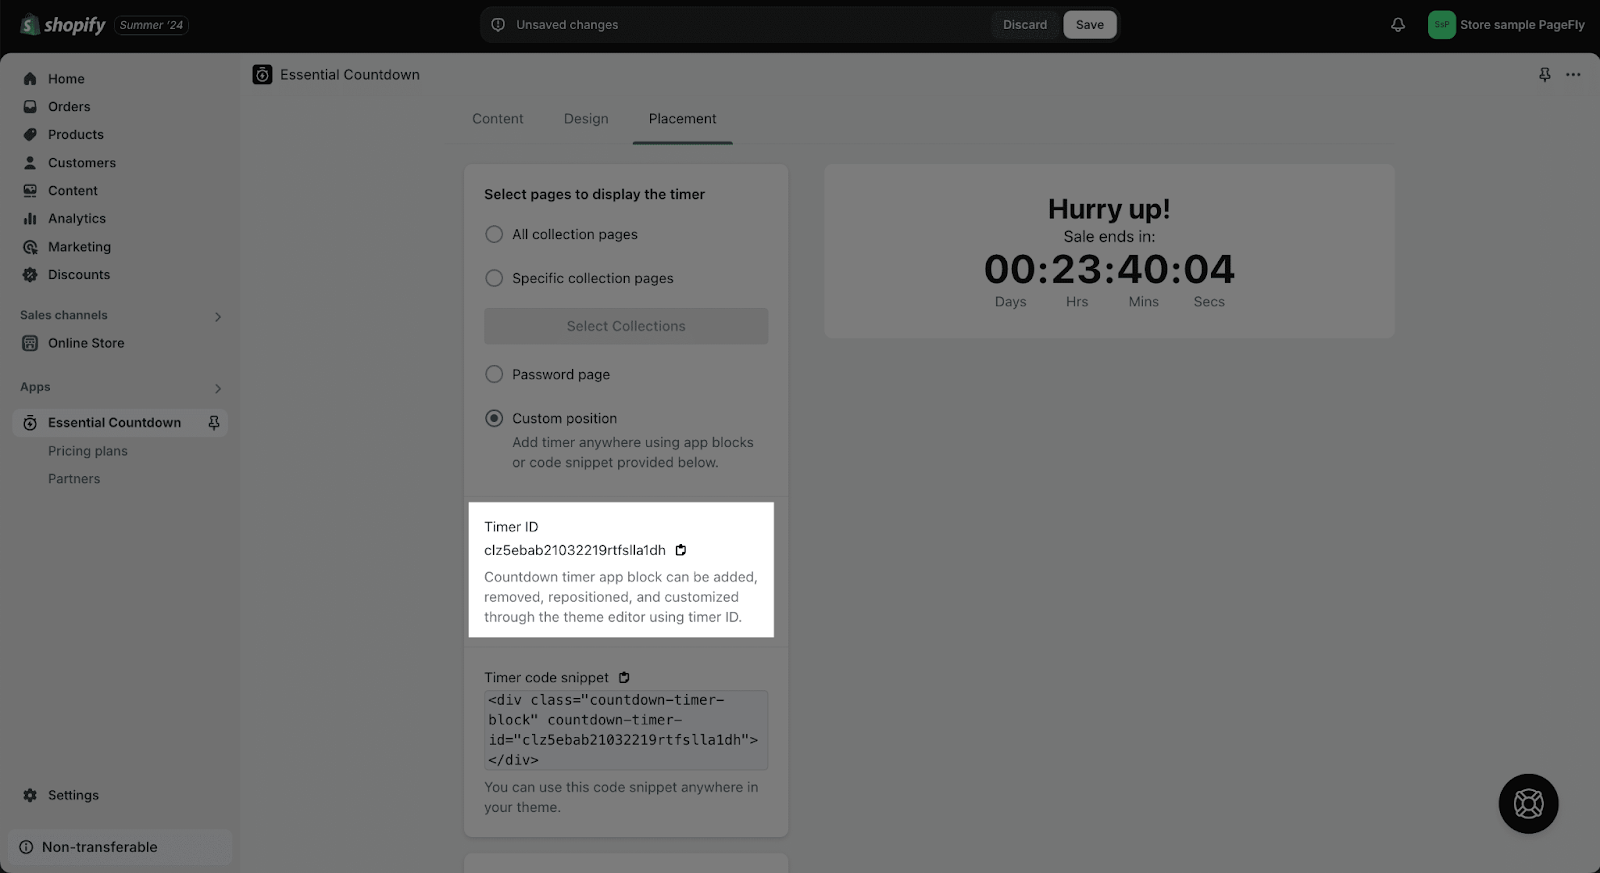
The Placement tab is used to set up where to display the timer. Each timer type has different placement options. To make the Essential Countdown work with PageFly, please select only the ‘Custom position’ option.
Once you have finished setting up the timer, you need to save or publish the timer to get the Timer ID, then copy and paste that ID into the PageFly Timer ID box.
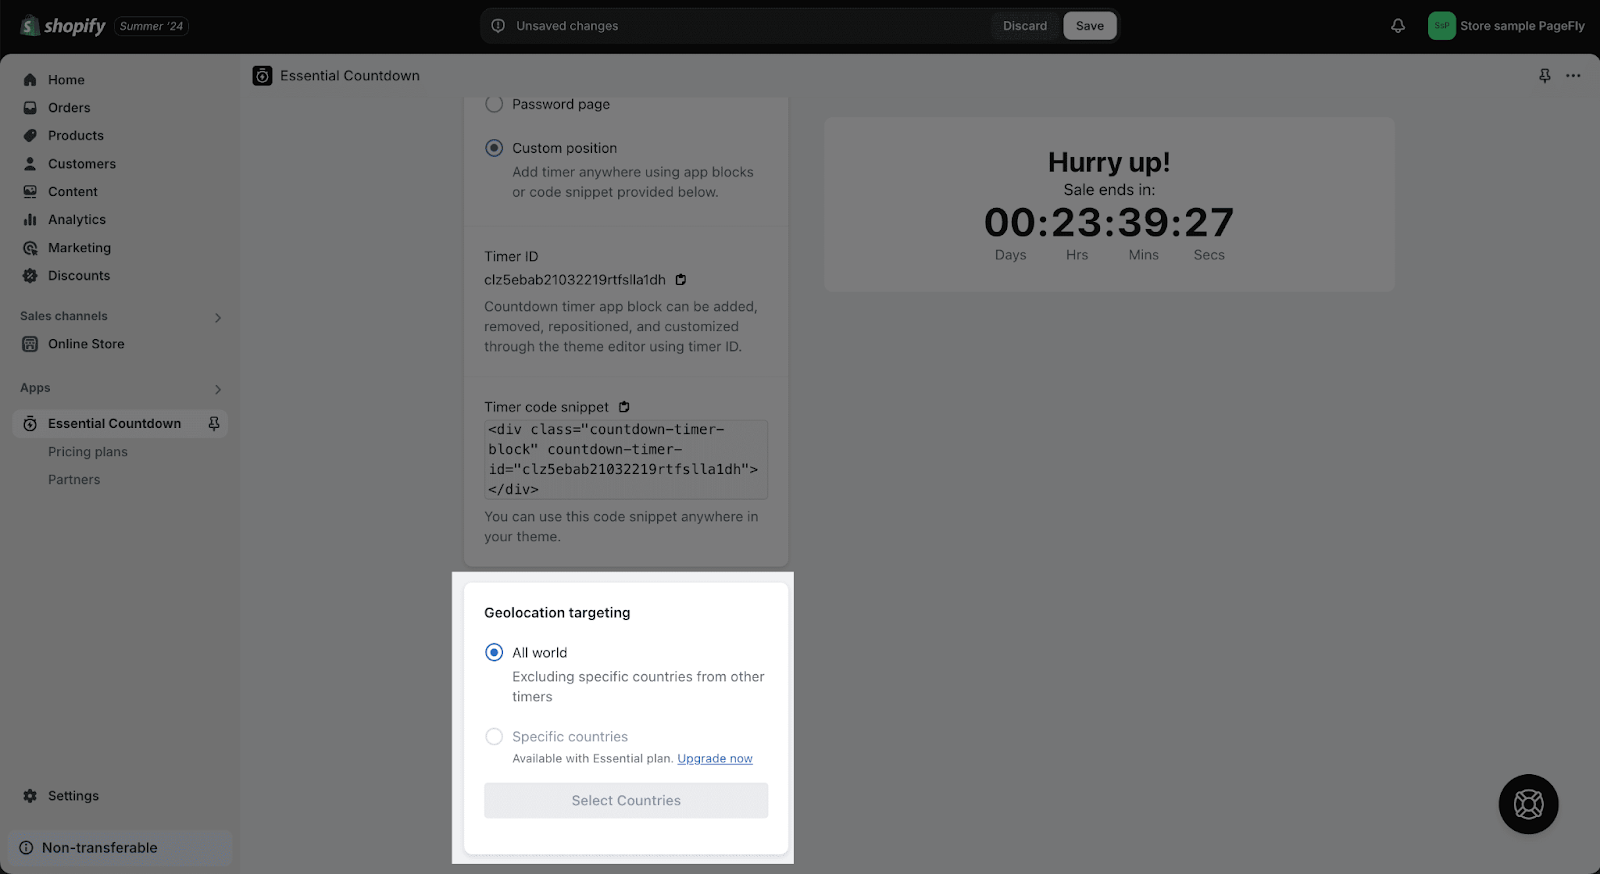
Lastly, you can choose to show this timer to everyone or some specific countries.
Frequently Asked Questions
1. Can I customize the appearance of the timer?
Yes, you can customize the timer’s appearance in the Design tab of the Essential Countdown app, choosing from pre-made templates or creating your own style.
2. How do I make the Essential Countdown Timer work with PageFly?
When setting up the timer in the Essential Countdown app, select only the “Custom position” option in the Placement tab.
3. What happens when the countdown ends?
You can choose from several options: do nothing, hide the timer for the buyer, repeat the countdown, or show a custom title.
