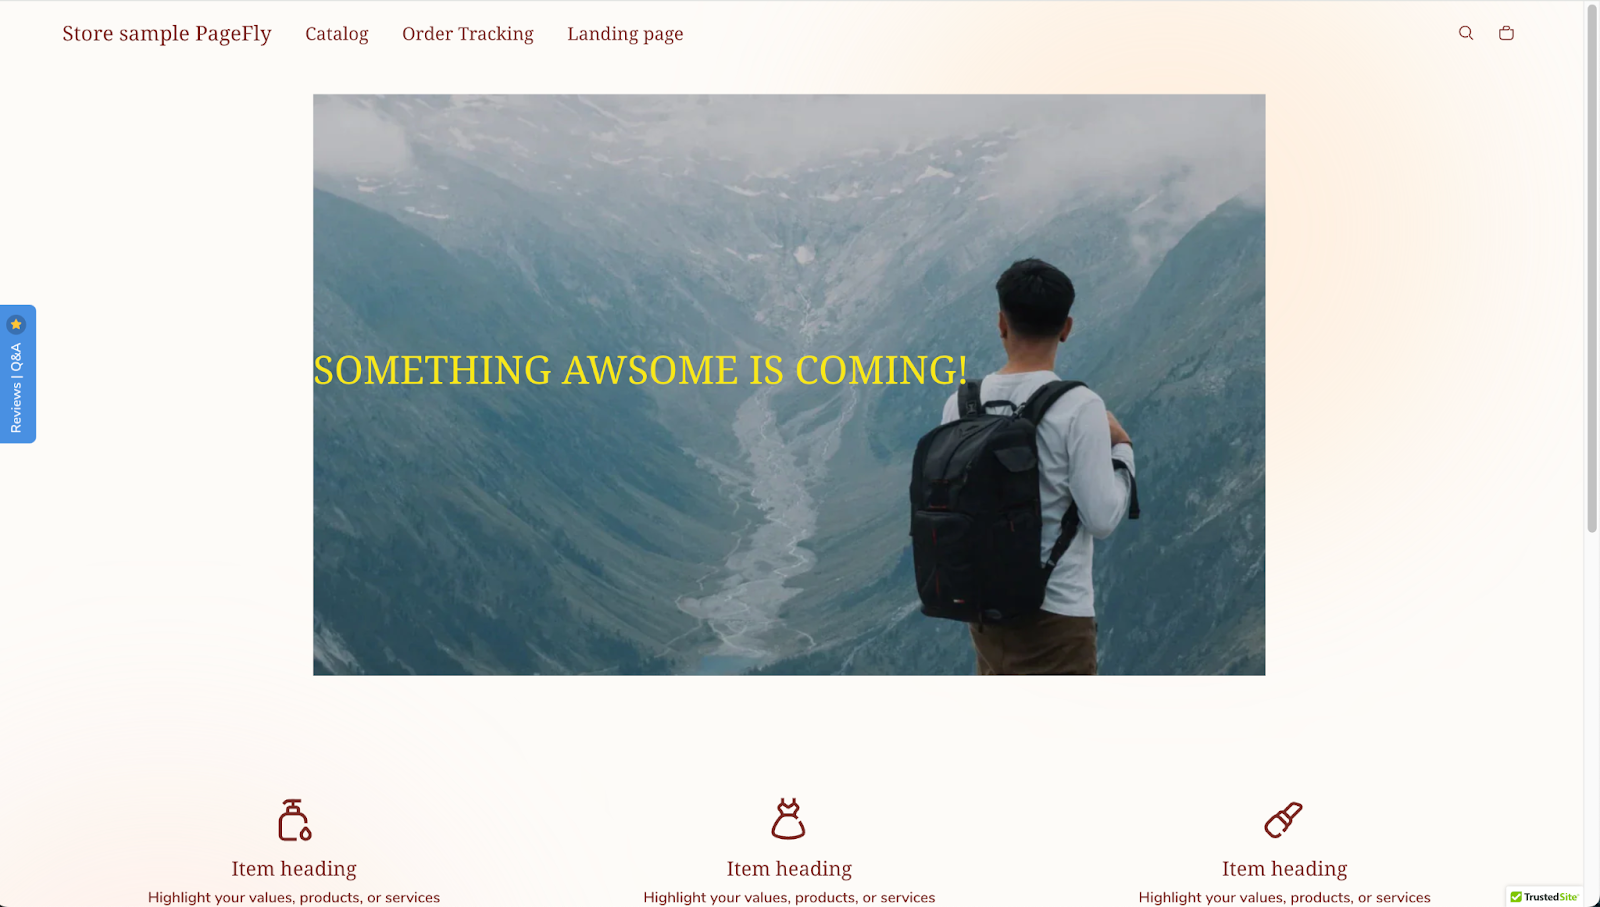
Overview
In this guide, we will go through the steps to create a captivating coming soon page using PageFly. By following along, you’ll end up with a visually attractive landing page that generates excitement for your upcoming product or website launch.
A well-designed coming soon page is a powerful tool for any entrepreneur as it allows them to snag potential customers’ attention and engage them before the official opening. This guide is perfect for anyone who wants to create a buzz around their upcoming site and start building an audience early on.
In this article
- Requirement
- How to create a coming soon page with PageFly
- Tips and best practice
- Frequently asked question
Requirement
The primary requirement is really the content and any visual assets you want to include on your page. This could involve text about your upcoming launch, images or videos that represent your brand, and perhaps a signup form to capture email leads.
Building your coming soon page with PageFly is just a breeze with the following clear and digestible steps below. And if you are a visual learner, we’ve covered you with this helpful video on creating a password/coming soon page with PageFly.
How to Configure Password on Shopify
Set A Store Password
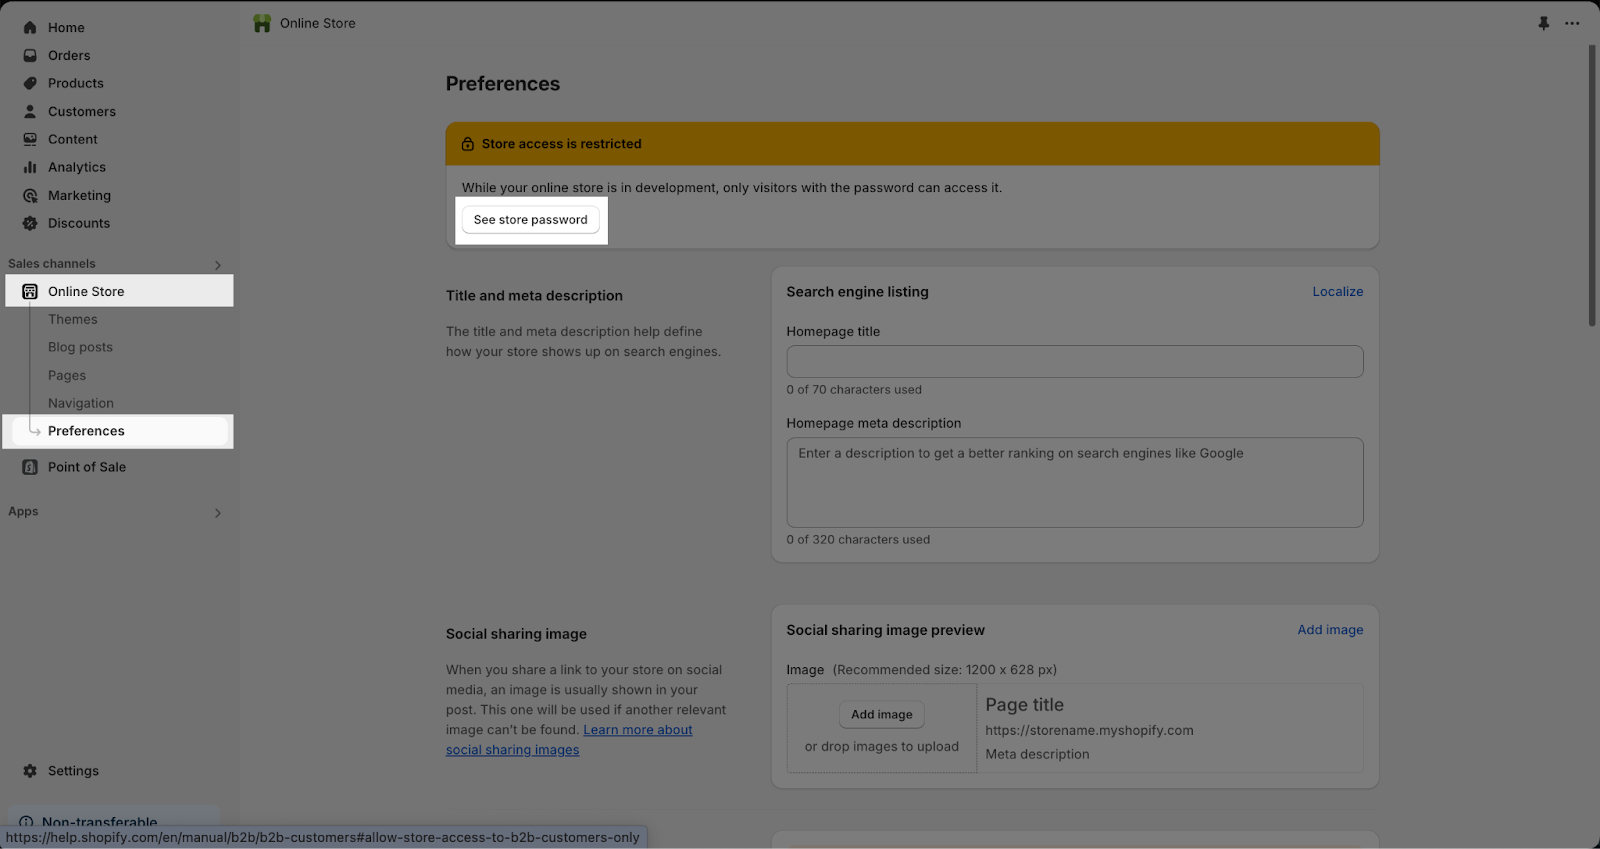
You need to set up a store password before creating any password-typed page. Follow the below steps to set up password for your store:
- Step 1: Navigate to Online Store > Preferences > See store password
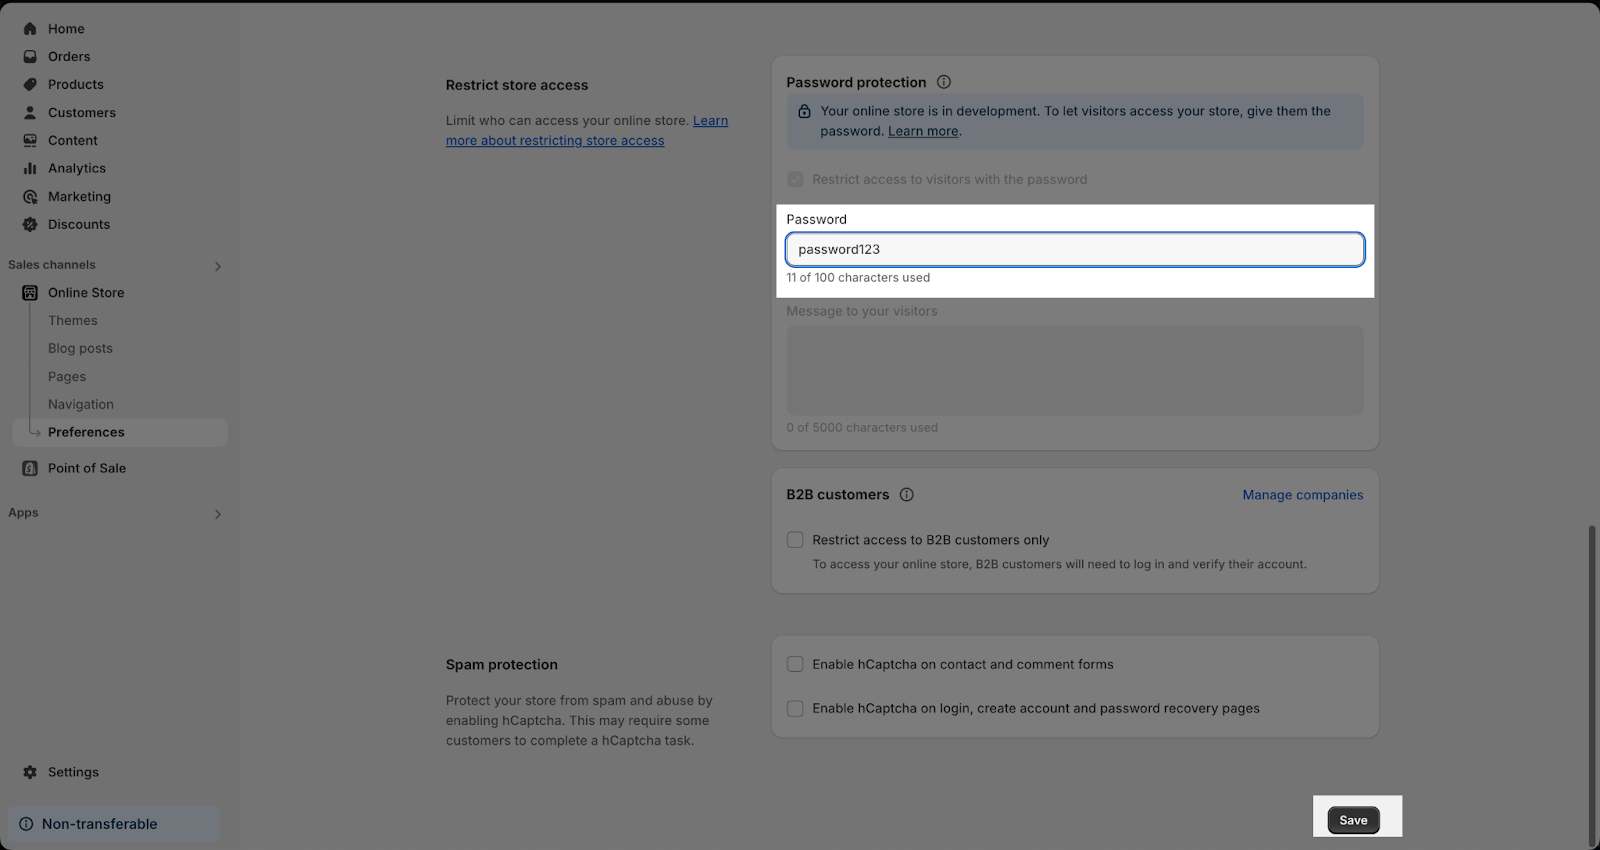
- Step 2: Set store password. For example: password123
- Step 3: Click “Save” to apply the changes
Create A Password Page
Create Blank Page
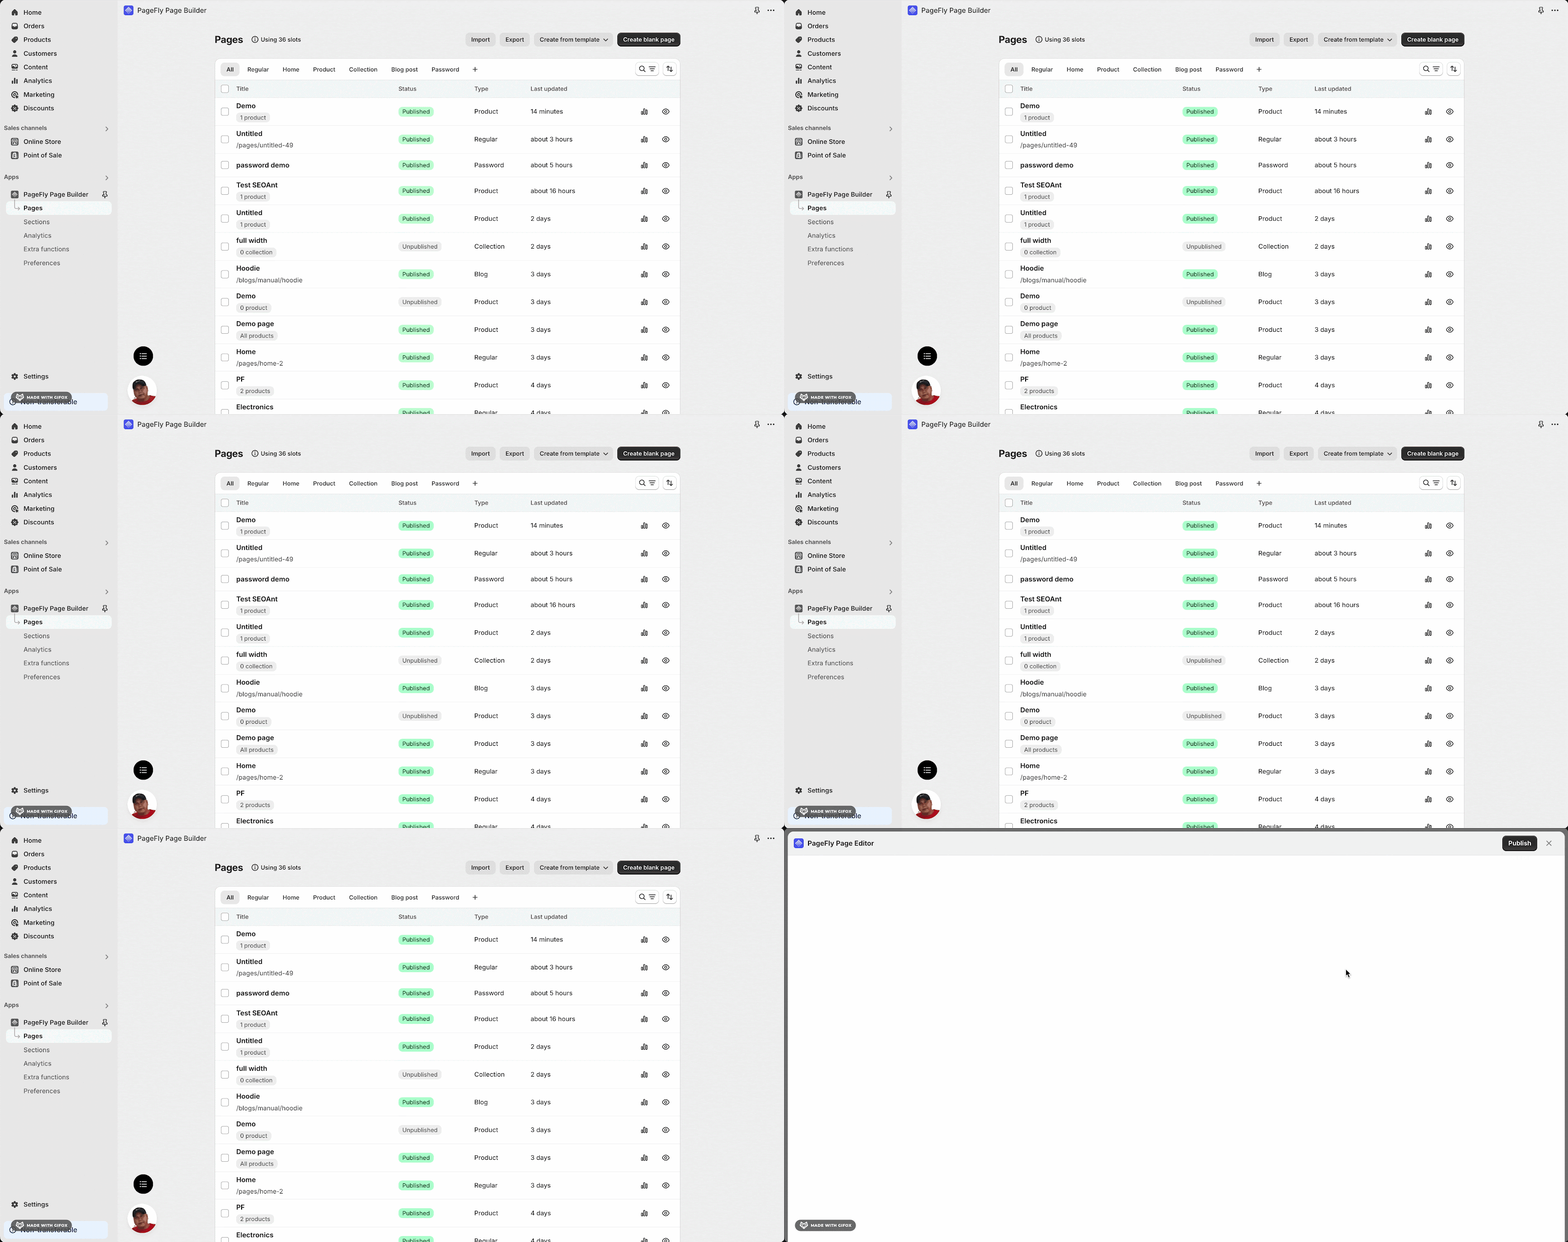
On PageFly’s Dashboard, to create a Coming Soon Page, head to Apps > Select PageFly > Select Pages
Select Create blank page at the top right corner > Click on Password
Create From Template
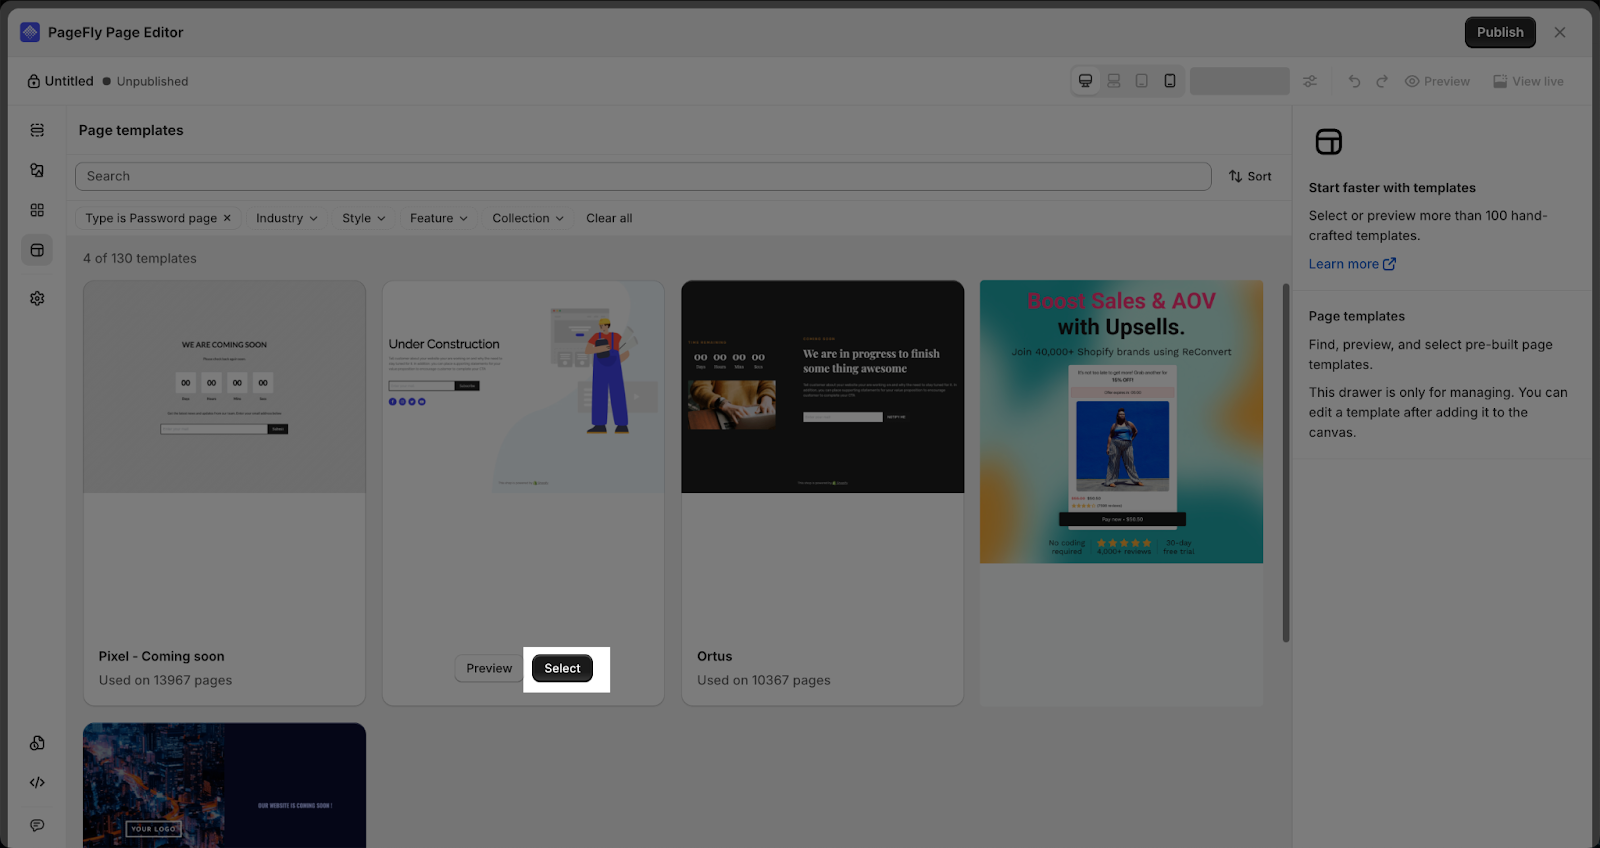
If you don’t want to start building a page from scratch, you could select a pre-designed template by clicking “Create from template” > Password
Click “Select” on desired template
Legacy Editor – How to Create a Coming Soon Page with PageFly
1. Set Up Layout And Background For the Coming Soon Page
Visually captivating visuals on a coming soon page create anticipation, convey brand identity, and entice potential customers to engage and subscribe for updates before the official launch. Follow the guides below on how to create stunning visuals for your coming soon page.
1.1. Add Section On The Page Canvas
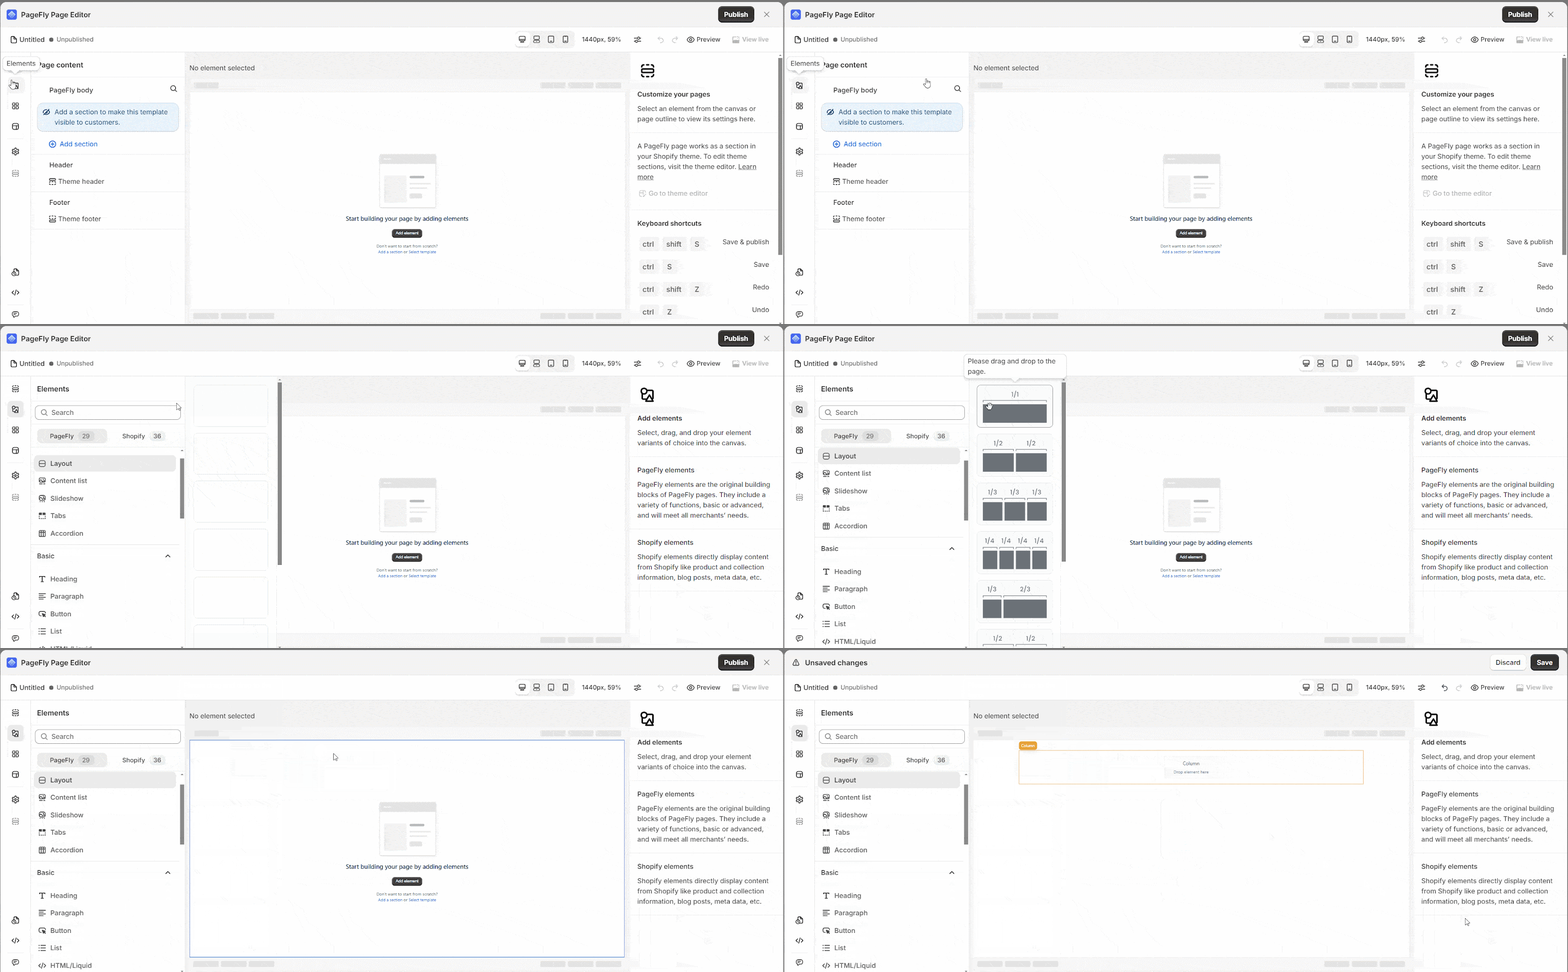
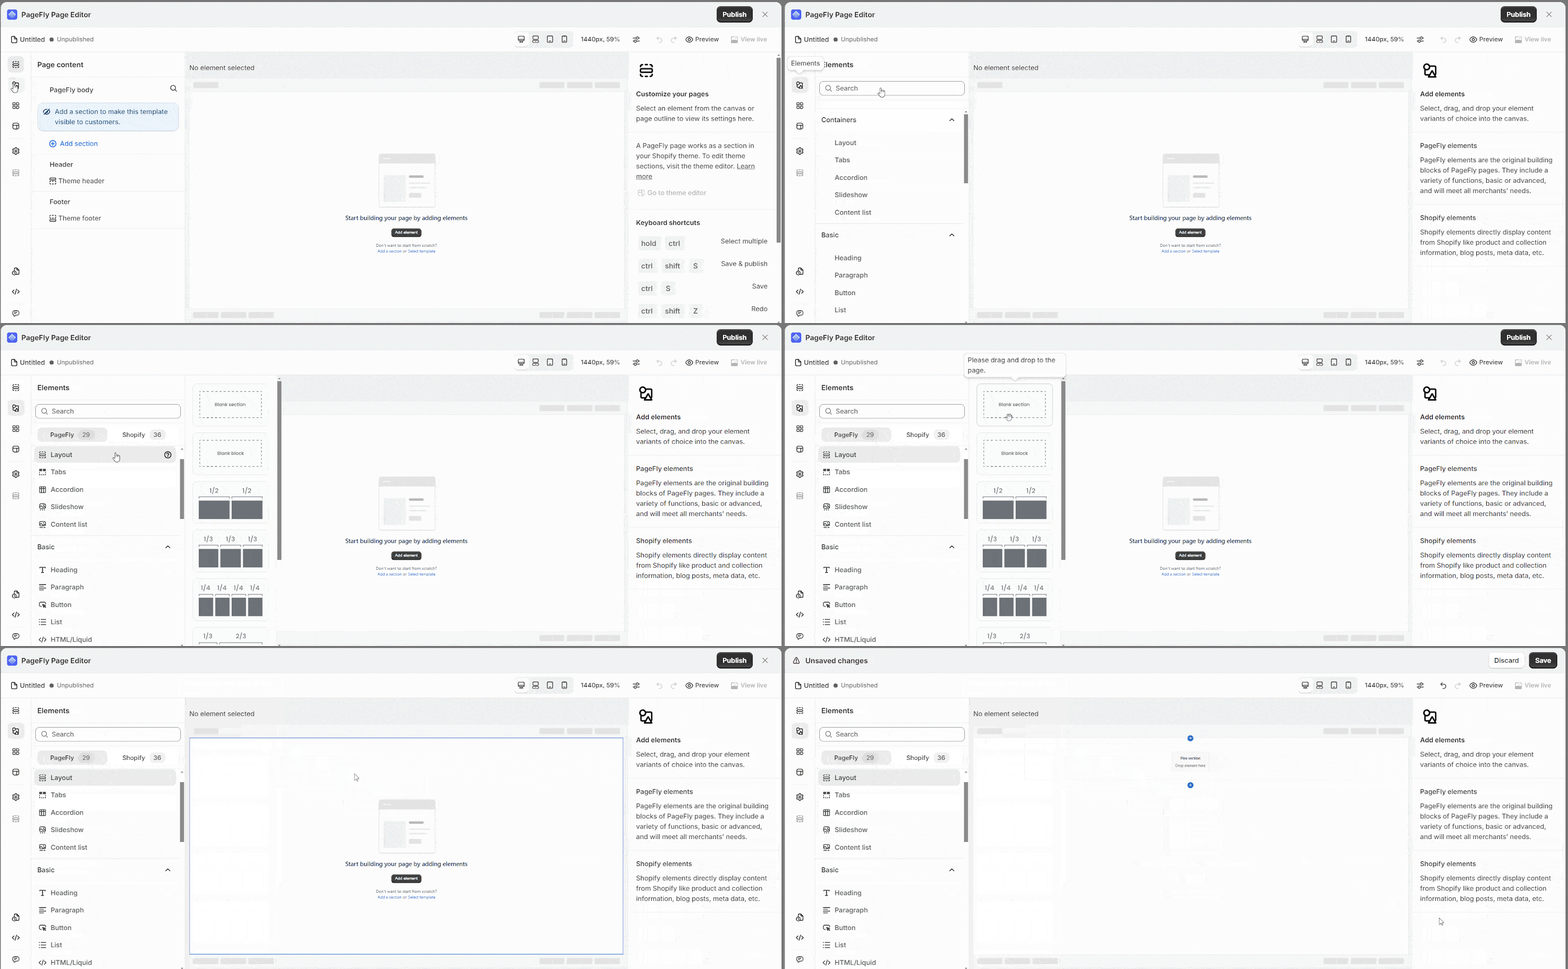
Click on Add element > Select Layout element > Drag & drop the one-column layout into the page editor.
1.2. Add A Background Image
1.2.1. Choose An Image
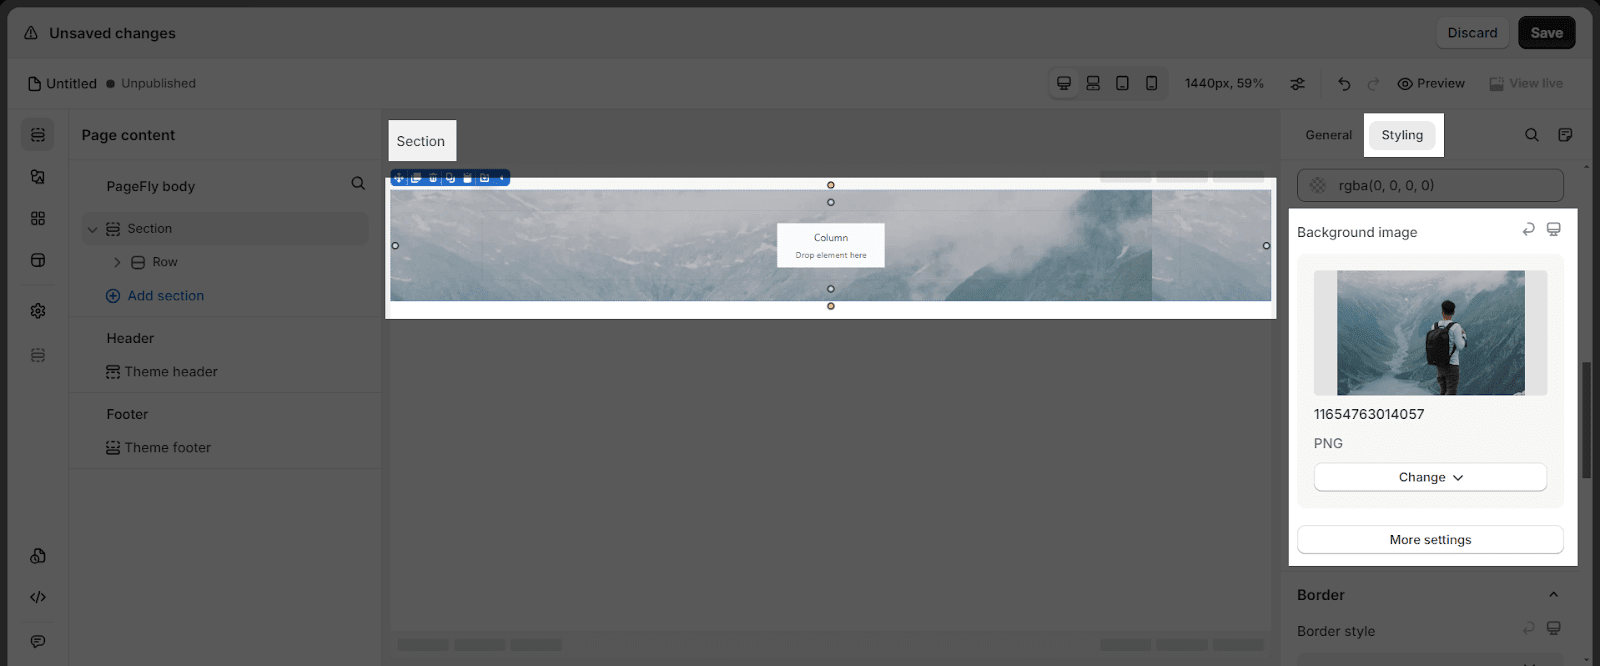
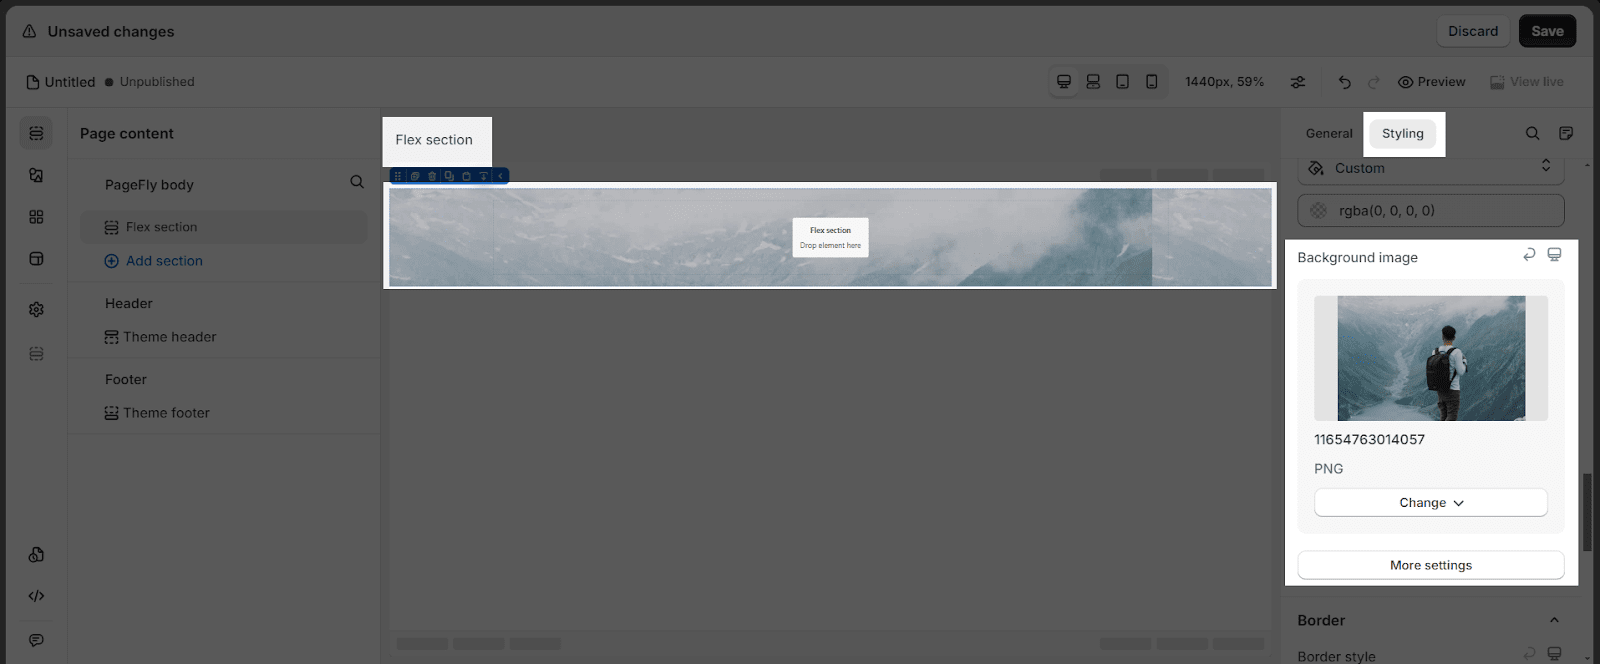
In the Styling tab, scroll down to the BACKGROUND parameter > Choose an image from Background image option > Select image
You can upload the image which is available in the Image Manager or upload it from the Internet.
1.2.2. Style The Image
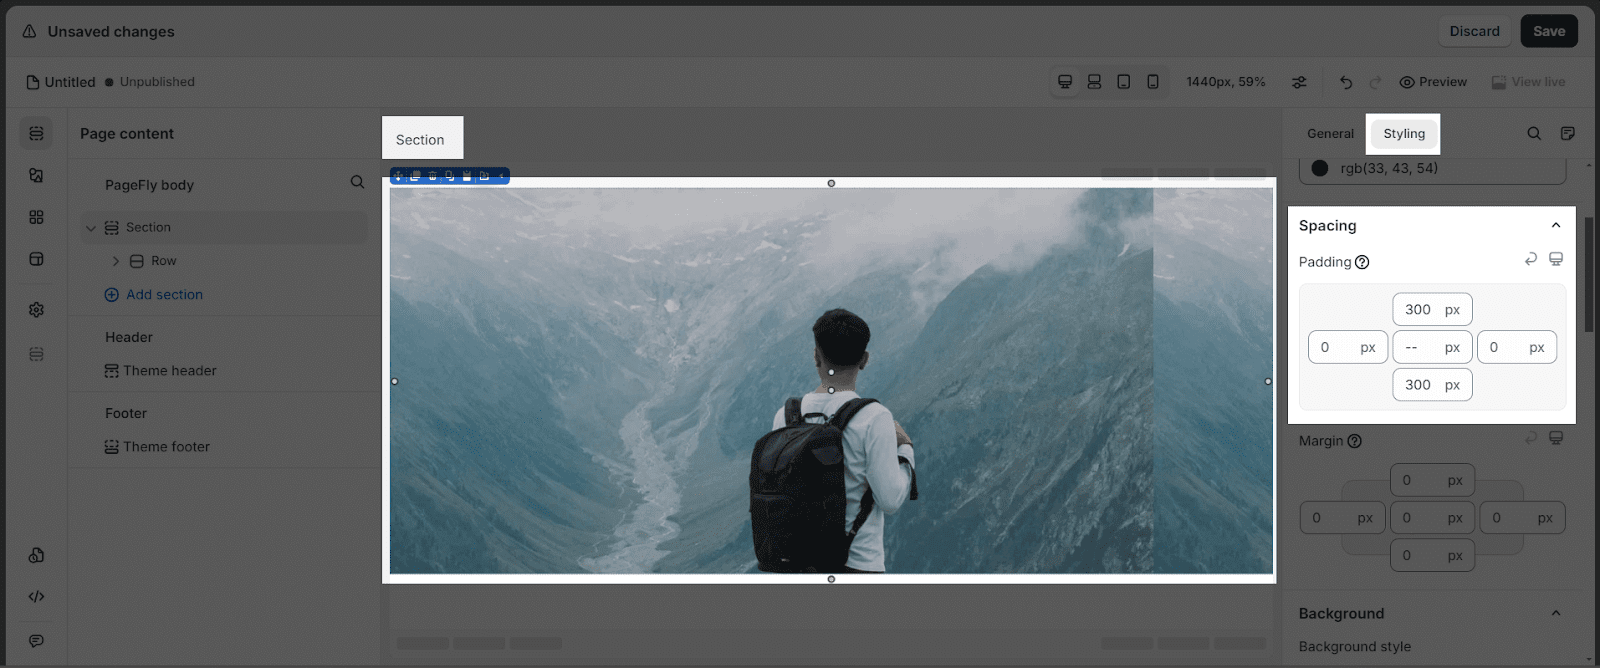
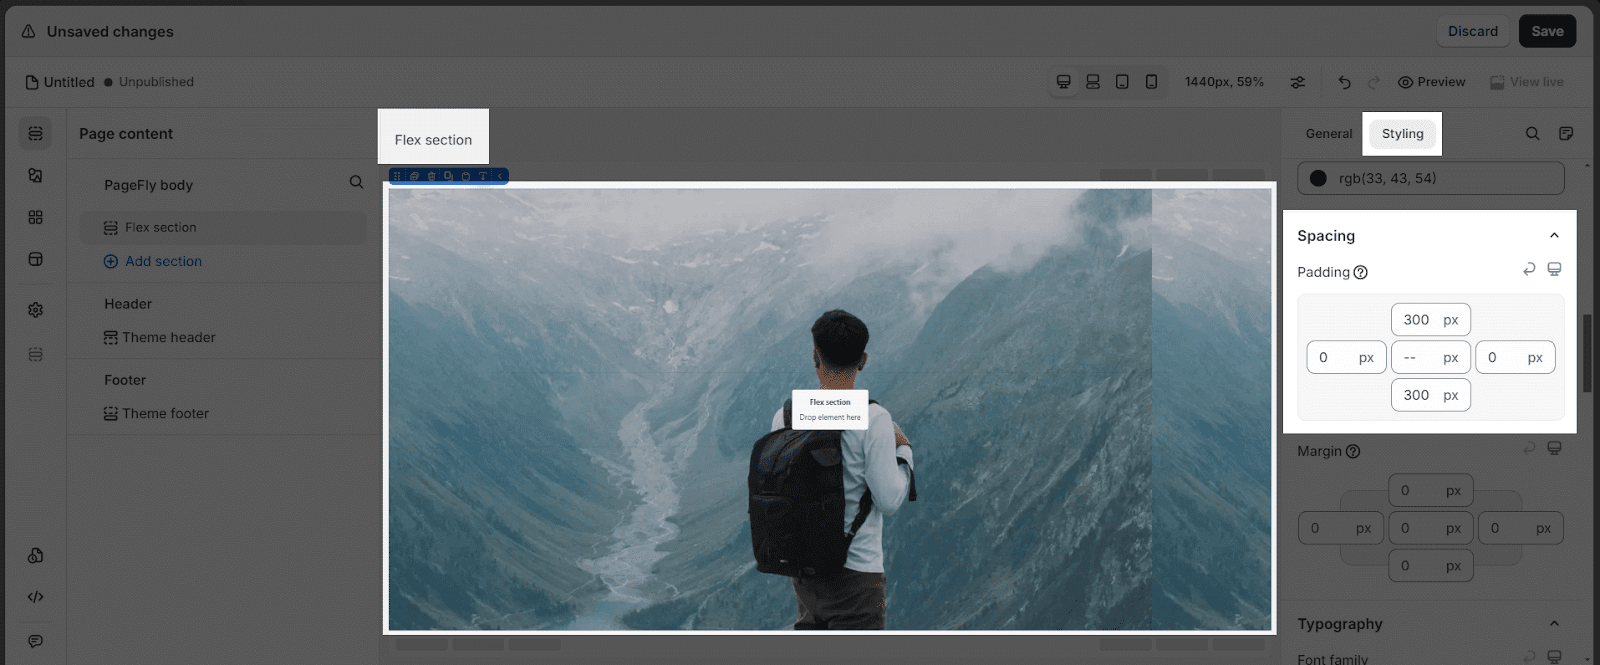
In the Styling tab, head to SPACING parameter > Padding
- Edit the top-padding and bottom-padding values to change the height of the section to fit your image’s height.
- The little box in the middle will set the same value for all four sides of Padding and Margin. In this case, we set 300px for both Padding top and bottom.
1.2.3. More Settings
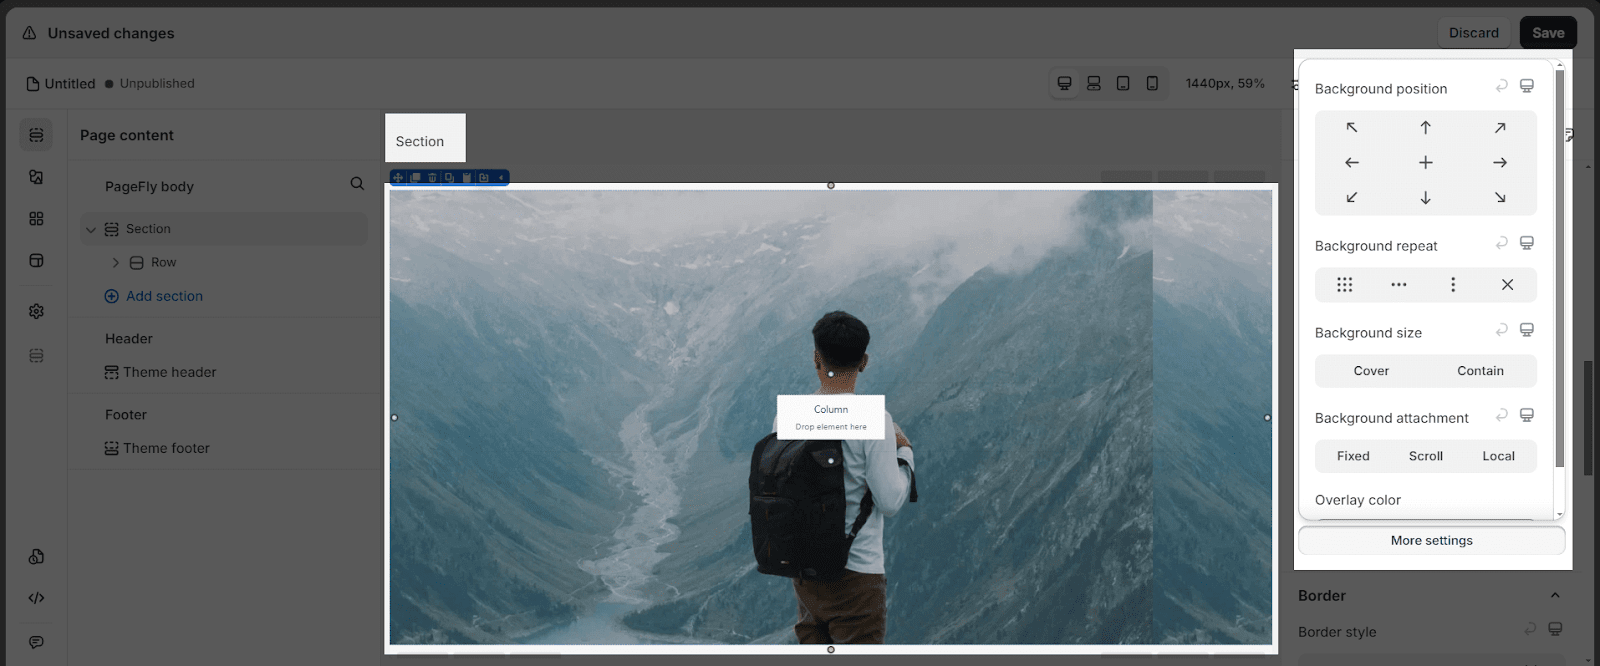
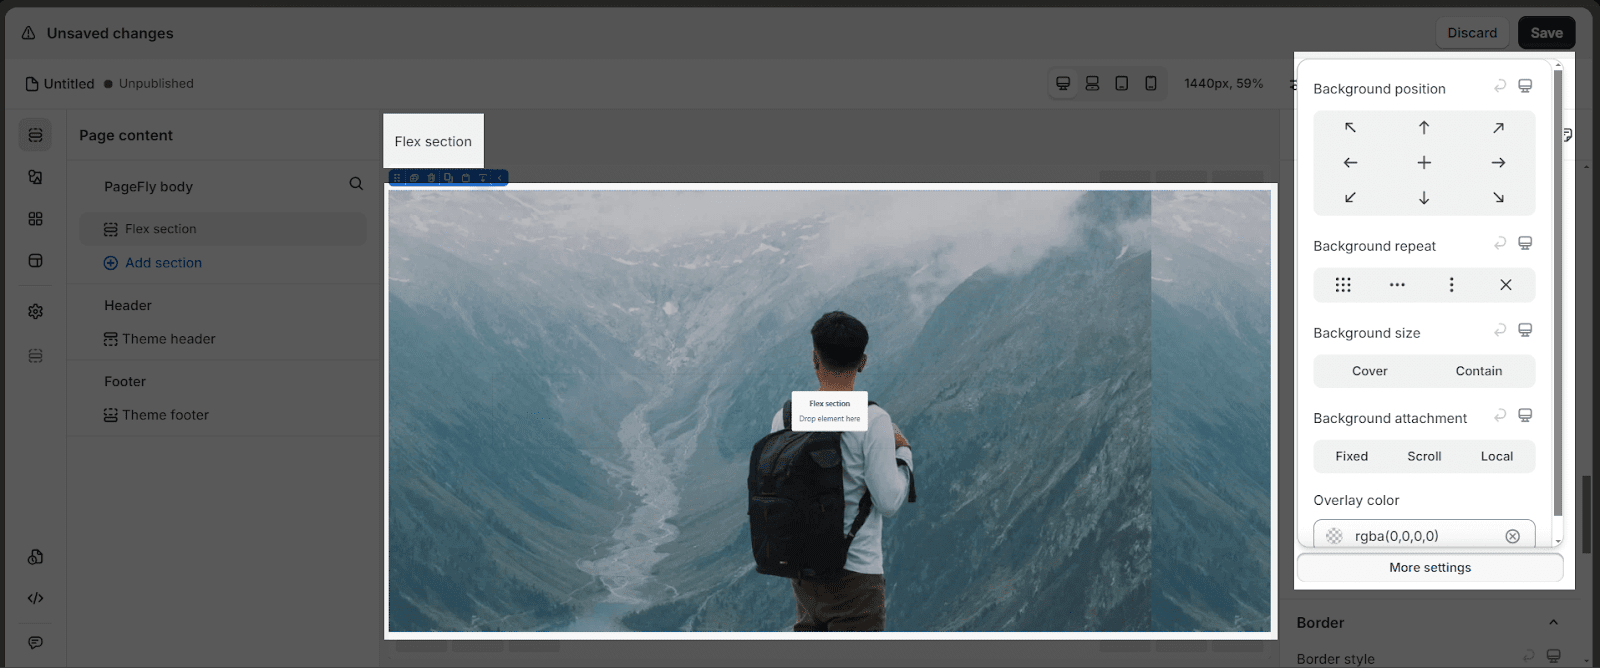
Scroll down to the BACKGROUND parameter, and click on the More Settings button.
In this case, we choose:
- Center Center for Background Position
- Cover for Background Size
2. Add Store Information
2.1 Add Heading
PageFly Heading Element is essential to create and optimize catchy content aka SEO title, to grab customer attention, in order to increase conversion rate. For more information, refer to this article.
2.1.1. Choose The Heading
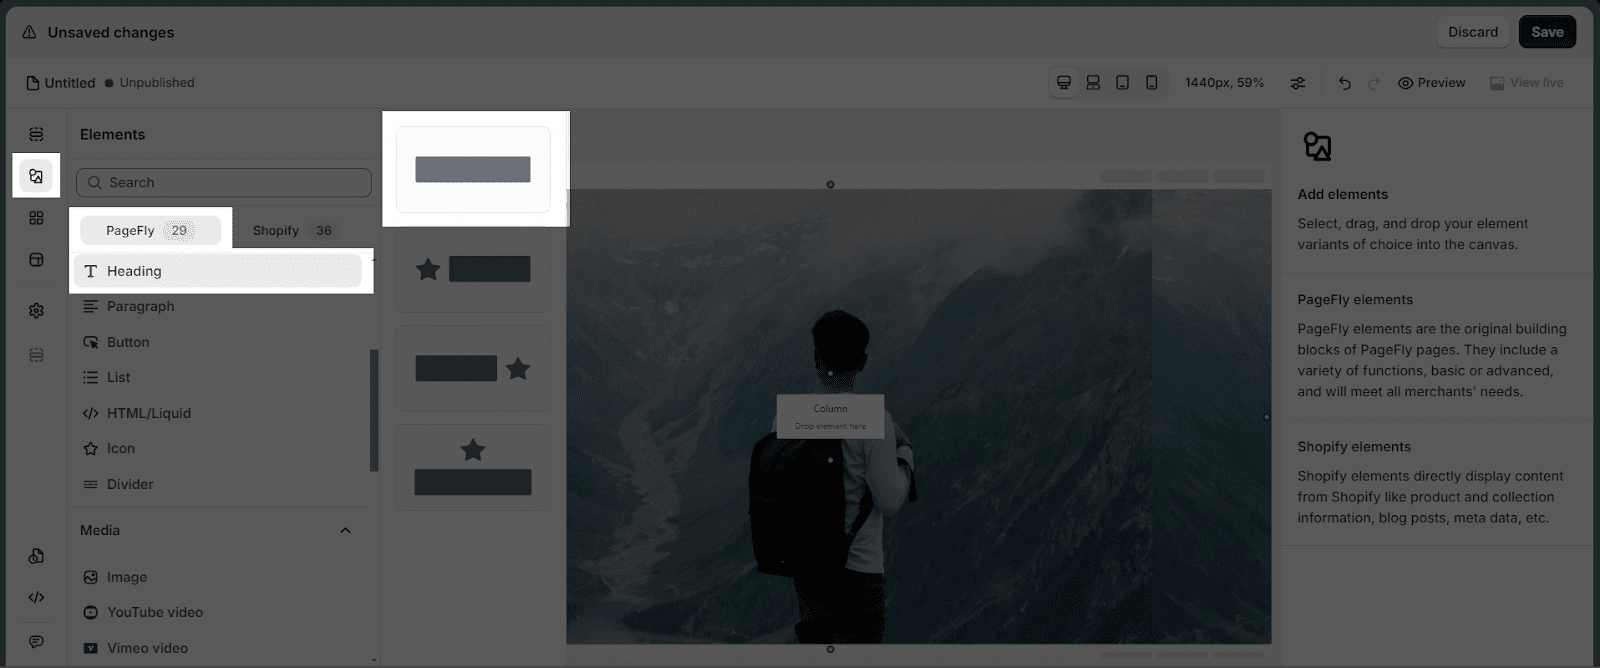
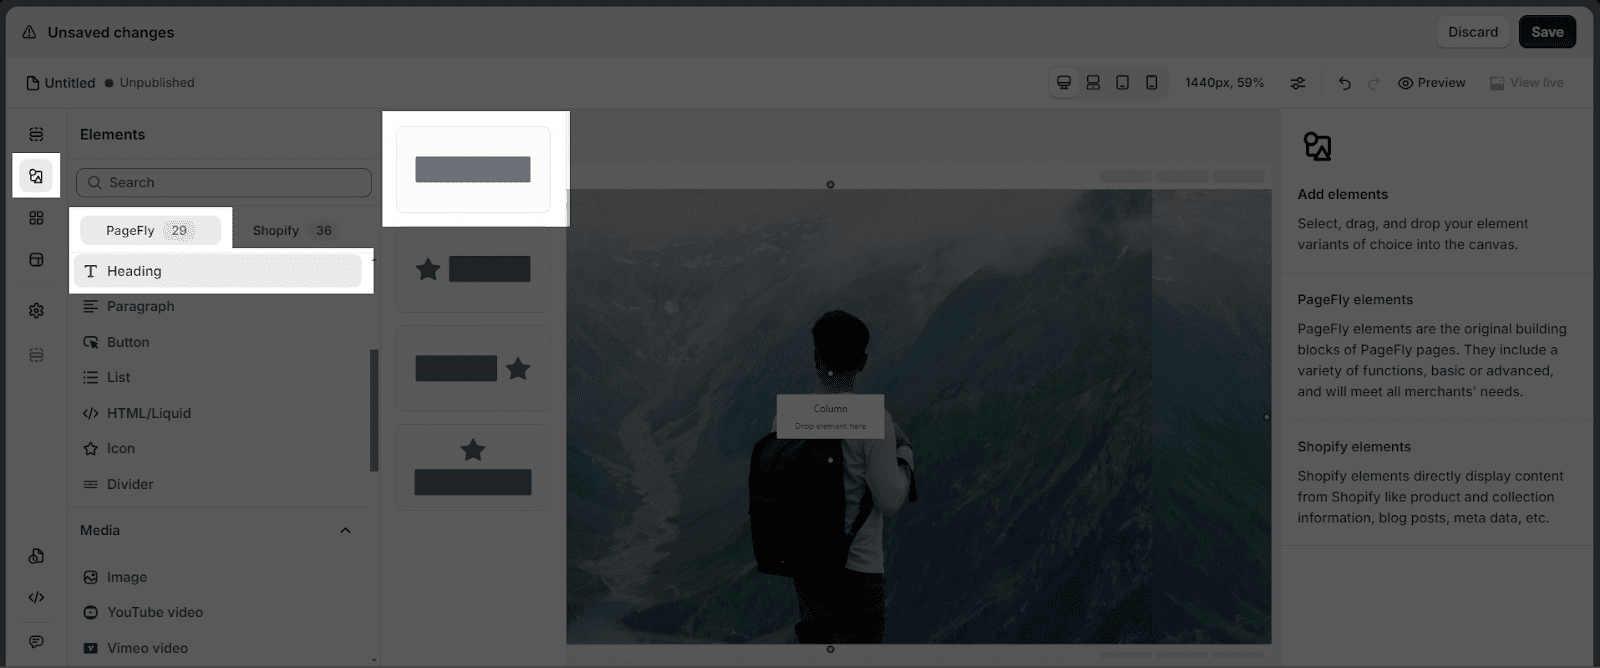
- Step 1: Click on the Plus icon which is the Elements function
- Step 2: Click on the Heading element in the PageFly section
- Step 3: Drag and drop the element you want into the page editor and then start using it.
2.1.2. Add Text To The Heading
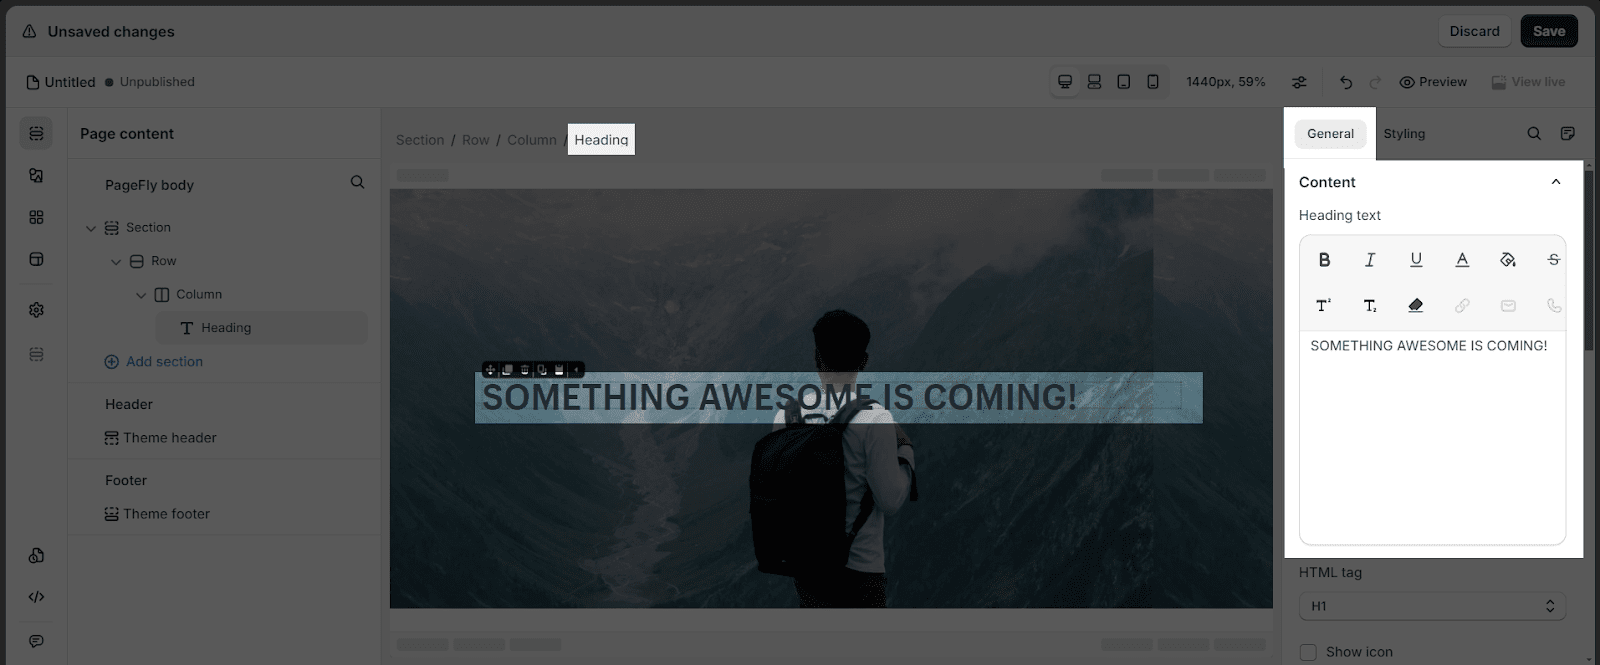
From the In the General tab, add text
2.1.3. Style The Headings
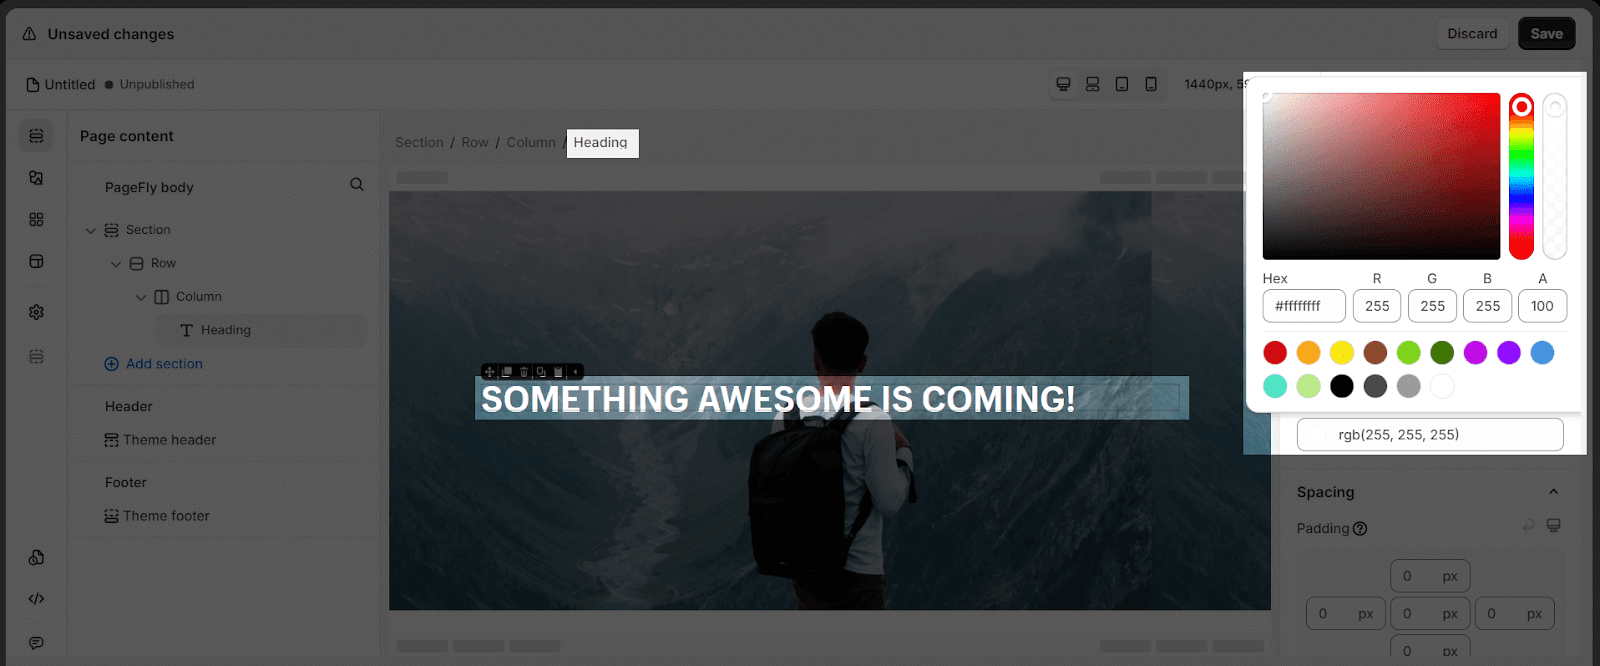
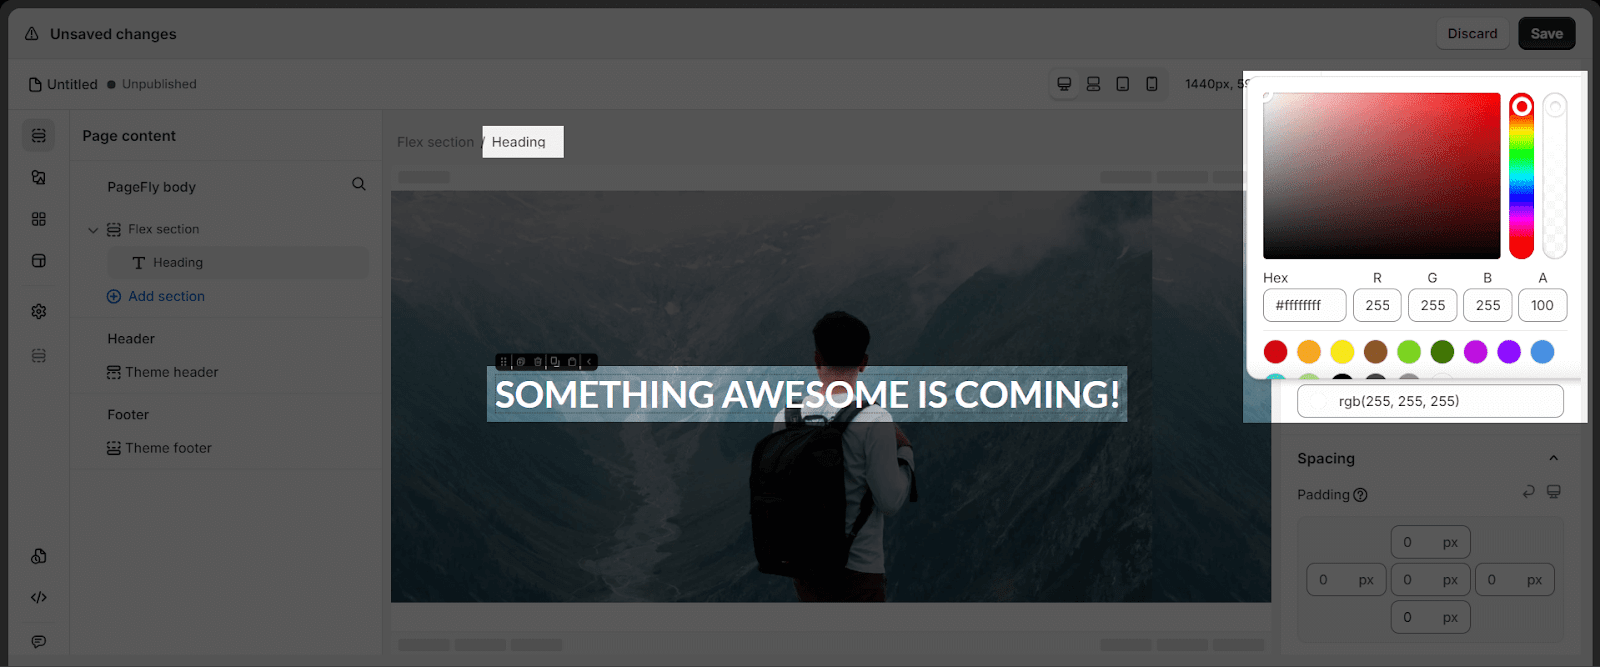
- Head to the Styling tab, in Content color, and choose the preferred color for your heading
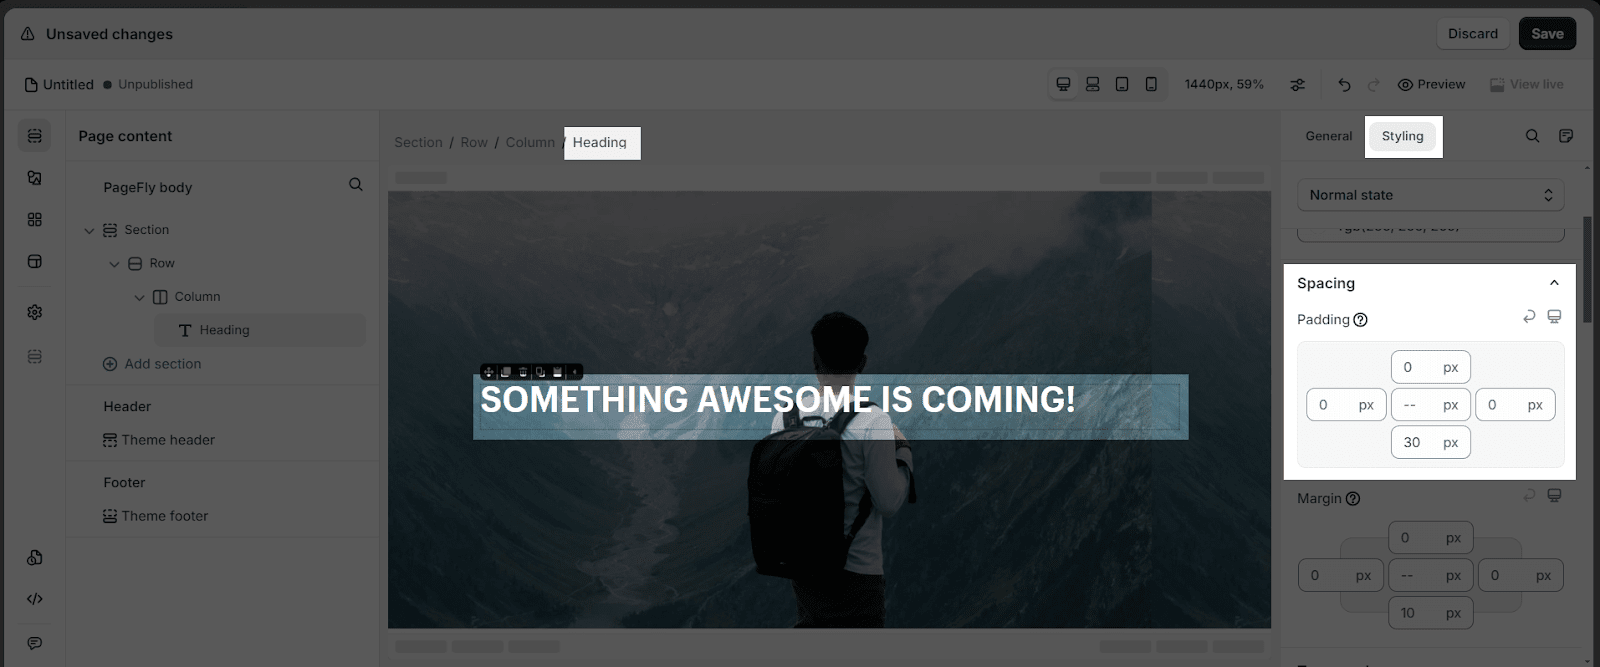
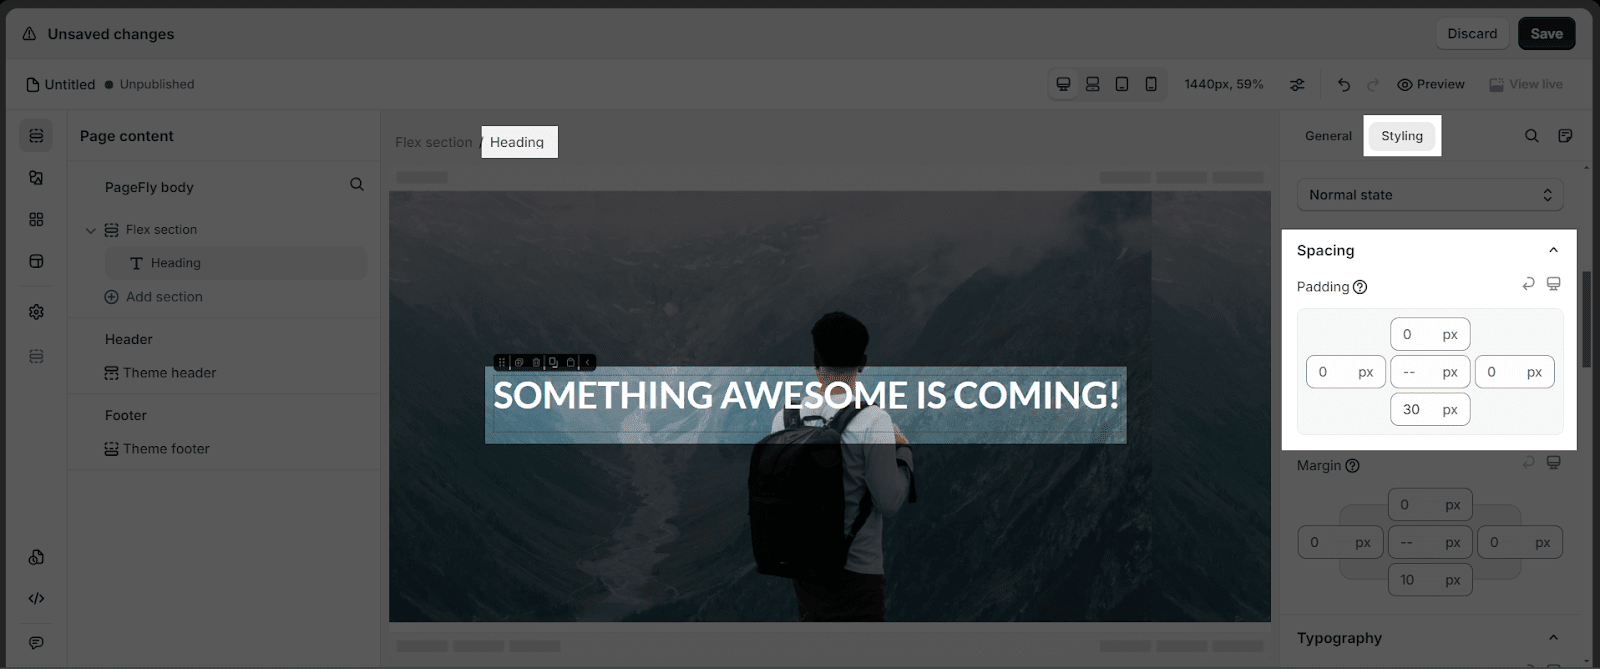
- On SPACING, set the margin-top to 0px and the margin-bottom to 20px to create some space between the header and the paragraph below it.
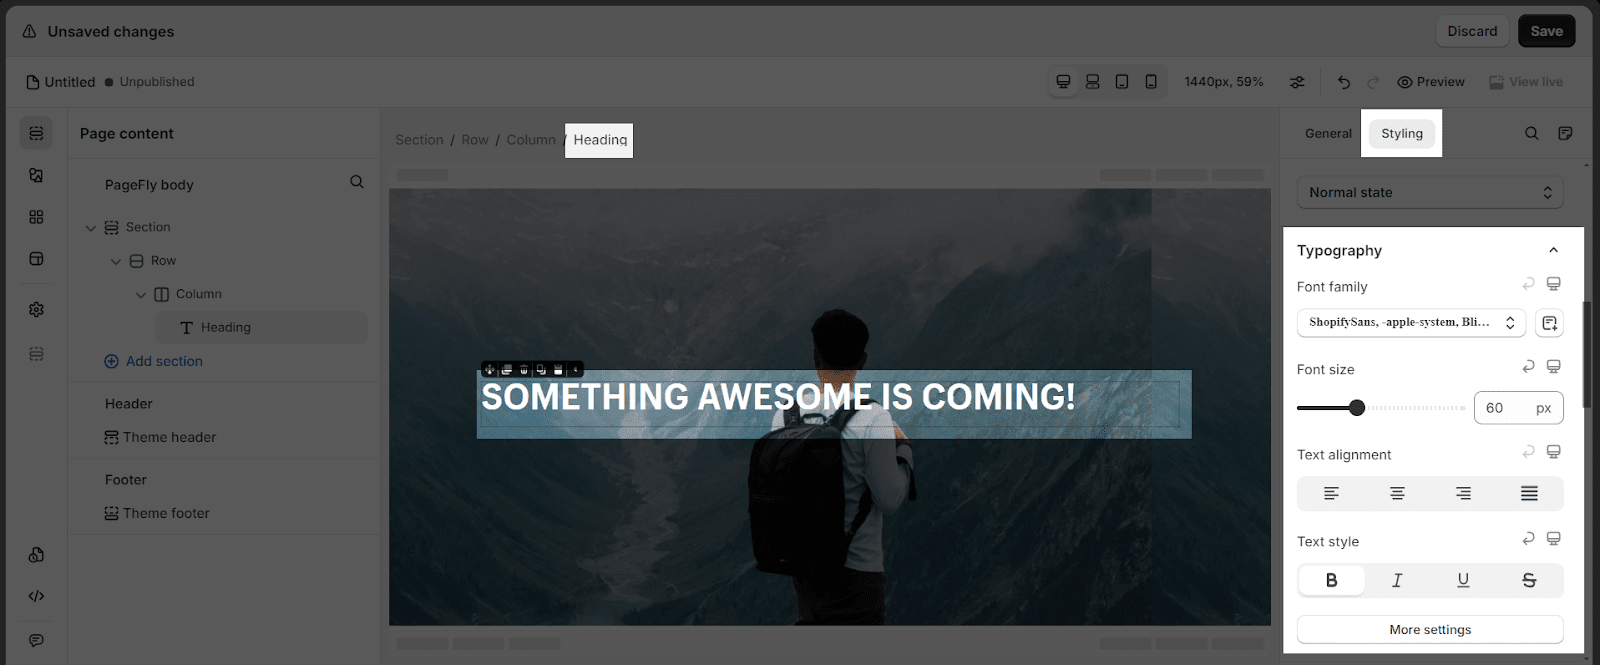
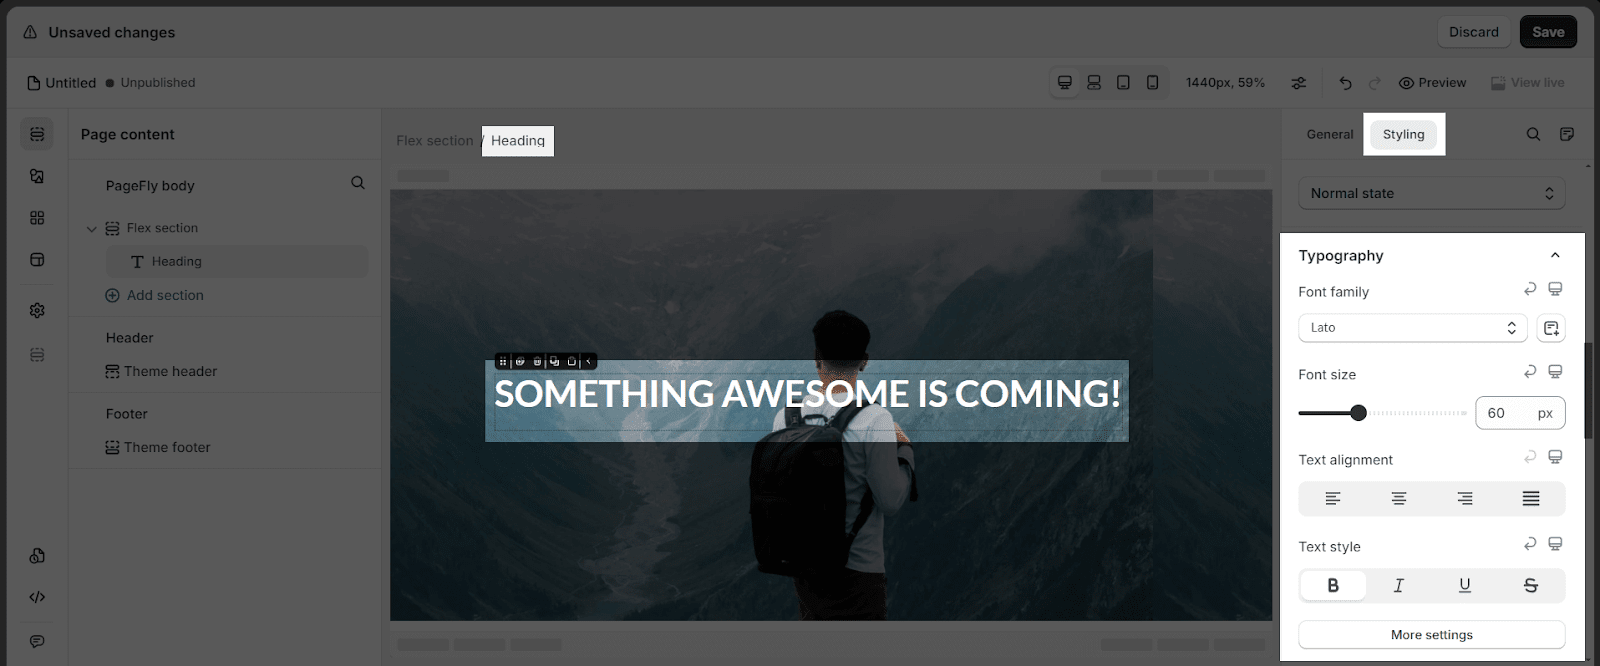
- Scroll down to the TYPOGRAPHY parameter > choose the font family
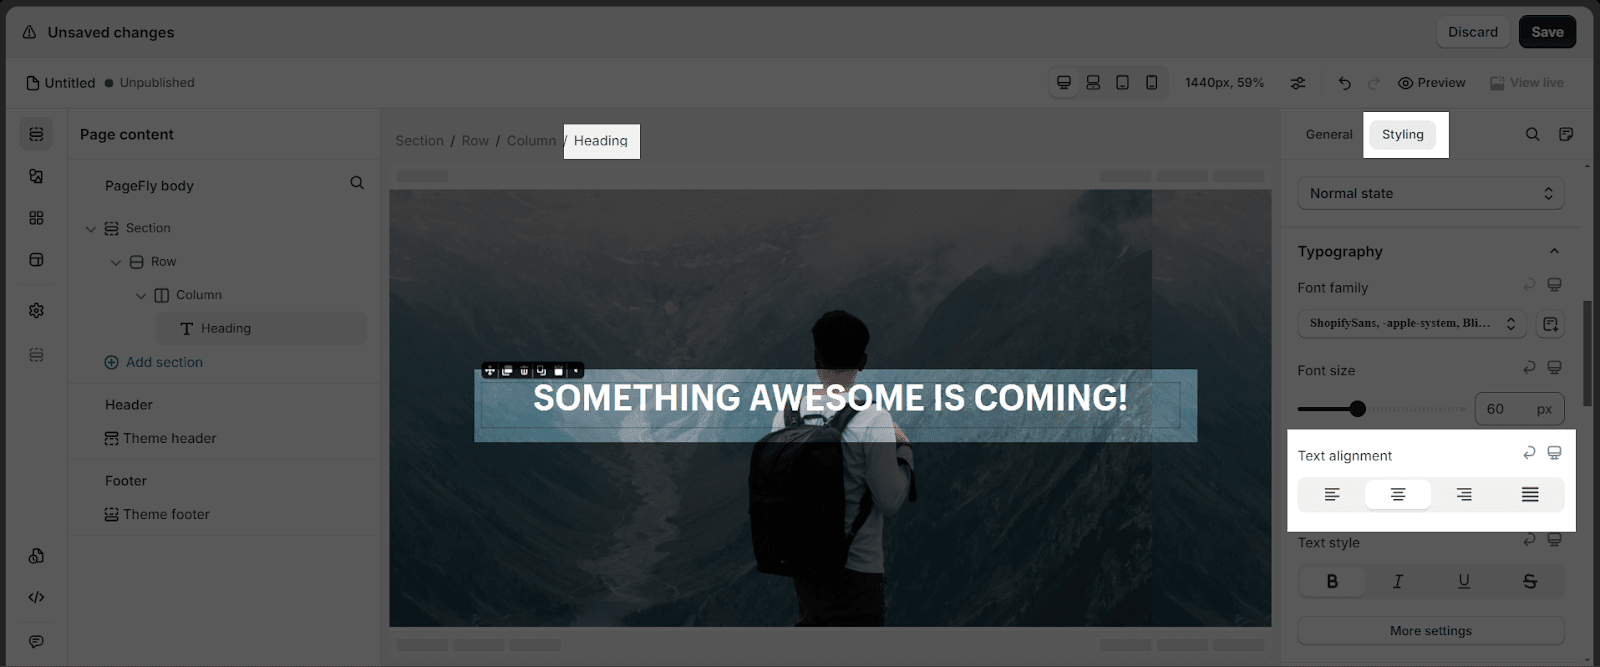
- Choose to align center in the Text Alignment option.
To align the heading, go to Styling tab > Find “Align items” parameter > Select the align center icon
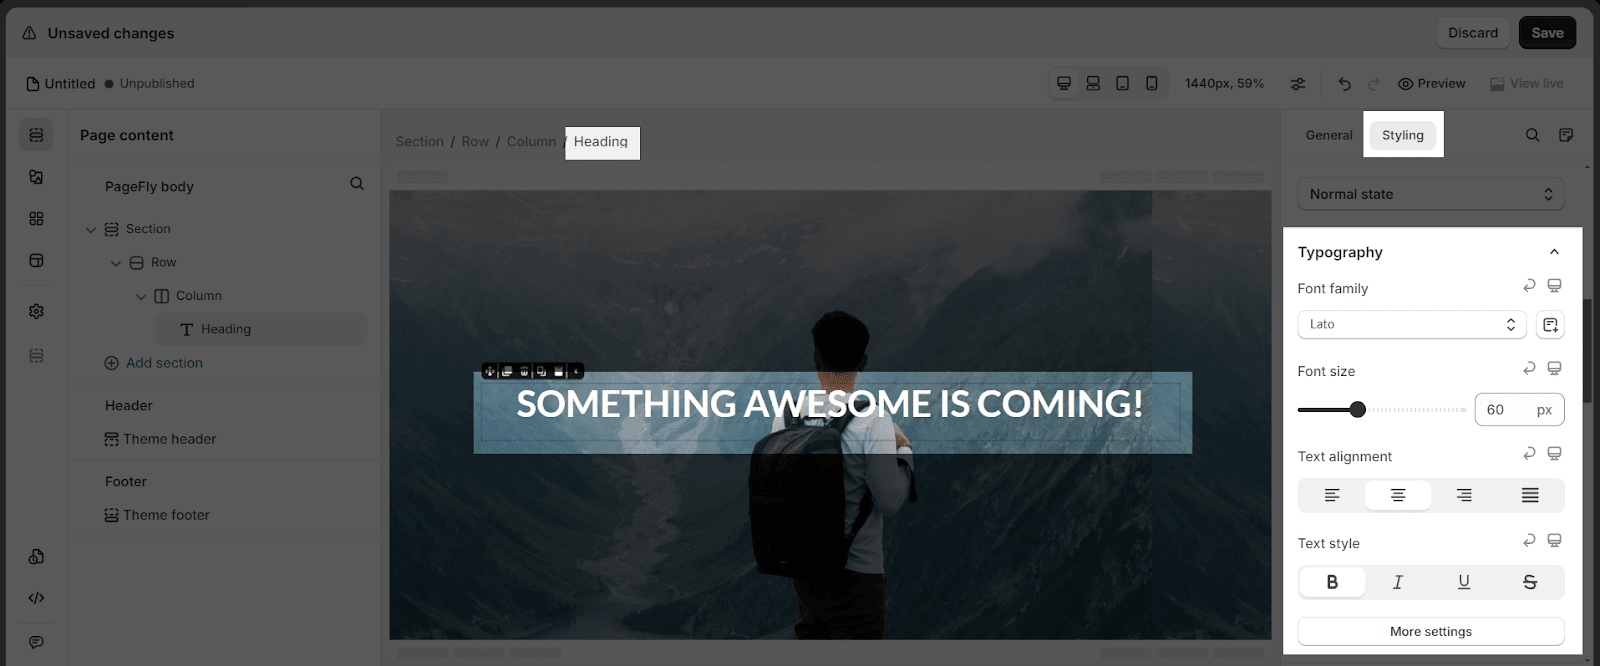
Then, scroll down to the TYPOGRAPHY parameter > choose the font family
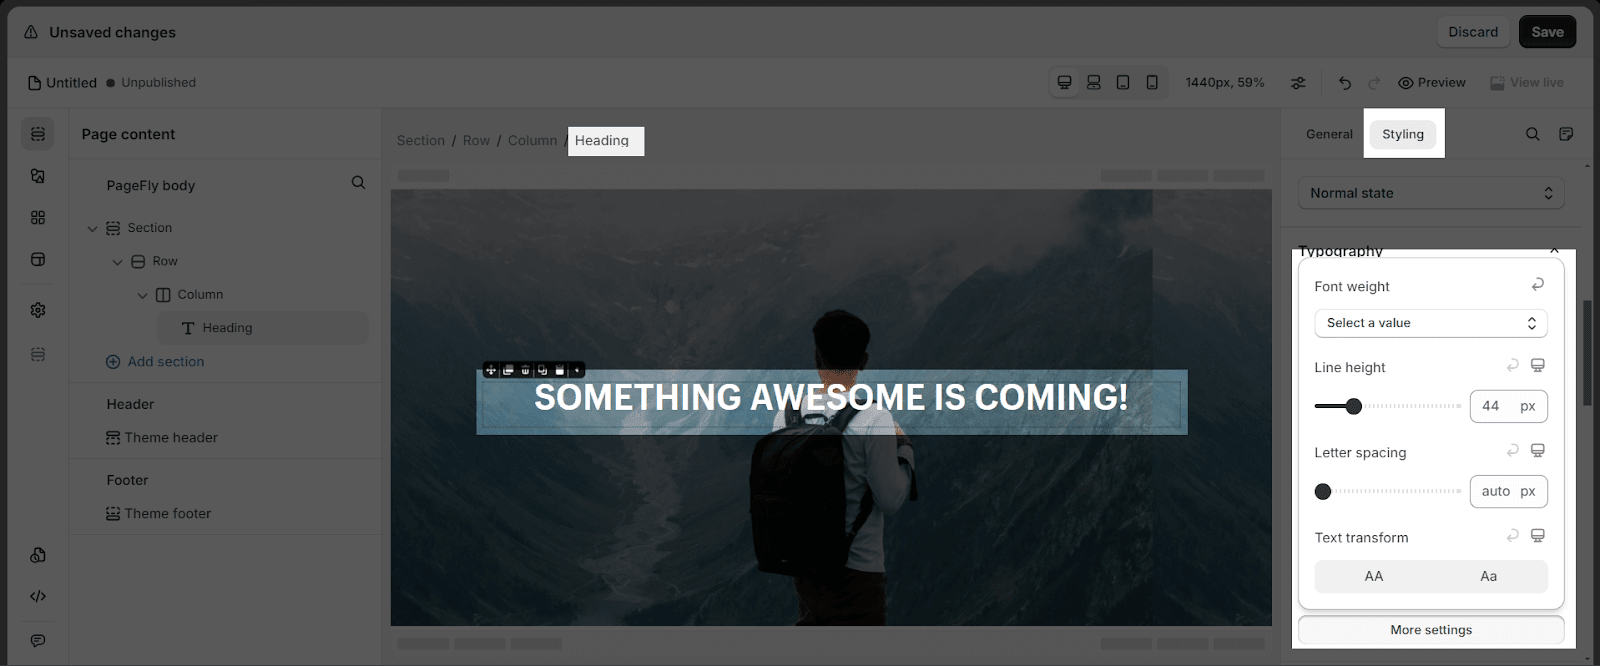
- Click on More Settings
For example, we chose the Font Family “Lato” and set up 60px for the Font Size. Set the Bold for the Font Weight and the 64px for the Line Height.
2.2 Add A Paragraph
2.2.1. Choose The Paragraph
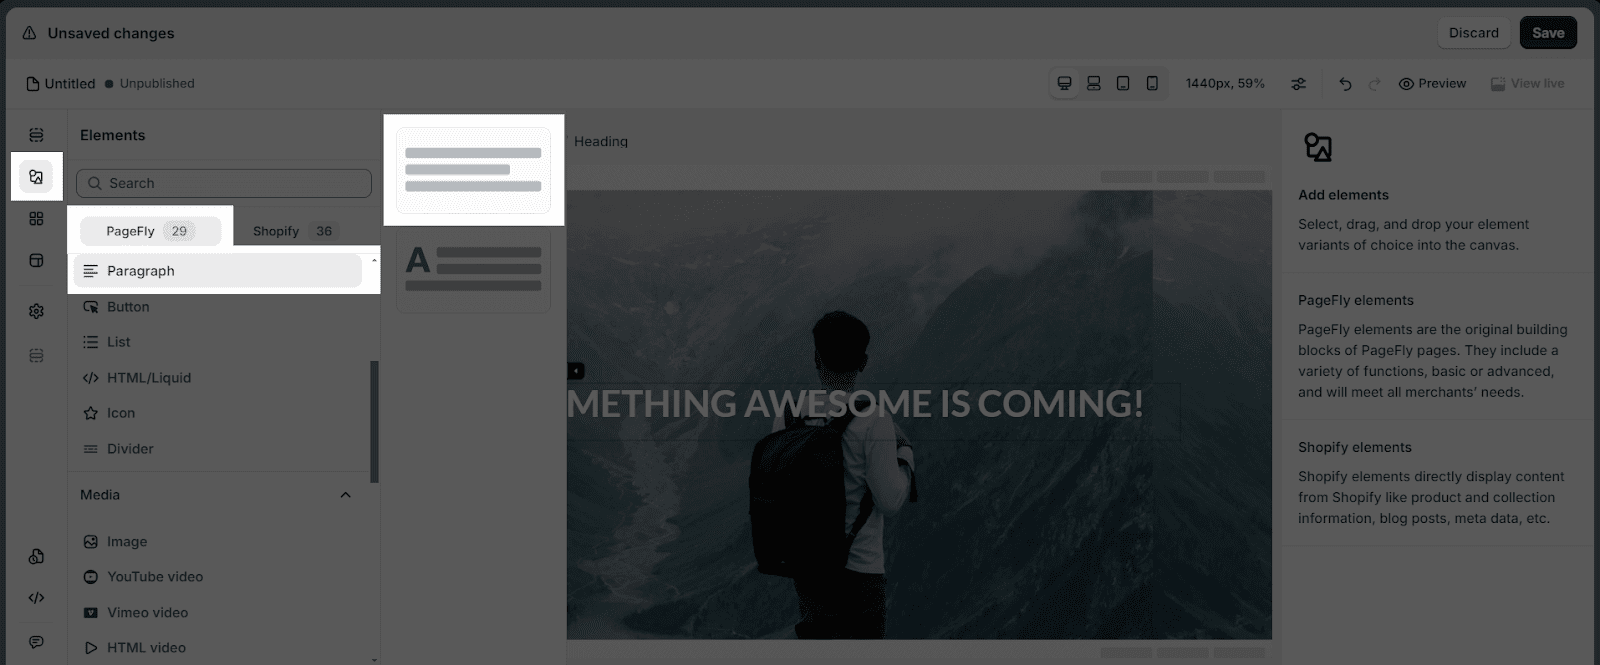
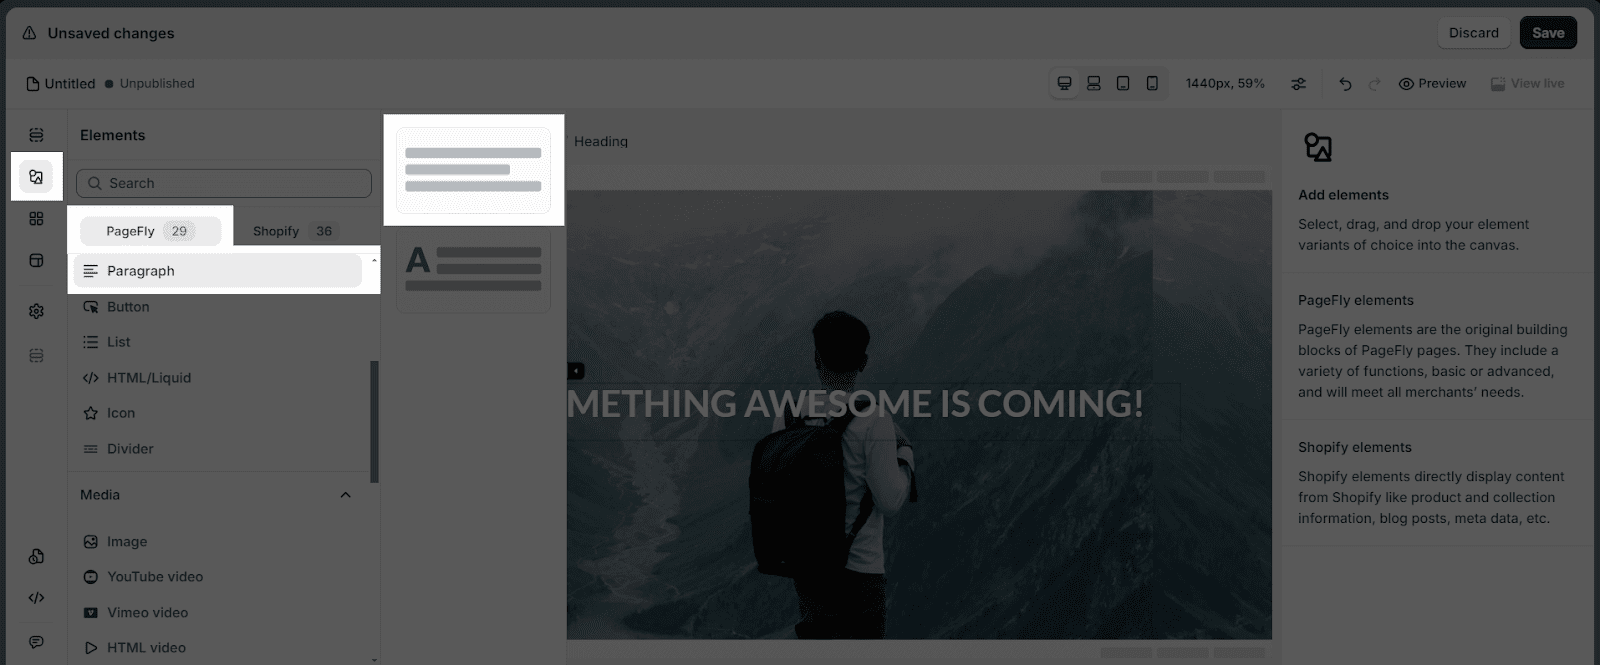
- Click the Add element icon > Choose the Paragraph element > Drag and drop the first variant into the page editor.
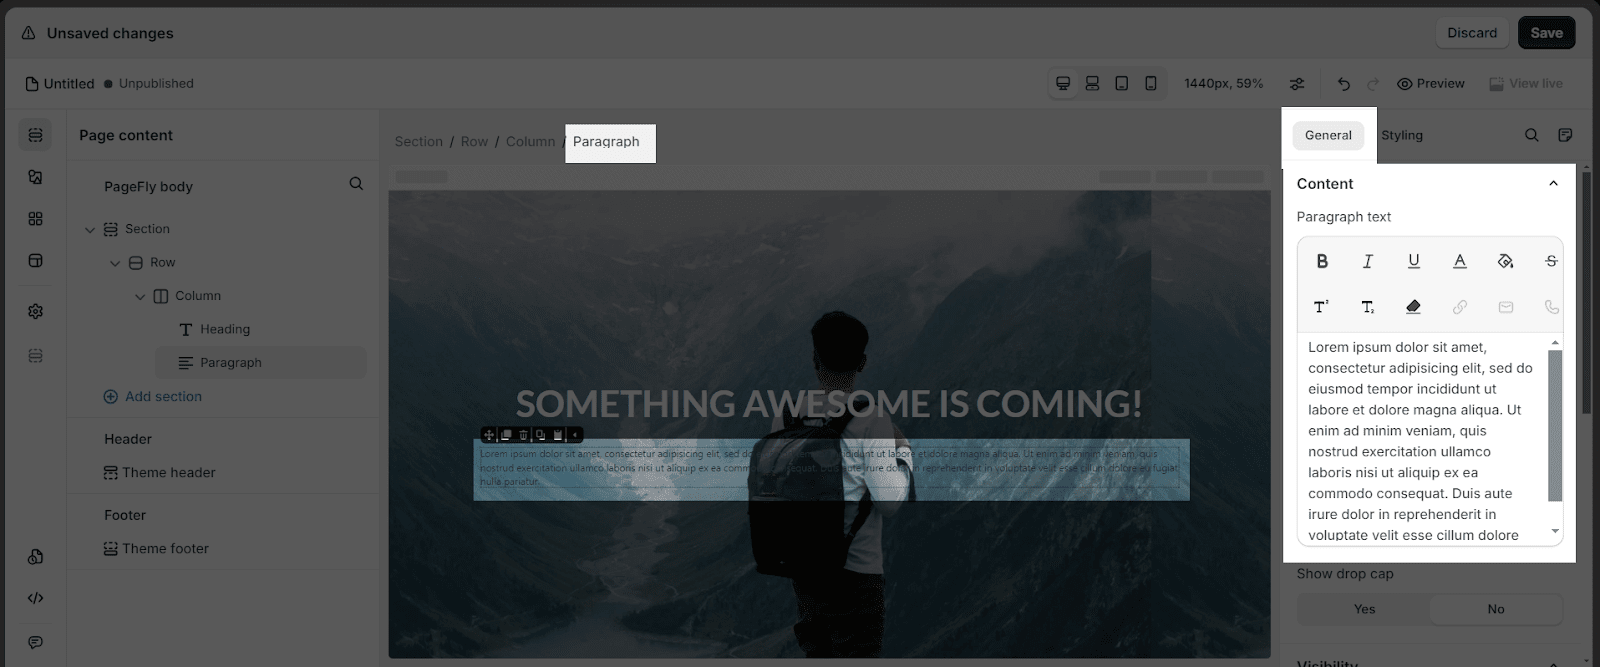
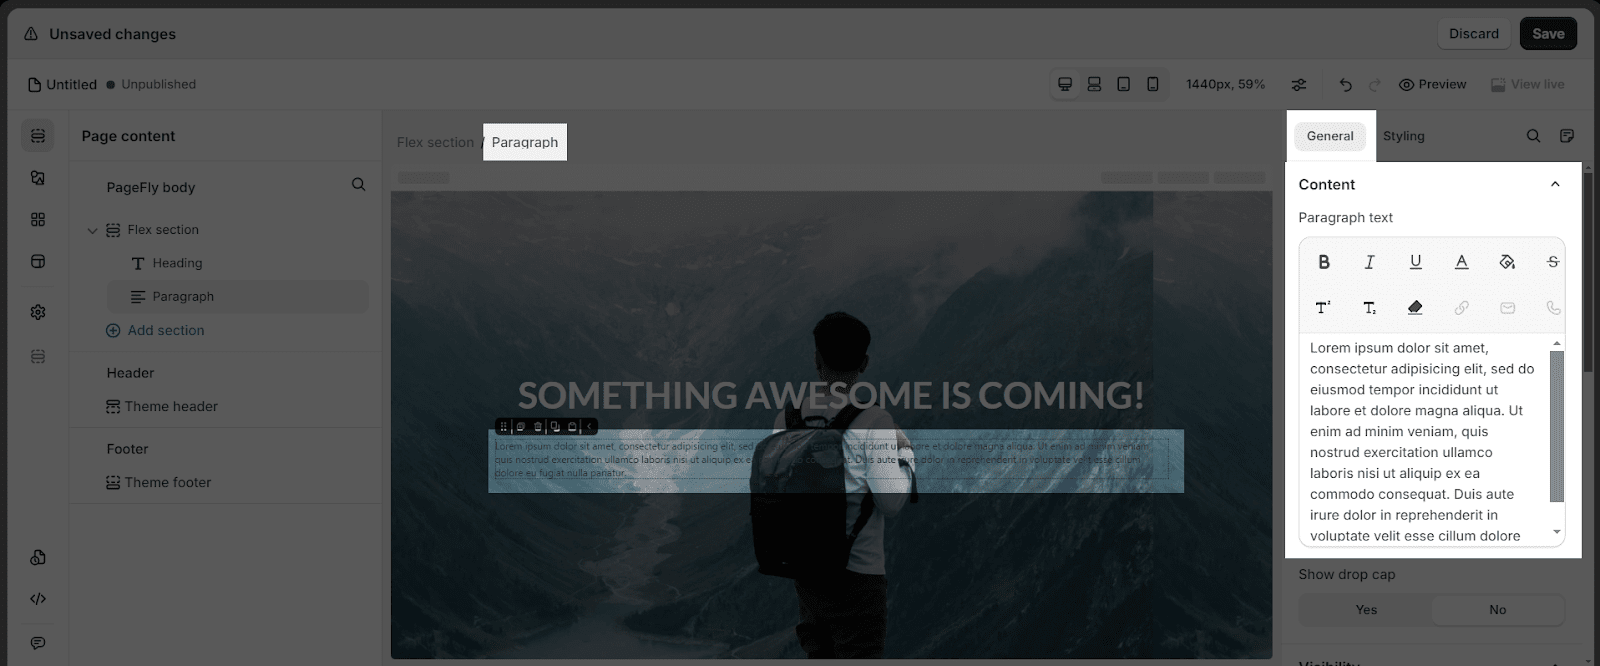
- In the General tab, add more details about the estimated release time or undercover the reason behind a delayed launch.
2.2.2. Style The Paragraph
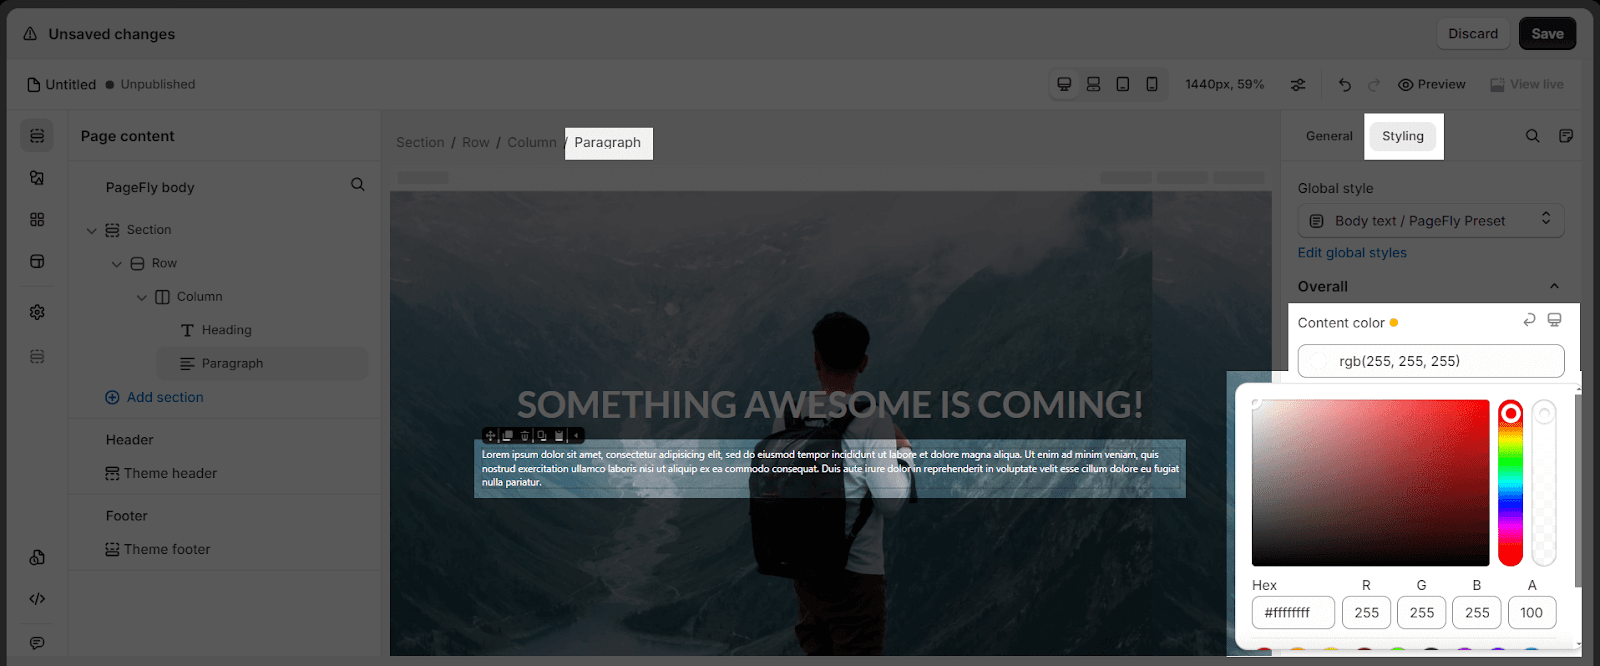
Go to the “Styling” tab
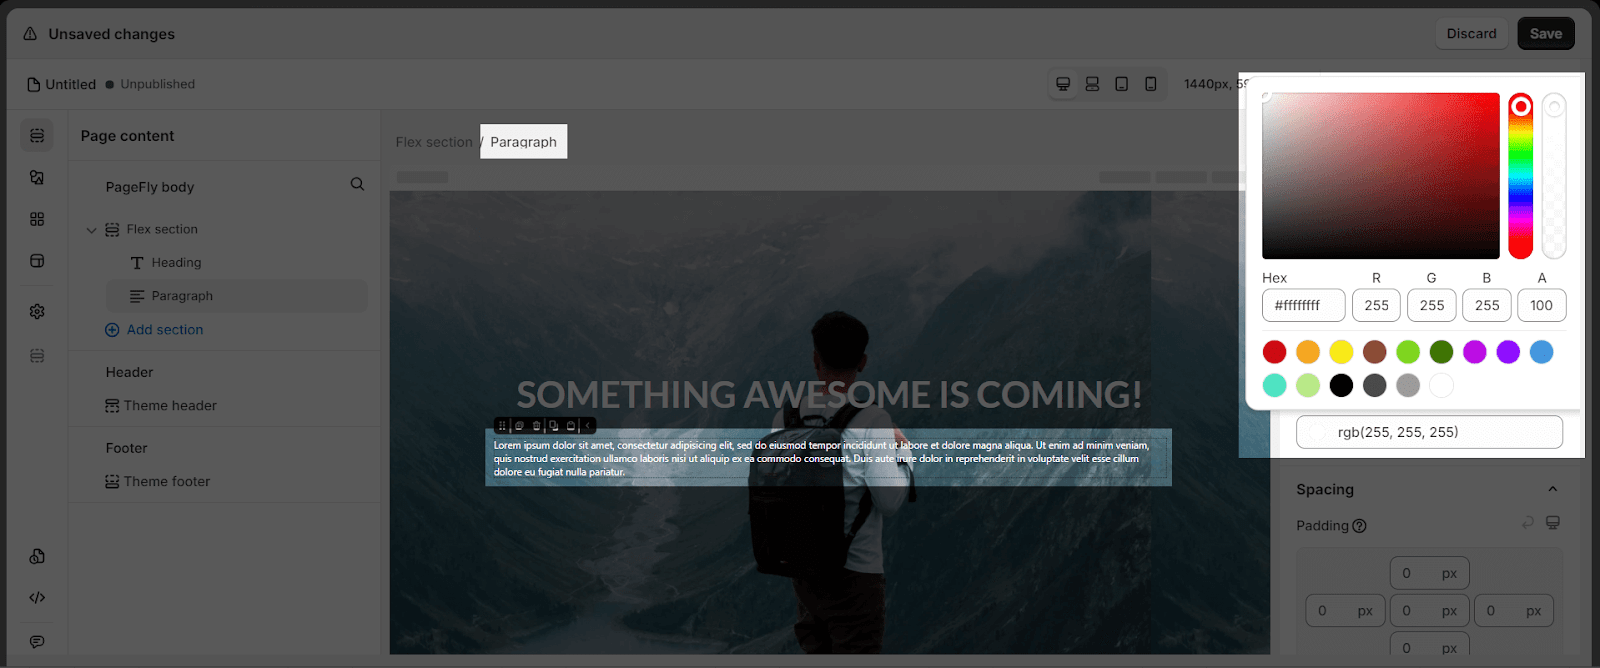
In Content color, select your preferred color for the paragraph content
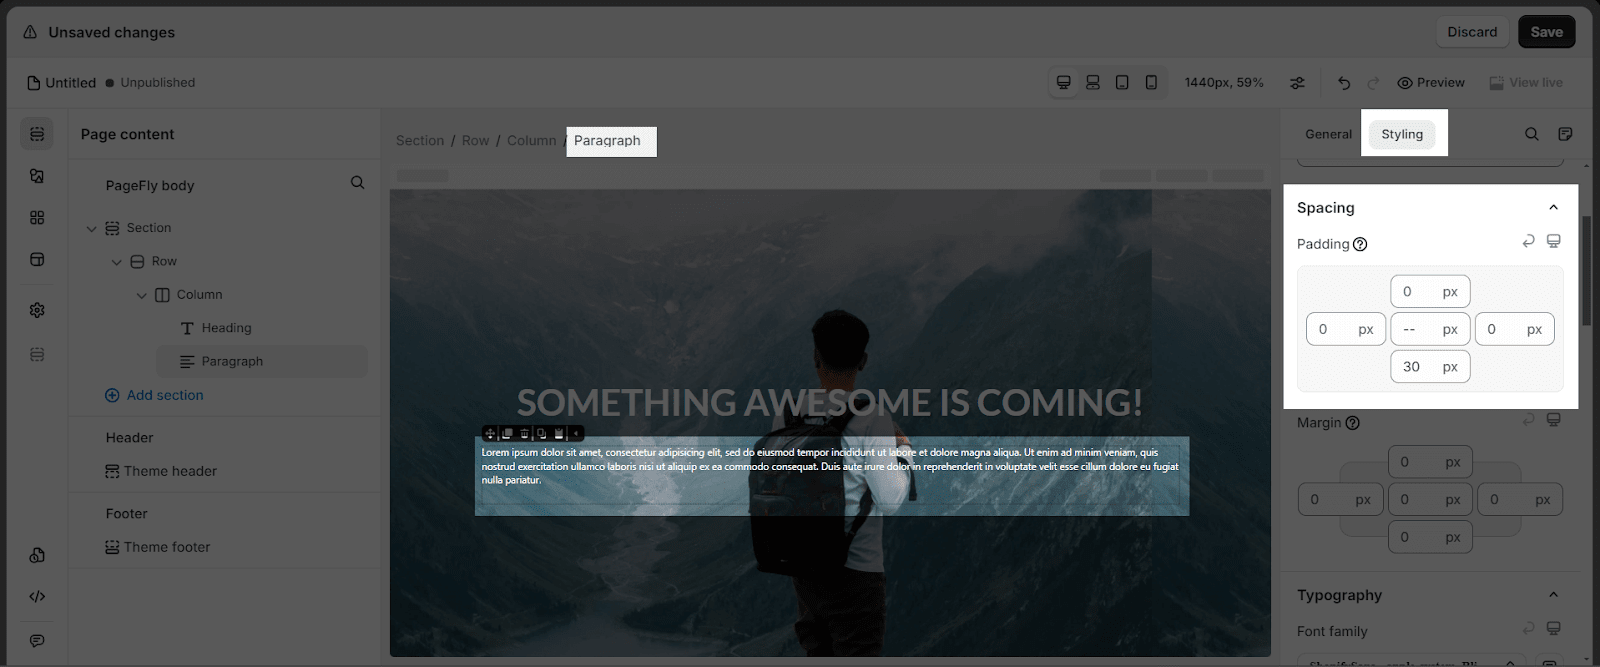
- On SPACING, set the margin-top to 0px and the margin-bottom to 40px to create some space between the header and the paragraph below it.
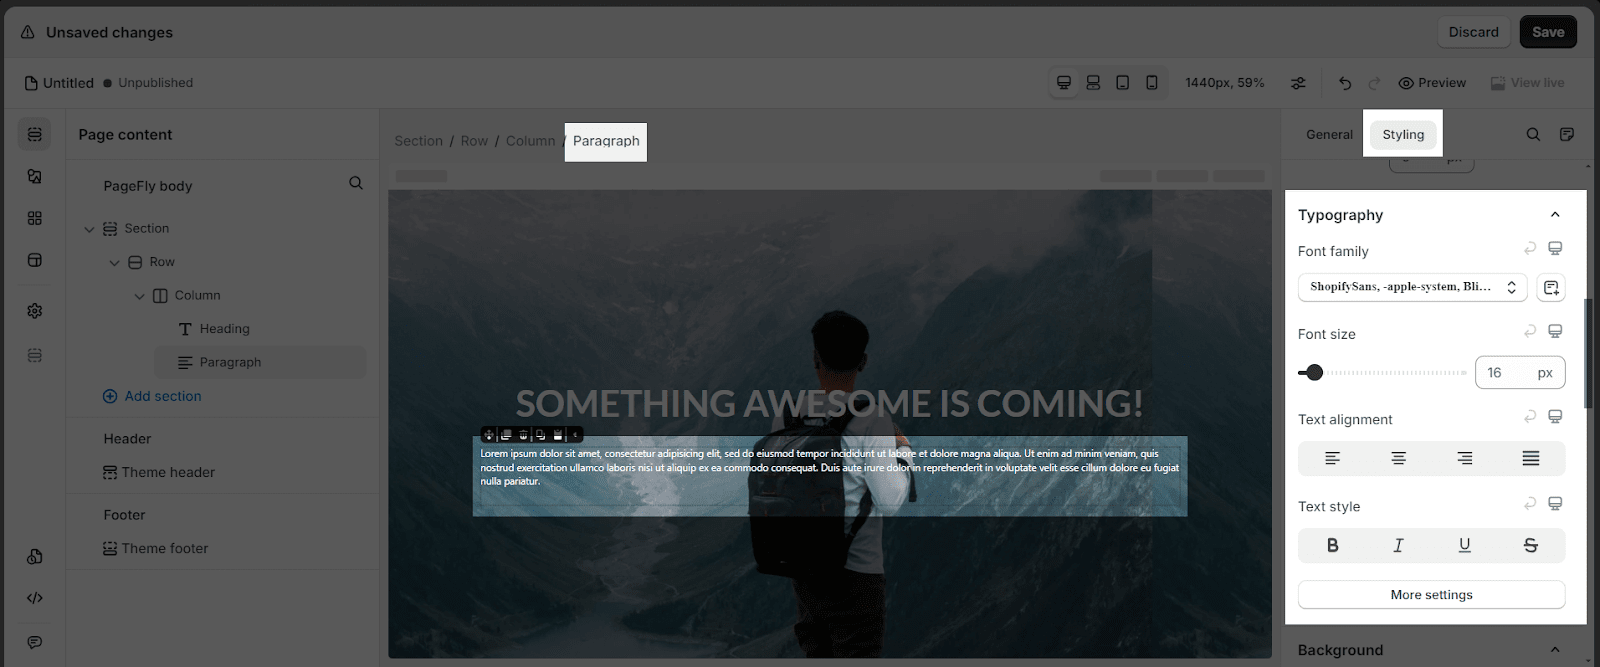
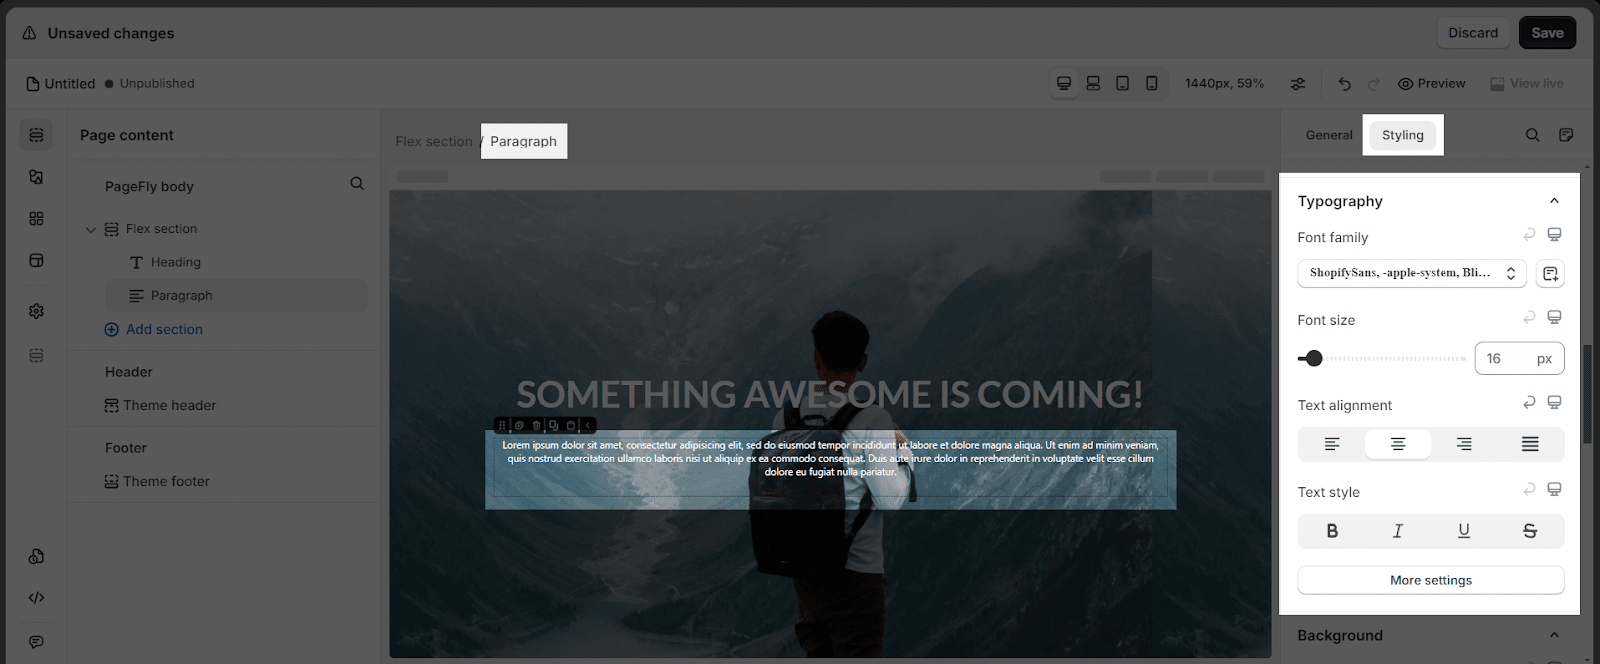
- Scroll down to the TYPOGRAPHY parameter > choose the font family
- Choose to align center in the Text Alignment option.
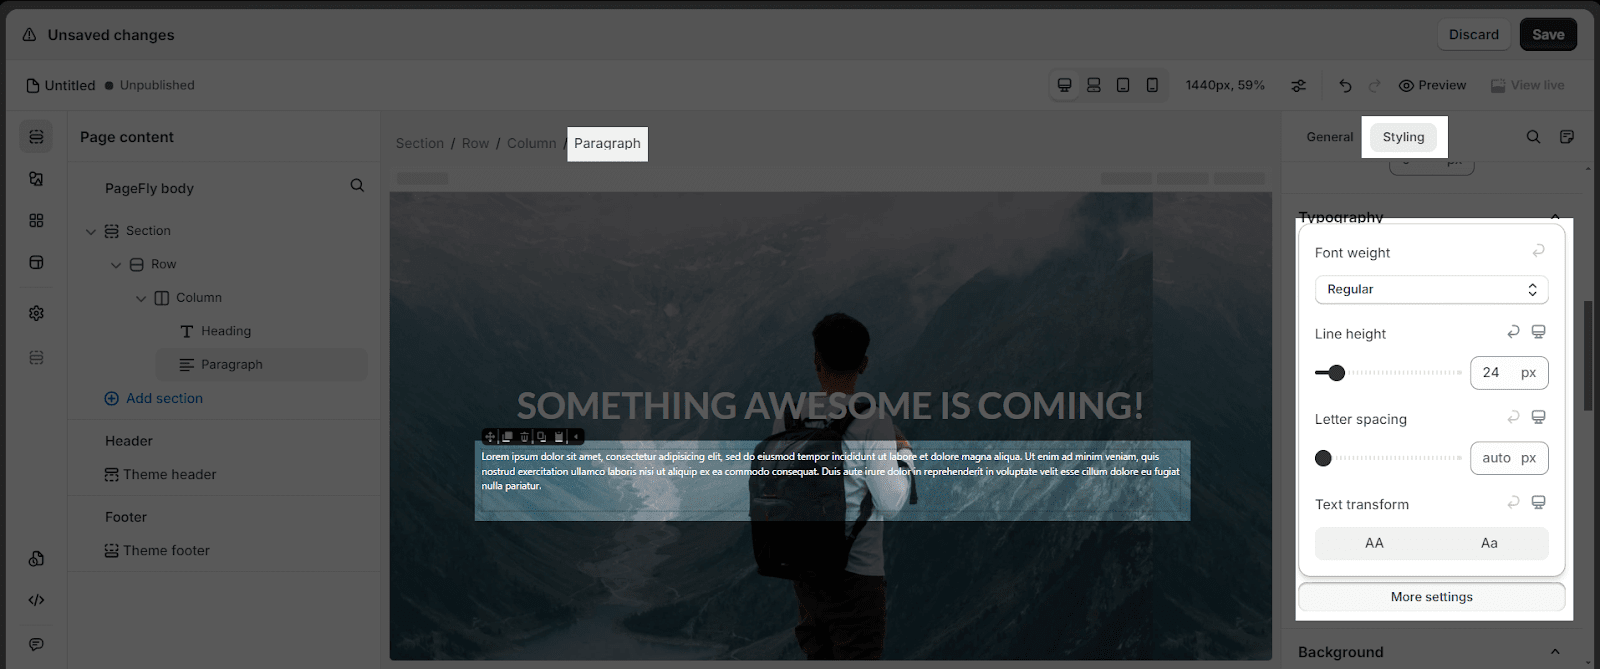
- Click on More Settings
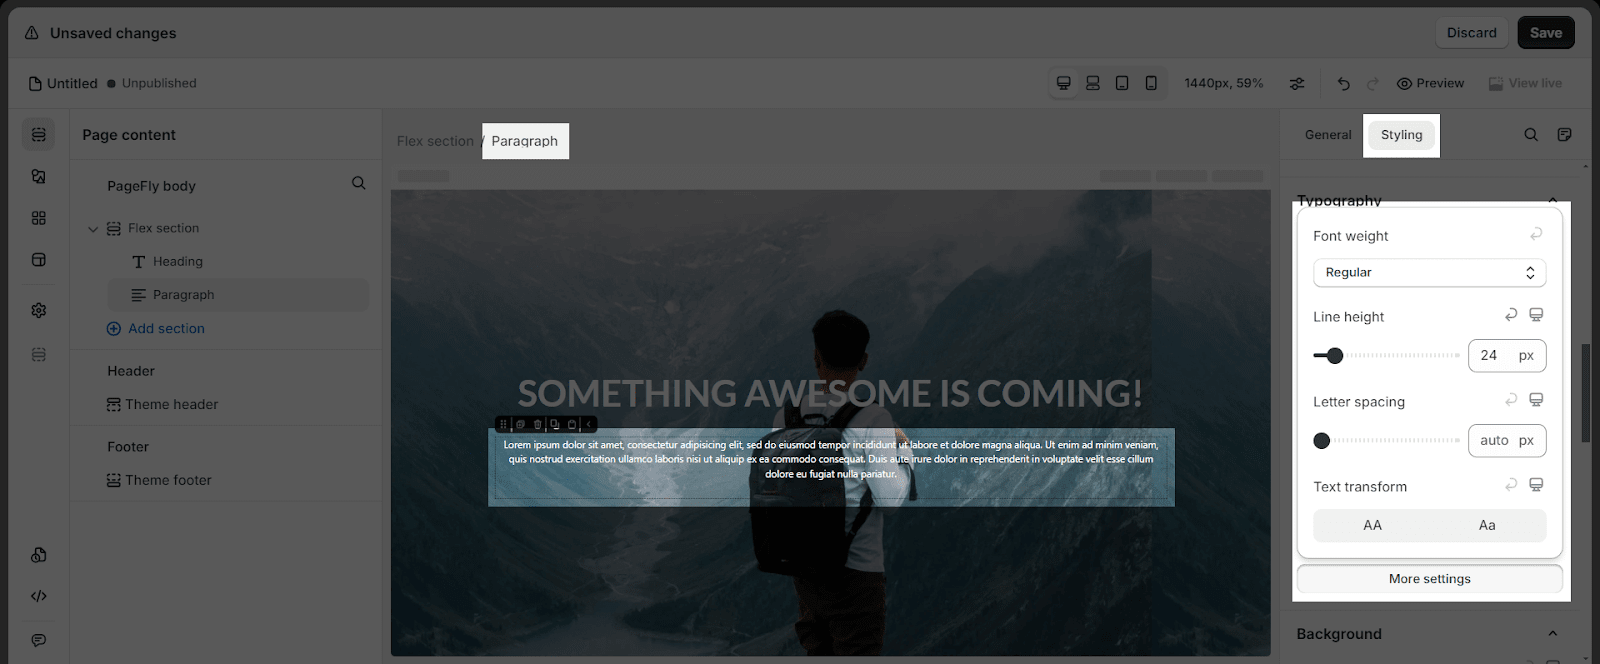
For example, we chose the Font Family “Shopifysans” and set up 16px for the Font Size. Set the Regular for the Font Weight and the 24px for the Line Height.
3. Create A Customer Form
Having a customer form on your coming soon page will help capture valuable leads, build anticipation, and provide essential customer data for targeted marketing efforts. For more information, refer to this article.
3.1. Choose A Form
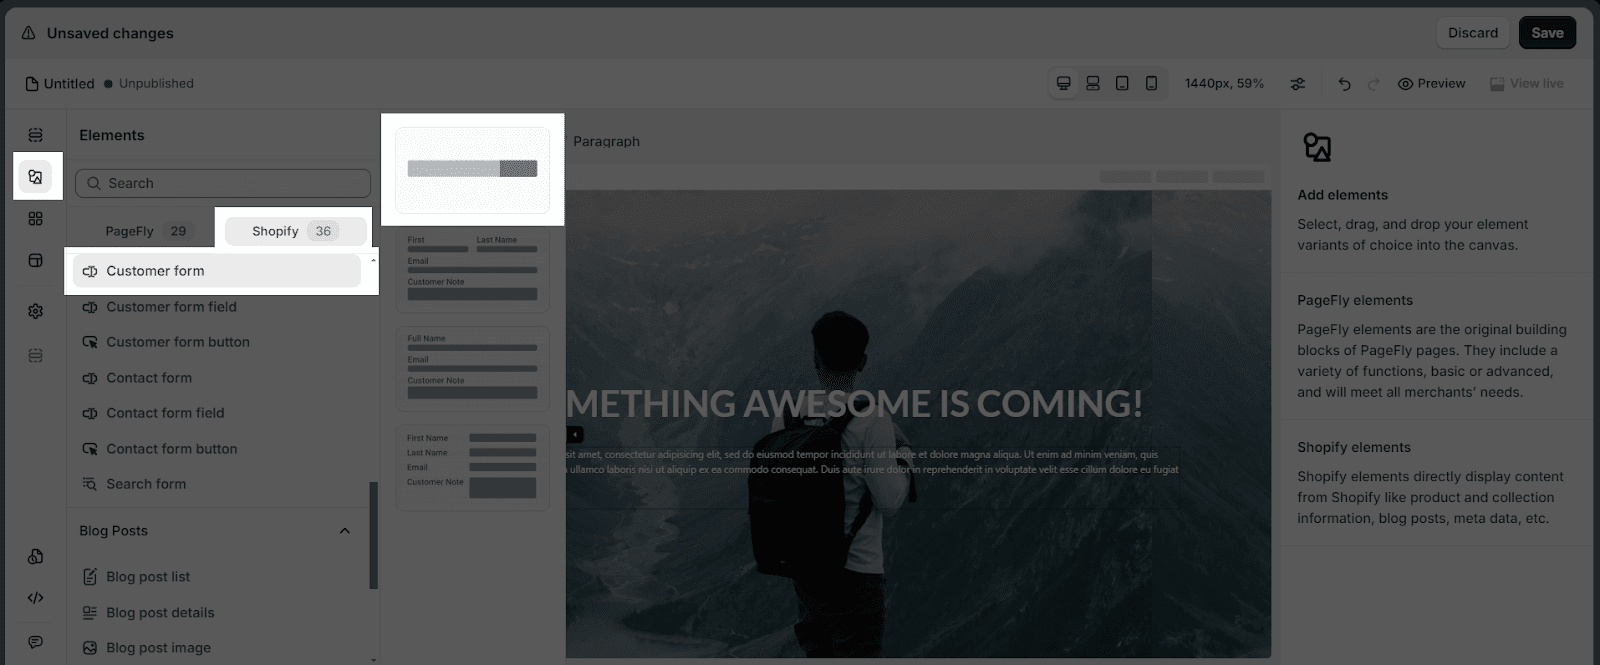
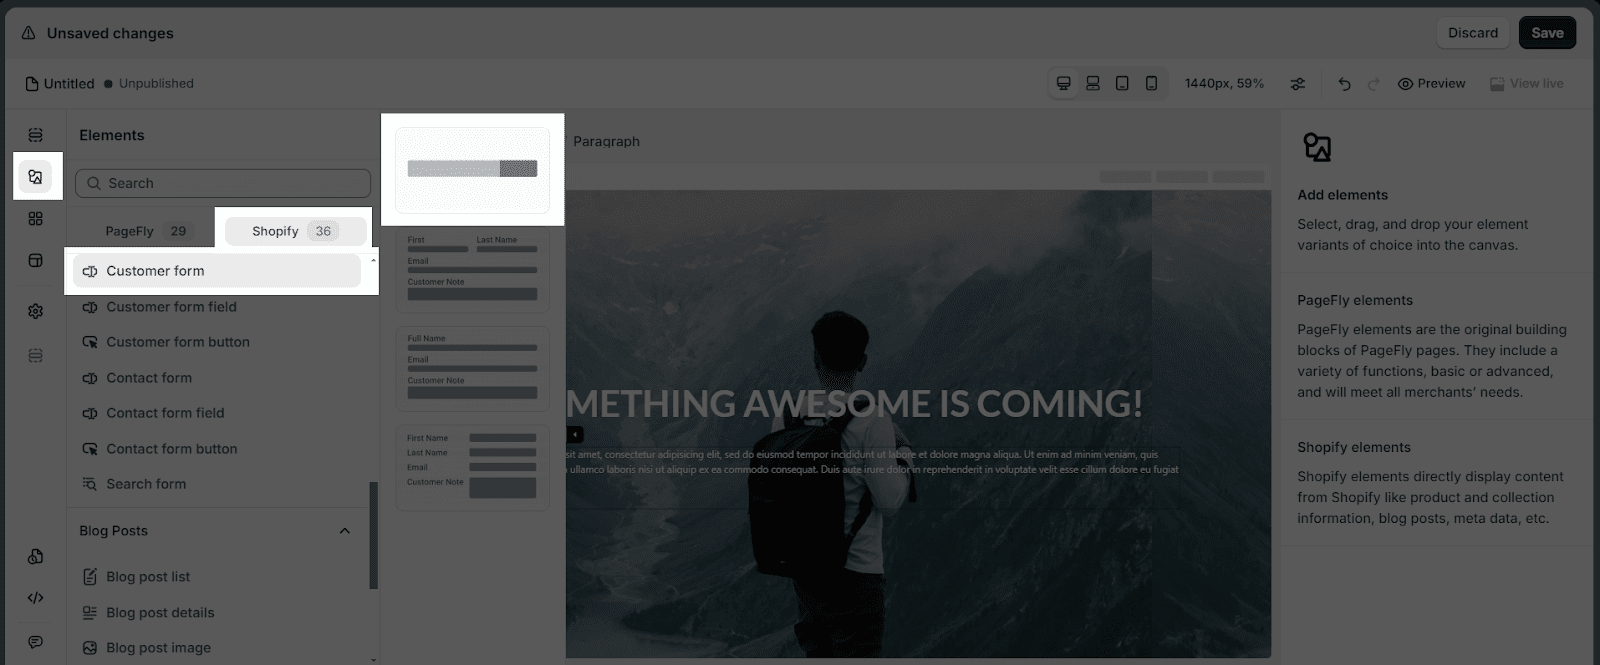
On the left sidebar of the Editor, click on the Shopify section > Choose the Customer Form element > Drag & drop the first variant into the page editor.
3.2. Style That Form
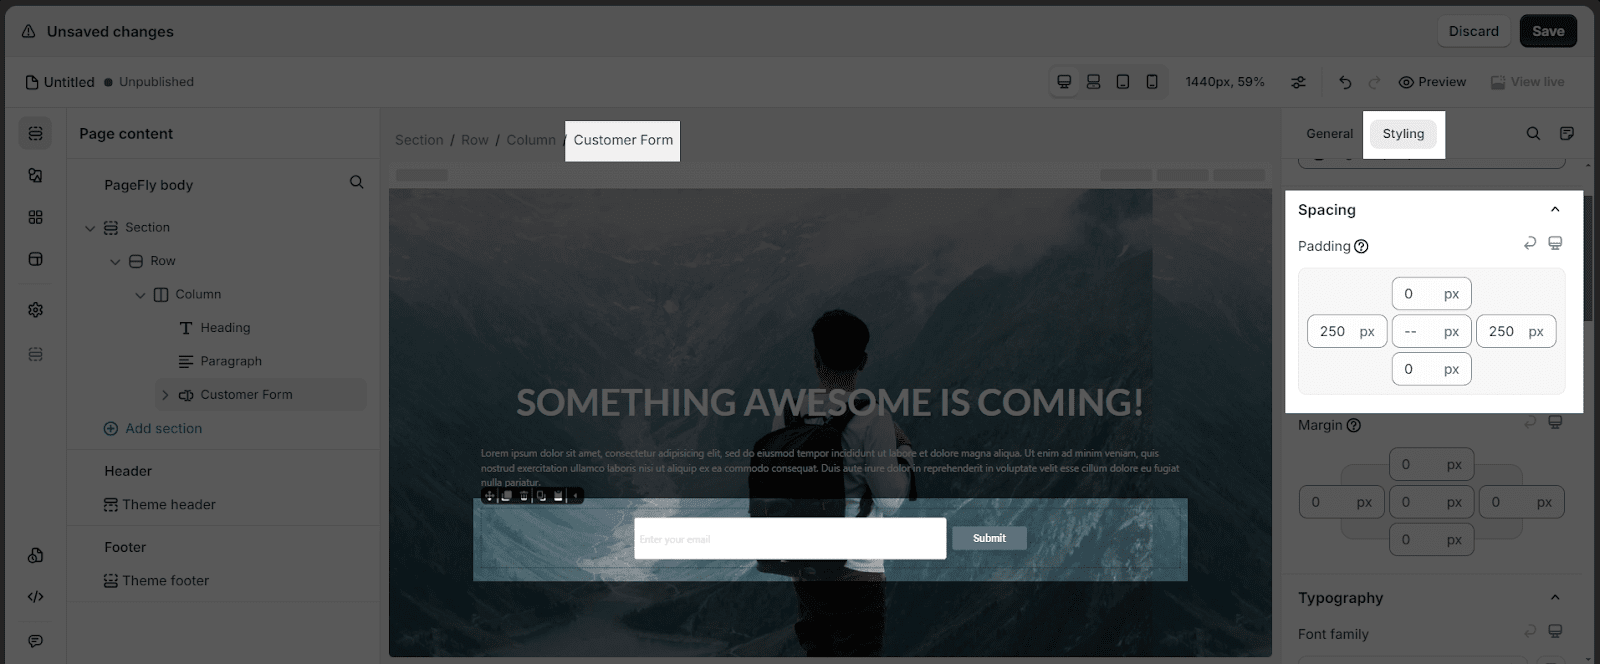
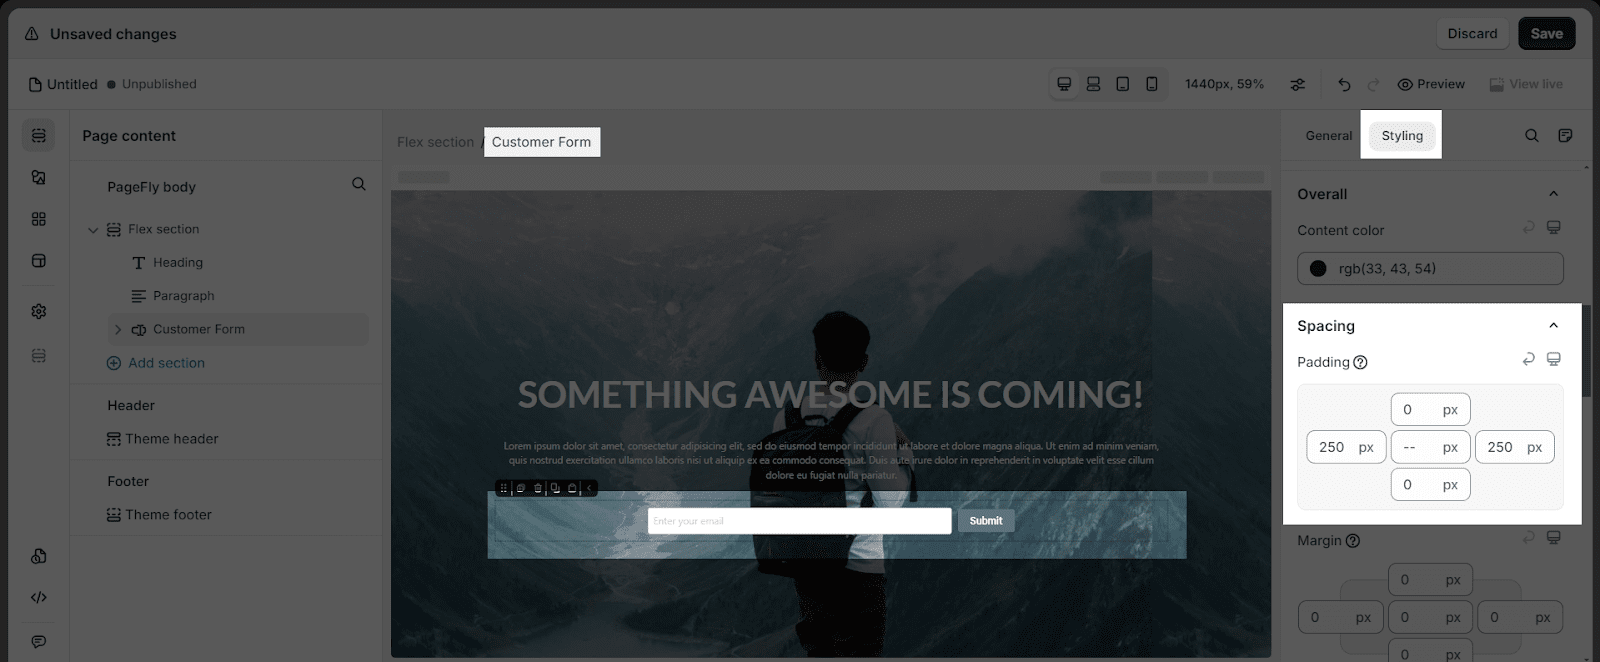
Go to Styling > Adjust the padding left and right. For example, we set 250px for both padding left and right.
3.3. Adjust Custom Form Field
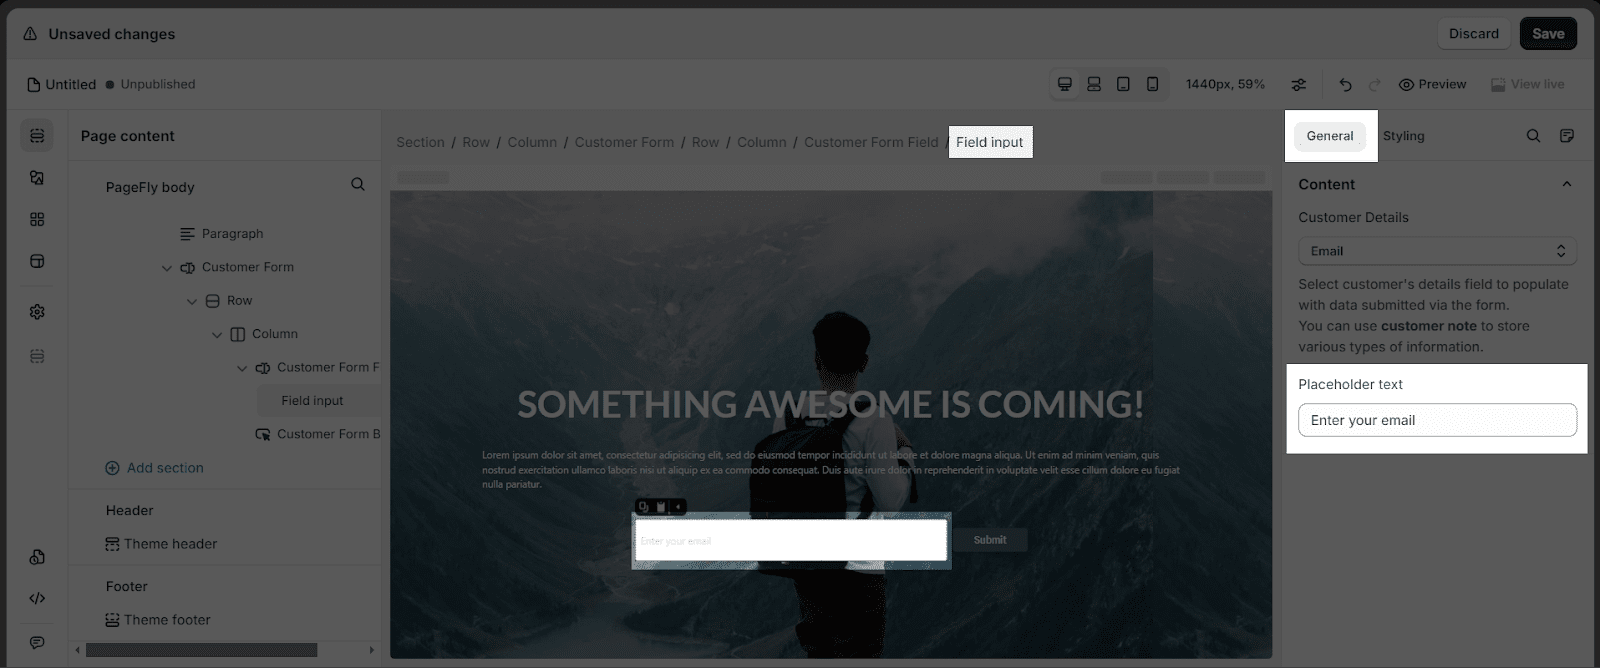
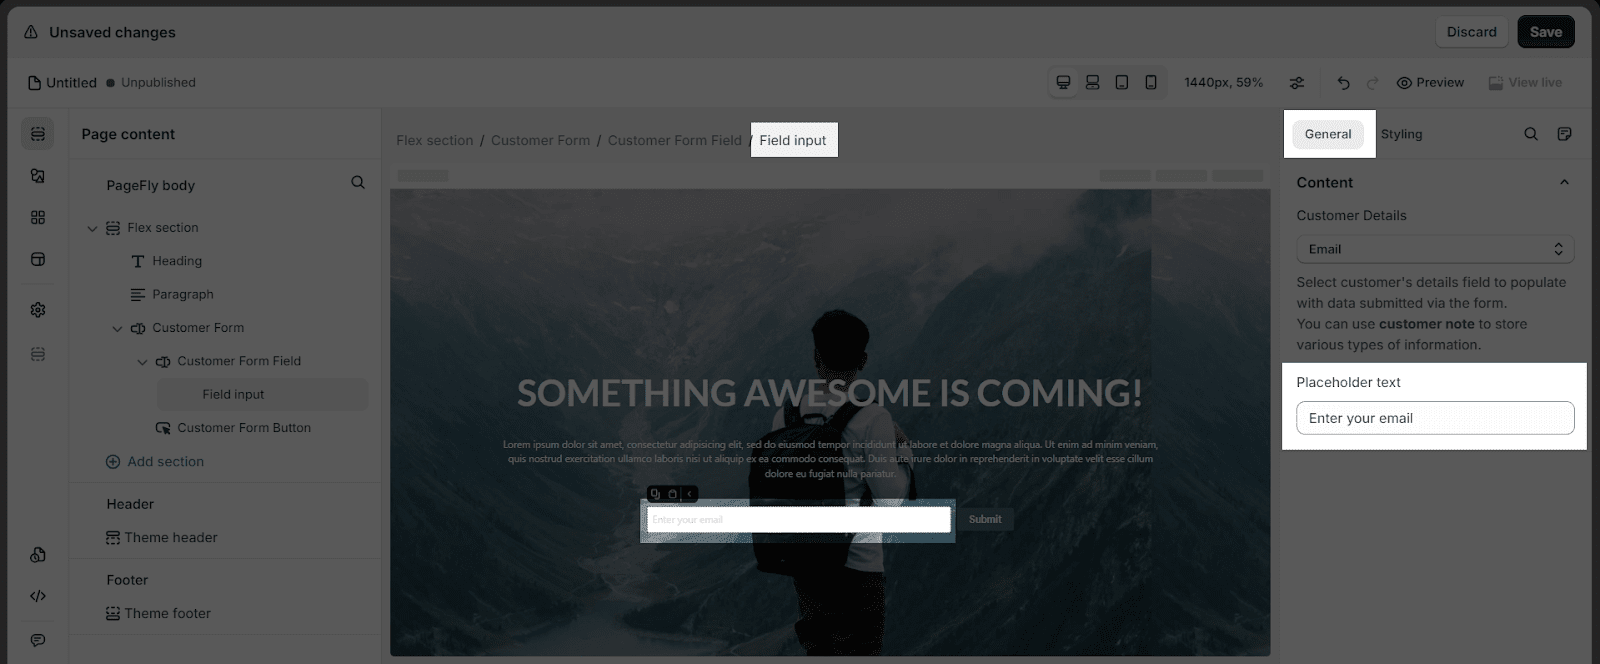
Click on the Custom Form Field > In the General tab, adjust the text in the field.
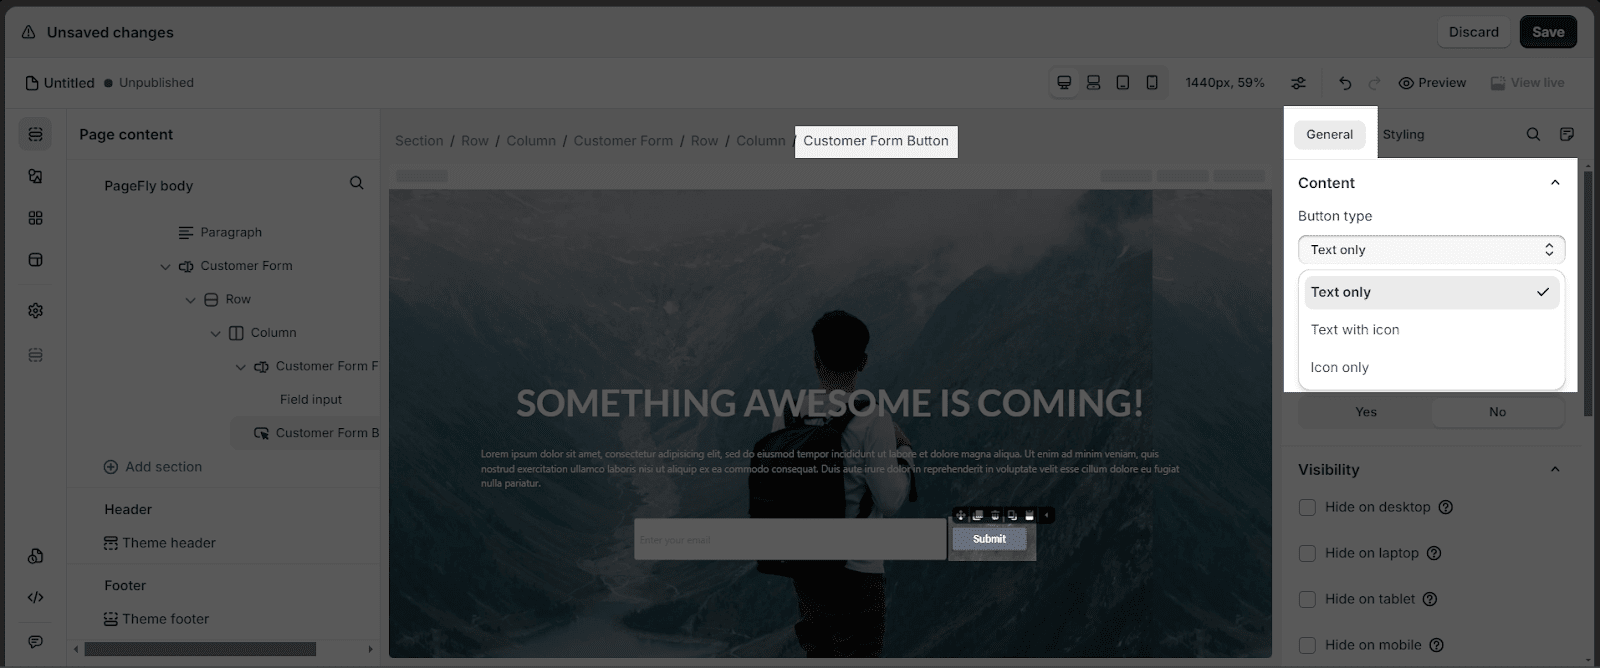
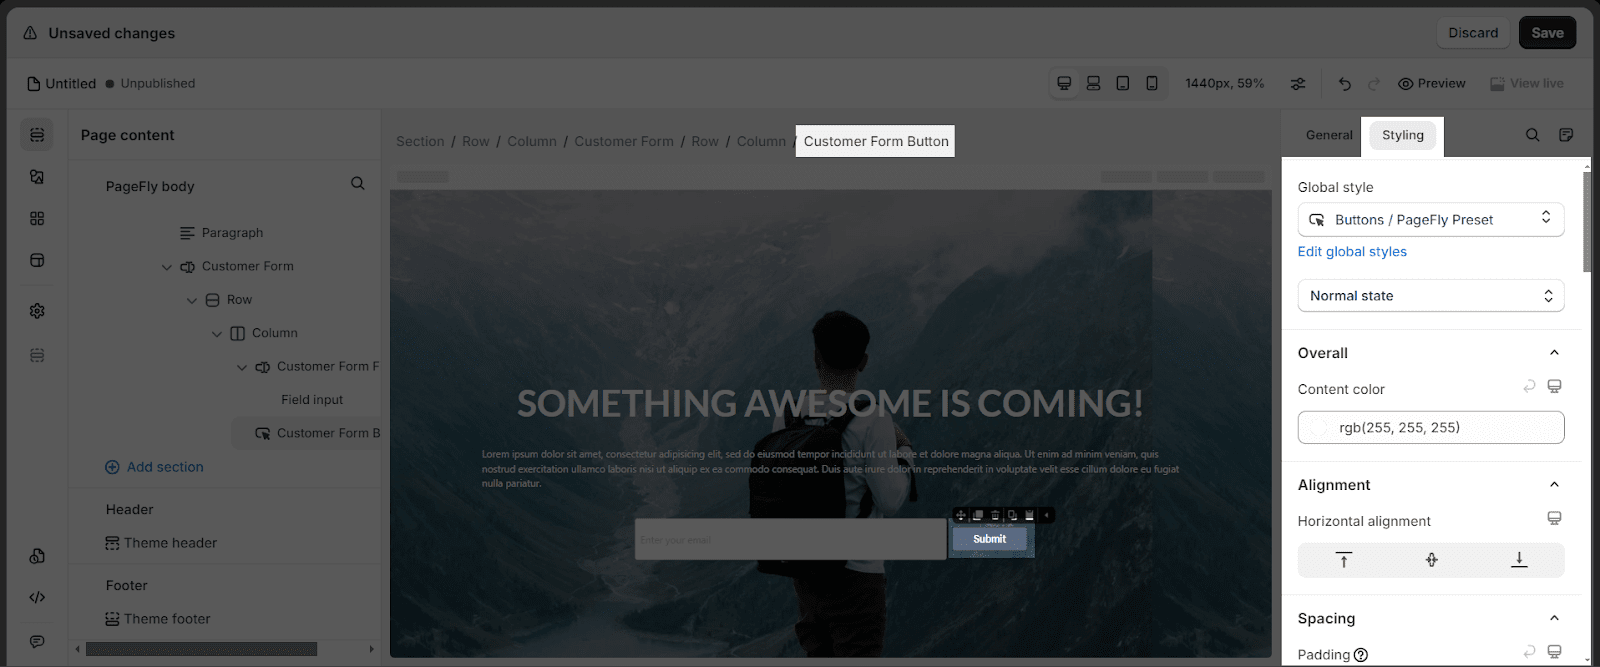
Click on the Custom Form Button
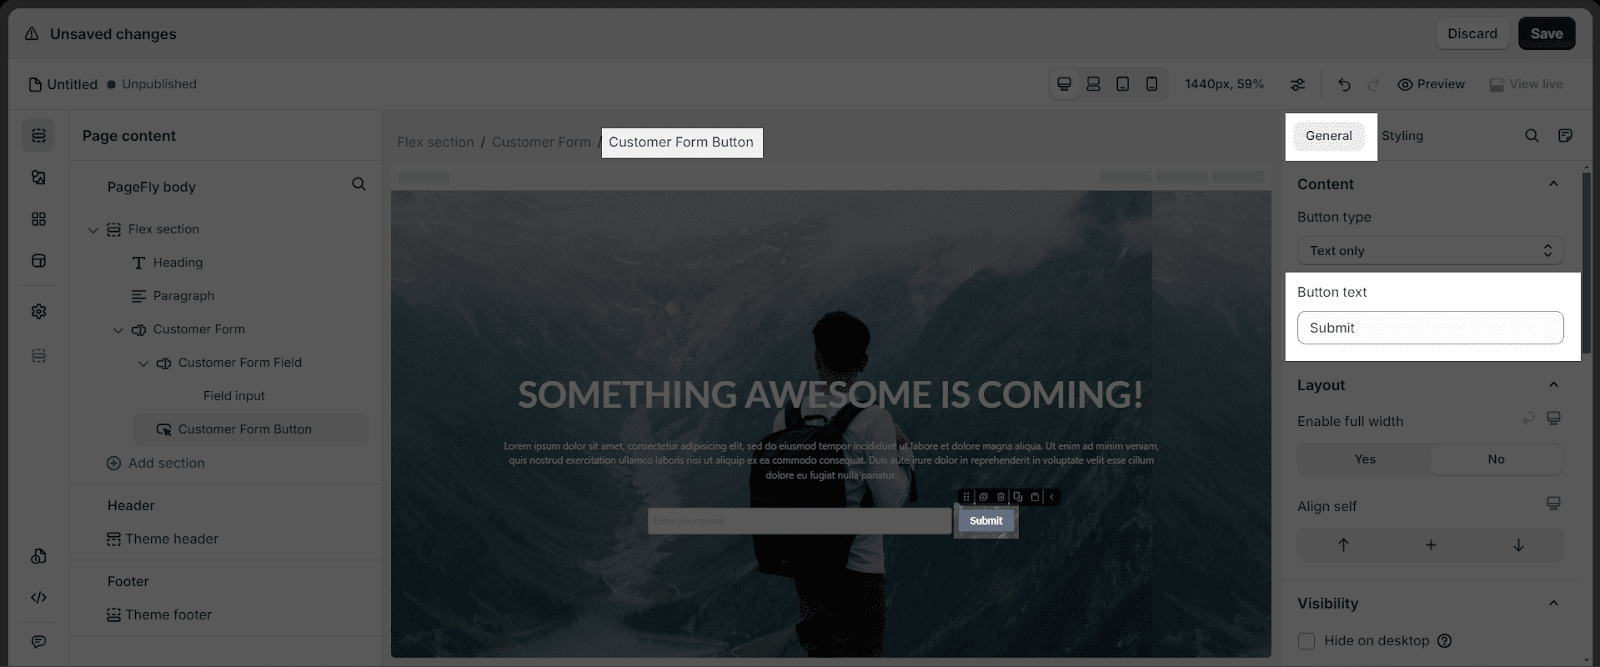
- In the General tab, there are three button types for you to choose from, which are Text Only, Text With Icon, Icon Only.
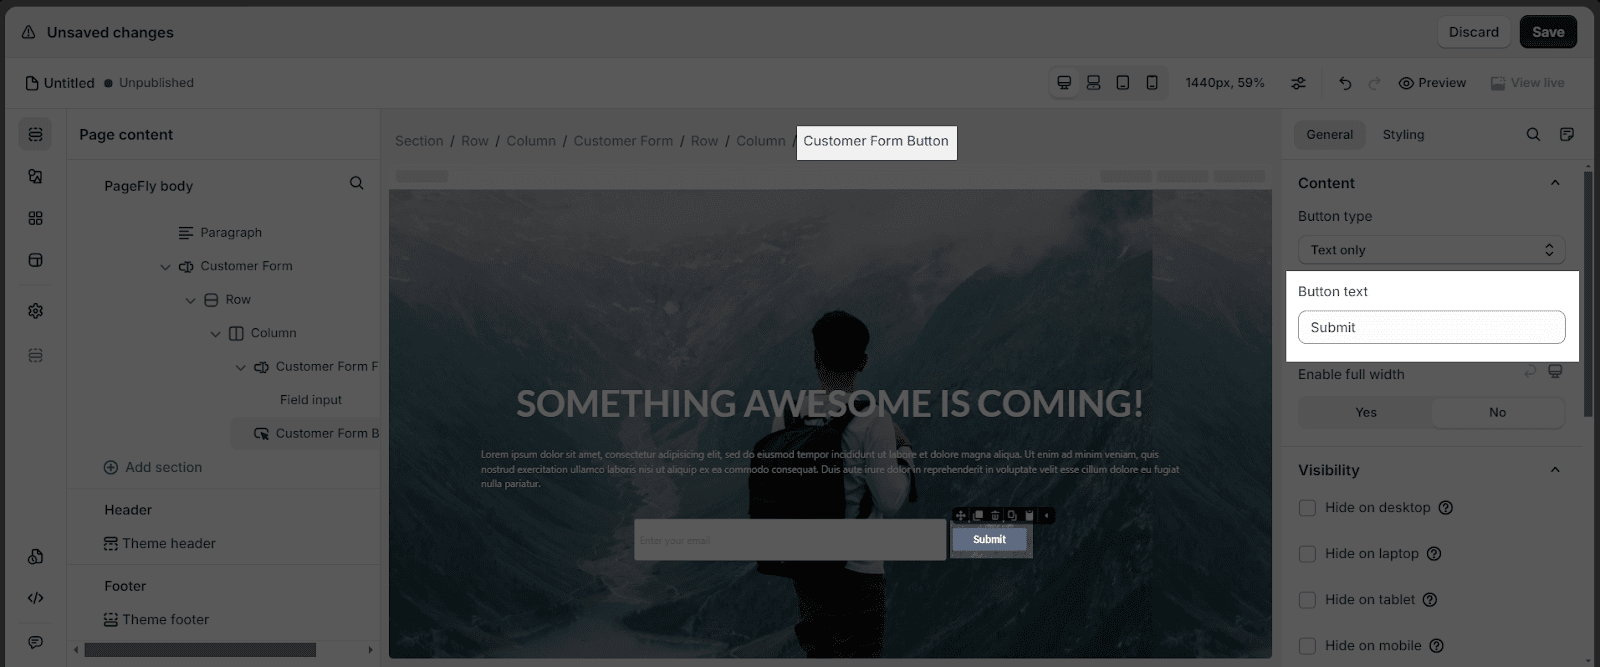
- Add text for the button
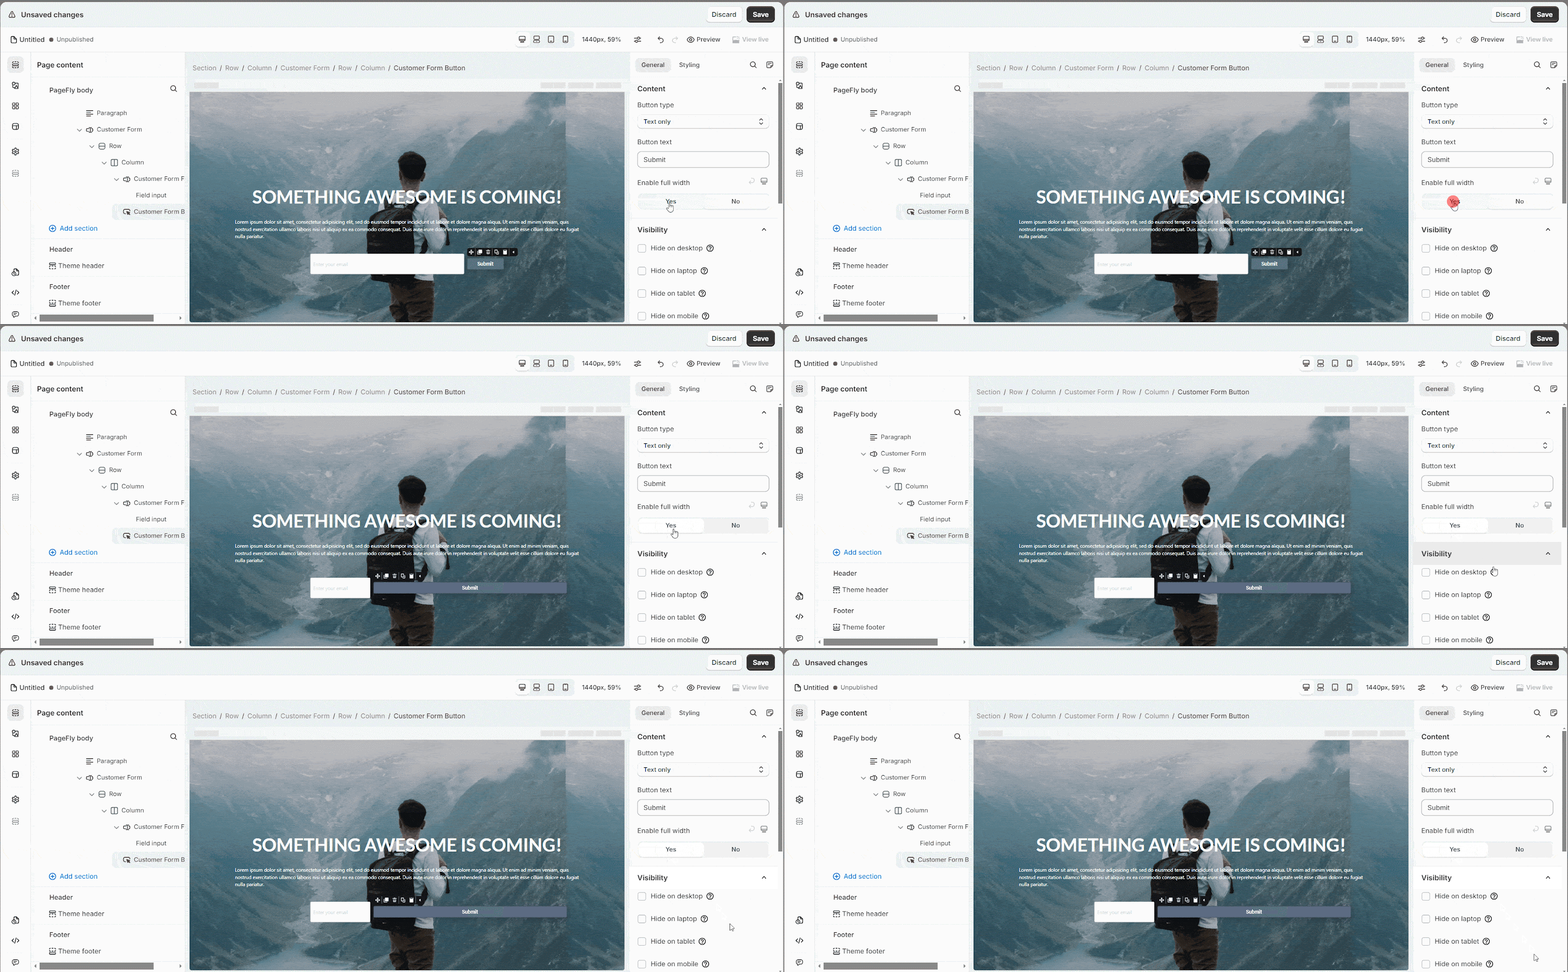
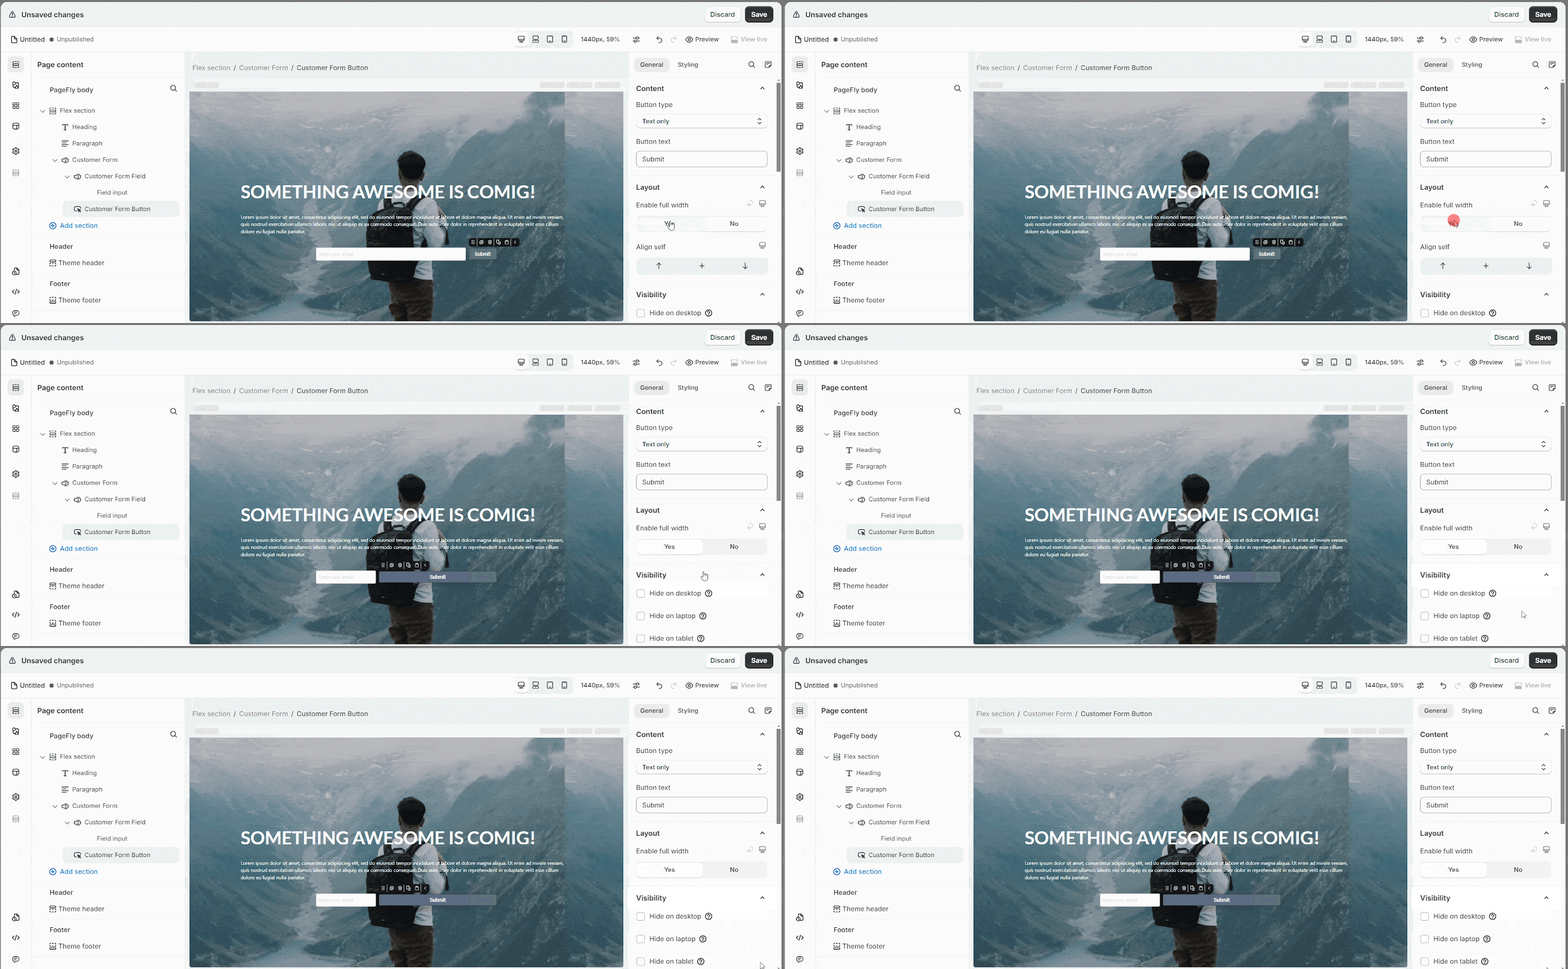
- Enable Full Width: Click on Yes if you want to enable full width of the button. If not, select No.
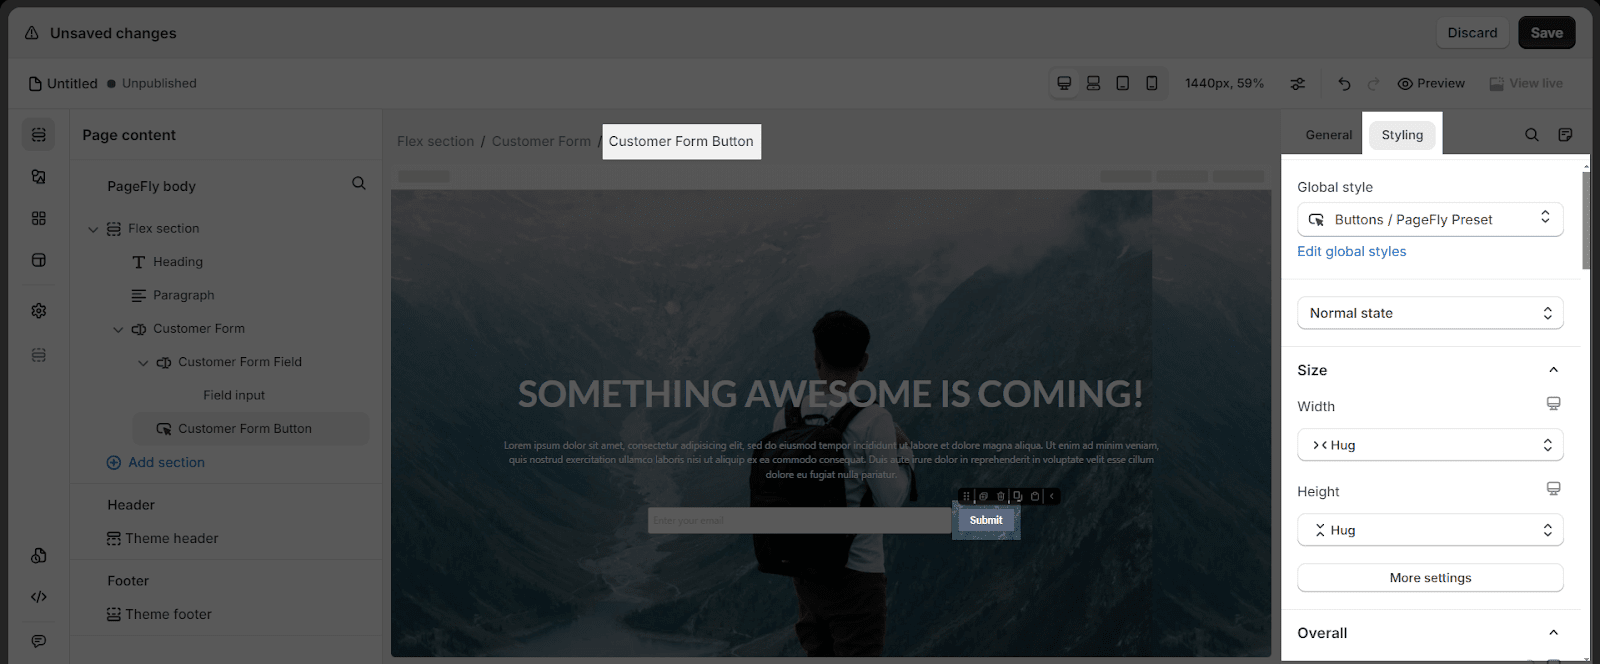
In order to customize the appearance of the Customer Form Button, switch to the Styling tab. Some available styling options include:
- Content color: customize the text color based on the configured color of the Global Style or set it up for your own.
- Typography: customize the font, font size, text element, etc
- Border: adjust the button border
- Normal state: add Hover/ Active state that helps the button look more attractive
You can find more about styling for a Customer form button here.
4. Save And Publish
After finishing editing your page, check once again the entire page.
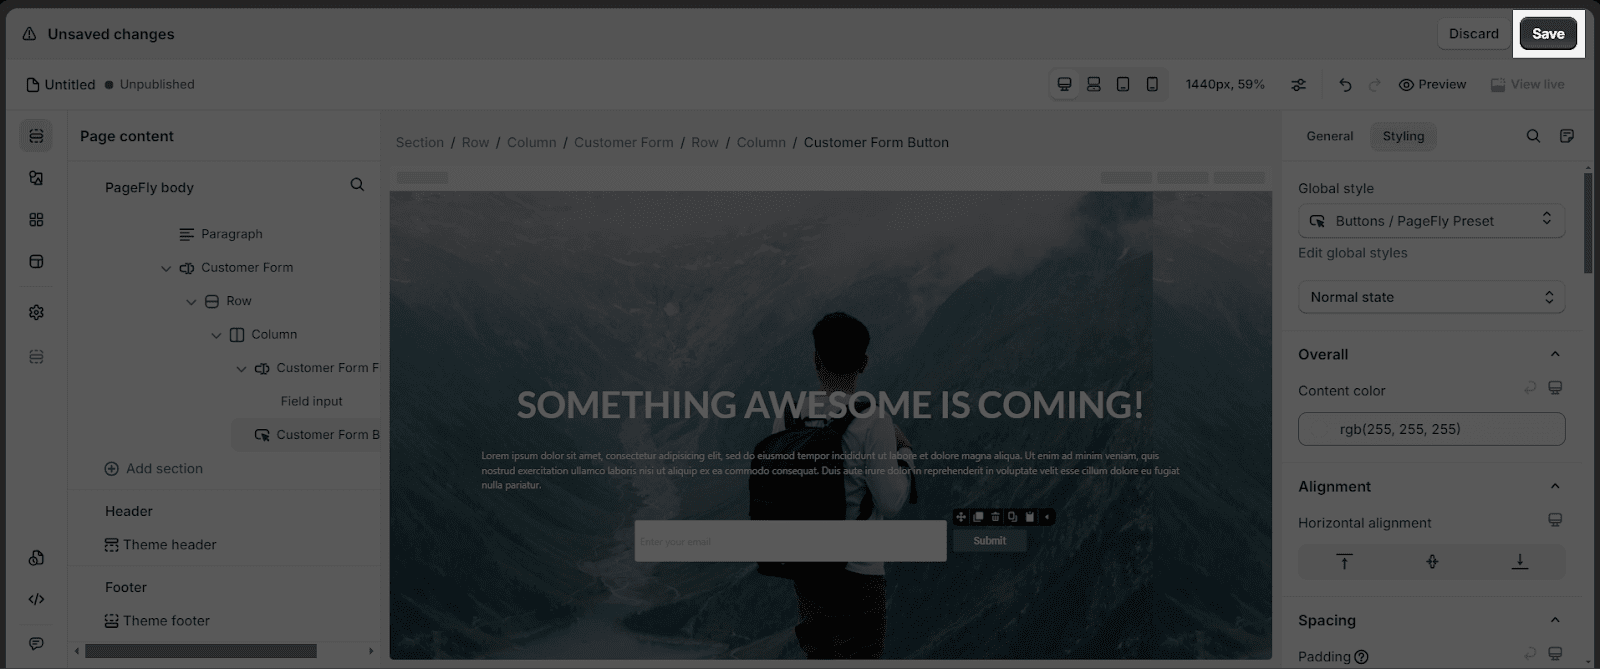
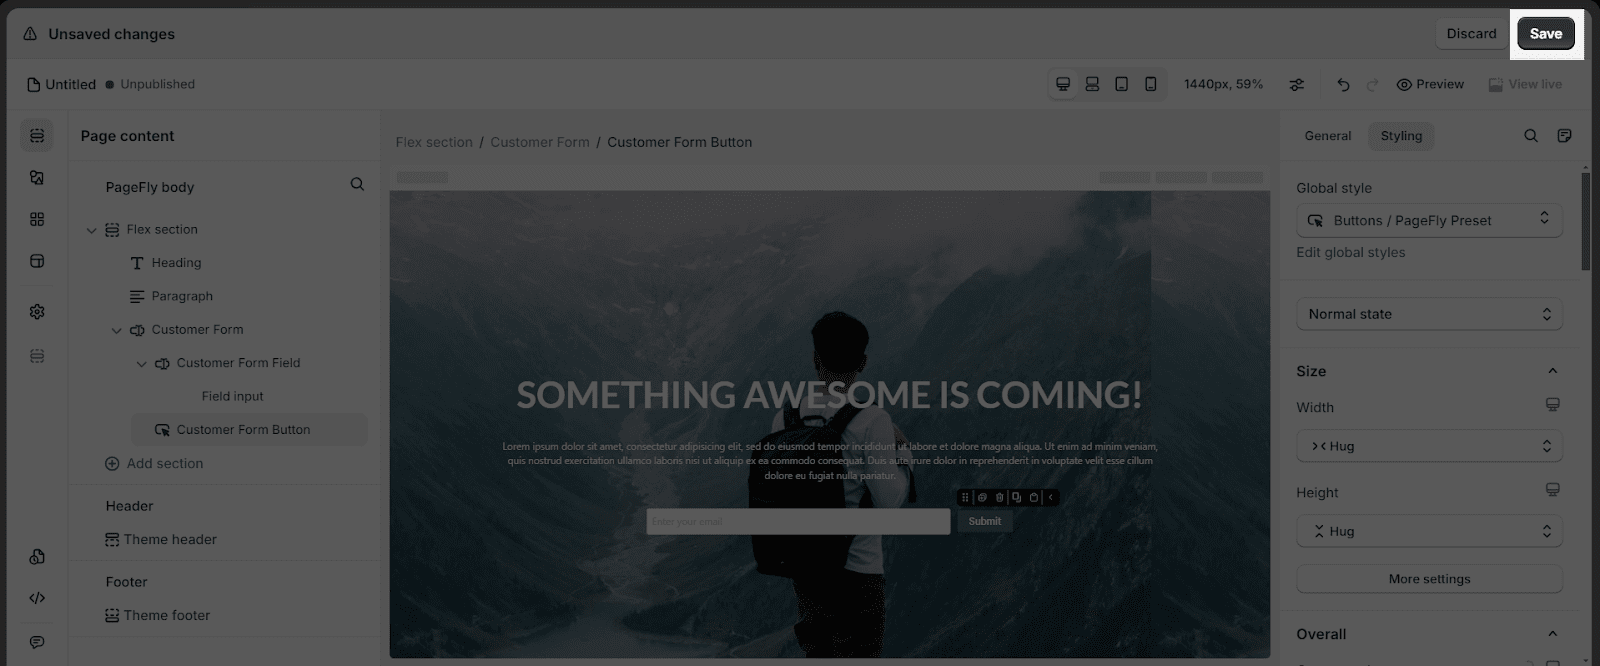
If you don’t want to publish, click on the Save button
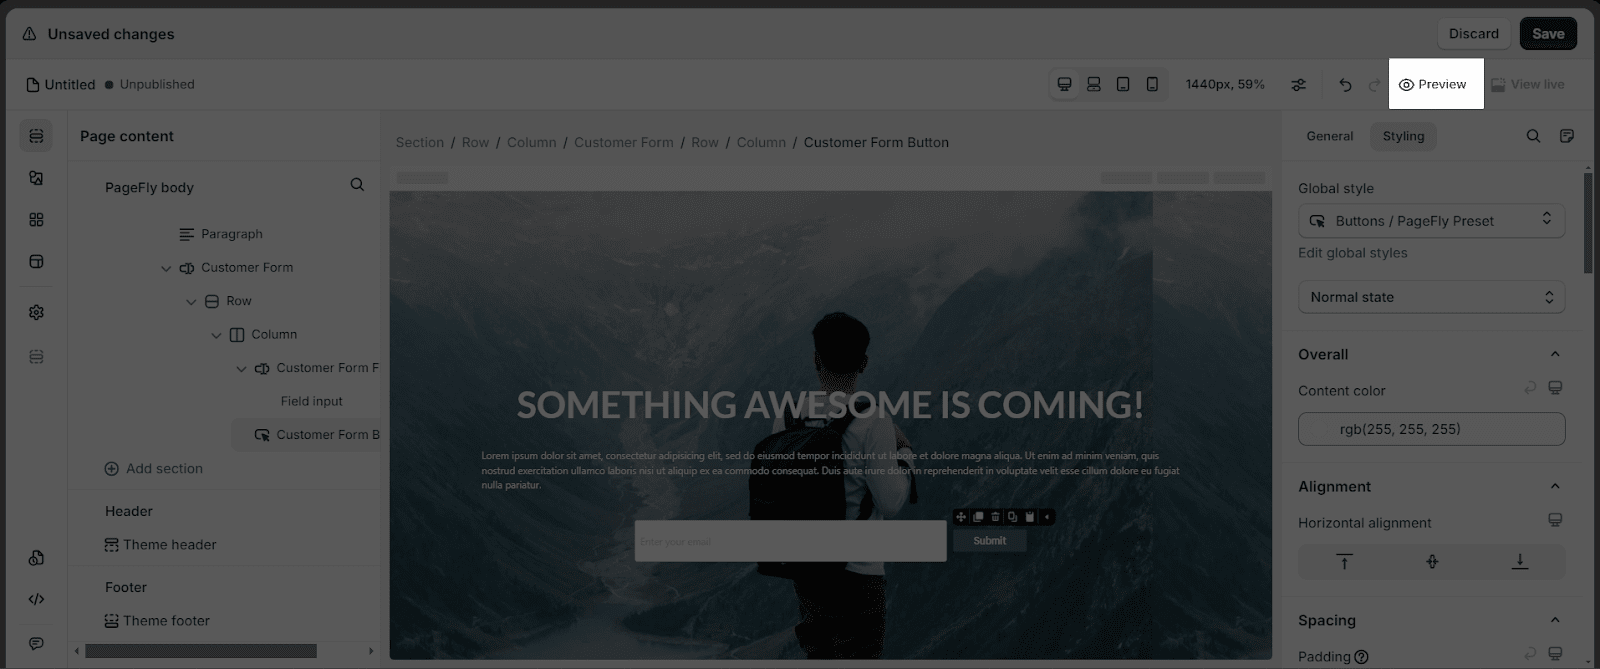
Click Preview to see it in the Preview mode.
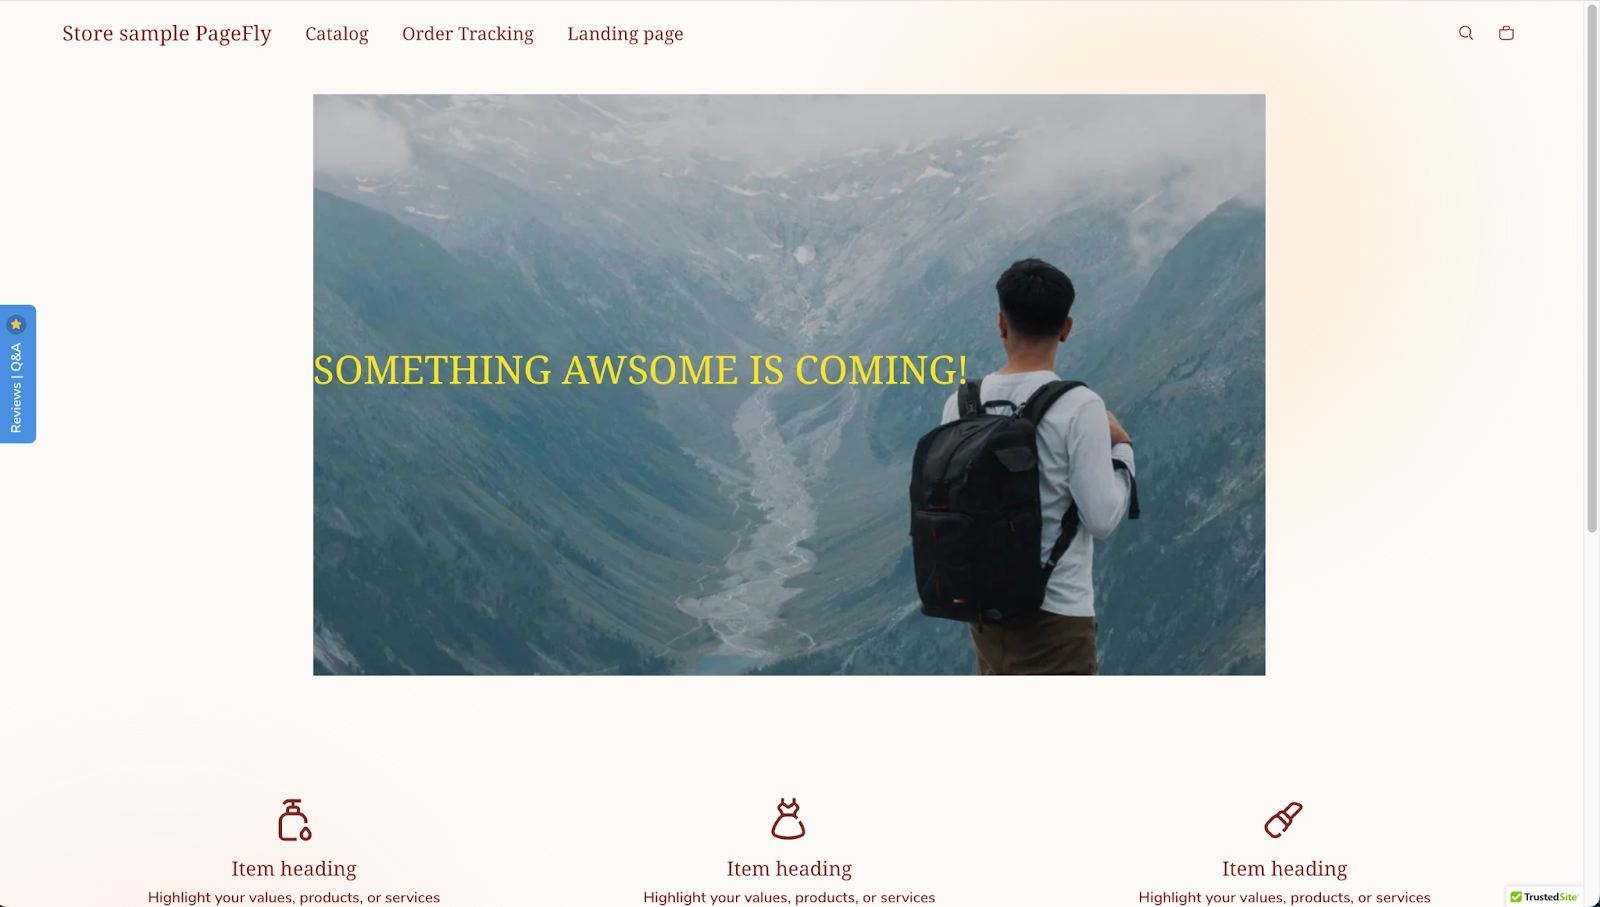
You can see the Preview as below:
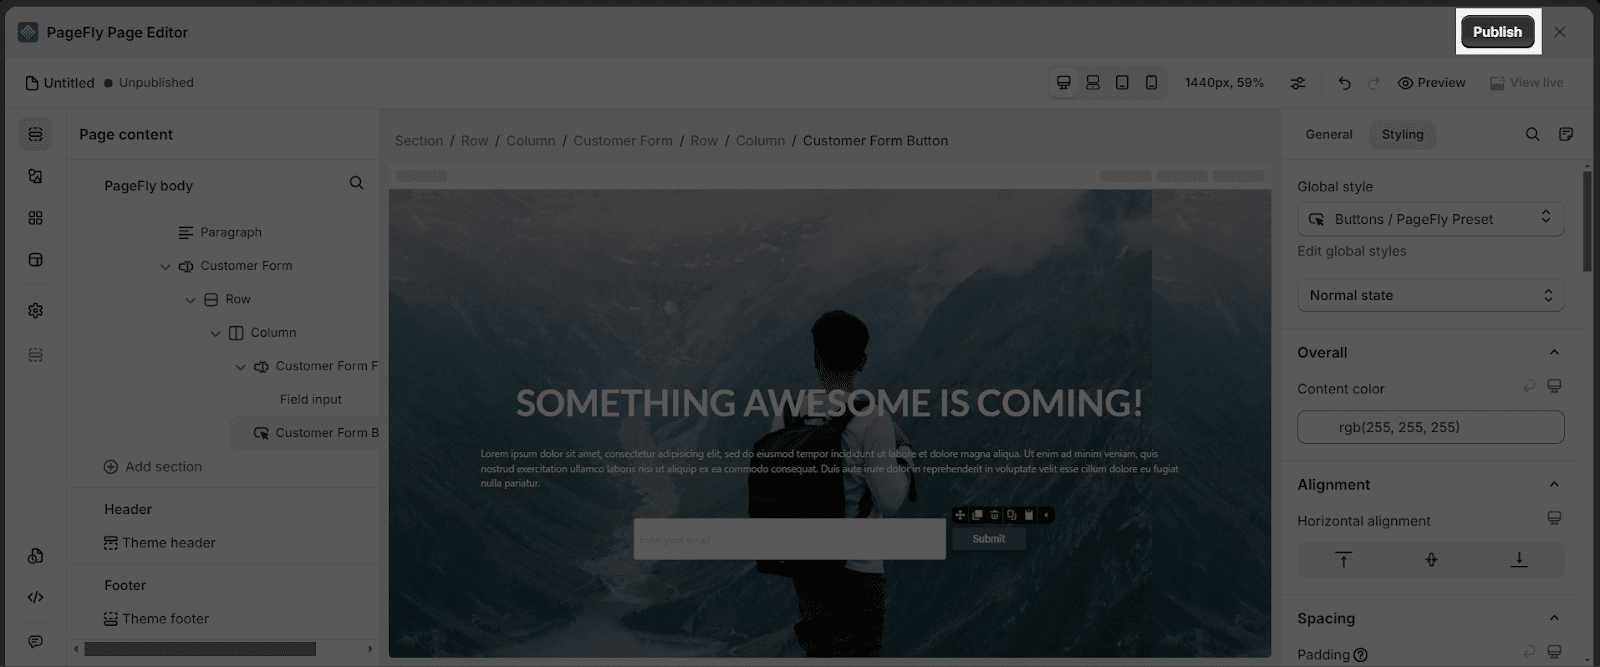
After the page is done, click on the Publish button to see the page in the live view.
Gen 2 Editor – How to Create a Coming Soon Page with PageFly
- Gen 2 Editor Beta is now closed. Pages and sections created with Gen 2 Editor will remain fully functional. Enhanced version will be coming soon.
- Gen 2 Layout will be available exclusively for Pay-as-you-go pricing model (slot plans).
1. Set Up Layout And Background For the Coming Soon Page
Visually captivating visuals on a coming soon page create anticipation, convey brand identity, and entice potential customers to engage and subscribe for updates before the official launch. Follow the guides below on how to create stunning visuals for your coming soon page.
1.1. Add Section On The Page Canvas
Click on Add element > Select Layout element > Drag & drop the one-column layout into the page editor.
1.2. Add A Background Image
1.2.1. Choose An Image
In the Styling tab, scroll down to the BACKGROUND parameter > Choose an image from Background image option > Select image
You can upload the image which is available in the Image Manager or upload it from the Internet.
1.2.2. Style The Image
In the Styling tab, head to SPACING parameter > Padding
- Edit the top-padding and bottom-padding values to change the height of the section to fit your image’s height.
- The little box in the middle will set the same value for all four sides of Padding and Margin. In this case, we set 300px for both Padding top and bottom.
1.2.3. More Settings
Scroll down to the BACKGROUND parameter, and click on the More Settings button.
In this case, we choose:
- Center Center for Background Position
- Cover for Background Size
2. Add Store Information
2.1 Add Heading
PageFly Heading Element is essential to create and optimize catchy content aka SEO title, to grab customer attention, in order to increase conversion rate. For more information, refer to this article.
2.1.1. Choose The Heading
- Step 1: Click on the Plus icon which is the Elements function
- Step 2: Click on the Heading element in the PageFly section
- Step 3: Drag and drop the element you want into the page editor and then start using it.
2.1.2. Add Text To The Heading
From the In the General tab, add text
2.1.3. Style The Headings
- Head to the Styling tab, in Content color, and choose the preferred color for your heading
- On SPACING, set the margin-top to 0px and the margin-bottom to 20px to create some space between the header and the paragraph below it.
- Scroll down to the TYPOGRAPHY parameter > choose the font family
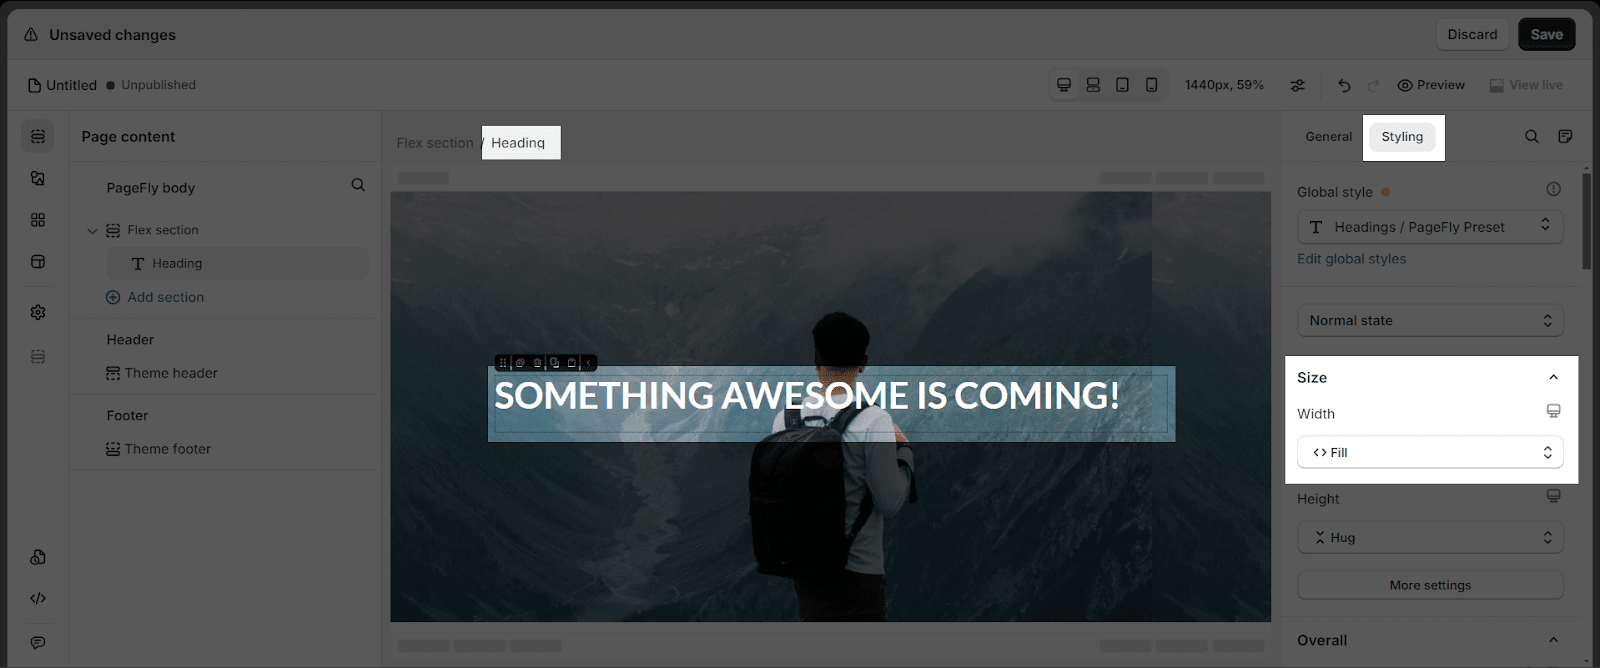
- To align the Heading element, go to Styling tab > Find Size parameter > Width, click on the dropdown, select Fill.
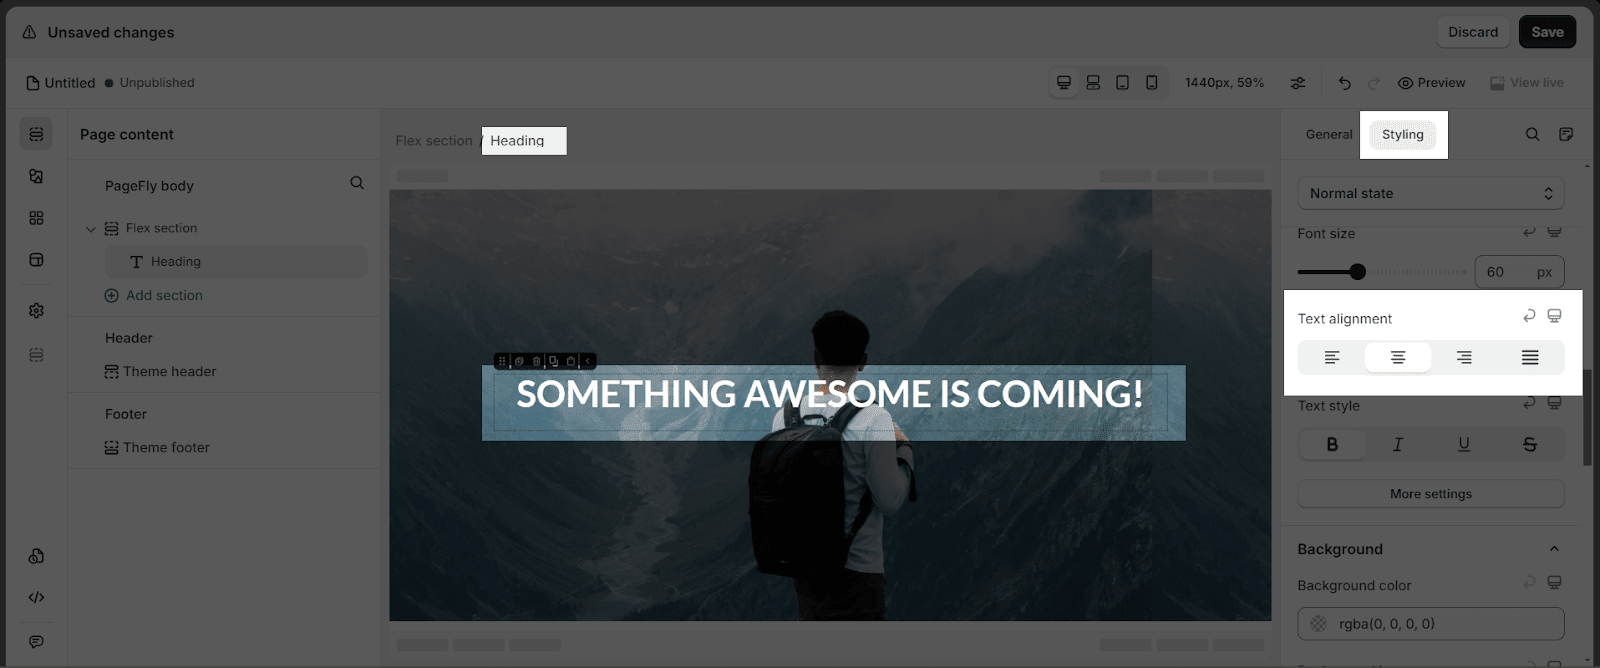
Then, scroll down to Text alignment, select the align center icon.
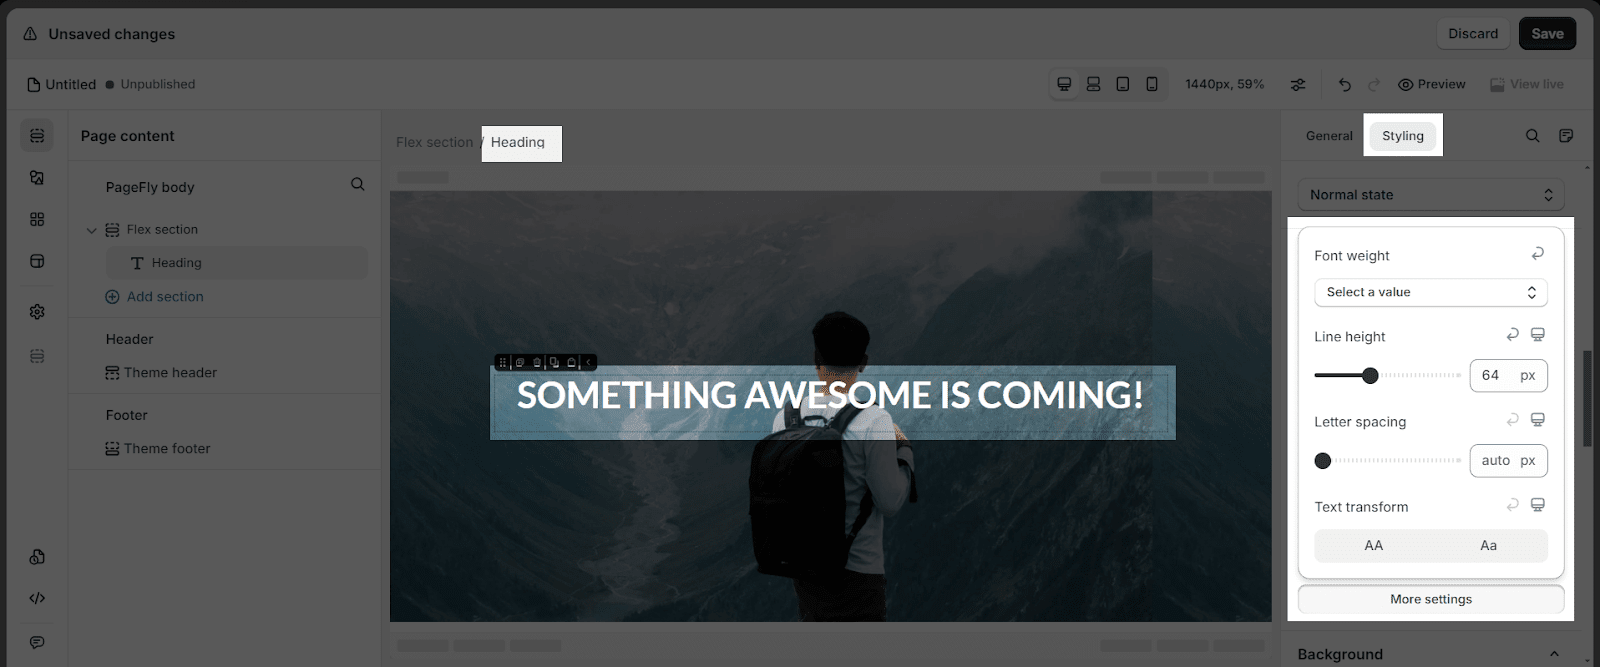
- Click on More Settings
For example, we chose the Font Family “Lato” and set up 60px for the Font Size. Set the Bold for the Font Weight and the 64px for the Line Height.
2.2 Add A Paragraph
2.2.1. Choose The Paragraph
- Click the Add element icon > Choose the Paragraph element > Drag and drop the first variant into the page editor.
- In the General tab, add more details about the estimated release time or undercover the reason behind a delayed launch.
2.2.2. Style The Paragraph
Go to the Styling tab
In Content color, select your preferred color for the paragraph content
- On SPACING, set the margin-top to 0px and the margin-bottom to 40px to create some space between the header and the paragraph below it.
- Scroll down to the TYPOGRAPHY parameter > choose the font family
- Choose to align center in the Text Alignment option.
- Click on More Settings
For example, we chose the Font Family “Shopifysans” and set up 16px for the Font Size. Set the Regular for the Font Weight and the 24px for the Line Height.
3. Create A Customer Form
Having a customer form on your coming soon page will help capture valuable leads, build anticipation, and provide essential customer data for targeted marketing efforts. For more information, refer to this article.
3.1. Choose A Form
On the left sidebar of the Editor, click on the Shopify section > Choose the Customer Form element > Drag & drop the first variant into the page editor.
3.2. Style That Form
Go to Styling > Adjust the padding left and right. For example, we set 250px for both padding left and right.
3.3. Adjust Custom Form Field
Click on the Custom Form Field > In the General tab, adjust the text in the field.
Click on the Custom Form Button
- In the General tab, there are three button types for you to choose from, which are Text Only, Text With Icon, Icon Only.
- Add text for the button
- Enable Full Width: Click on Yes if you want to enable full width of the button. If not, select No.
In order to customize the appearance of the Customer Form Button, switch to the Styling tab. Some available styling options include:
- Content color: customize the text color based on the configured color of the Global Style or set it up for your own.
- Typography: customize the font, font size, text element, etc
- Border: adjust the button border
- Normal state: add Hover/ Active state that helps the button look more attractive
You can find more about styling for a Customer form button here.
4. Save And Publish
After finishing editing your page, check once again the entire page.
If you don’t want to publish, click on the Save button
Click Preview to see it in the Preview mode.
You can see the Preview as below:
After the page is done, click on the Publish button to see the page in the live view.
Tips And Best Practice
- Use high-quality visuals and a clear headline to grab visitor interest
- Motivate visitors to sign up with a strong call to action
- Ensure your design looks great and functions flawlessly on all devices
- Include a countdown timer and engaging text about your upcoming launch
Frequently Asked Questions
1. What is a Coming Soon page?
A Coming Soon Page is a hint to let your customers know that sellers are preparing to release something, for example, a new product or launching a new brand.
2. What should a Coming Soon page include?
Logo, Simple Sentences, a beautiful image, and a contact-us form.
3. Great Coming Soon message examples?
‘New Product is coming soon. We are working hard on the full version and will be back shortly.’ or ‘Stay tuned. We are launching soon. Something awesome is coming. Be first to know’
