Overview
Your homepage is the storefront window of your online store. It’s the first thing visitors see, and it sets the tone for their entire shopping experience.
The homepage is prime real estate for promoting your products. You can highlight best-sellers, new arrivals, or special offers through high-quality images, clear descriptions, and calls to action that encourage visitors to click and learn more, ultimately leading to sales.
In this article, we will explore how to create a homepage with PageFly Page Builder.
You can also check this video about how to create a homepage with PageFly:
How To Create A Homepage With PageFly
Step 1: Make A Homepage
There are 2 ways to create a PageFly home page:
- Create the page from scratch
- Create the page from templates
Create New Homepage From Scratch
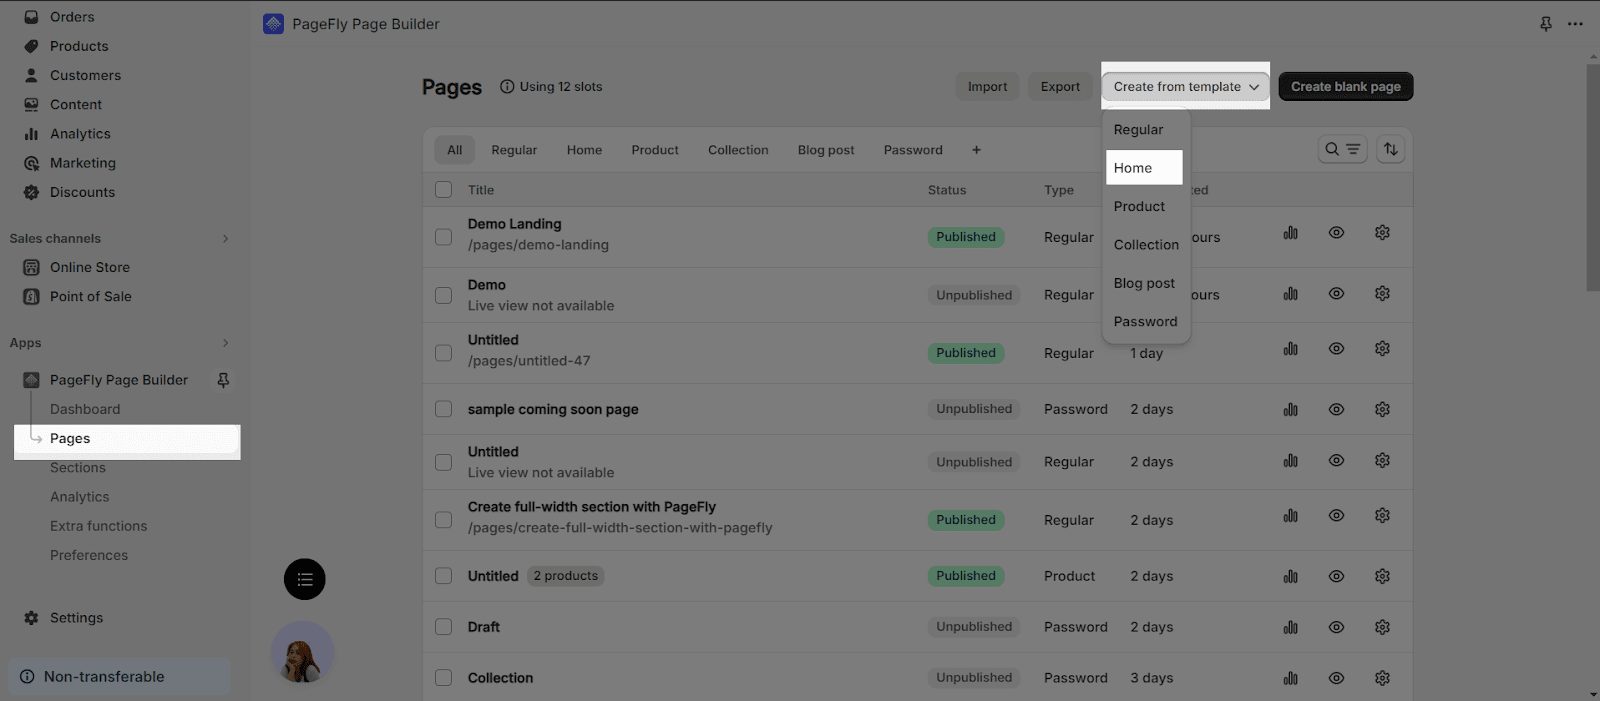
In the PageFly dashboard, head to the Pages tab > Click on the Create blank page button on the right sidebar to start building your page from scratch > Select Home.
Create New Homepage From Templates
From the Pages Dashboard, hit the Create from template button > Choose Home. Once the Template Library is opened, you can pick a suitable PageFly template for your Homepage. Click Select after you have chosen one.
Add A Section On The Page Canvas
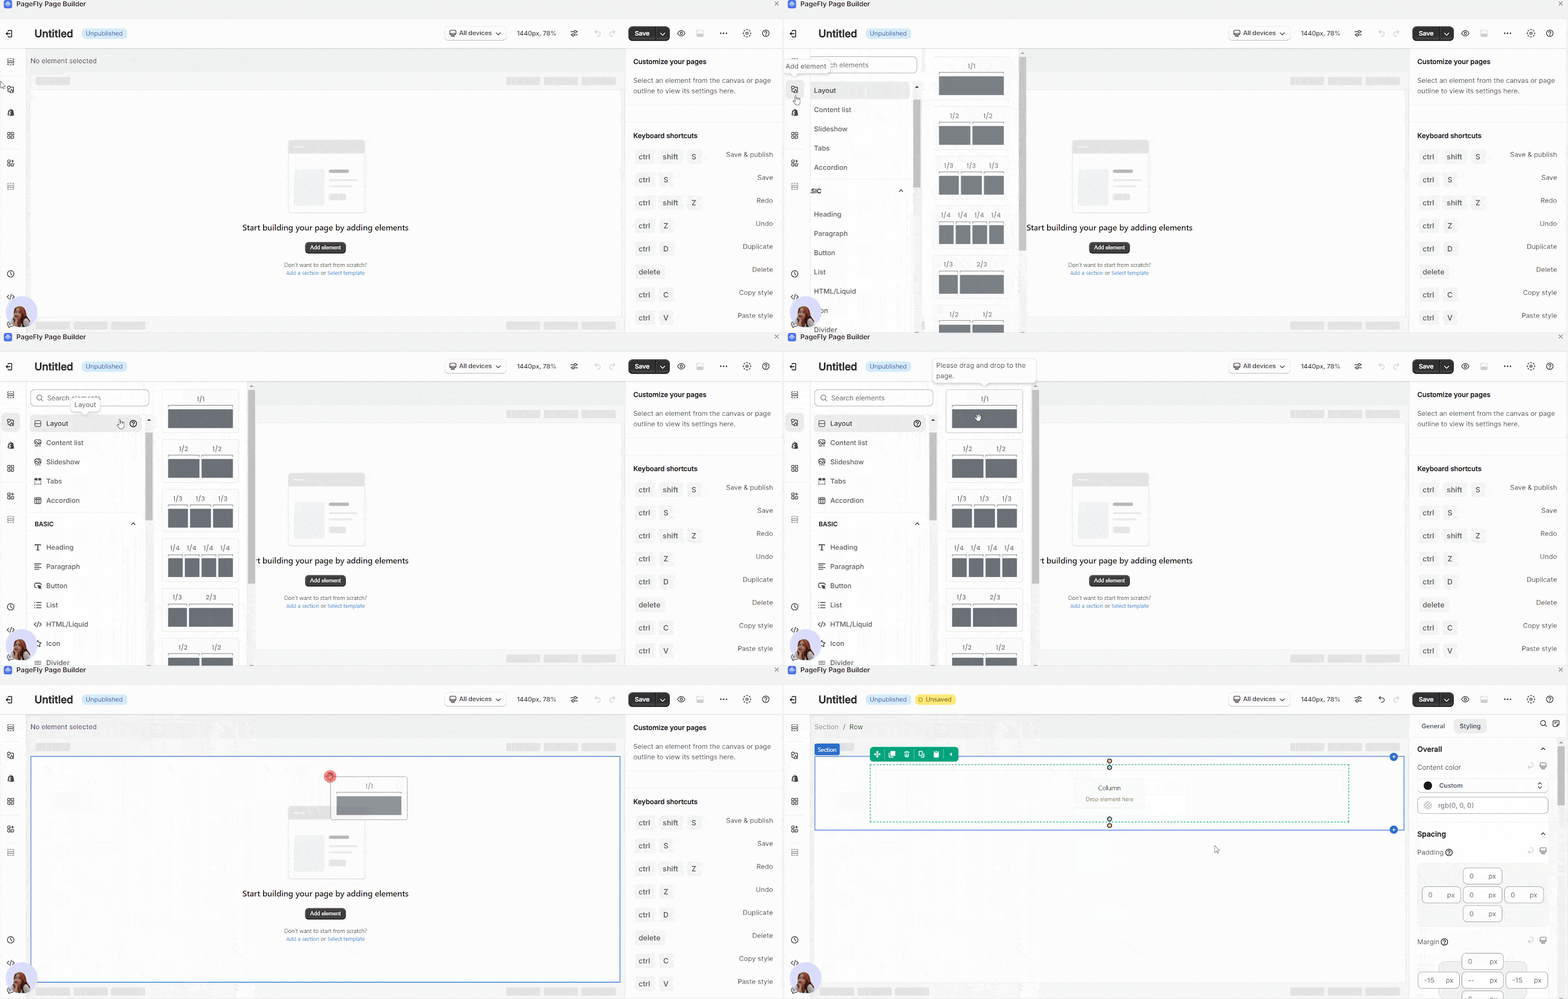
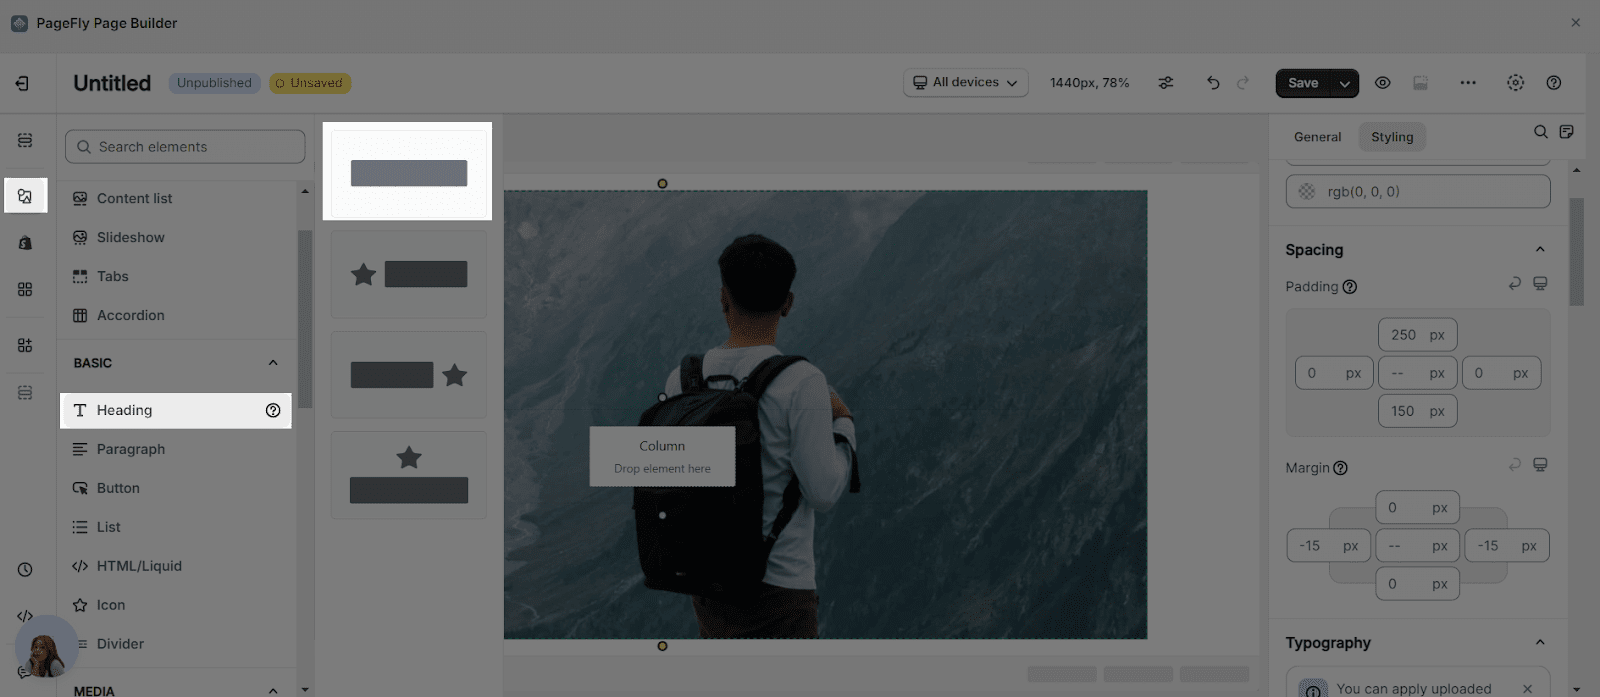
On the element catalog, click on the Add element icon, choose the Layout element > Drag and drop the Full Section option into the page editor.
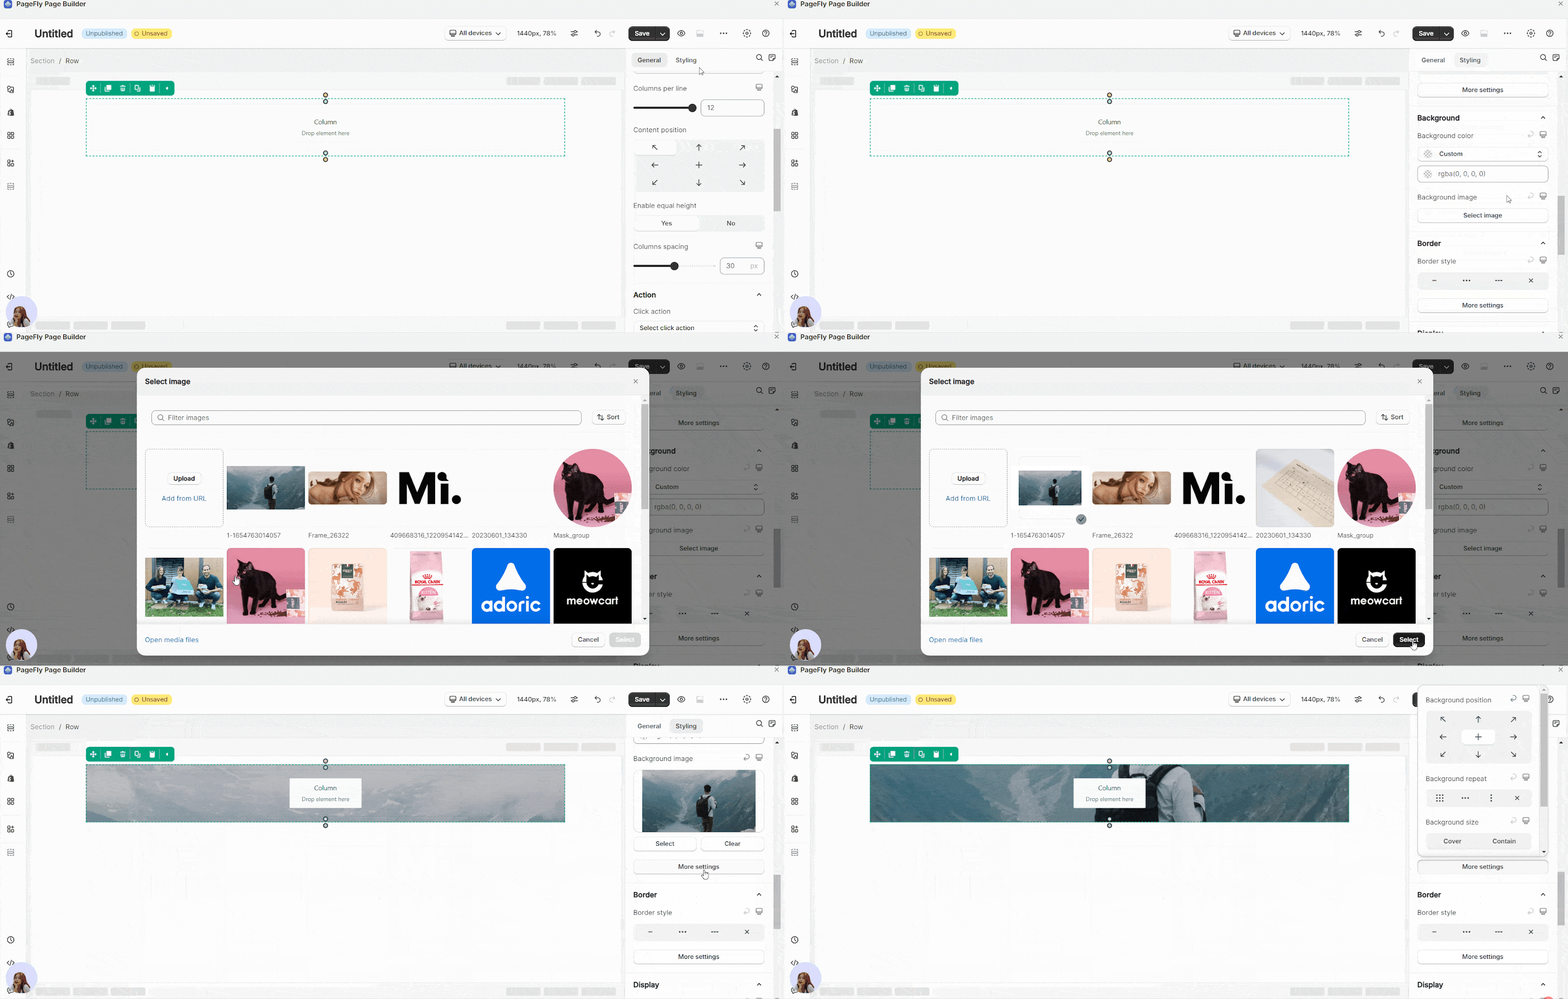
In the Styling tab, scroll down to the BACKGROUND parameter > Choose an image from the Background Image option.
You can upload the image which is available in the Image Manager or upload it from the Internet. Read more here to know more details.
Scroll down to the BACKGROUND parameter > Click on the More Settings button.
Choose the Center Center for the Background Position and Cover for Background Size.
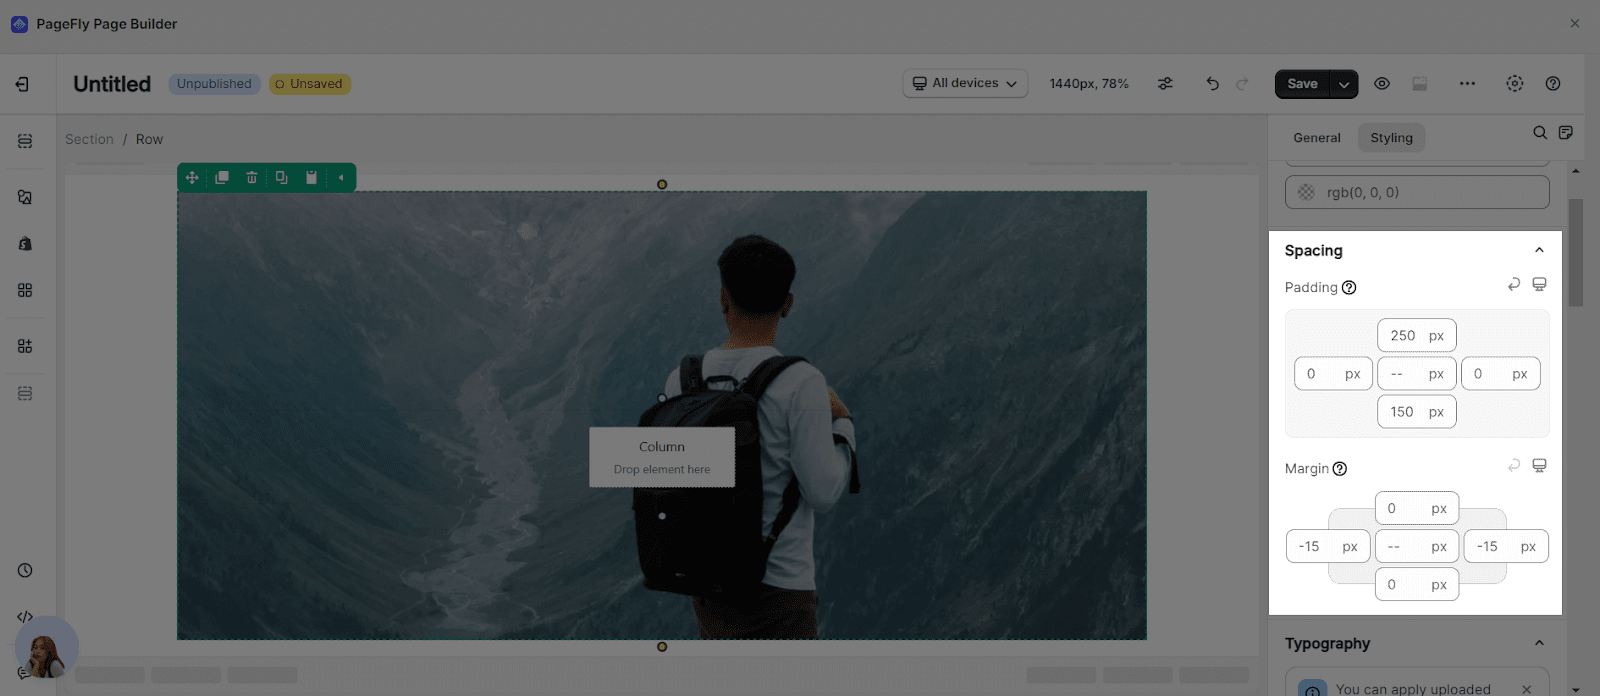
In the Styling tab, find the SPACING section.
- Edit the top-padding and bottom-padding values to change the height of the section to fit your image’s height.
- The little box in the middle will set the same value for all four sides of the Padding and Margin.
In this case, we set 250px for the Padding top and bottom.
Add A Slogan For Your Store
A quote or a slogan makes your store unique. Customers will remember your store if you have a special slogan, especially when you customize it visually prominent.
So we will use a Heading element on the banner
On the element catalog, click on the Add element icon, choose the Heading element > Drag and drop the first variant into the page editor.
After dragging and dropping the element on the banner, we will change the content for it.
- Heading over to the General tab, change the content in the Heading Text box of the CONTENT parameter.
- Change the HTML Tag to H2. Adding HTML Tag is good for SEO for your store.

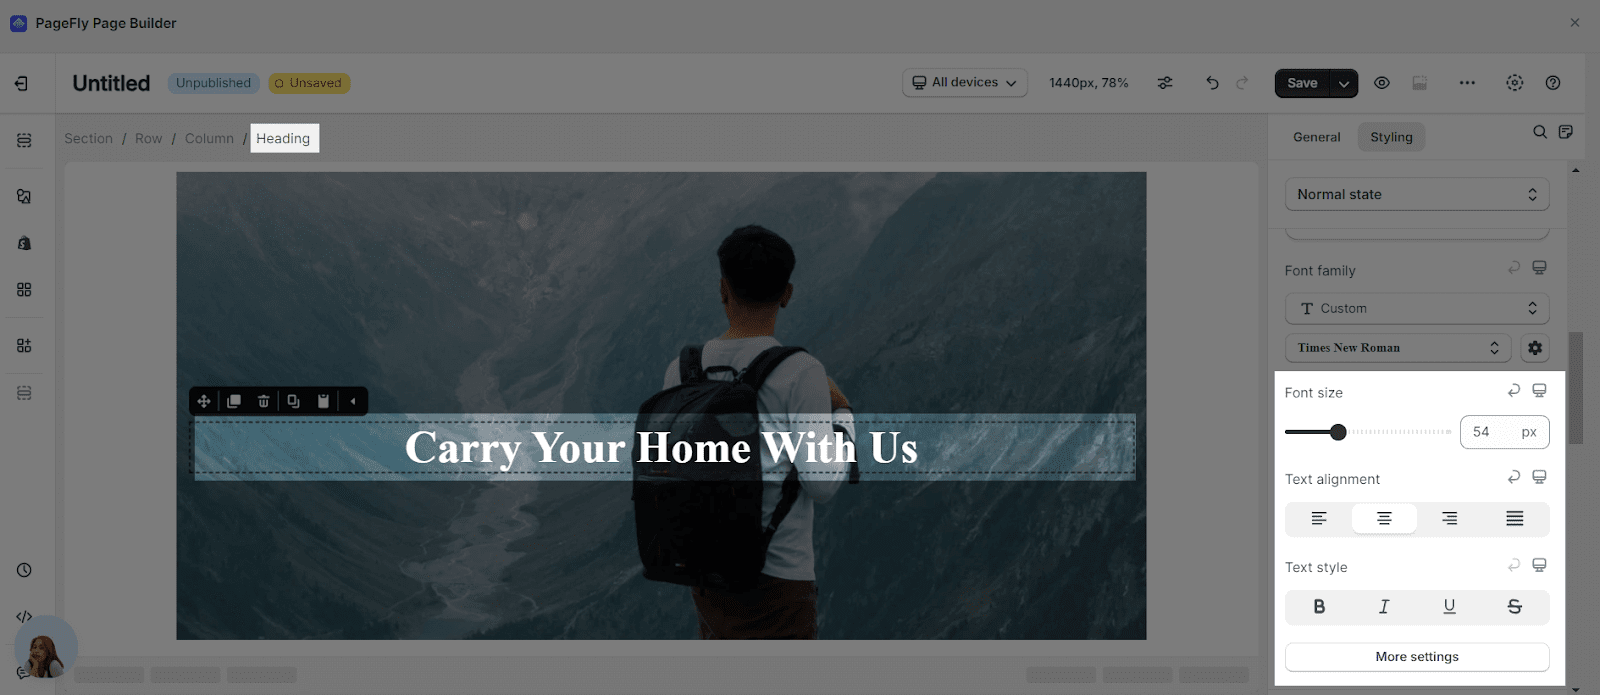
Switching to the Styling tab and change the styles for it:
- Choose white color for Content Color
- Change the font family to Roboto Slab font
- Adjust the font size to 80px
- Click on the More Settings button and choose the font weight as Bold style and Line height to 2px
- Set 0px for the Padding top and 20px for the Padding bottom
It’s very important to determine a primary call to action for an online store, especially on the home page. This call to action button will let users take action that you – the store owner expect the most.
- On the element catalog, click on the Add element icon, choose the Button element, and then, drag and drop the first variant on the banner
- Now, head over to the General tab and change the content for the button. In the Button Text box, change the default content to DISCOVER NOW.
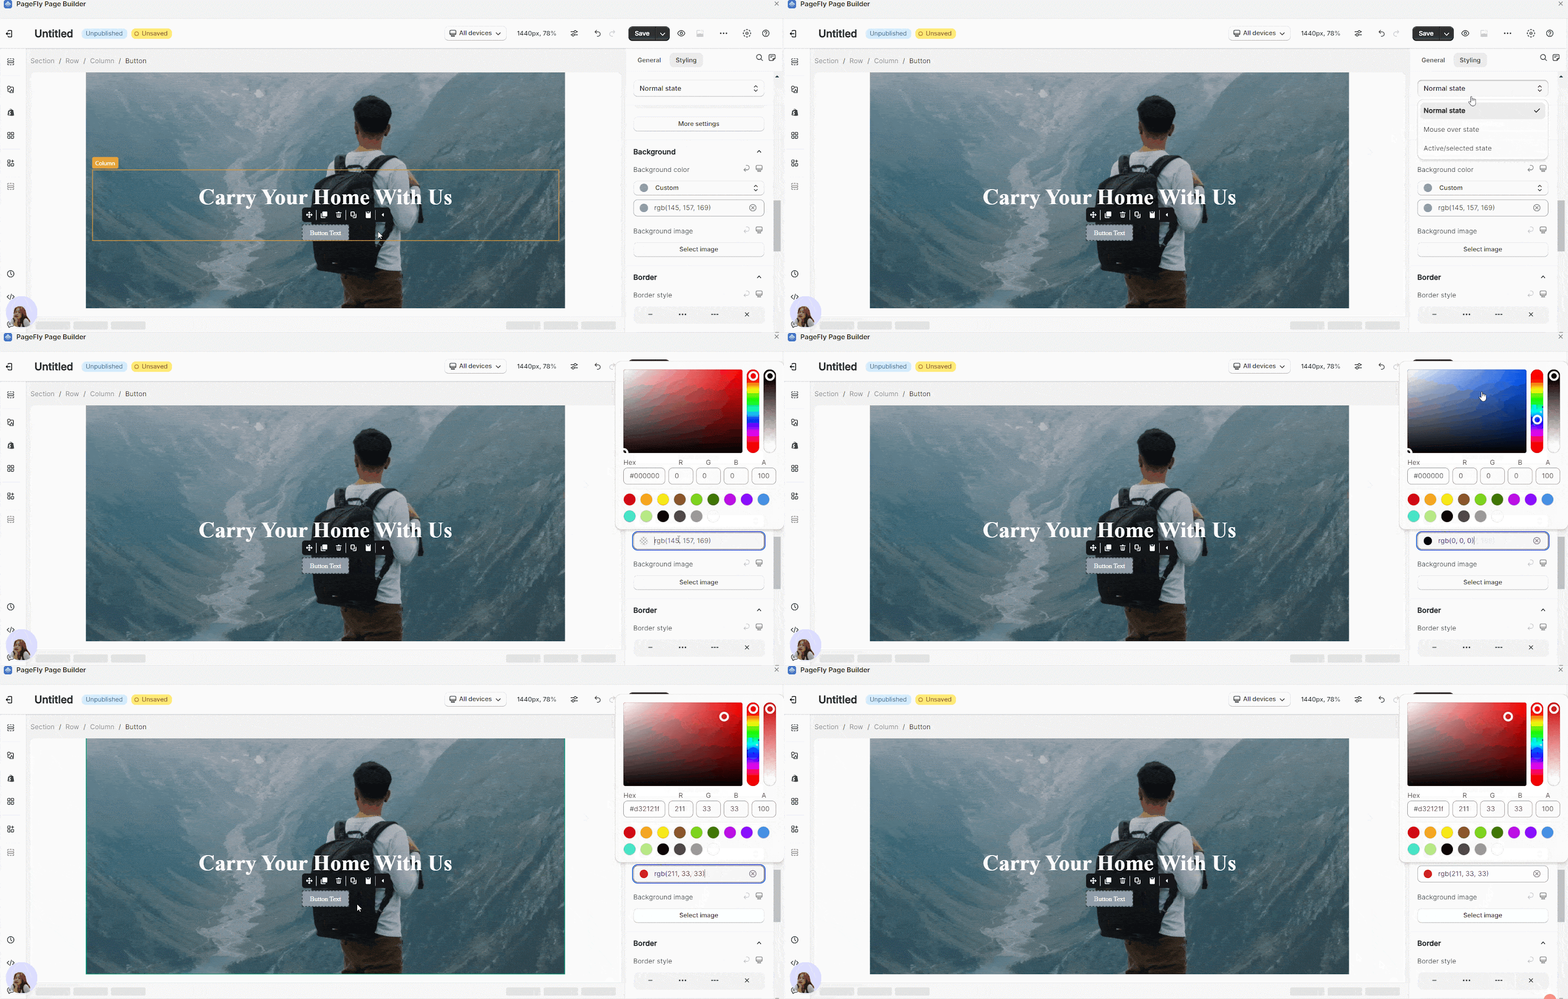
- Switch to the Styling tab, we will style the button in the normal state. Set up 15px for the Padding top and bottom and 30px for the Padding right and left.
- And we will set up the Montserrat font and Font size to 20px for the text in the TYPOGRAPHY parameter.
- Scroll down to the BACKGROUND parameter, we will set rgb(245, 166, 35) code for the background color.
- In the Border parameter, click on More settings button and set 30px for the Border radius.
In the Styling tab, we will style for the button of the Mouse over and Active state. Set rgb(208, 108, 9) for the BACKGROUND COLOR. And finally, when you hover on the button, you can see the change.
Step 3: Add A Description Of Your Store Section
When customers visit your store, one of the essential things you need to do is to let them know what products/ services your store provides. Don’t make customers confused or make them wonder what is sold in this store.
Add A Section Layout
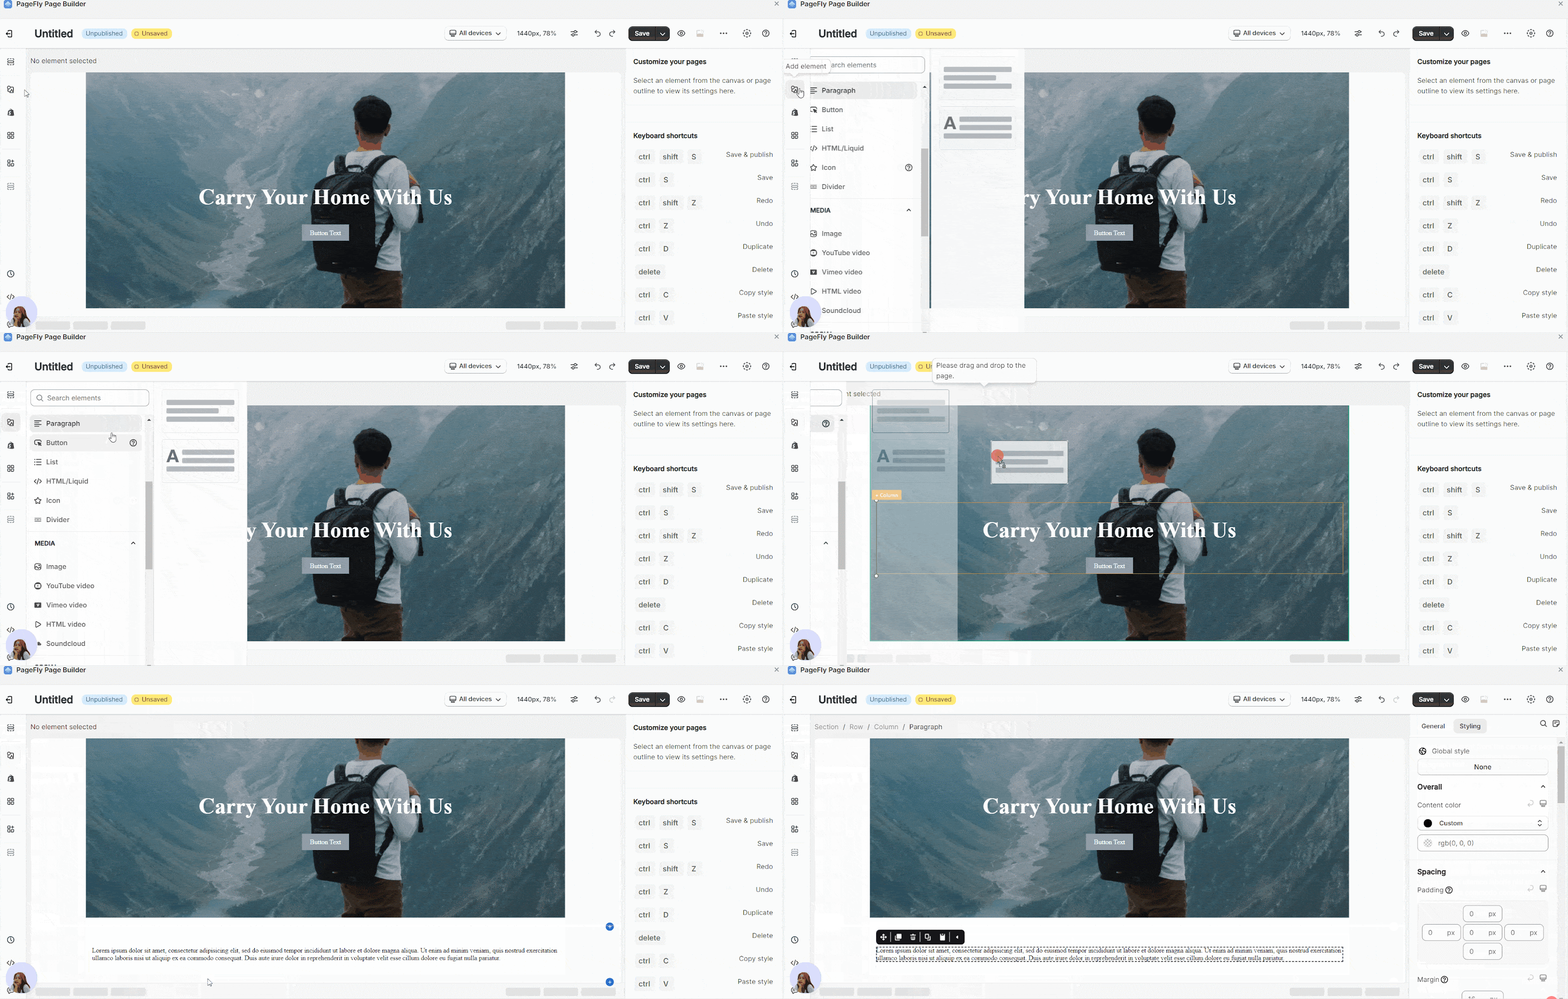
On the element catalog, click the Add element icon > Choose the Layout element > Drag and drop the 1/1 option into the page editor.
Add A Paragraph Element To Describe Your Store Shortly
On the element catalogue, click the Add element icon > Choose the Paragraph element > Drag and drop the first variant on the section.
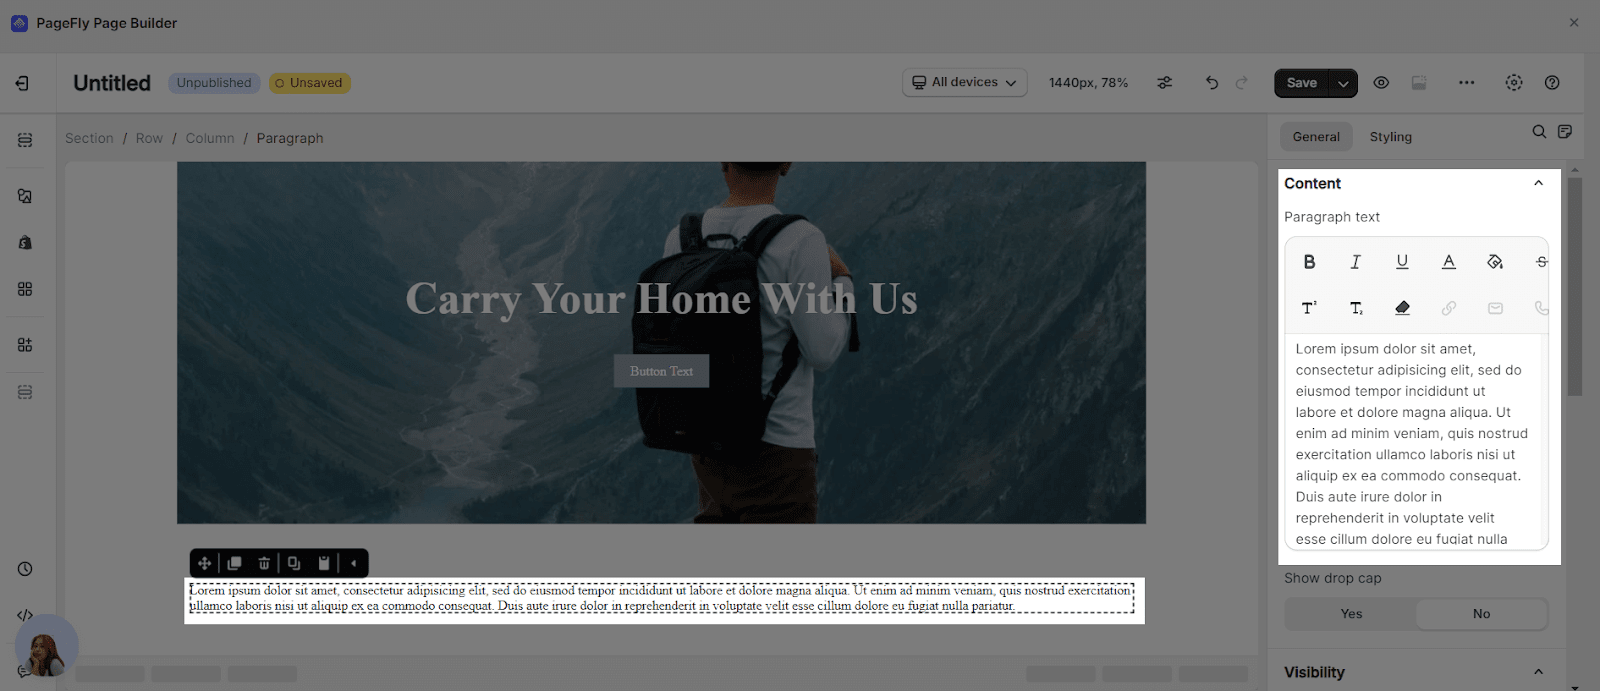
- Click on the Paragraph element to change the content. In the General tab, put the content that describes shortly about your store you want here
- Continue to the Styling tab to customize the style for the paragraph:
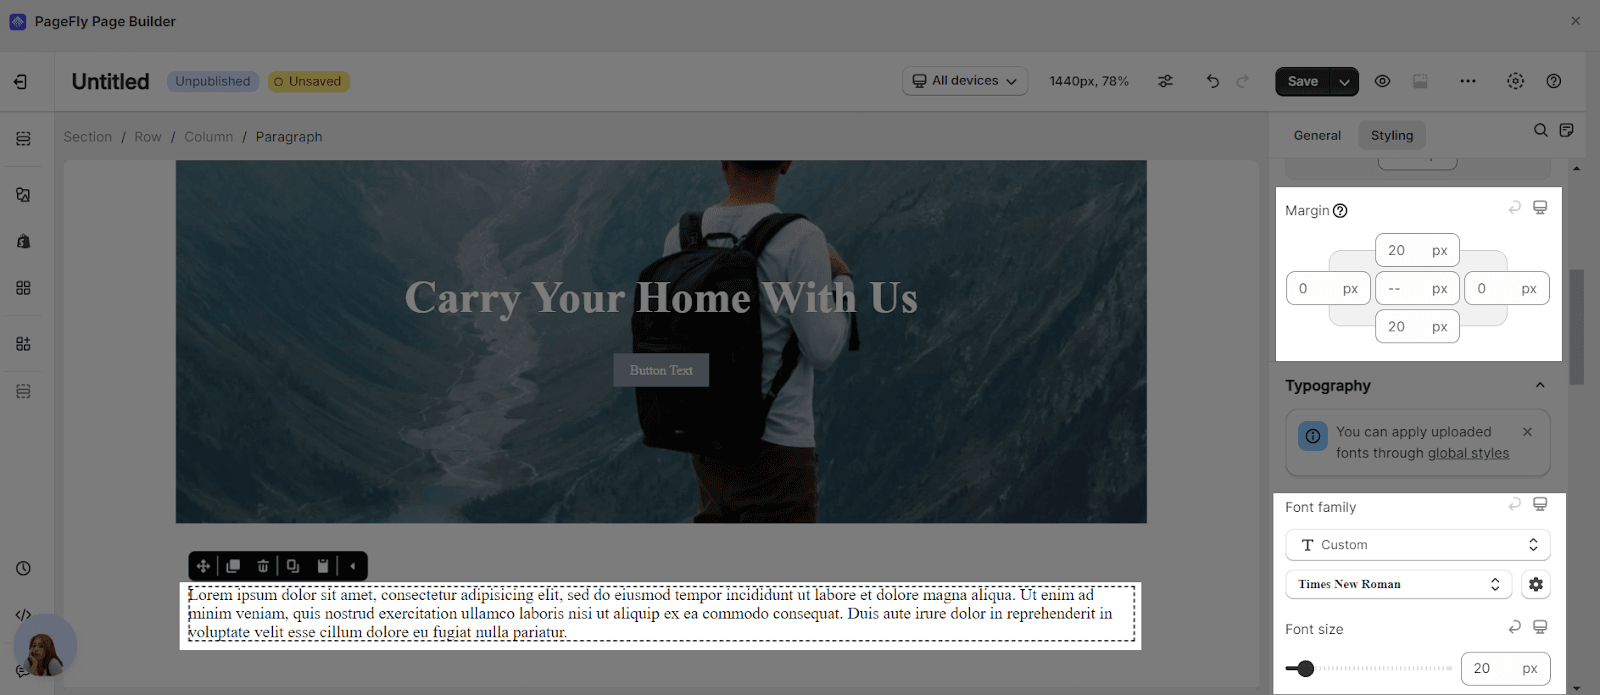
- Change the font family to Playfair Display font
- Adjust the font size to 30px
- Set 0px for the Margin top and bottom
- Click on the More Settings button and choose the font weight as Bold style and set up 1.5 em for Line Height.
Add A Background Image For The Description
- Click on the Section, in the Styling tab > Scroll down to the BACKGROUND parameter > Choose an image from the Background Image option,
- Set 150px for padding top and bottom, 40px for Padding left, and 650px for Padding right
You can upload the image which is available in the Image Manager or upload it from the Internet. Read more here to know more details.
Step 4: Show Featured Collections Of Your Store
Featuring a broad range of product types in your store will let customers have the best general view of all products.
If your store provides different types of products and they are not featured, this can lead to misinterpretations for customers, and losing sales can be the result of this.
And PageFly has the Collection List element to help you to feature your collections.
Adding A Heading
Before adding the collection list element, we will add a Heading element and give it a name.
- On the element catalog, click on the Add element icon, choose the Heading element > Drag and drop the first variant.
* Go to the General tab, change the content of the heading in the Heading Text box. Here we change to FEATURED COLLECTIONS.
* Switch to the Styling tab, style for the heading as following options:
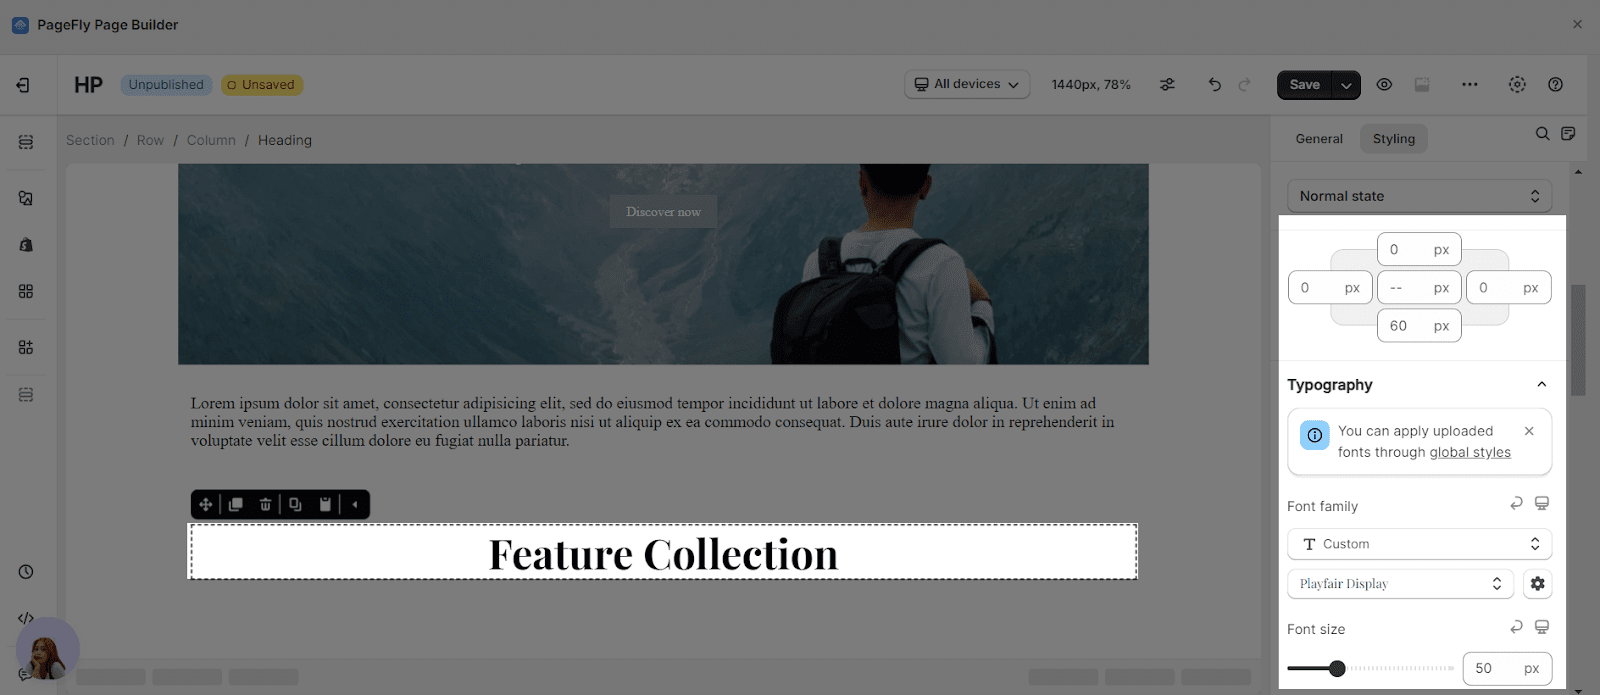
- Adjust the margin-top to 0px and 60px for the margin bottom
- Change the Font family to Playfair Display font
- Adjust the Font size to 50px
Set the Font weight as Bold and Line height as 2em
Click on the Row which contains the heading and align center for the Row so the heading can be centered.
Adding Collection List Elements
After we have a heading, we will use the Collection List element to display your store’s collections.
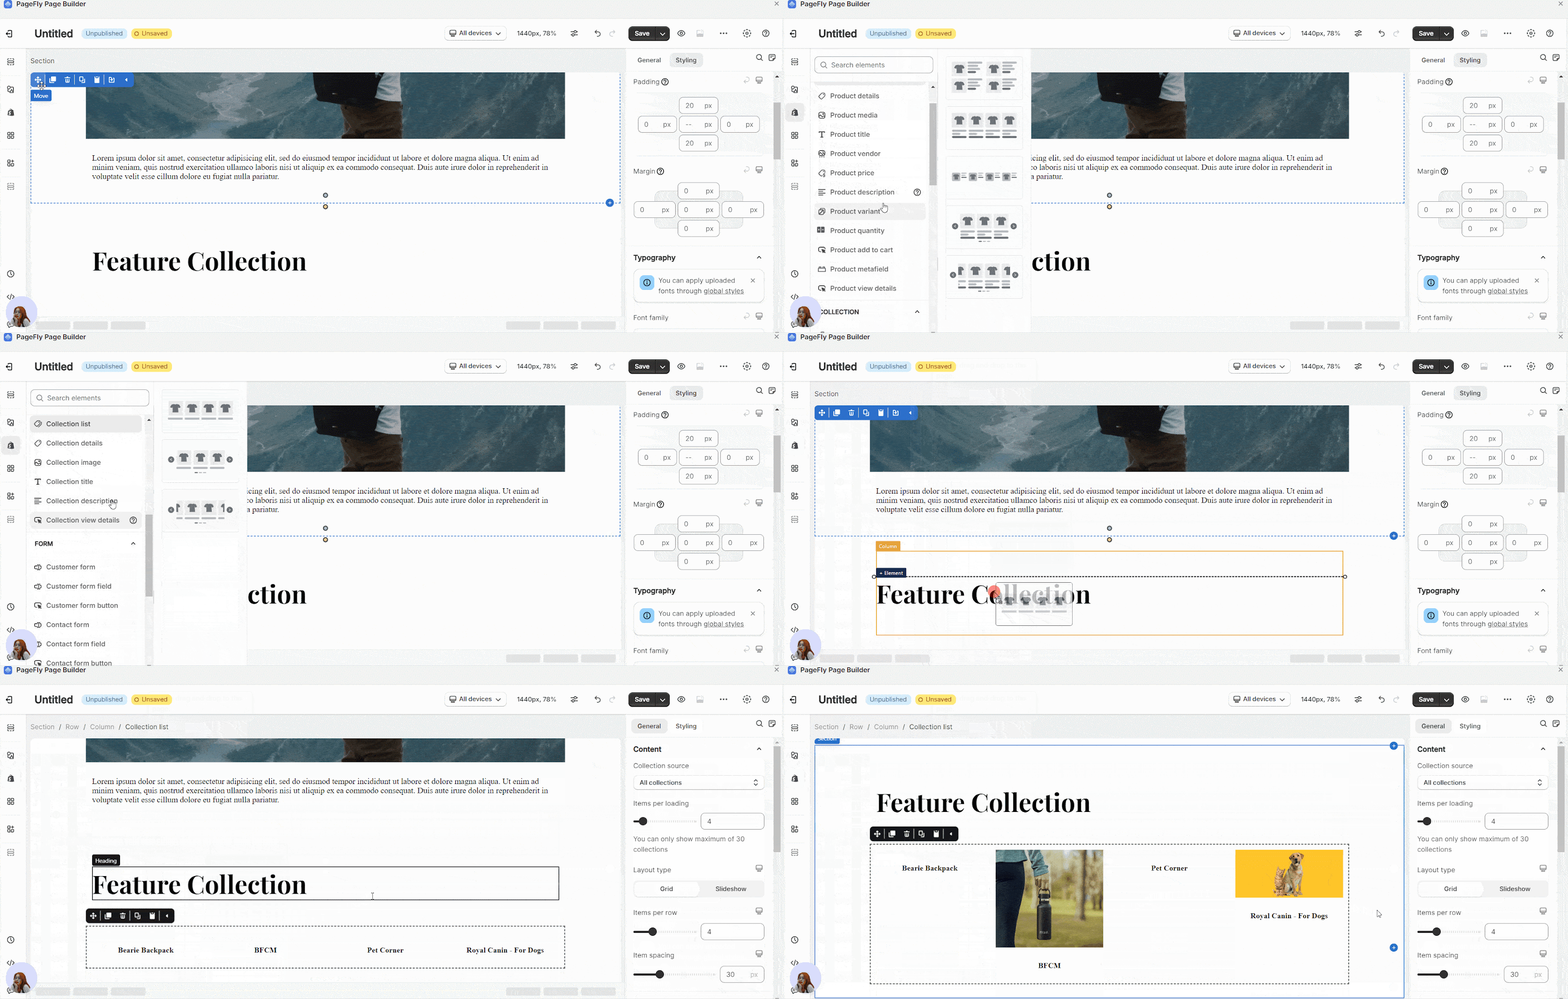
On the element catalog, click on the Add Shopify elements icon, choose the Collection List > Drag and drop the first variant into the same Row with the heading element above.
It will automatically show all collections of your store and you can adjust the items per loading to display the number of items you want. And by default, it shows 4 items. You can check this article to know more about the settings configuration for the Collection List.
Step 5: Promote The Store’s Campaign Or New Arrival
Add A ½ – ½ Layout
On the element catalog, click on the Add element icon, choose the Layout element > Drag and drop the ½ – ½ layout into the page editor.
Add Image Element
- Click on the Add elements icon, drag the Image element onto the right column.
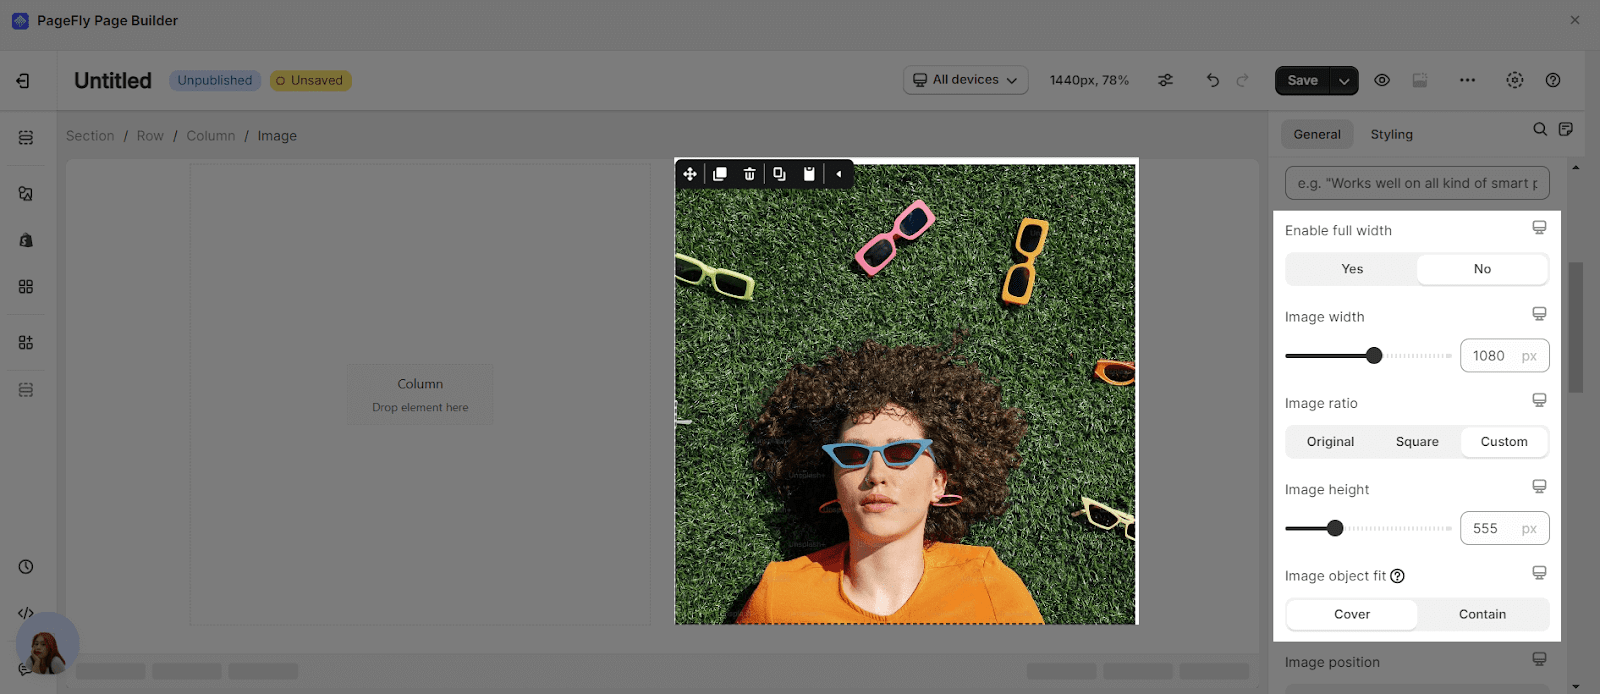
- Click on the Image > Go to the General tab. In Enable Full Width, select No and Custom for Image Ratio.
- Adjust 680px for the Image Width and 500px for the Image Height.
Add Campaign Titles
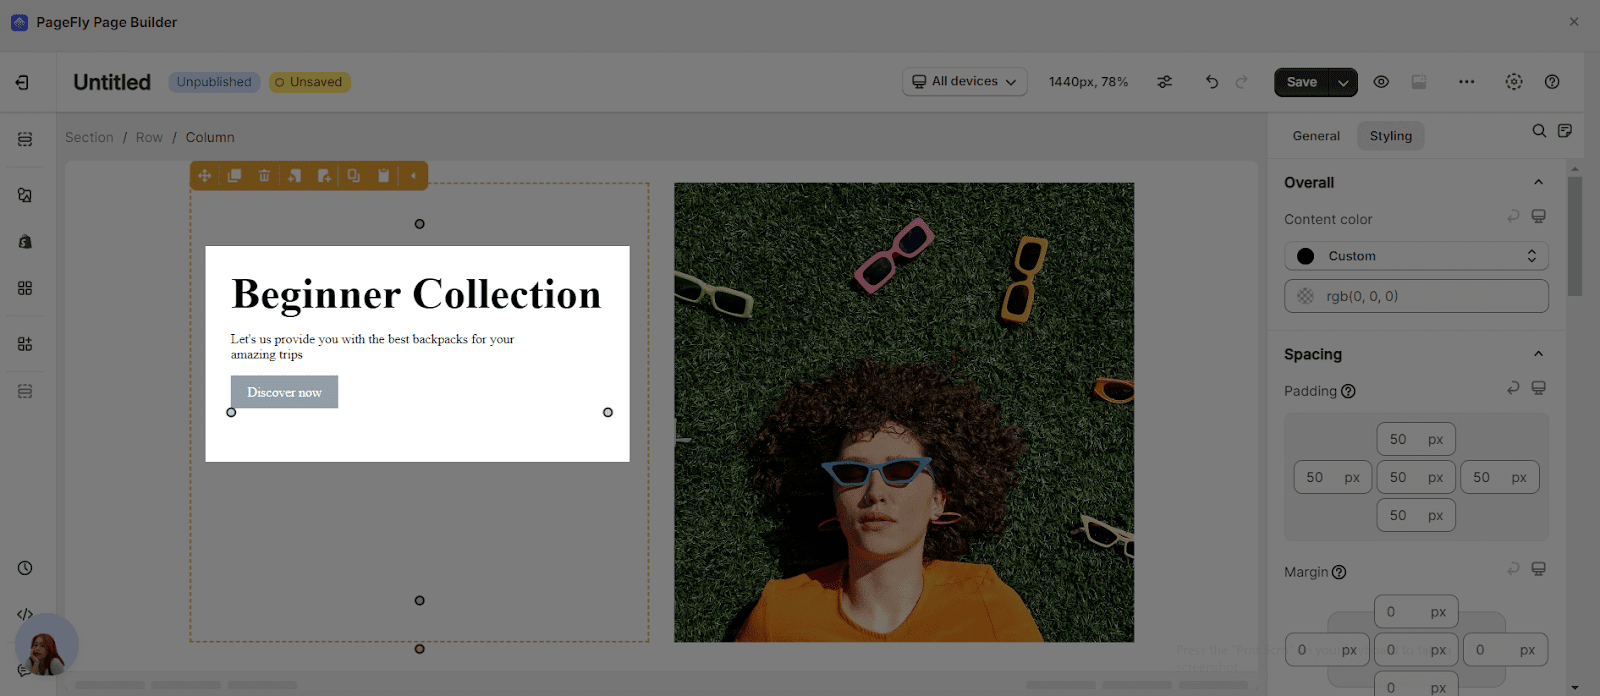
On the element catalog, click on the Add element icon > Drag and drop the Heading, Paragraph, and Button elements into the left column.
- Go to the General tab > Change the content in the Heading, Paragraph, and Button Text.
- Go to the Styling tab > Change the Styling of the three elements.
Step 6: Add Product Details
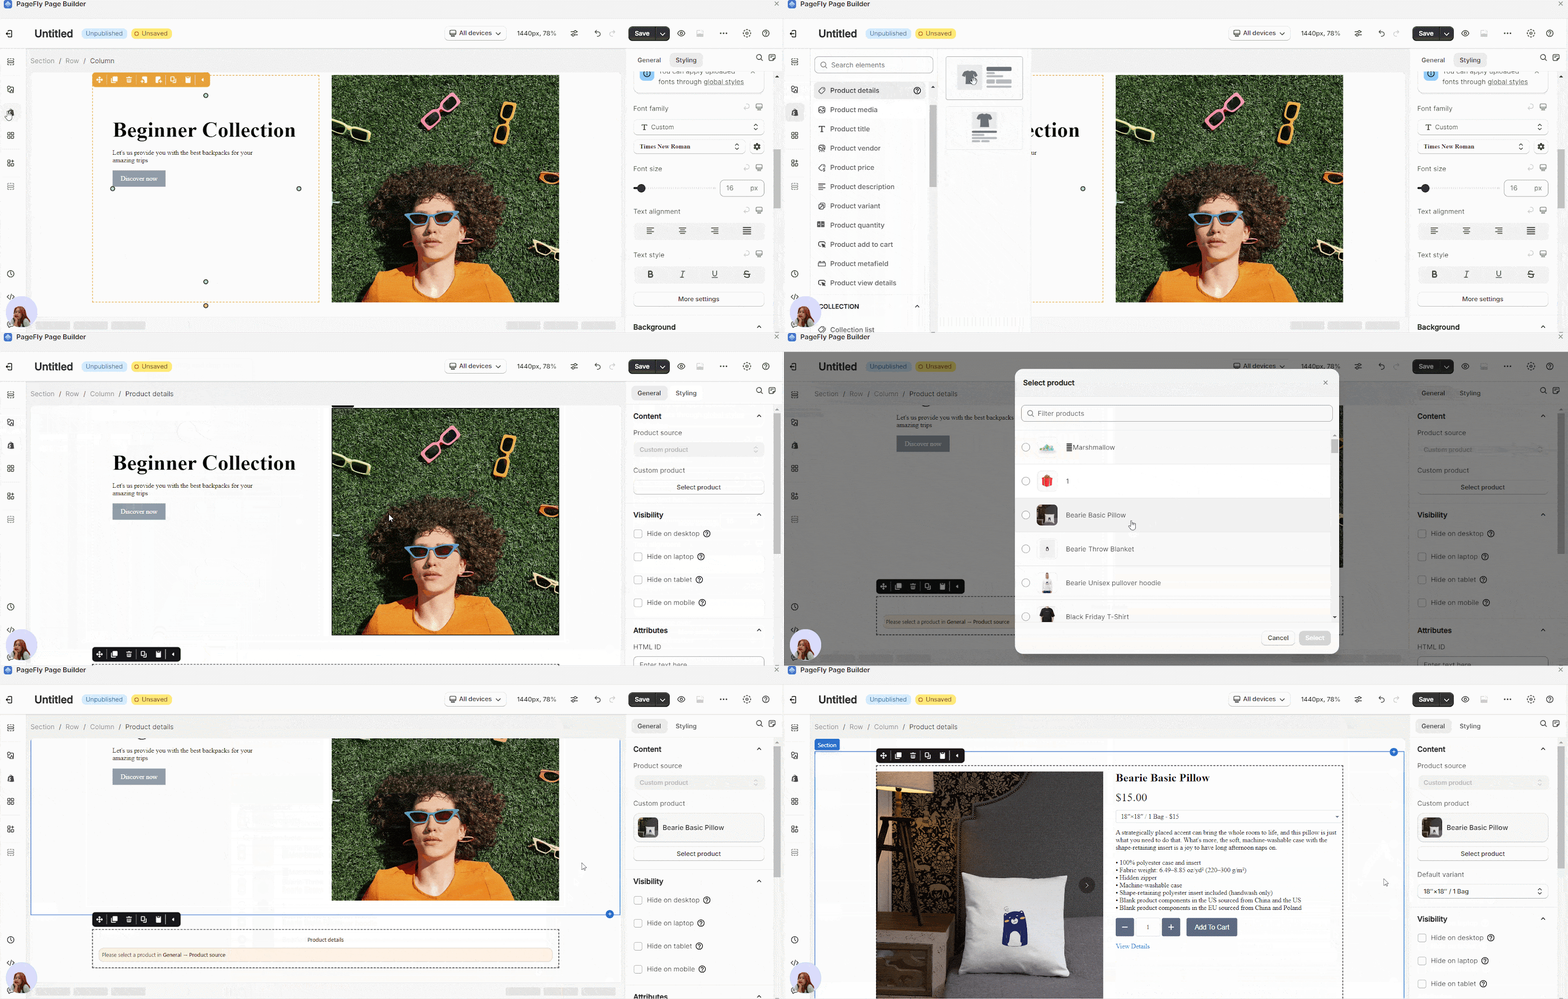
- On the element catalog, click on the Add Shopify elements icon > Choose the Product Details> Drag and drop the first variant into the same Row with 2 columns above.
- Head over to the General tab > Choose the Custom Product option > Select the Product you want to display.
Step 7: Add Testimonials
Testimonials as well as social proof will be helpful for your online store because basically, they help to build trust and credibility for your store’s products. And this encourages other customers to buy products from your store.
PageFly provides a Testimonial option as one of the premade sections so you can use it to show customer feedback.
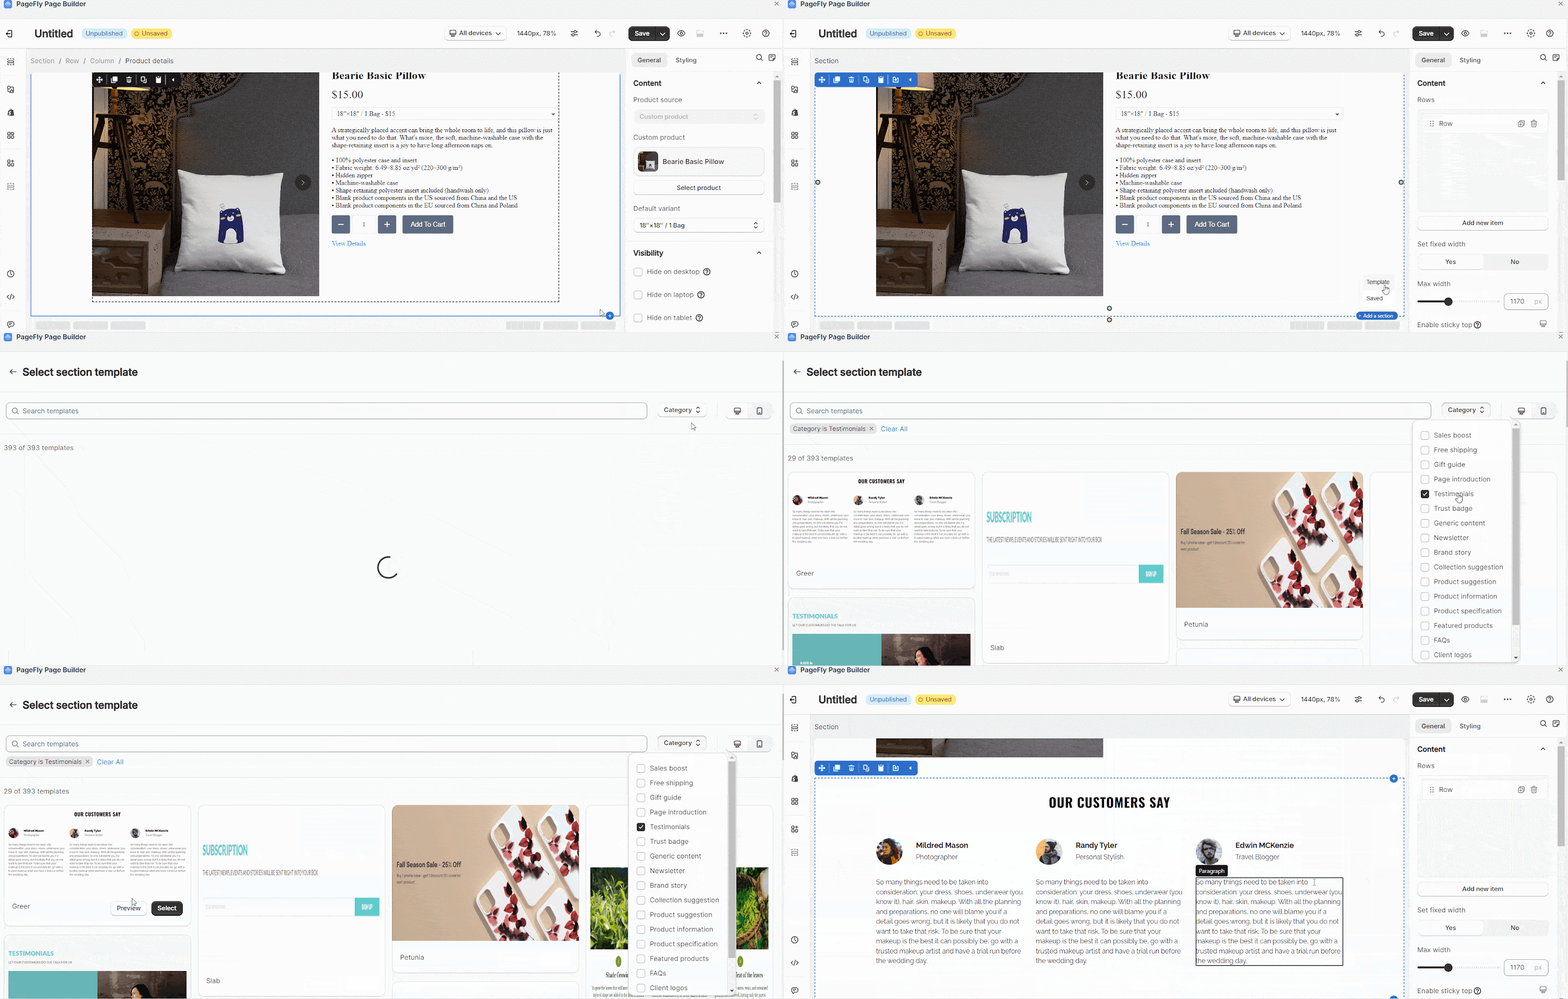
Hover or click on the section and you will see the plus icon on the bottom right > Hit the icon > Select Template.
In the template library popup, head to the Category dropdown button > Choose Testimonials > Select the pre-made sections.
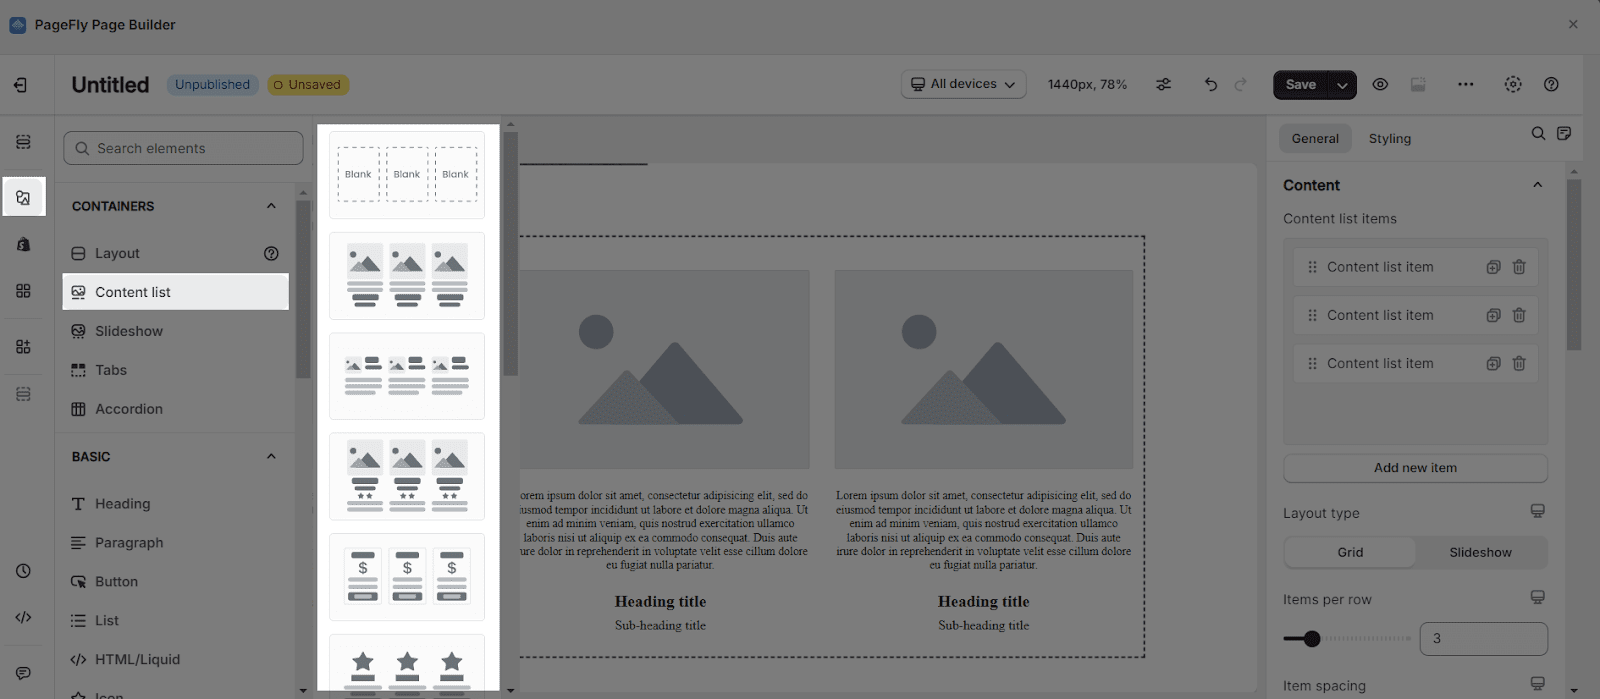
Or you can create your own unique testimonial by using the Content list element in the left toolbar.
- Click on the image element to choose the customer’s image in the General tab.
- Switch to the Styling tab to change the Style Preset for the image.
- Click on the Paragraph element to change the customer’s content review in the General tab.
- Switch to the Styling tab, you can customize the style for the paragraph here.
- Click on the Testimonial section.
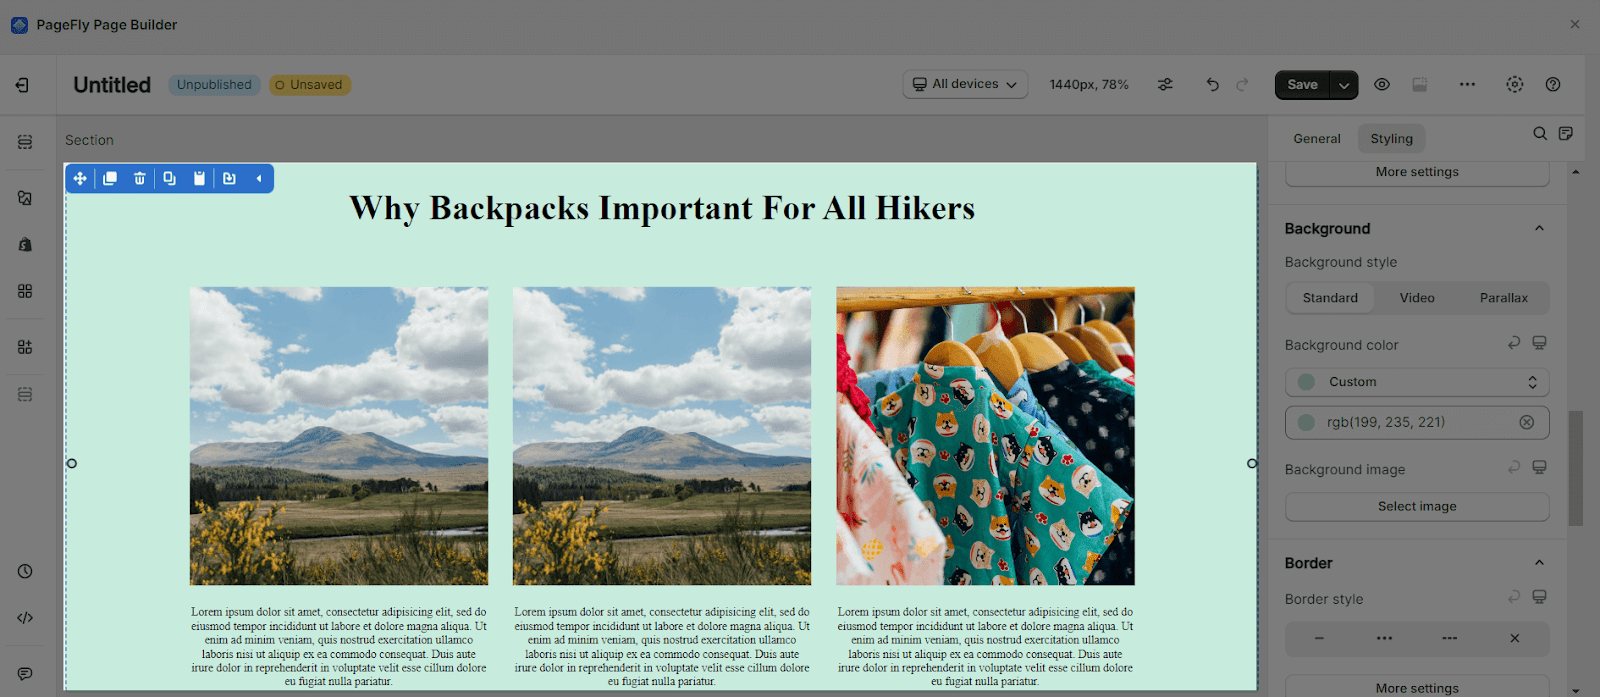
- Go to the Styling tab > Scroll down to the BACKGROUND parameter > Choose a background color.
Voila! We’ve just finished making a home page with PageFly.
This home page’s structure helps you to have a basic and standard home page for a Shopify online store, just remember that you need to show the store’s products on the home page, a primary call to action and tell customers what you are selling.
Click on the Publish button to see it on the live view.
Tips And Best Practice
- When you publish the PageFly home page, it will replace the current home page of your store which was made by theme. If you unpublish the PageFly home page, the home page made by the theme will be displayed back.
- You can consult this article for building a landing page.
- Note that you cannot use PageFly to edit the home page made by your theme.
Frequently Asked Questions
What Is A HomePage On Shopify?
A Homepage is a web page, can be made from scratch or template, is the starting point for your Shopify store
How Many Websites Can You Host On Shopify?
Up to 20 domains or subdomains, however, it must be in the Shopify admin, as you cannot create these in the PageFly dashboard.
What Should Be Included In The Homepage?
- Banner with clear value proposition and proper navigation
- Clear call-to-action (Around 1 or 2) …
- Highlights of your content
- Client Testimonials
- Information about products, services and features
- Contact information


