About The PageFly FAQ Page
An FAQ Page (Frequently Asked Questions page) is the key part of a knowledge base, as it addresses the most common questions customers have; which is useful to customers at all stages of the customer journey.
This is also the page where marketers can input all complicated answers to attract engaged shoppers to understand more about the brand.
How To Create A FAQ Page With PageFly?
Check out this informative video showcasing a great example of a Shopify FAQ Page built by PageFly!
Step 1: Create A Regular Page
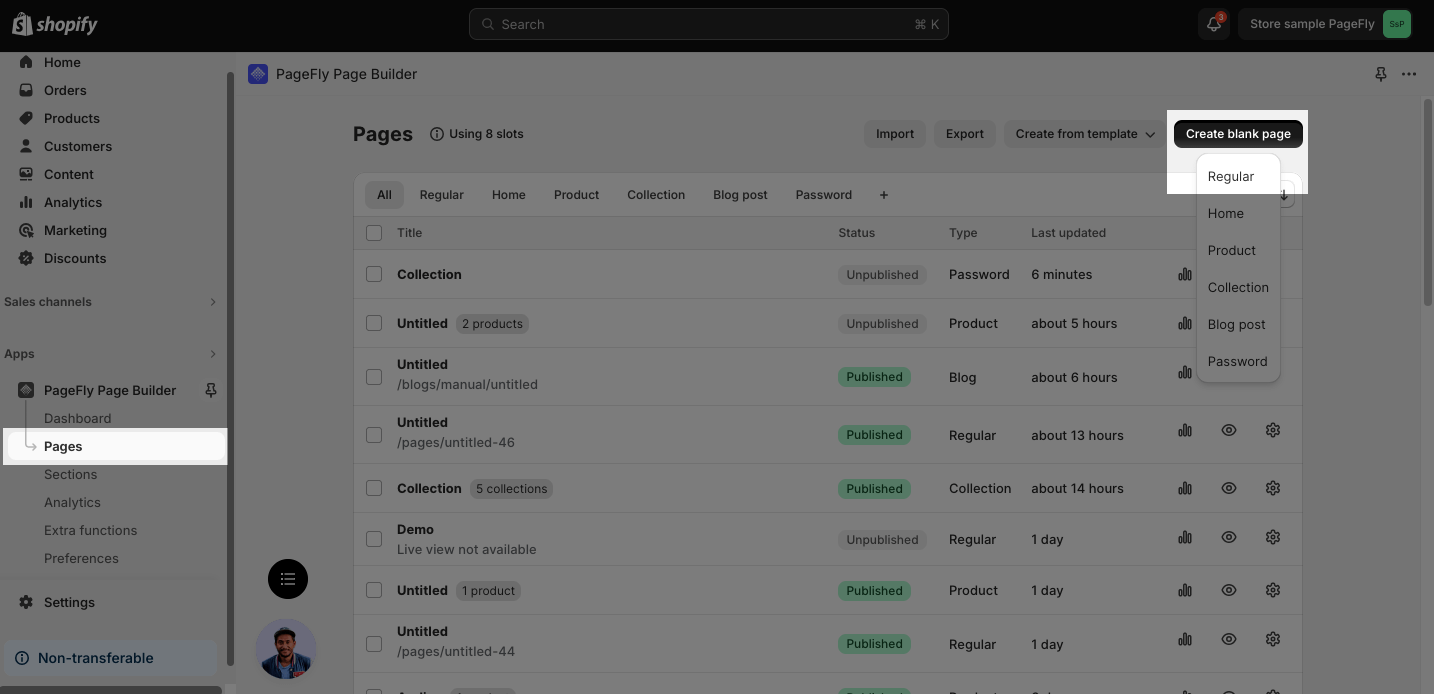
In the PageFly dashboard, select the Pages tab and click on the Create blank page button on the right screen, choose Regular to start building your page from scratch.
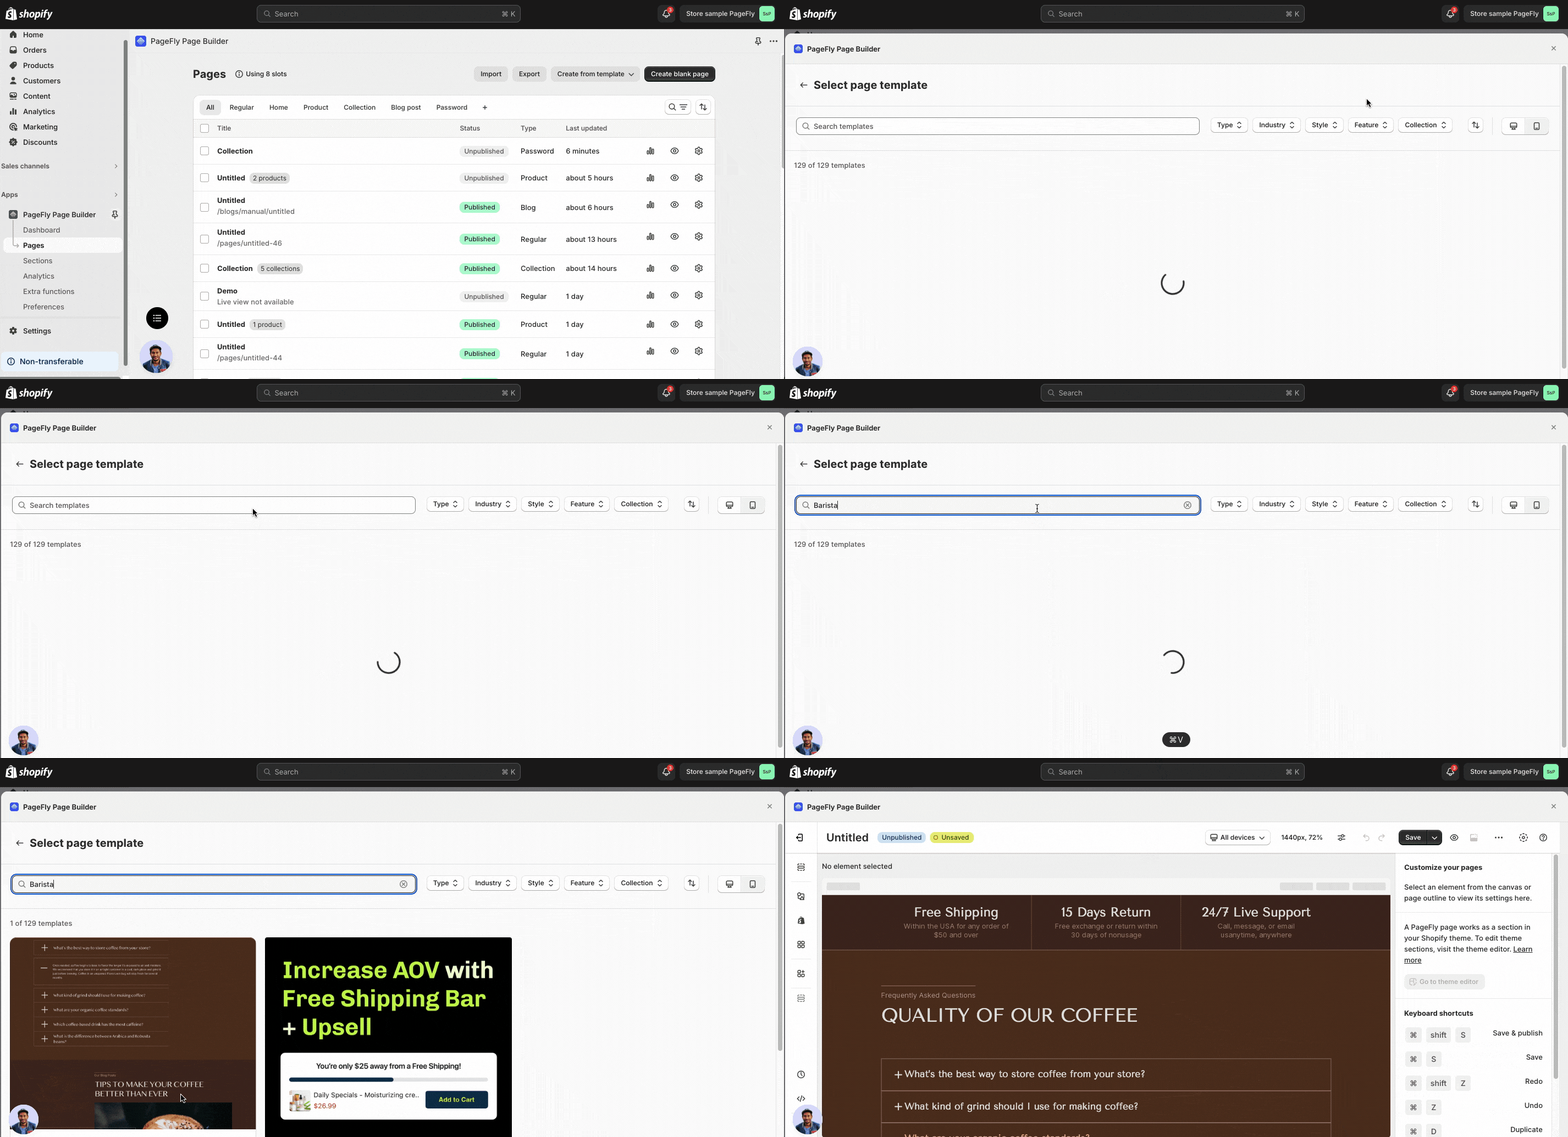
Or hit the Create from a template button to use PageFly templates for your FAQs page.
Step 2: Add FAQs Sections
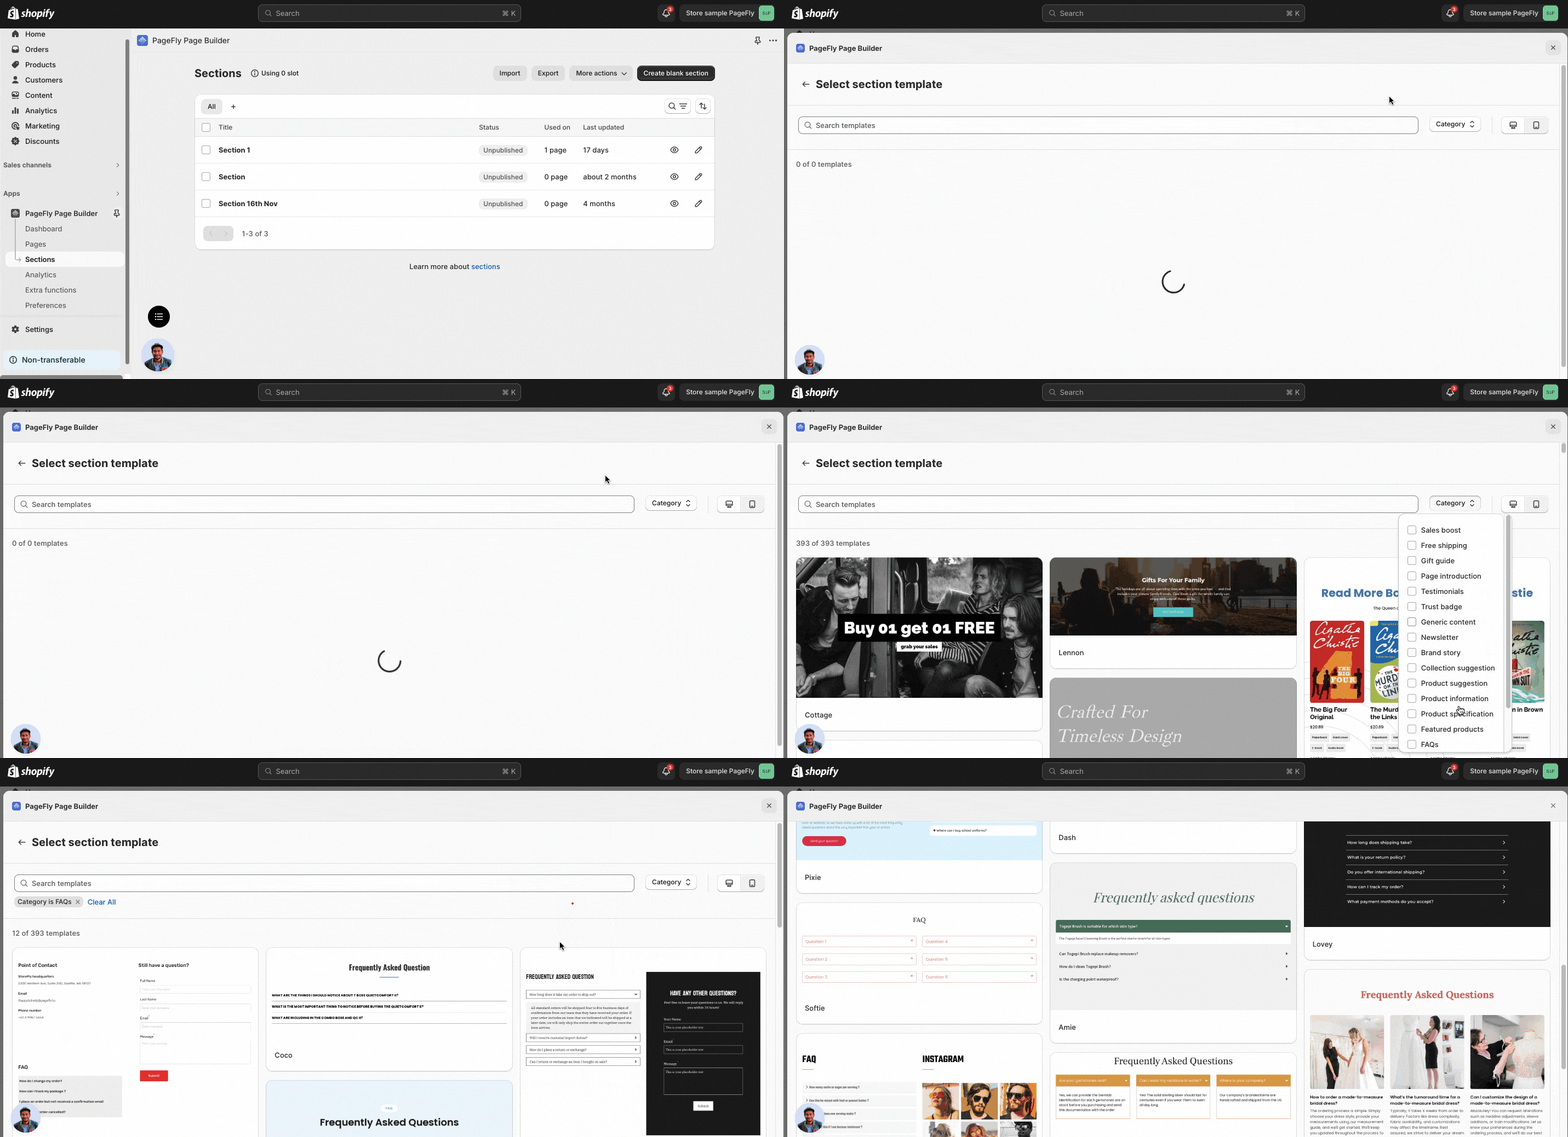
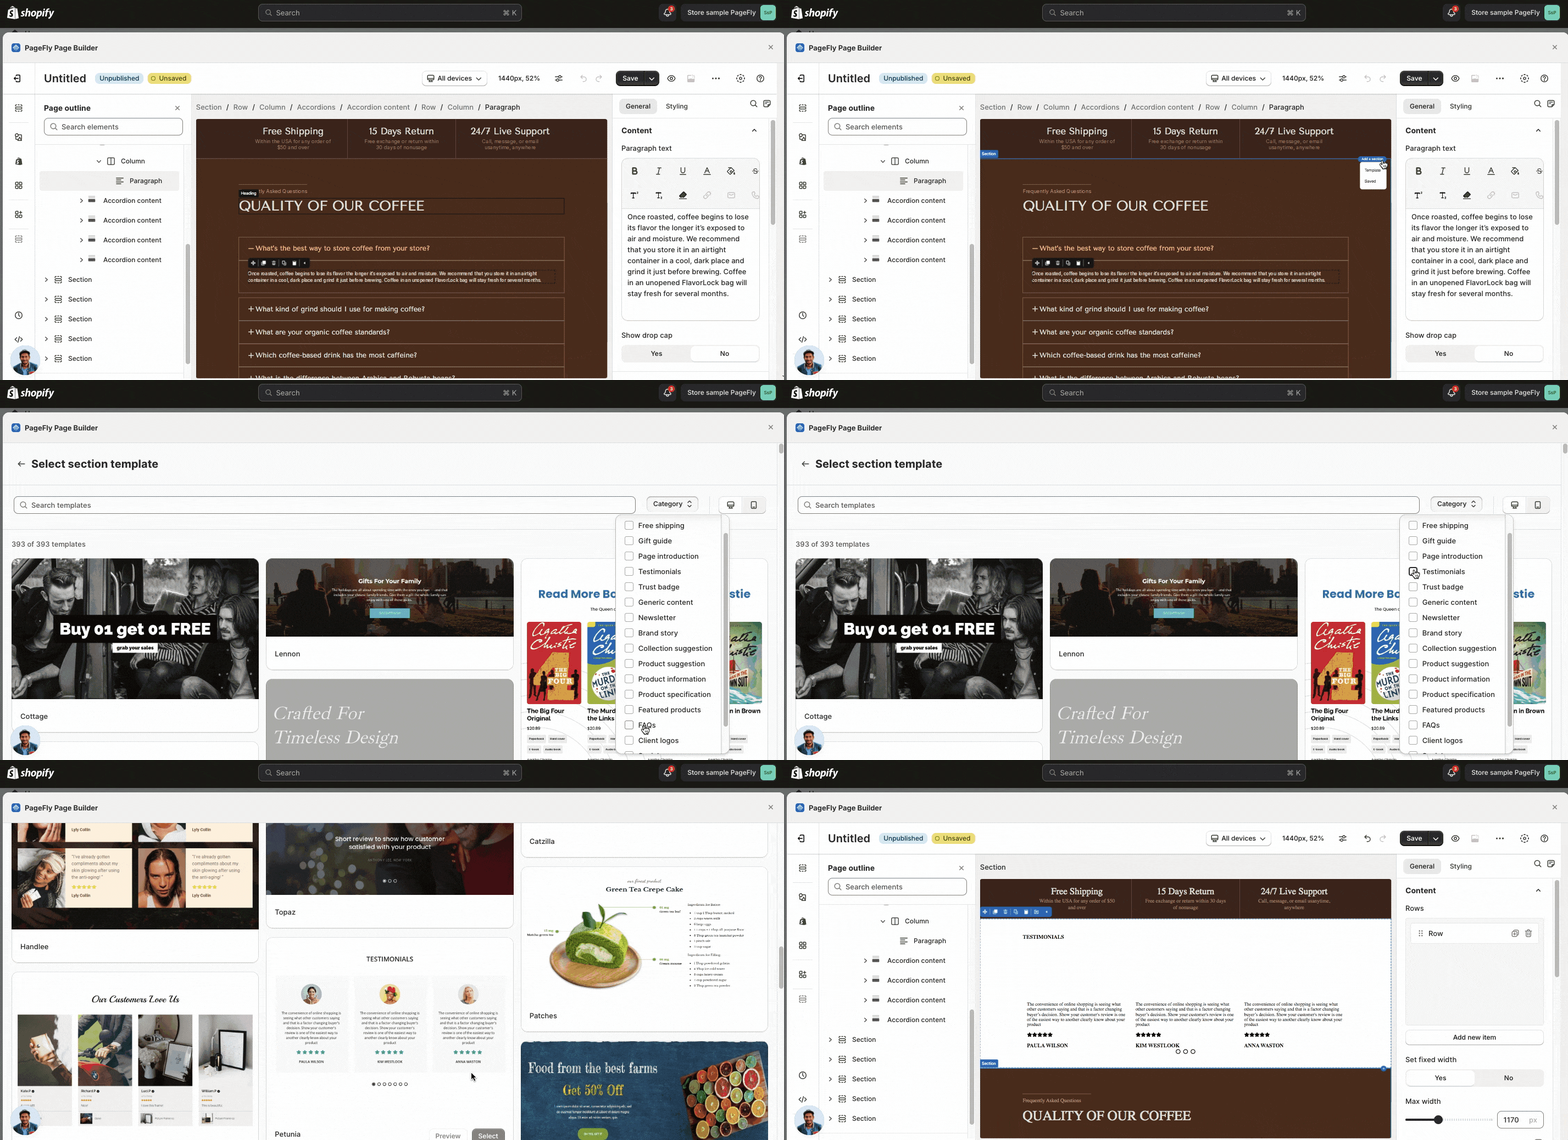
To save time, you can access the PageFly pre-made section and select FAQs sections here.
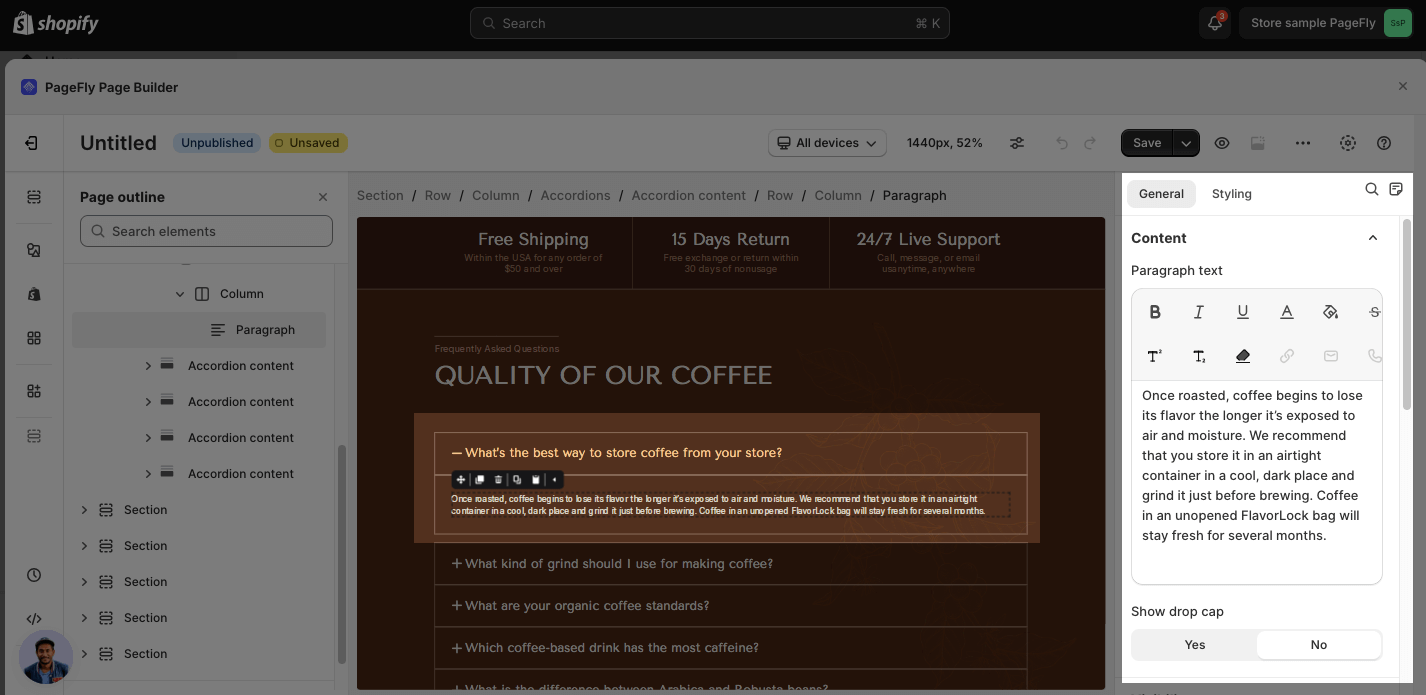
After that, you can freely change content in this section to your prepared content.
Elements that can be used for this section:
- Accordion element: Then the Accordion element is highly recommended because it is used to create collapsible content on a page to provide a cleaner user experience.
- Tab element: If you end up with a long list of questions, you can organize many questions into categories like “Shipping” or “Sizing & Fit” so visitors can find what they’re looking for more easily. In this case, you can use the Tab element for it.
For a comprehensive understanding, let’s watch this video tutorial for your reference before proceeding:
Step 3: Add Testimonial Section
To save time, you can access the PageFly pre-made section and select the Testimonial section here.
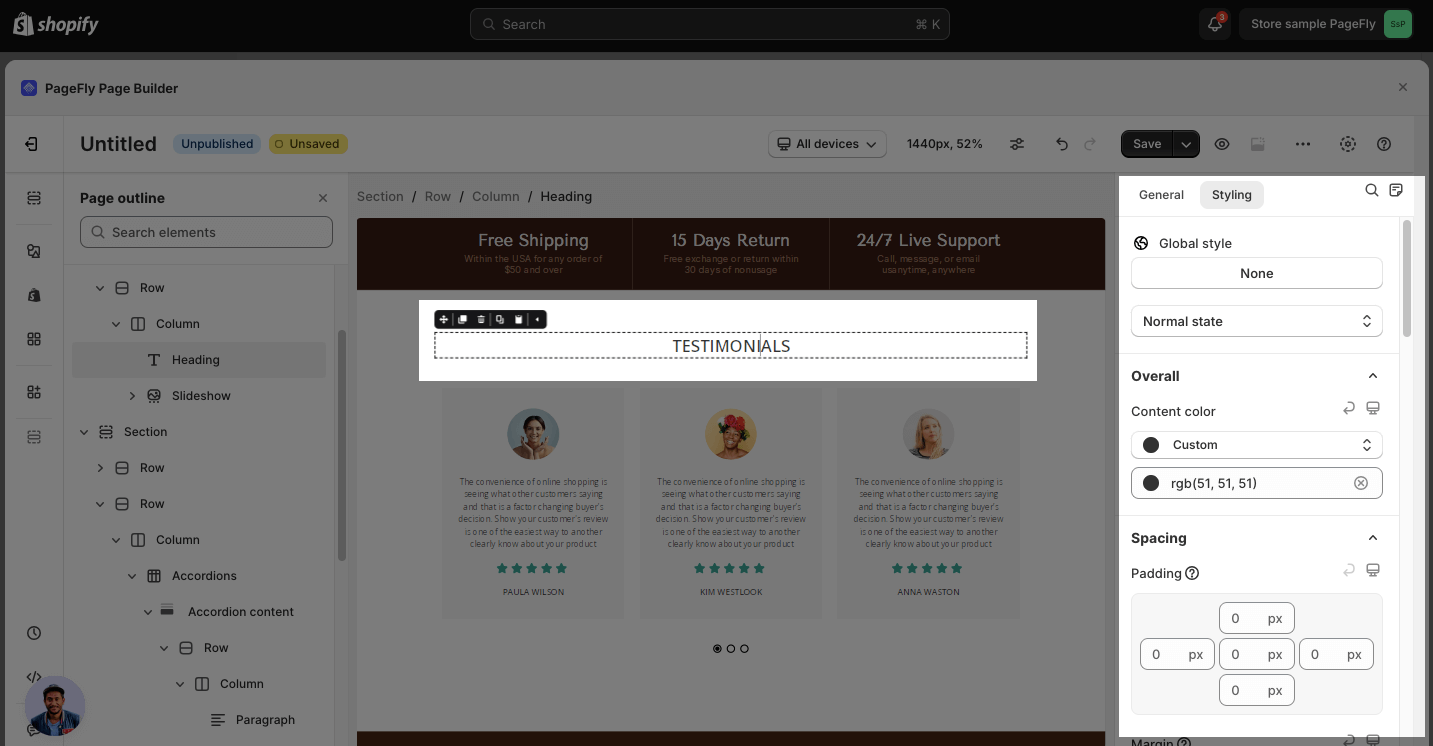
Next, click on each element to change in the general tab and adjust styling in the Styling tab.
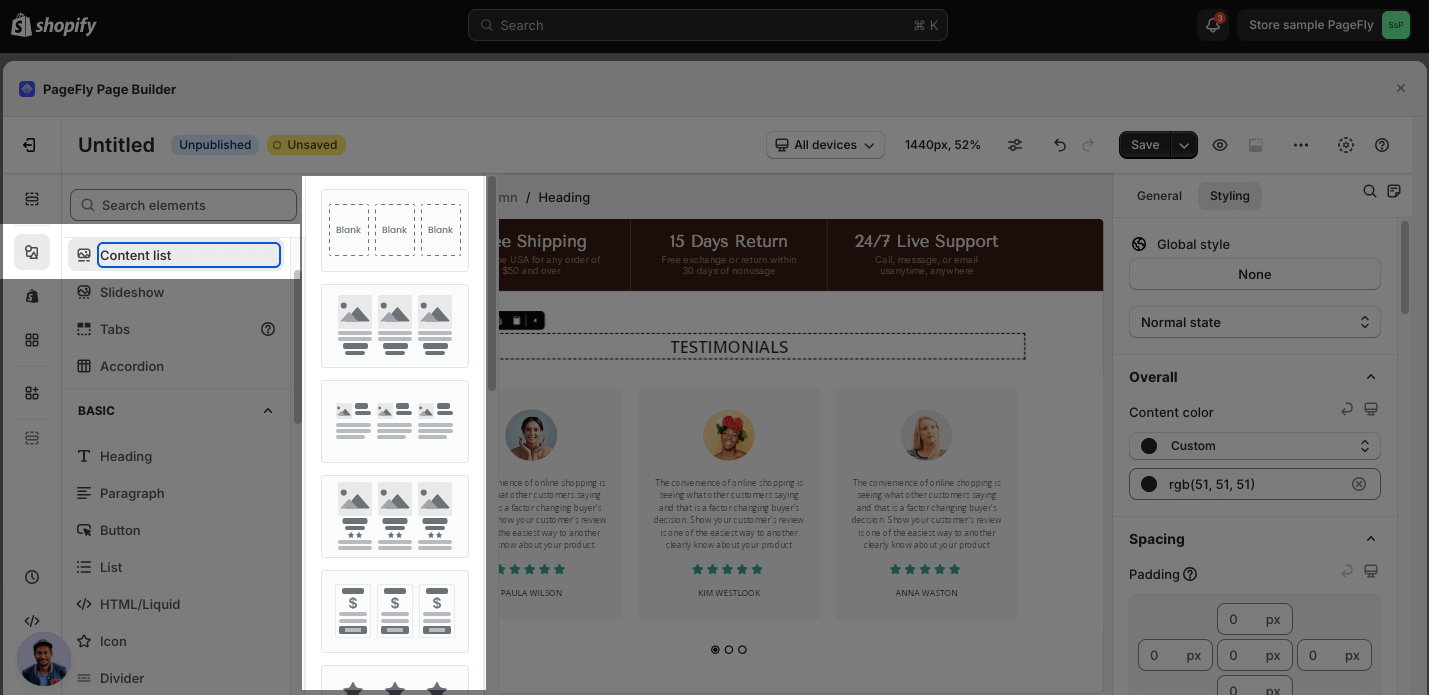
You can also build the section from scratch using the Content list element. In the Element catalog, click on the Add elements icon to add the Content list element.
Step 4: Add Contact Form
The Contact Form element is designed to help you easily collect customer’s messages or inquiries to increase your conversion rate.
Create Layout
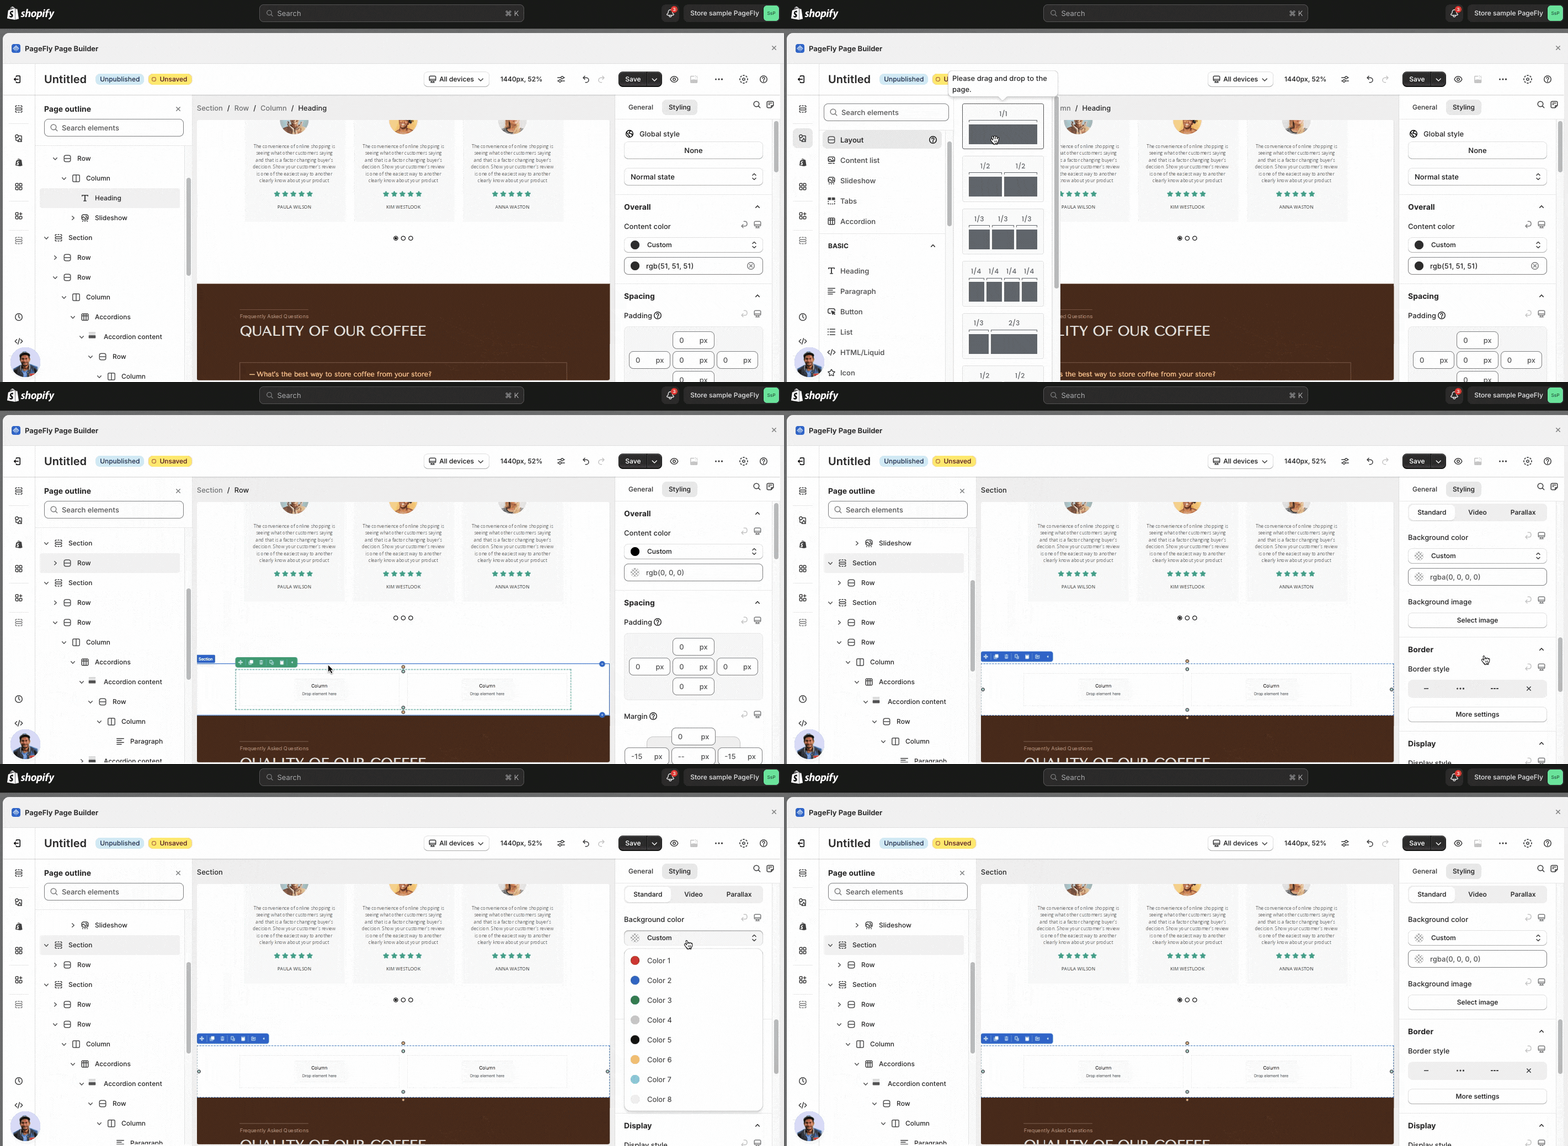
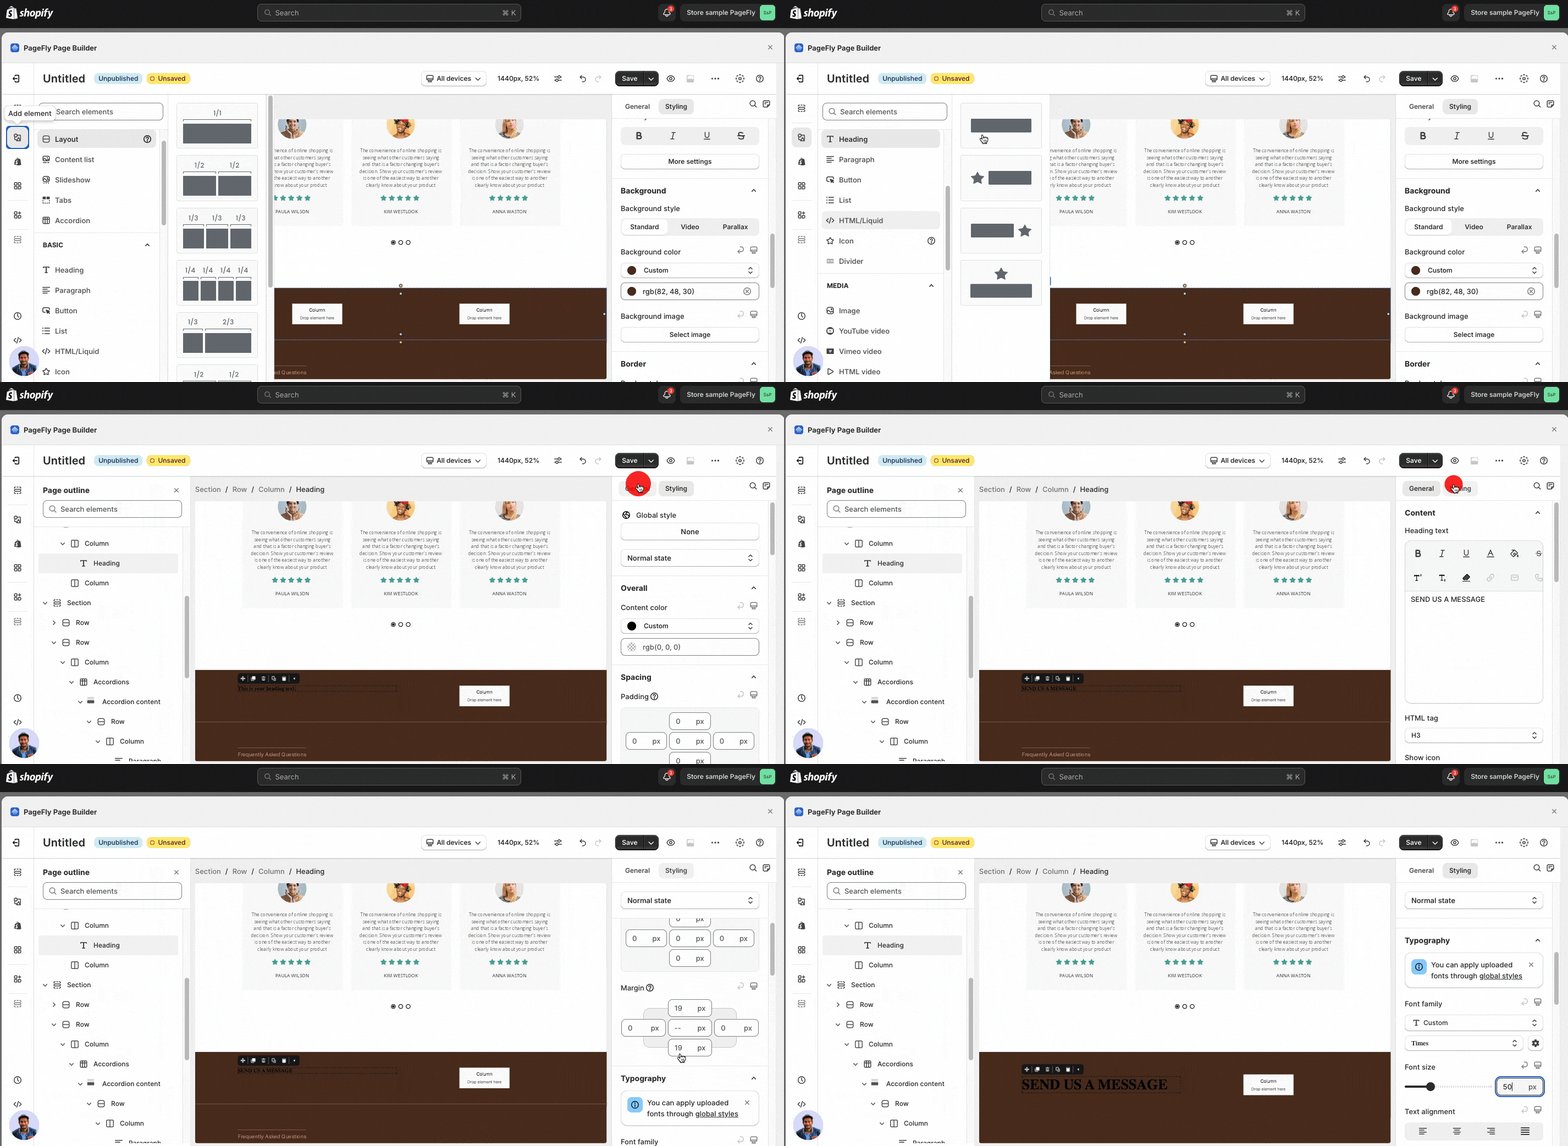
In the Element catalog, click on the Add element and select ½ and ½ layout.
After that, adjust padding top and bottom for the section and scroll down to change Background color.
Add Content
Now add the Heading element into the first column. Apply content in the General tab and switch to the Styling tab to change the font size, font family, color, etc.
Add Contact Form
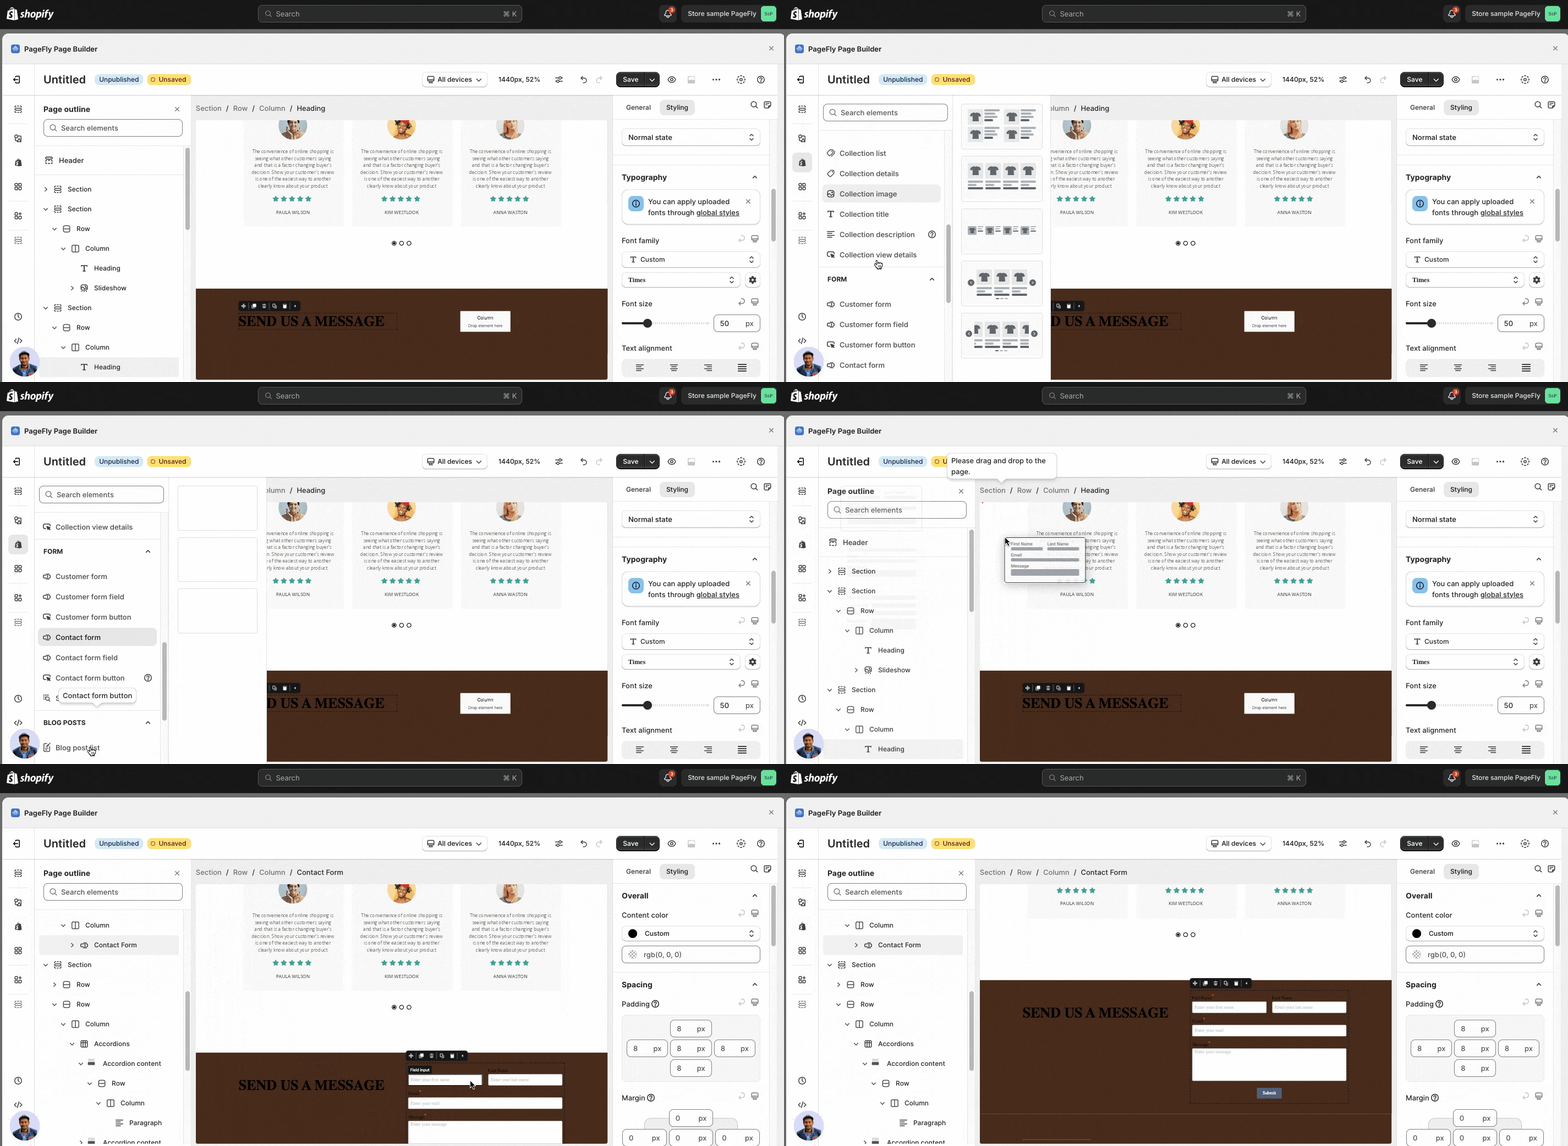
In the Element catalog, click on the Add Shopify element icon > Add Contact form element in the second column.
Step 5: Save And Publish The Page
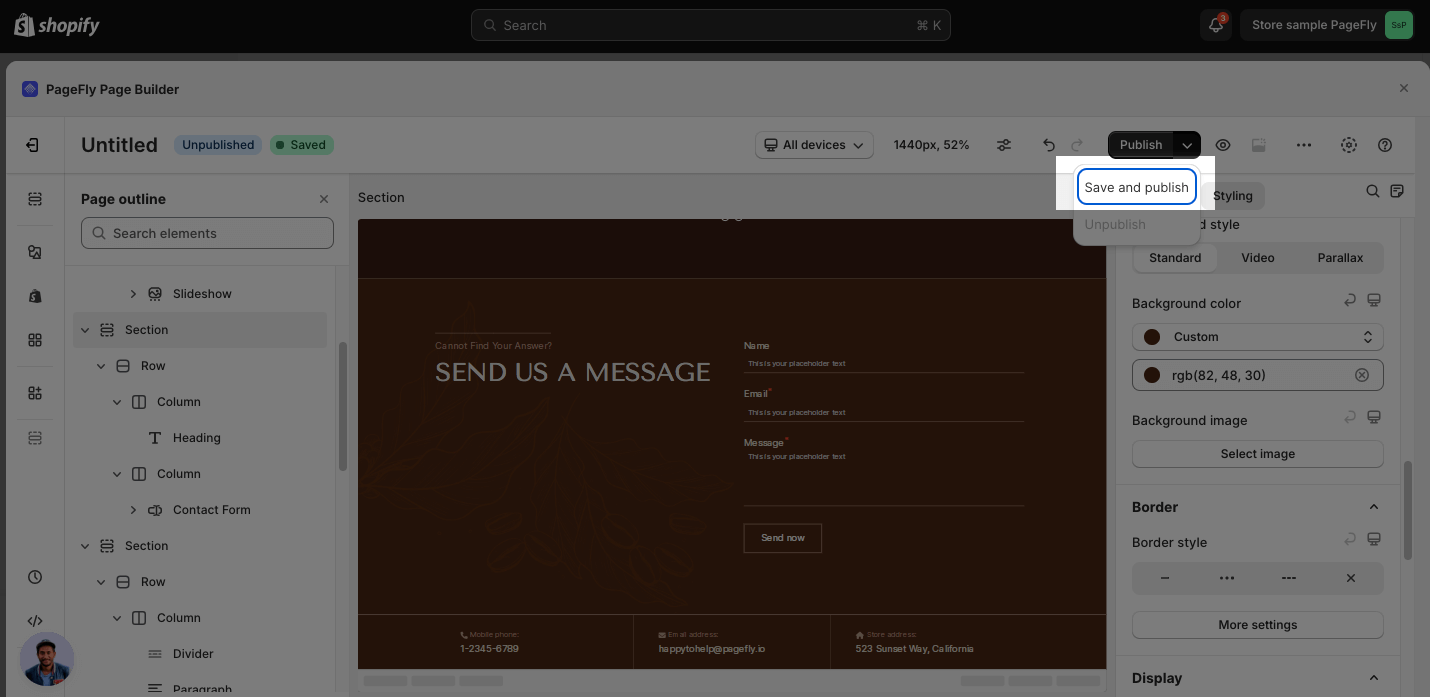
After the page is done, click on the Save & Publish button and Live view to see the page in the live.
Tips And Best Practices
- Write Clear, Concise Answers: Craft straightforward, easy-to-understand answers, avoiding jargon.
- Optimize for Mobile: Ensure your FAQ page is optimized for seamless viewing on mobile devices.
- Include Relevant Visuals: Add supporting images, graphics, or videos to illustrate concepts.
- Link to Other Resources: Include links to related pages like returns, shipping, and contact info.
Frequently Asked Questions
What Is The FAQs Page?
A FAQ page is a page in your online store that answers common customer questions, concerns, and objections. It is important to collect all the questions you hear from your customers and research more about the problems that they have trouble understanding. It can be about the shipping, products, orders issues, sizing, and return policy. Note that to use FAQ pages, you must write clear answers to questions.
What Should Be Included In A FAQ Page?
The FAQ page commonly includes 4 following sections: FAQs Section, Testimonial Section, Newsletter, and Trust Badge.
How Should I Start Writing A FAQ Page?
You should write your questions from your customer’s point of view (e.g. “How do I …”) and answer from your business’s perspective (e.g., “You should …” or “We provide …”).


