About Page Analytics
Page Analytics lets you view your page’s performance and how PageFly pages can help you grow your business and increase sales. By visualizing metrics, you can get an overview of your page’s performance and see how it changes over time. This information can help you make better business decisions.
For a quick overview, you can watch this video below:
How To Access Page Analytics In PageFly
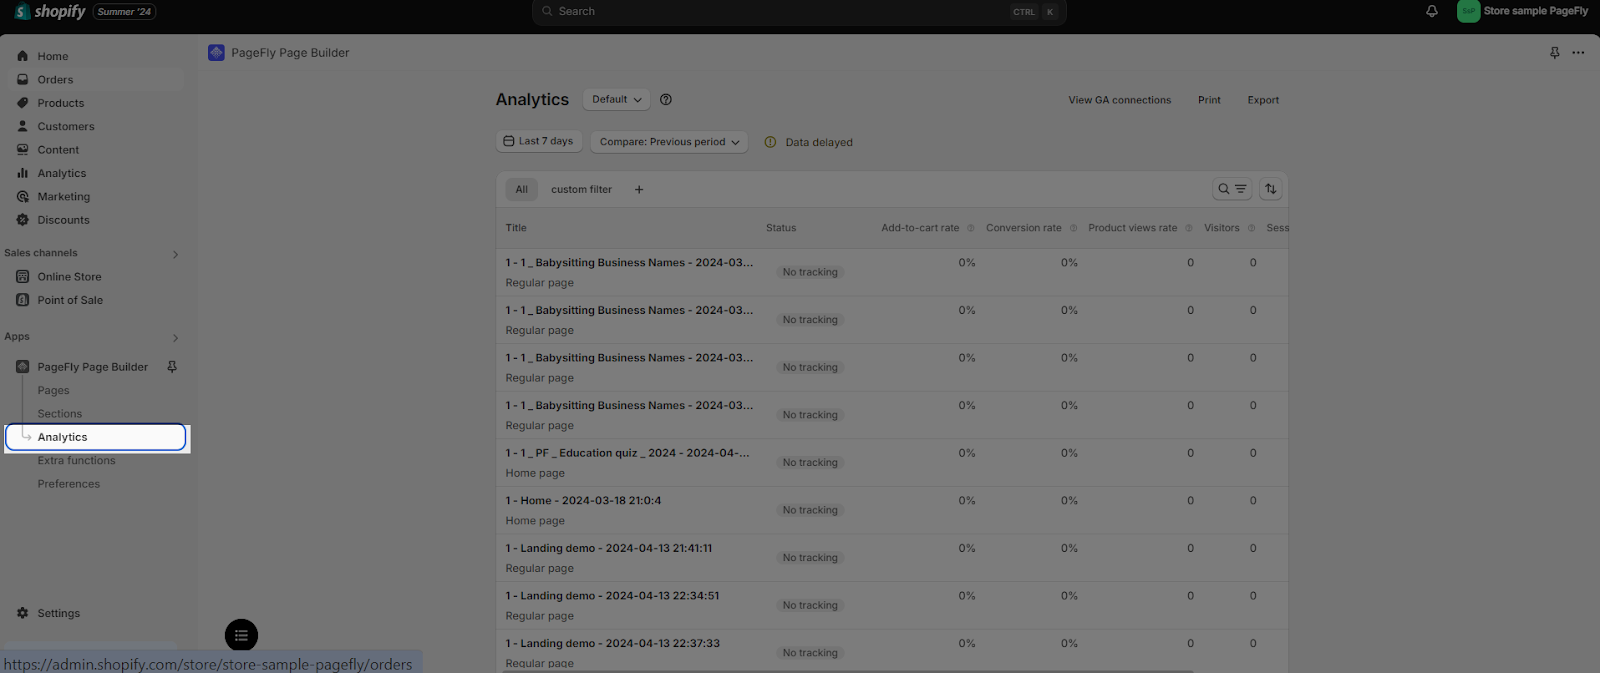
When using the PageFly, you’ll see a menu on the left side. Click on the “Analytics” option in this menu. This will take you to the Analytics dashboard.
How To Configure For Page Analytics With PageFly
Step 1: Activate Google Analytics
To activate Page Analytics, go to the Google Analytics section on the left menu bar of the PageFly dashboard. If you disable Page Analytics, a modal message will appear directing you to Open Analytics Settings in Preferences to enable it.
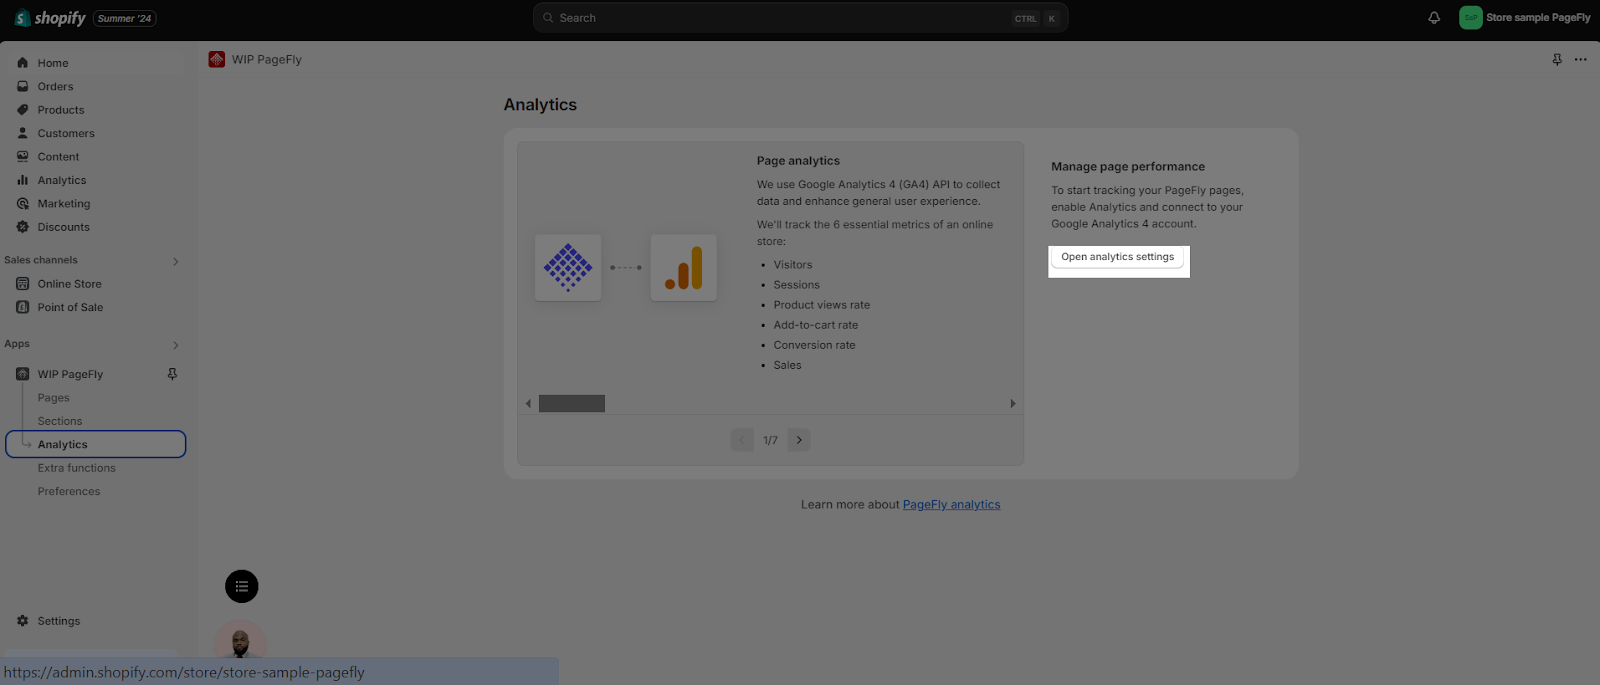

Once you click on the “Enable PageFly analytics“, you will need to connect to your email account that has the connection with Google Analytics.
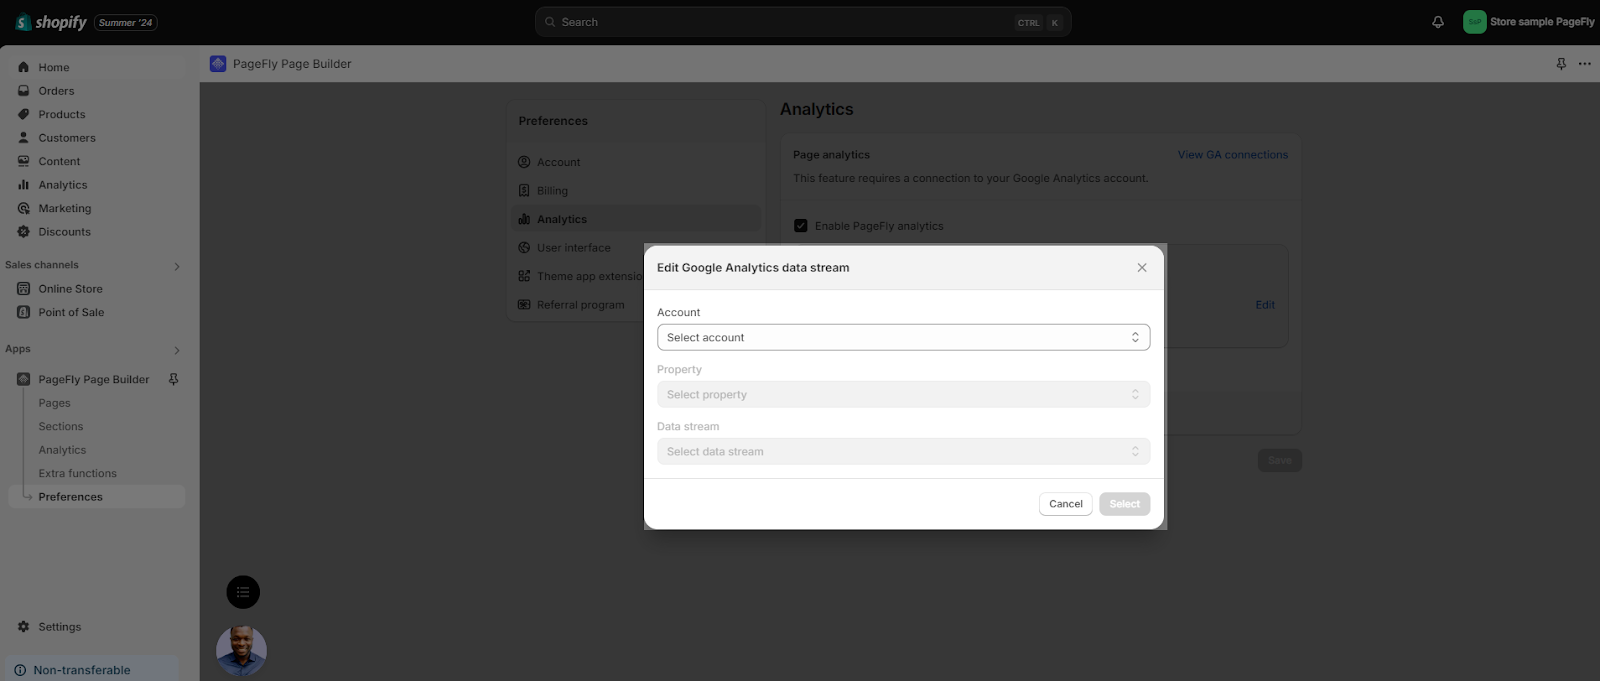
After completing the process to grant PageFly access to your email, you will see a box below. Select the proper account that you have set up before like in this step.

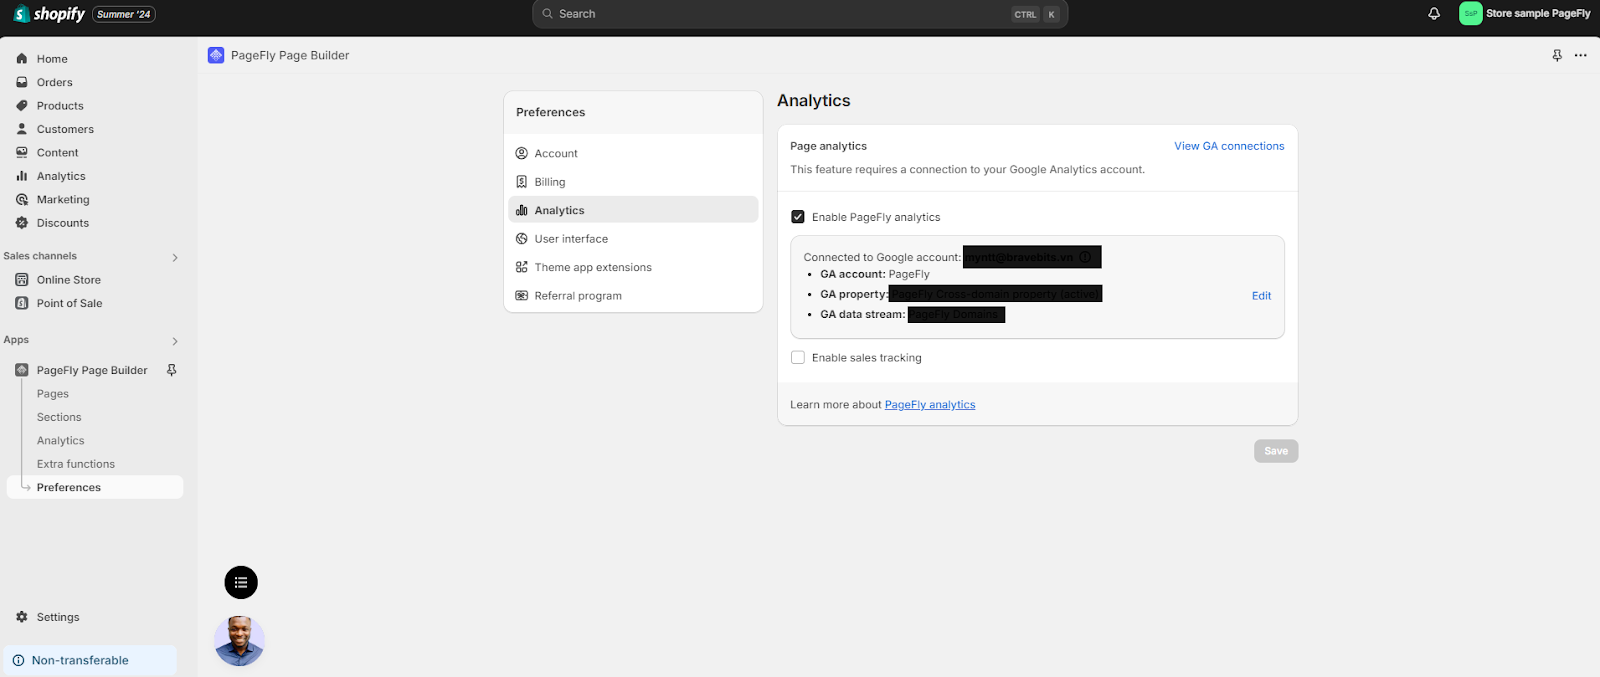
The settings will look like the image below when completed.
Step 2: View Analytics
Now you can go to the Analytics page (in the left menu) to see performance results of your pages.
Click on each page to see a detailed report.
Besides, there are several functions in the Analytics page that you should take a note:
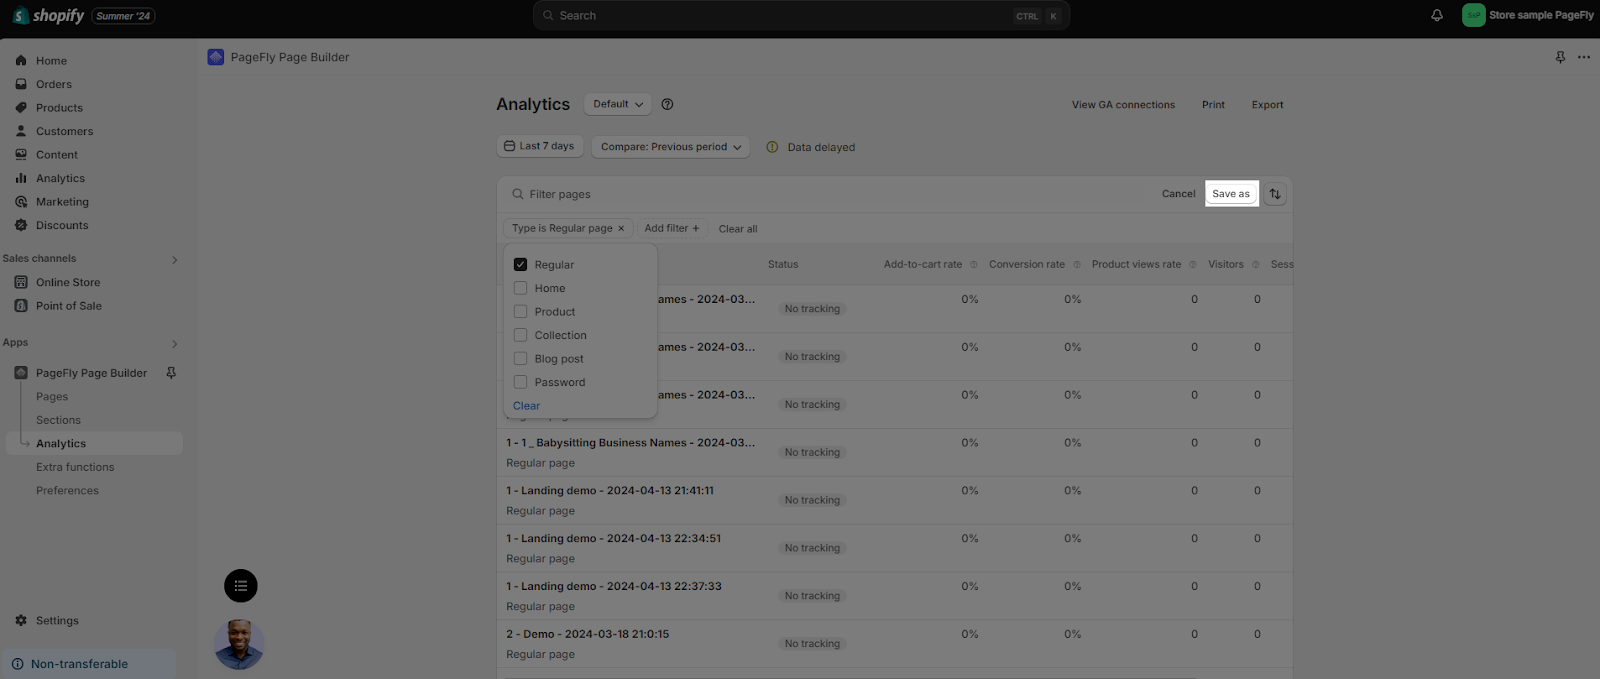
| Filter Features | To enable Filter features, please click on the magnify icon like the image below.
It will open a filter pages bar. You can also create a custom filter by clicking on “Add filter”. You can filter pages based on Type, Status and Metric.
To save your customer filter, please click on the “Save as” button.
|
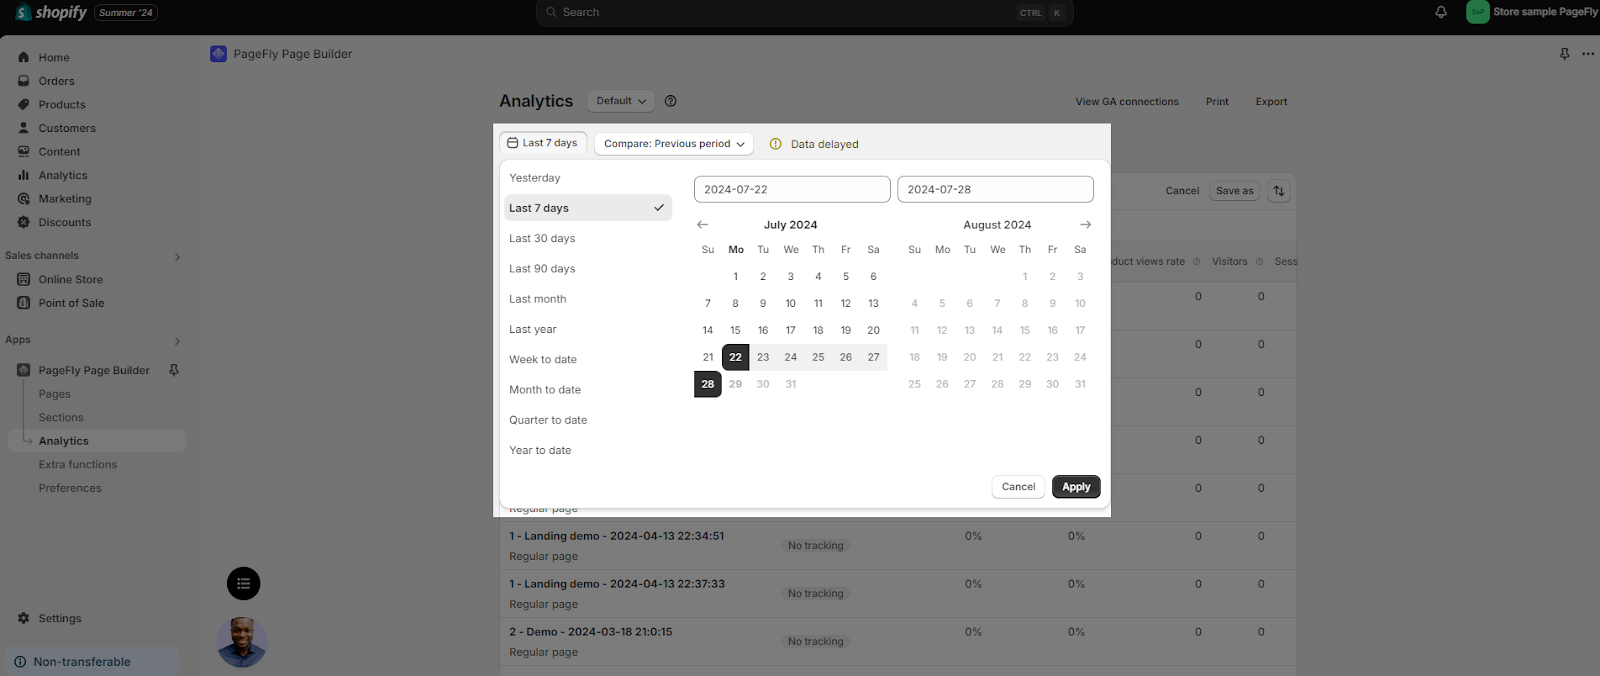
| Change date | You can view the data for different dates.
|
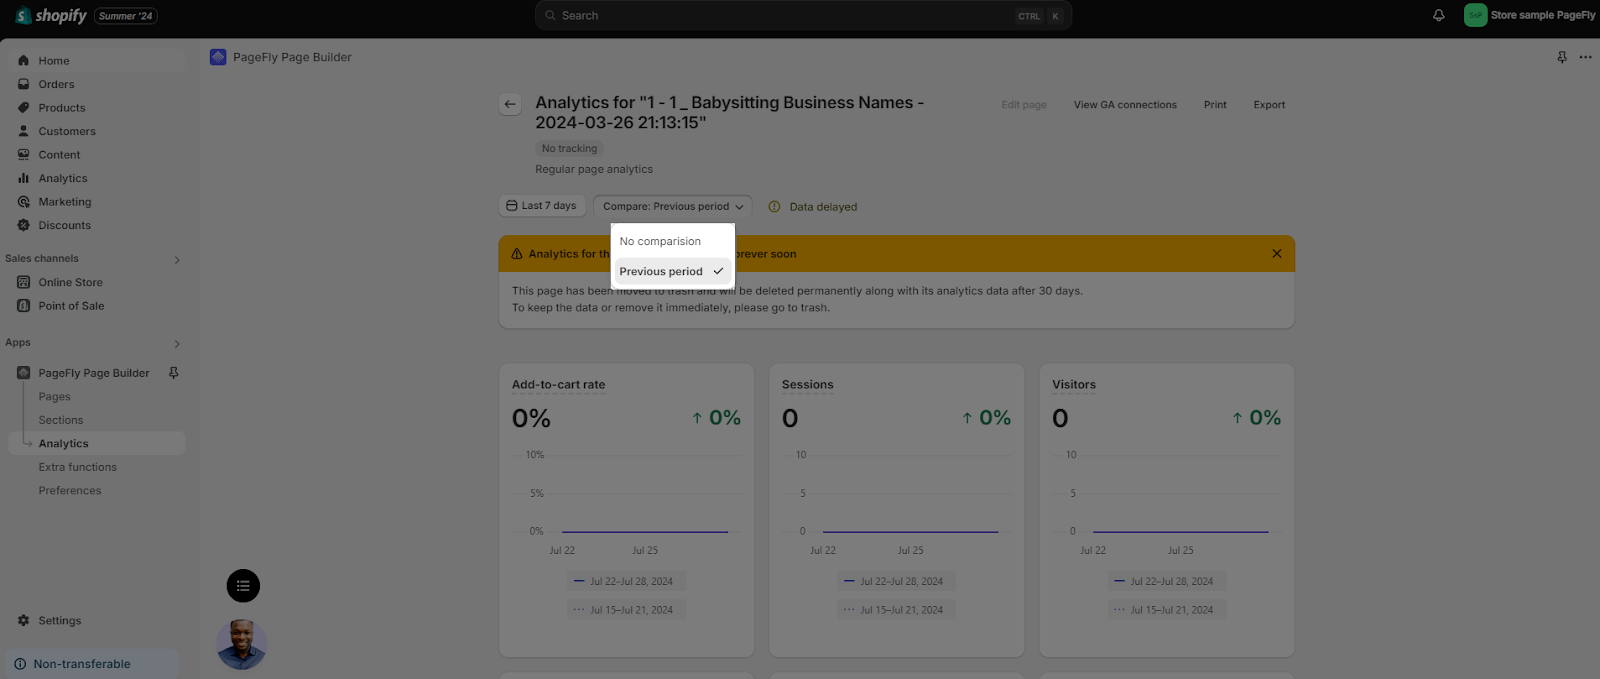
| Comparison | Select “Previous period” if you want to compare data with the same past period.
|
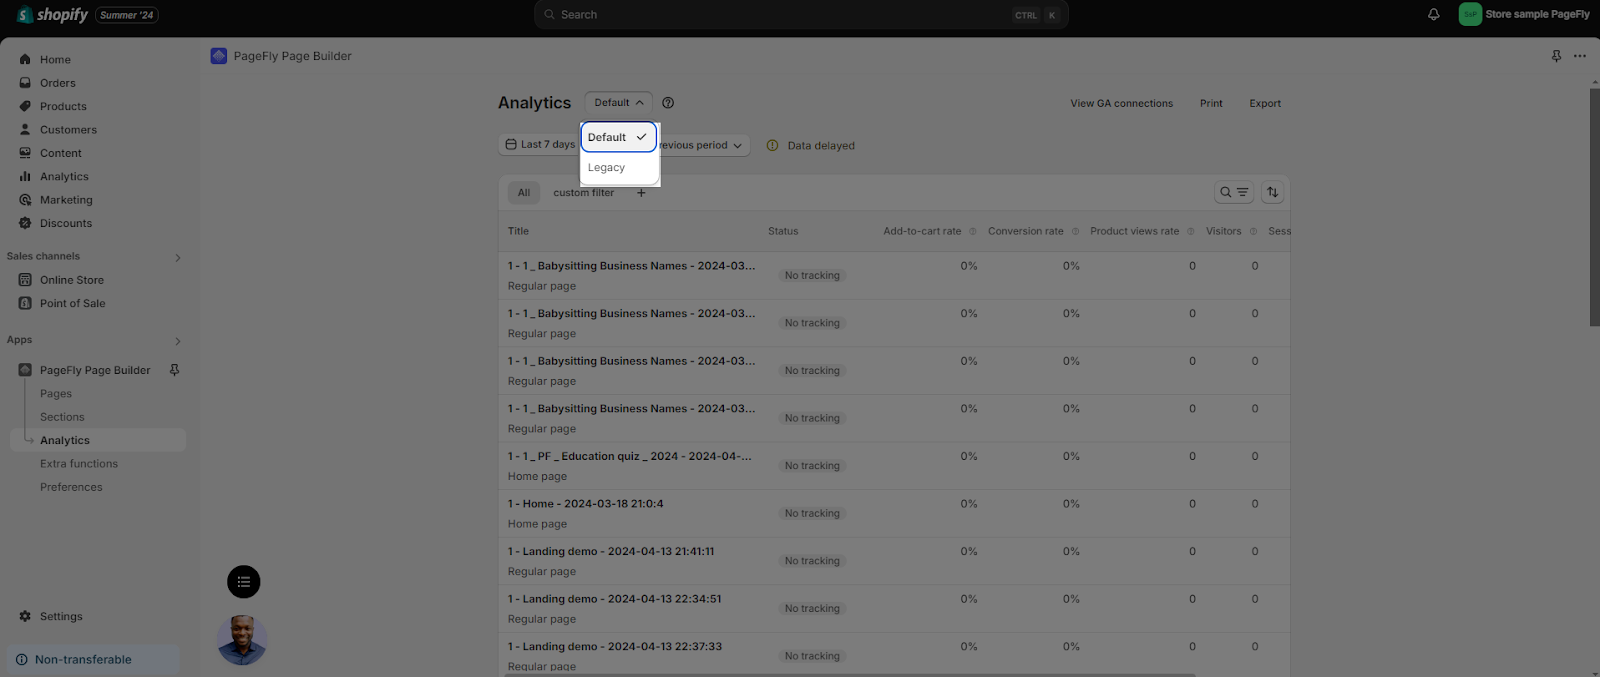
| Legacy View | The legacy view enables you to view your old data within the old version of PageFly (PageFly 3.0).
|
| View GA Connections | Click on “View GA Connections” to view your GA connection history.
|
| Print & Export |
|

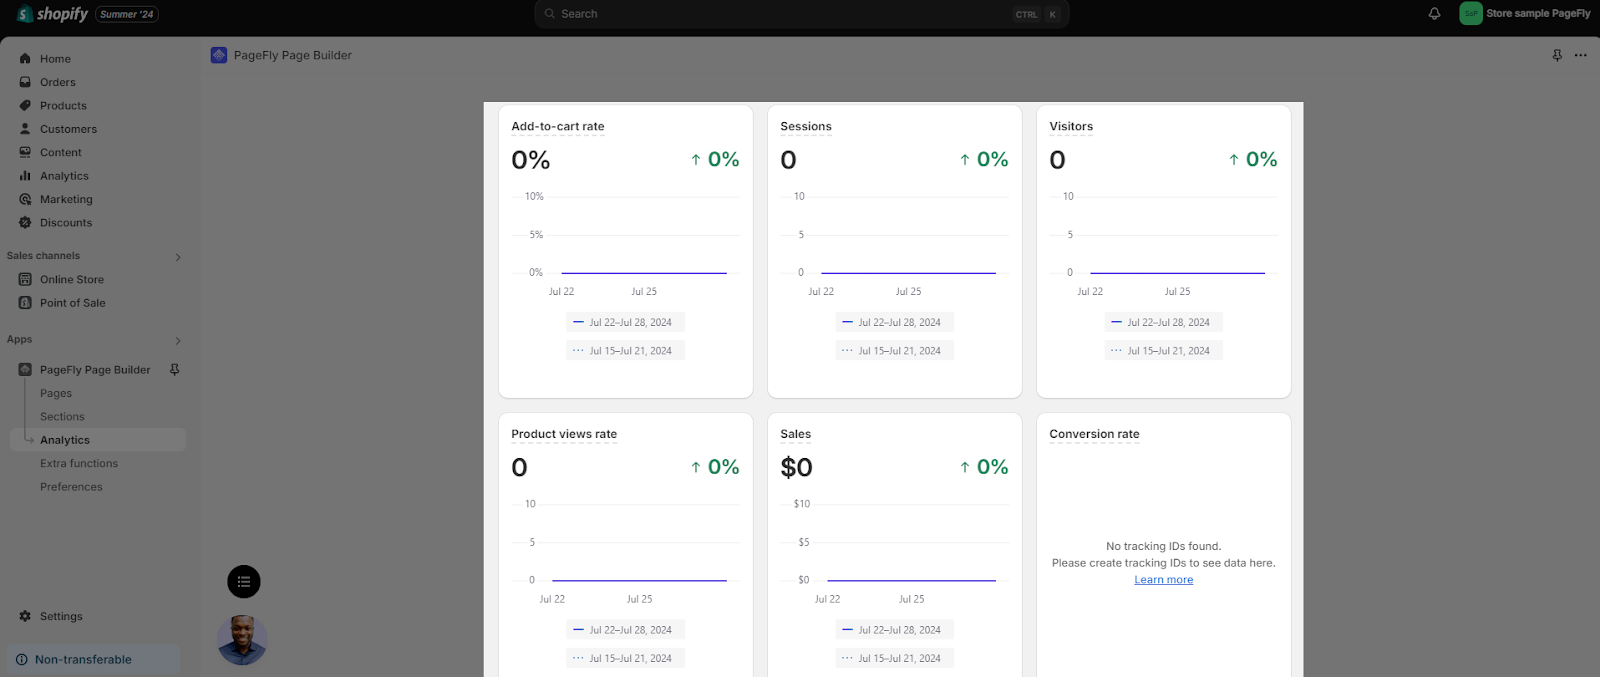
Step 3: Analyze Key Metrics
PageFly Analytics sends a custom event to your Google Analytics account whenever a customer clicks on trackable elements. Then PageFly calculates to define metrics, and the results are displayed in easy-to-understand charts on the Analytics dashboard.
PageFly provides 6 key metrics to analyze page’s performance as the demonstration below:
| 1. Add-to-cart rate: The percentage of sessions where a product is added to cart. | 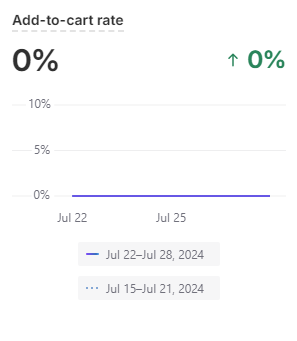 |
| 2. Sessions: The total number of sessions on a page. |  |
| 3. Visitors: The total number of unique visitors to a page. |   |
| 4. Product view rate: The number of times a specific product is viewed by visitors within a specified period. |  |
| 5. Sales: Total gross sales generated by a page. This number is calculated based on the product price from complete orders. |  |
| 6. Conversion rate: The percentage of sessions where visitors click on a trackable element from the page. | 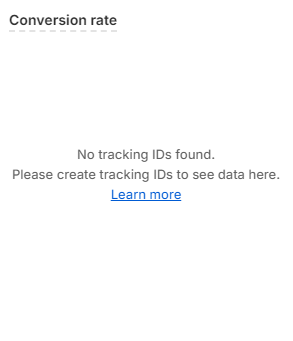 |
Common Case
Add A Tracking ID In The Page Editor
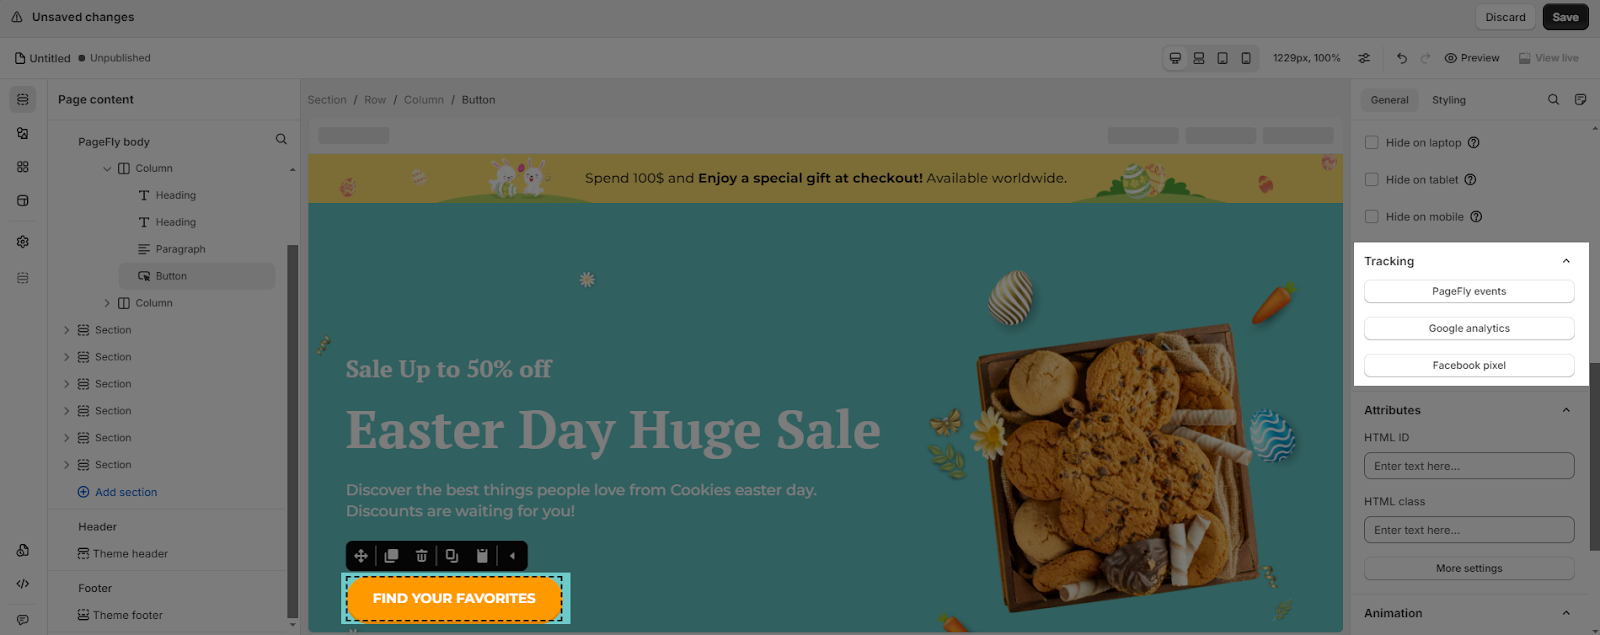
In the page editor, you can add a tracking ID for any elements. Each element should be given a different ID so PageFly can separately show the tracked data of that element.
You can set the tracking ID for PageFly Event in the editor by clicking on one element > go to the General tab > scroll down to Tracking > type any tracking ID that is good for you > Save and Publish.
On the Analytics page, it will show the percentage of conversion for that element in the name of the ID you have set before.
This percentage of conversion rate here is the average number of clicks over the number of visitors on the page.
Create An Account In Google Analytics 4 (GA4)
Here’s a tutorial to help you set up your account in Google Analytics 4
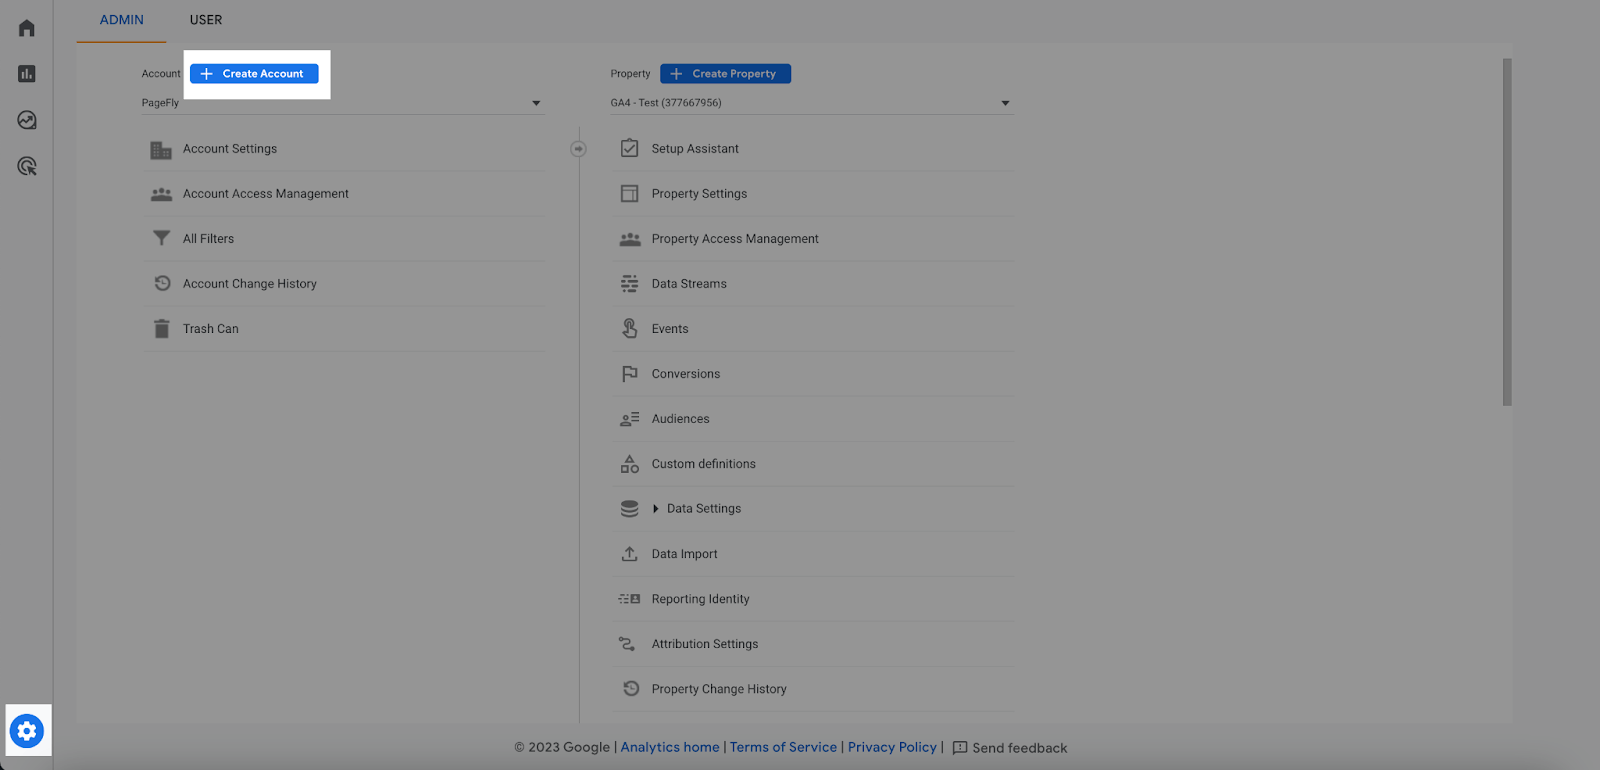
- Head over to Settings and hit the “Create Account” button
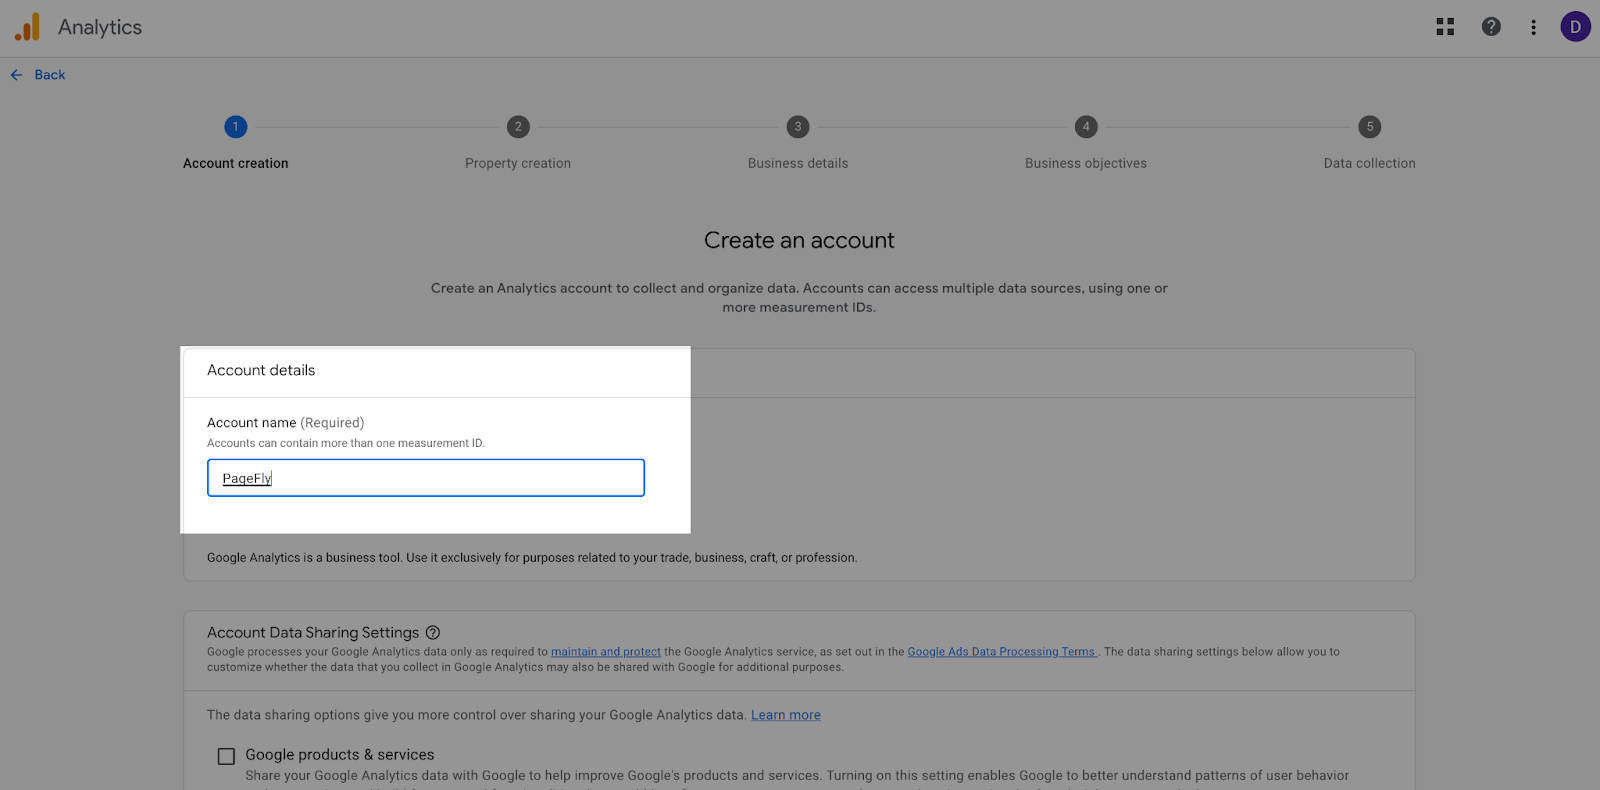
- Set up the account name that you want.
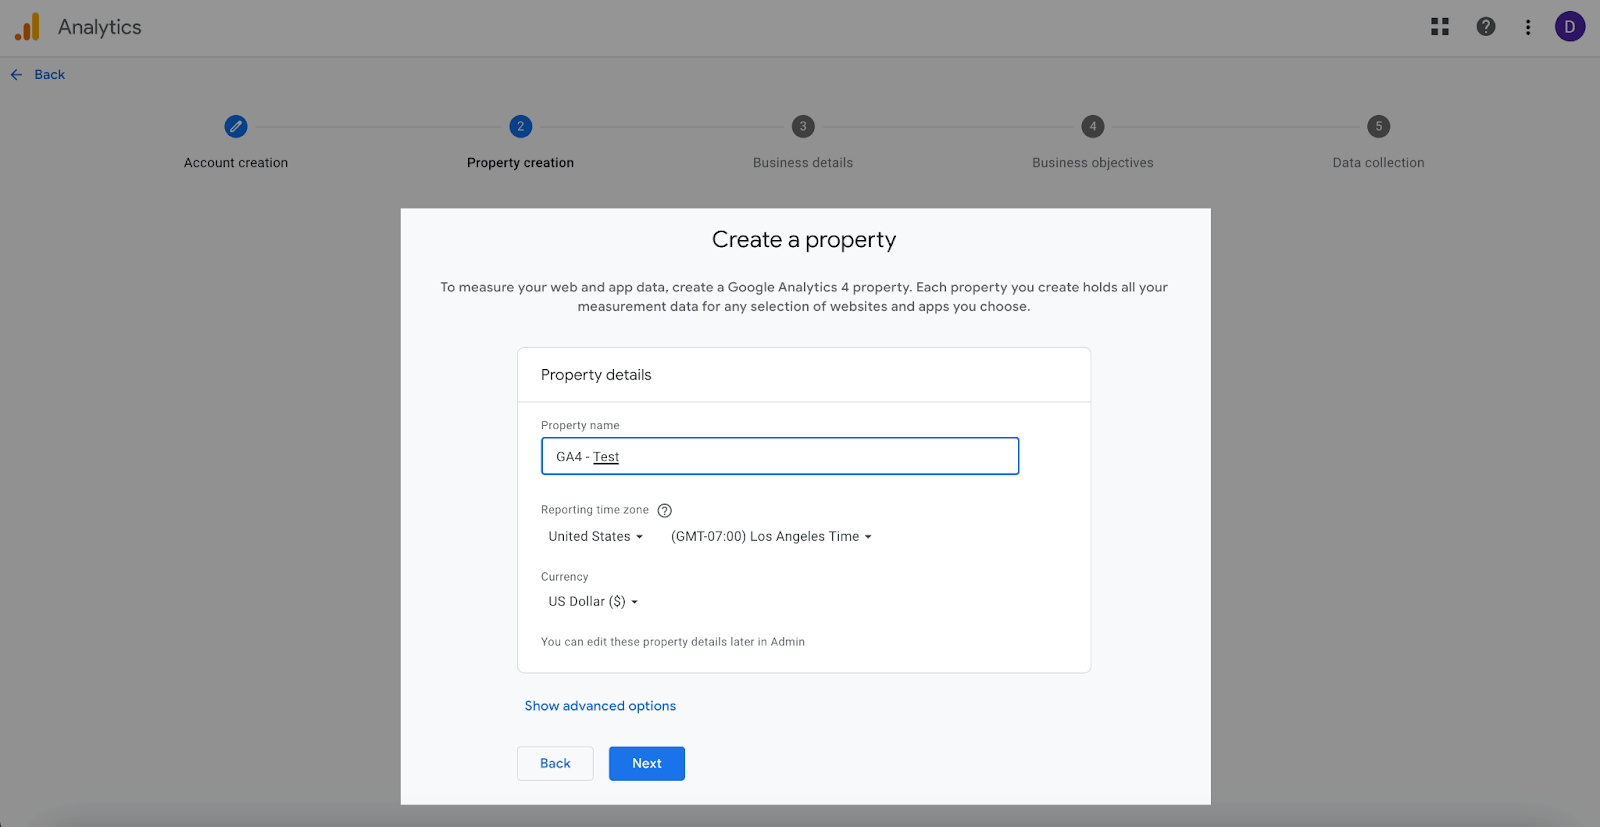
- Set up the Property Name and other options based on your preferences.
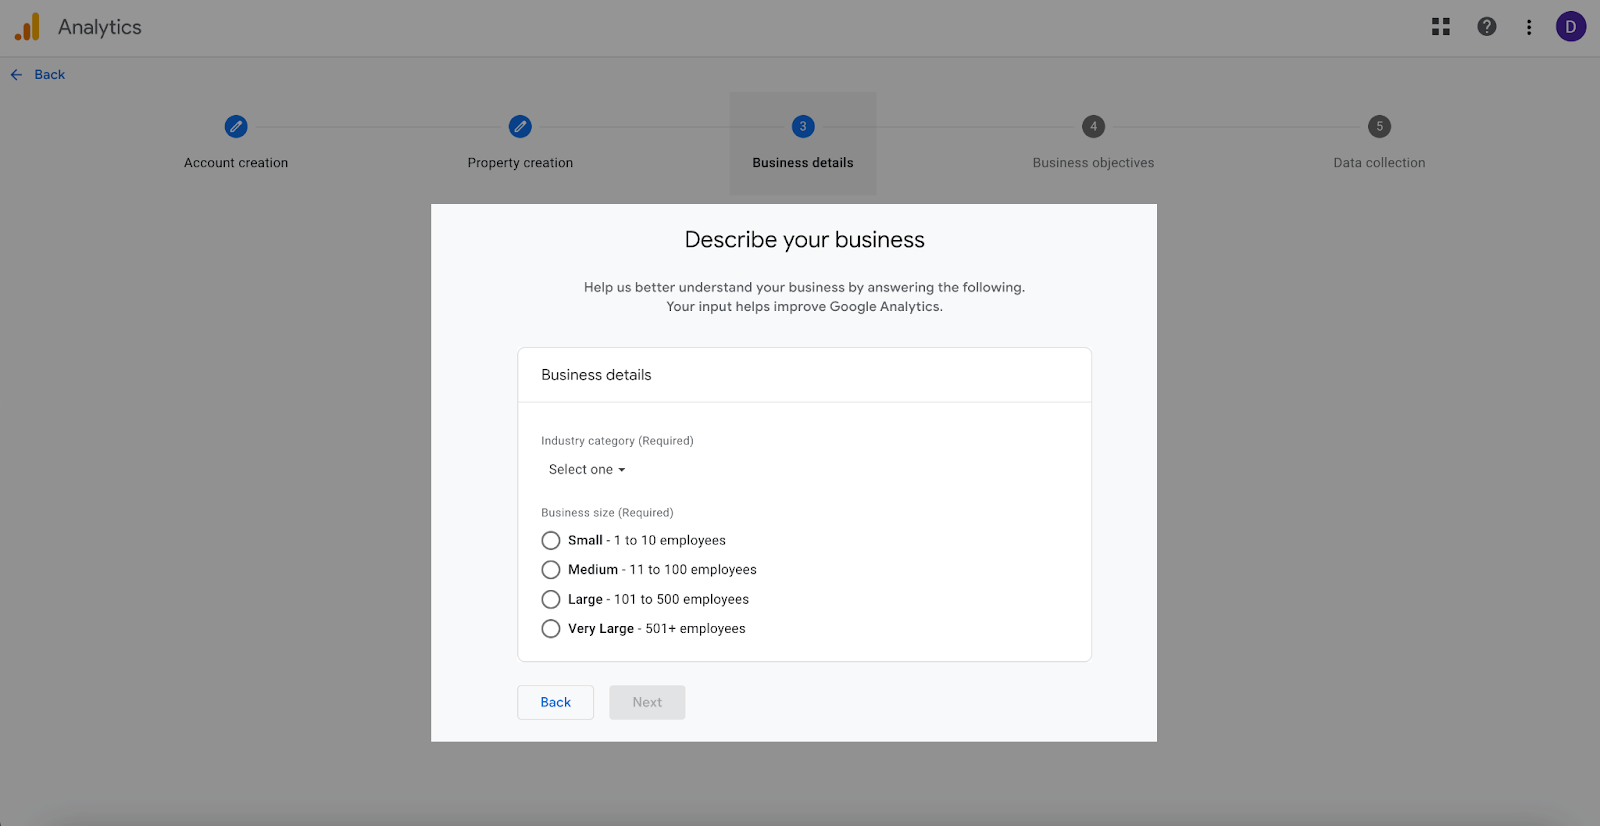
- Choose your business size
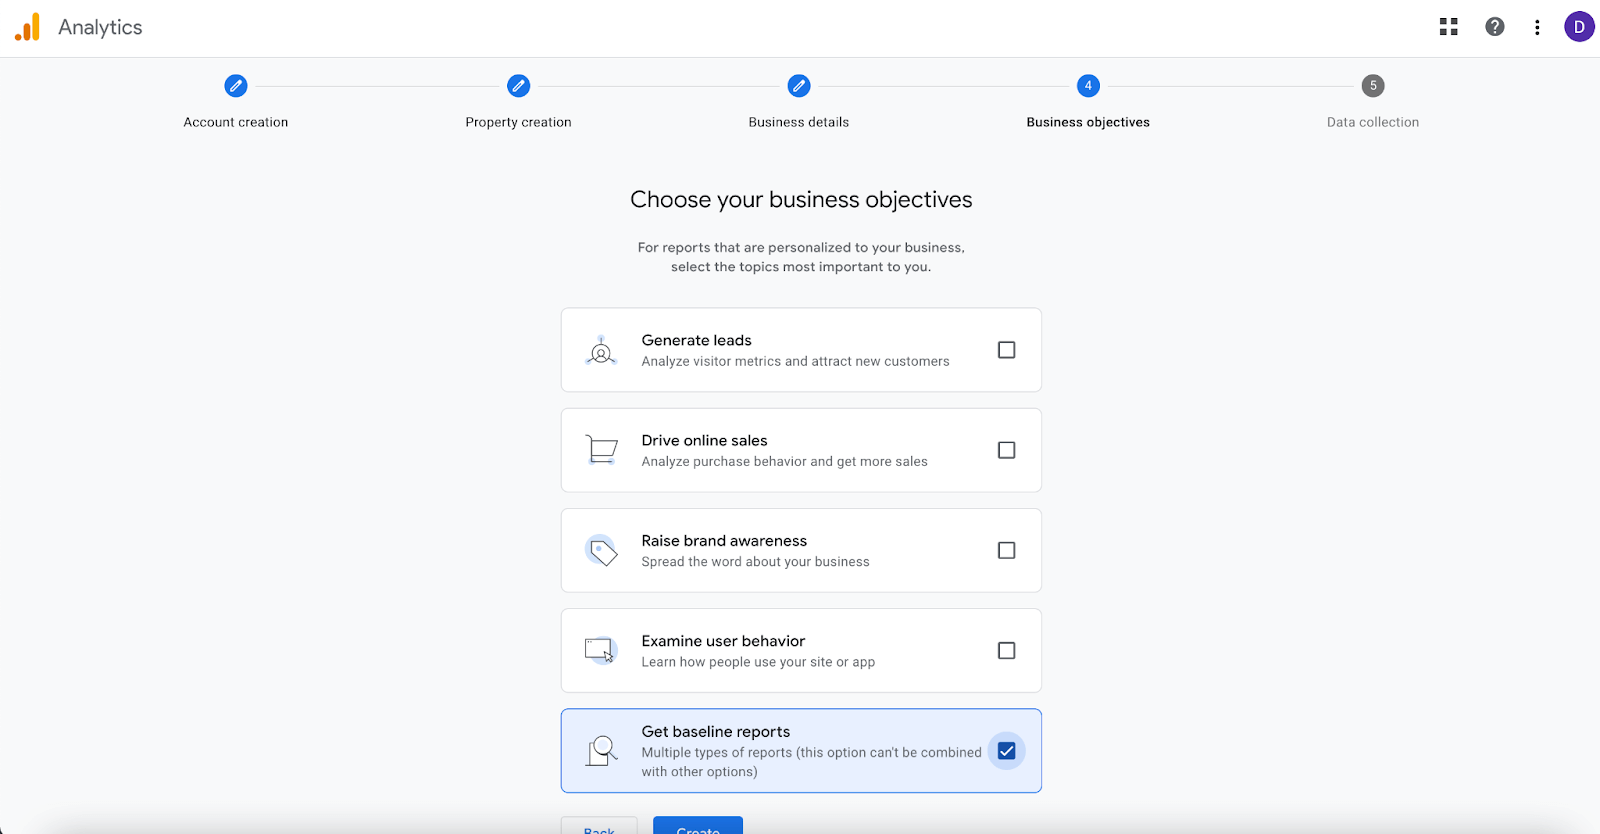
- Select the business objectives. “Get baseline reports” is recommended.
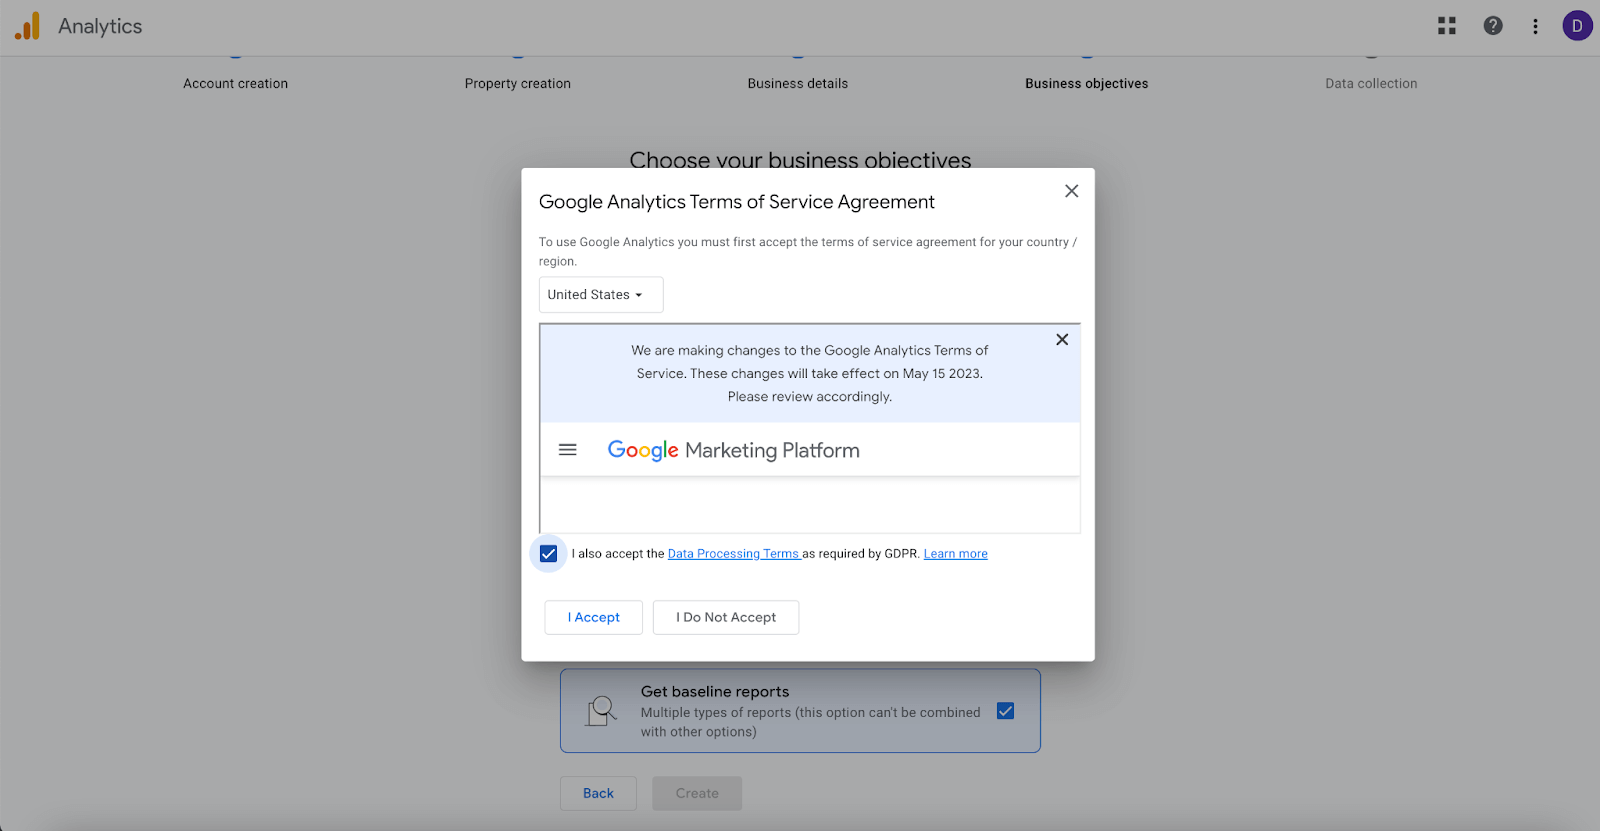
- Accept the terms.
- Select the option for the web platform.

- Enter your store URL name and set up the stream name.
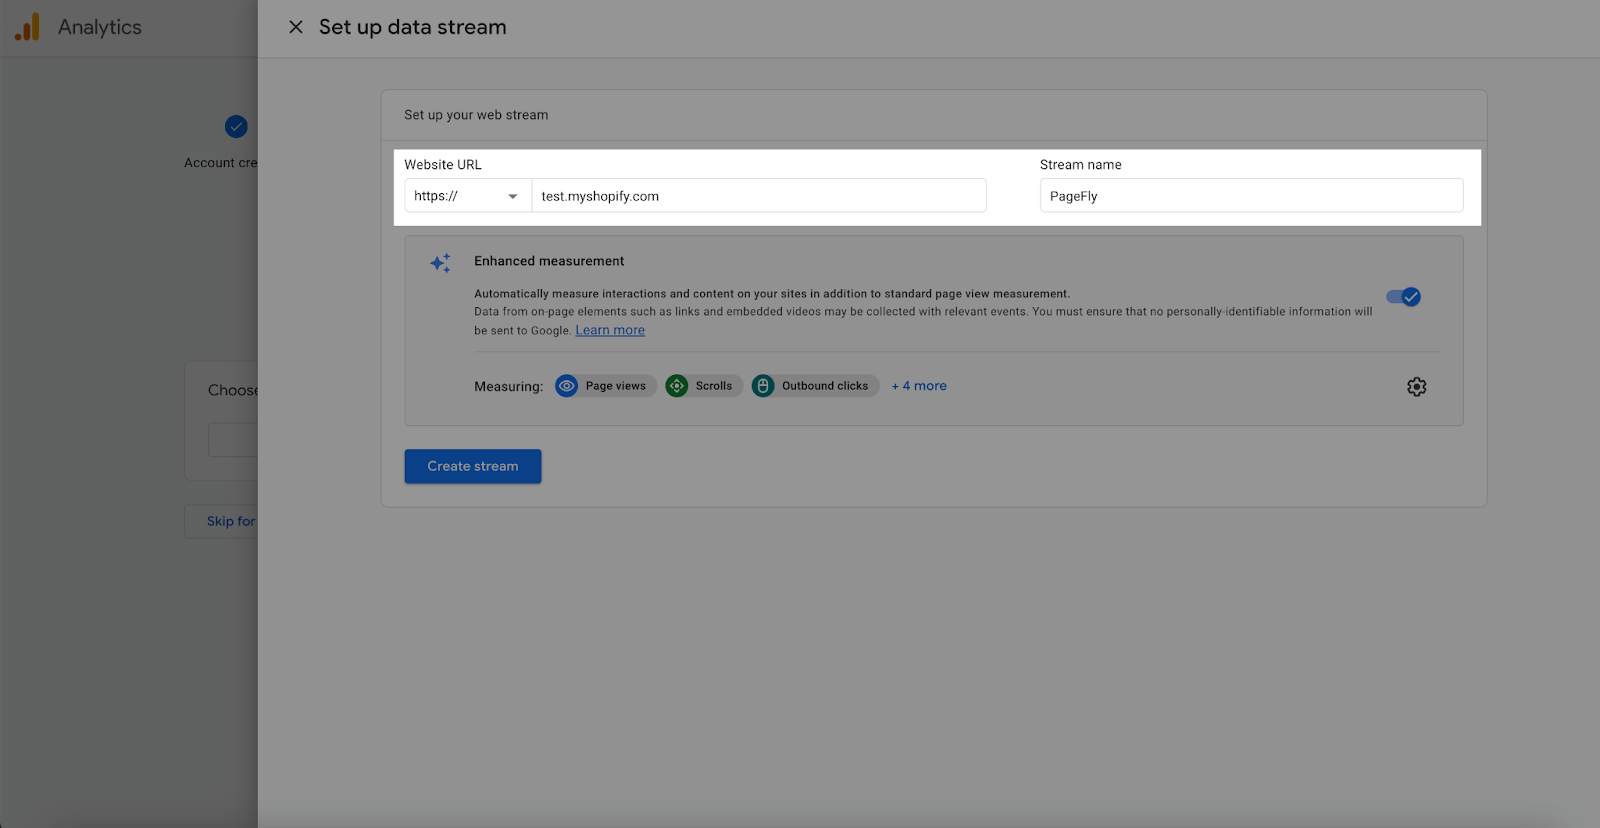
Hit the “Create stream” button and now you have completed the process.

And then click on the Review Term and then “I acknowledge” option.
Frequently Asked Questions
1. Why can’t I connect PageFly with Google Analytics?
If you see an error message when connecting to GA4, it means that the email address you are using does not have permission to create custom definitions in GA4. When you log in to GA4 from PageFly Analytics, PageFly will automatically create some custom dimensions and metrics on GA4. Dimensions are for page names, page types, etc., and metrics are for tracking add-to-carts, conversion rates, visitors, revenue, and sessions. To create these, your account must have permission to edit and create new custom definitions in the property.
If your account does not have this permission, please contact your GA4 administrators to request that they grant you this permission.
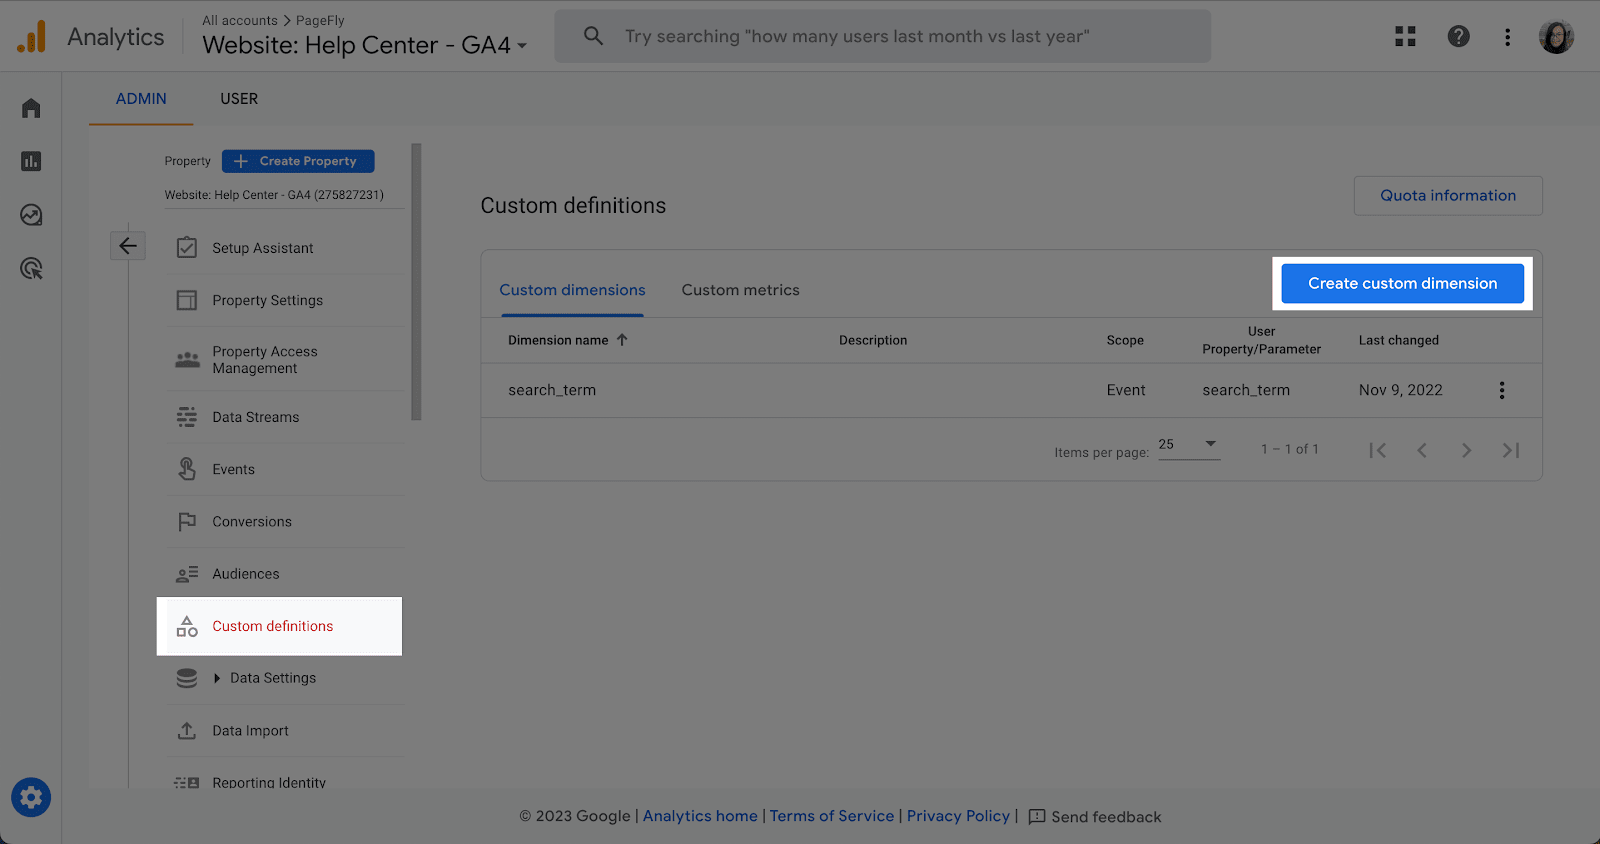
2. How can I tell if my account has permission?
To check if your account has permission to create custom definitions, go to GA4 > Admin > Custom Definitions. If you don’t see the Create Custom Dimensions button, as shown in the screenshot below, your account doesn’t have the permission:
3. Why do I see messages?
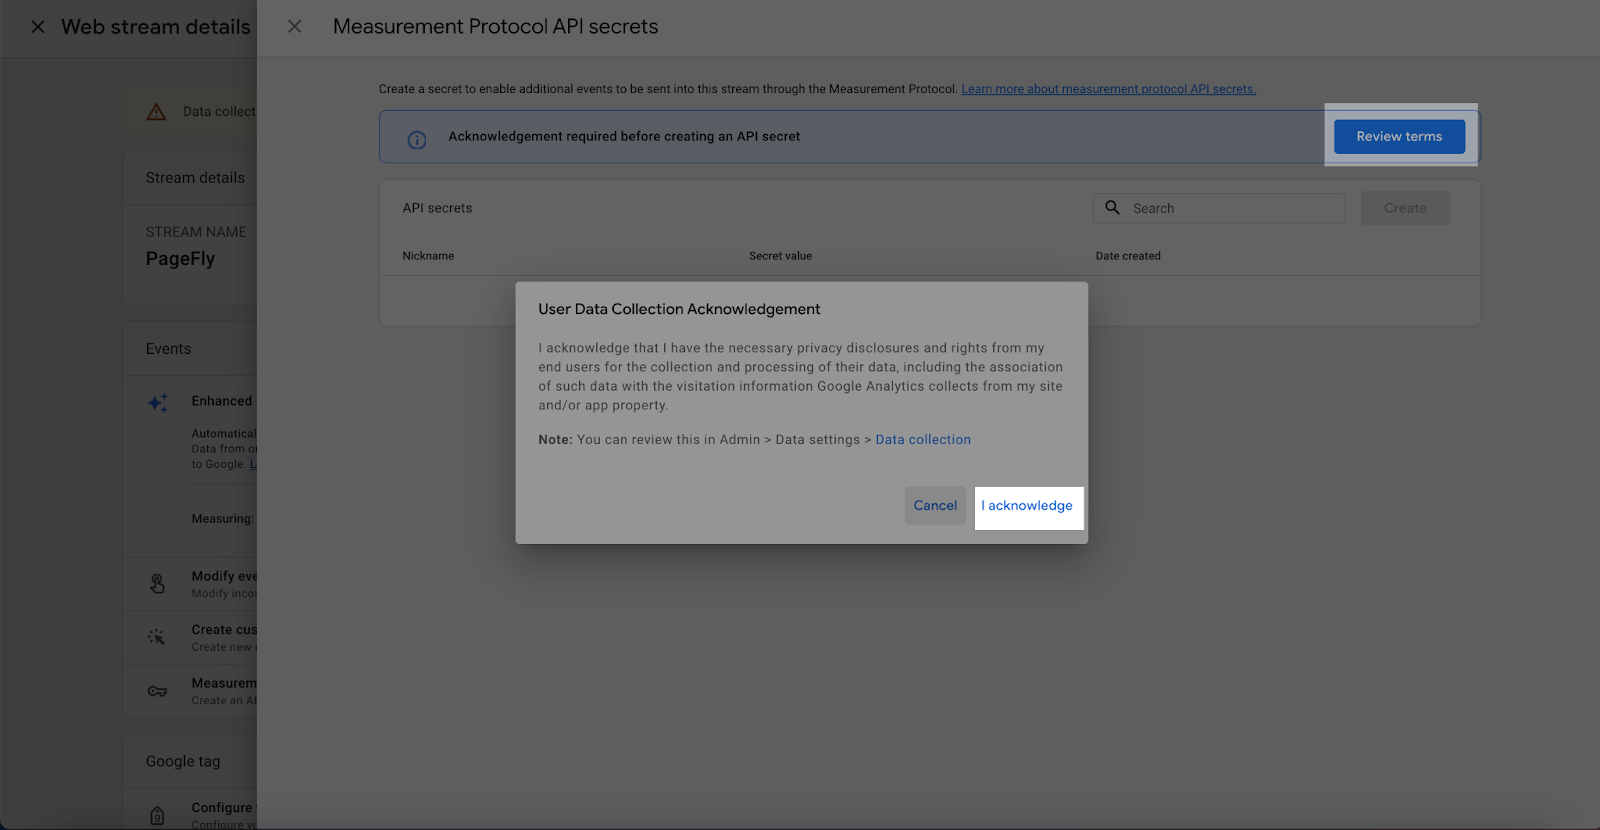
Why do I see the message “The User Data Collection Acknowledgement must be attested on this property” when logging in to Google Analytics 4 in PageFly?
If you see this message when logging in to Google Analytics 4 in PageFly, it means that you have not yet acknowledged the Google Analytics 4 User Data Collection Terms. To acknowledge these terms, you will need to click on the Review terms button and select the I acknowledge option.
To fix this, please follow these steps:
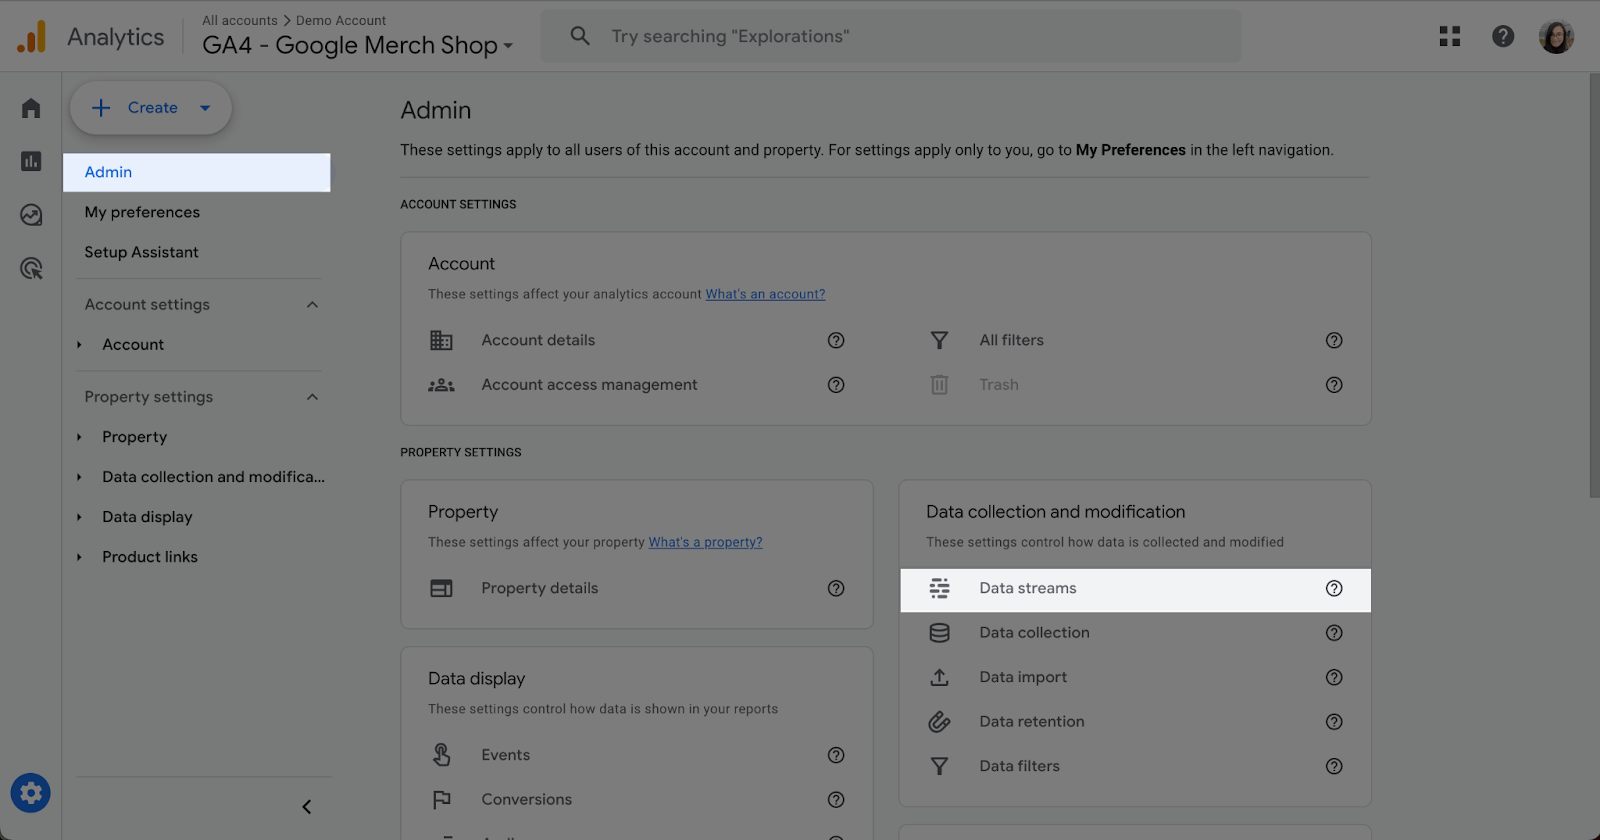
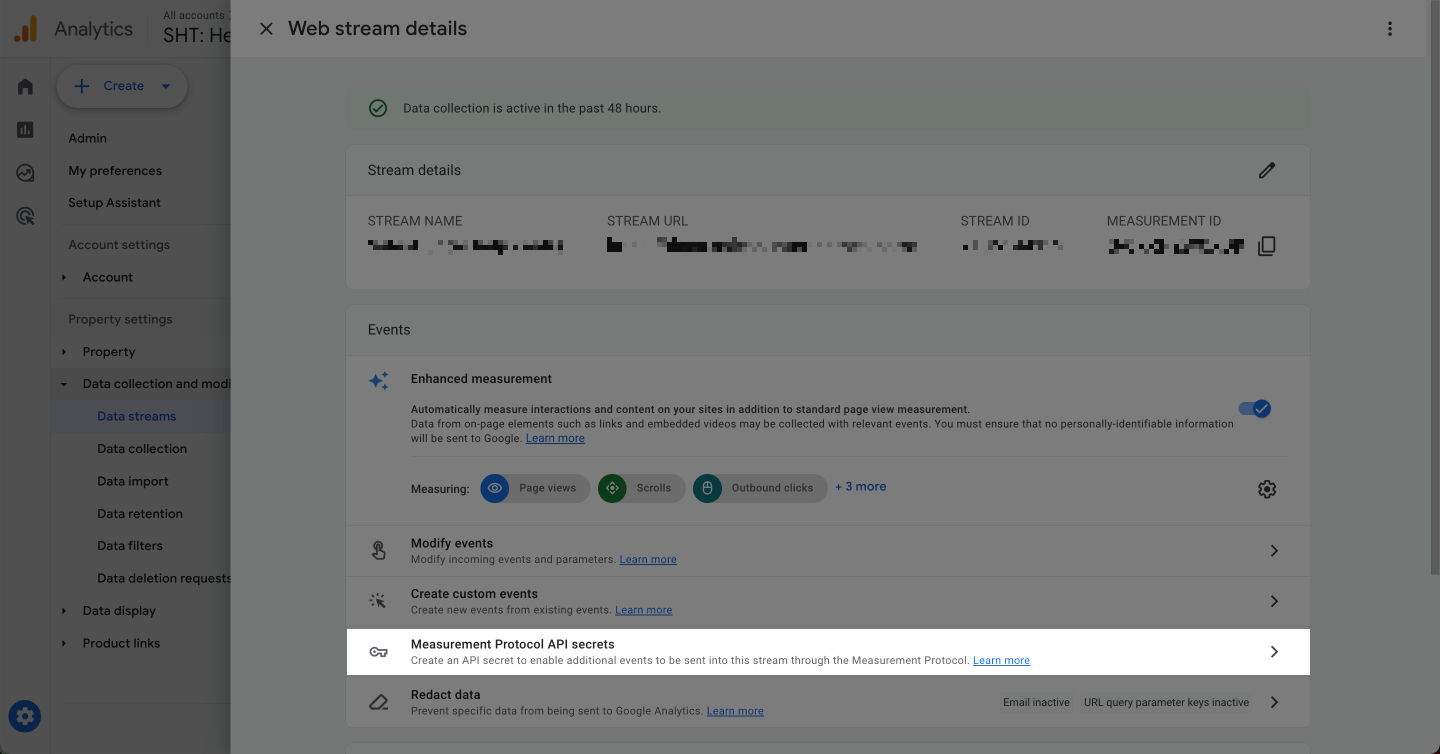
- Step 1: Access your GA4 account and go to Admin.

- Step 2: Click on “Data Streams” then click on the relevant stream.
- Step 3: Select “Measurement Protocol API Secrets”.
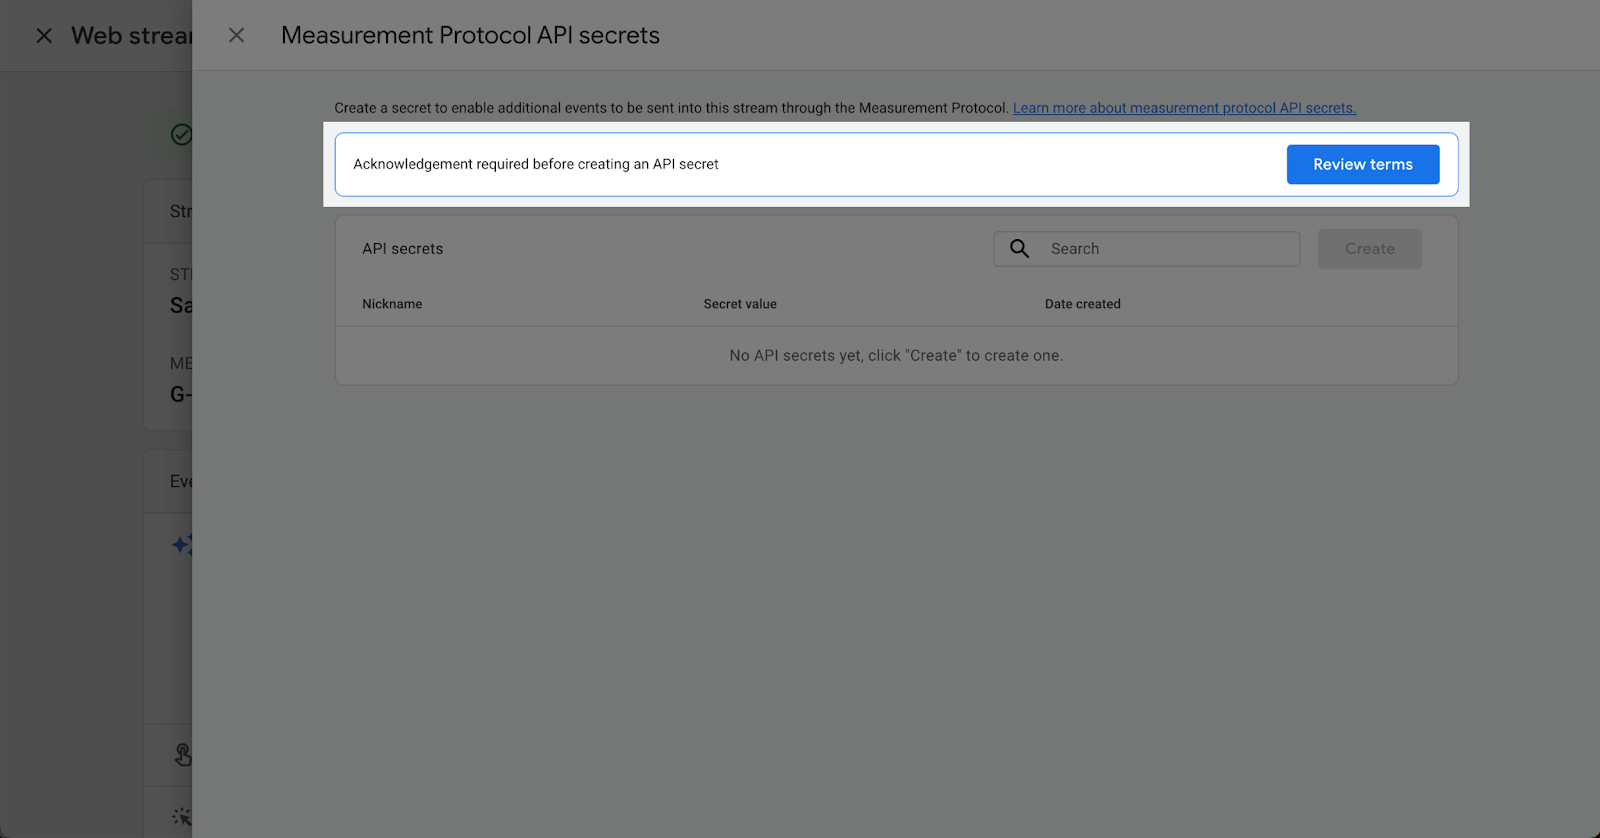
- Step 4: Click on the “Review Terms” button.
- Step 5: Choose the “I Acknowledge” option.
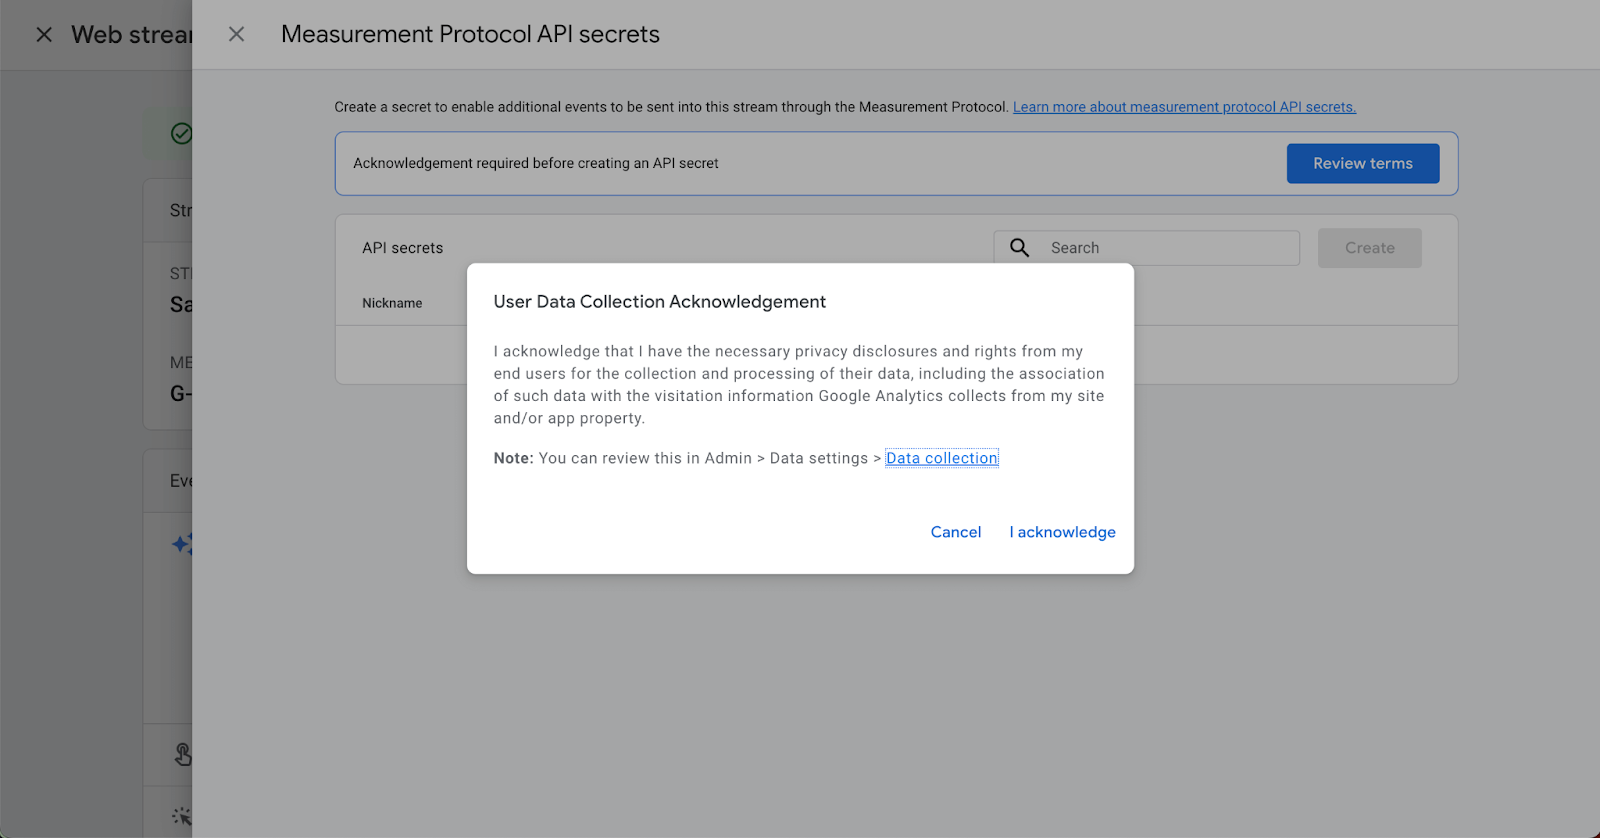
After you have acknowledged the terms, the message should no longer appear. If the issue persists or if you have any other questions, don’t hesitate to reach out for further assistance.
4. What metrics are measured by Page Analytics with PageFly?
In total, there are 6 key metrics, including Add-to-cart rate, Sessions, Visitors, Product view rate, Sales and Conversion rate.
5. Can I use GA3 to set up Page Analytics for PageFly Pages?
No, you can’t, as from July 2023, GA3 is no longer supported by Google Analytics.
6. Difference between GA3 and GA4?
GA3 focused on pageviews and sessions as ‘pure data‘, while GA4 aims to give a more overview picture of the customer journey, by collecting data from multiple sources including online and offline events, interactions with emails, data from Google Adverts and measurement methods working with Google.