1. About Setup Facebook Pixel Shopify

Facebook Pixel is an analytics tool that allows you to measure the effectiveness of your advertising by understanding the actions people take on your website. Therefore, Setup Facebook Pixel plays very important roles!
Therefore, Facebook Pixel plays an important roles to monitor your Shopify Store Performance.
You can read more about Facebook Pixel.
2. Setup Facebook Pixel on My Page
Before getting started, ensure you have:
- A Business Facebook page
- A Shopify online store that is not password protected
- Facebook Business Manager connected to your business’s Facebook page
- Administrator permissions
- A Facebook Ads account is set up and ready to go. If you haven’t done that yet, simply follow Facebook’s step-by-step guide, which can be found here.
If you have successfully setup Facebook Pixel on your account, skip Step 2.
2.1. Step 1: Setup Facebook Pixel
First, in Events Manager, go to Business Settings > Click Data Source > Select Pixels > Click More
![]()
![]()
Next, choose your pixel name > Click Continue > Set up pixel now > Add code using partner integrations
![]()
![]()
Then choose Shopify as a Partner.
![]()
![]()
Follow the 3-step process to successfully connect the Facebook Pixel to your Shopify account.
![]()
![]()
Once you’re all set, it’s time to add a Facebook Pixel ID to your Shopify store.
2.2. Step 2: Install Facebook Pixel to Your Store
Make sure you’re on the Events Manager page. Copy the unique pixel ID under your account’s name.
Go back to your Shopify Admin > Head to Online store > Preferences > Paste the Pixel ID into the Facebook Pixel section > Hit Save.
Voila! You’re all set to add a Facebook Pixel ID to your store.
2.3. Step 3: Add Facebook and Instagram App
- From Shopify Admin, go to Sales Channel > Preferences > On Facebook Pixel section, select Set up Facebook.
![]()
![]()
2. Click on Add sale channel.
![]()
![]()
3. Now, on the left sidebar, you’ll see a new sale channel which is Facebook & Instagram.
![]()
![]()
3. Configuration
3.1. General settings
Now hop on over to the page you want to set up tracking.
The Tracking option for Facebook Pixel is available in 12 elements including:
- Heading
- Button
- Image
- MailChimp Form
- Product List
- Product Image
- Product Title
- Product Add to cart
- Product View Details
- Collection Image
- Collection Title
- Collection View Details
There are 10 event types you can choose from, which are:
- Search
- View Content
- Add To Cart
- Add To Wishlist
- Initiate Checkout
- Add Payment Info
- Purchase
- Lead
- Complete Registration
- Custom Event
![]()
![]()
Once you choose an event type, the event code will be generated automatically.
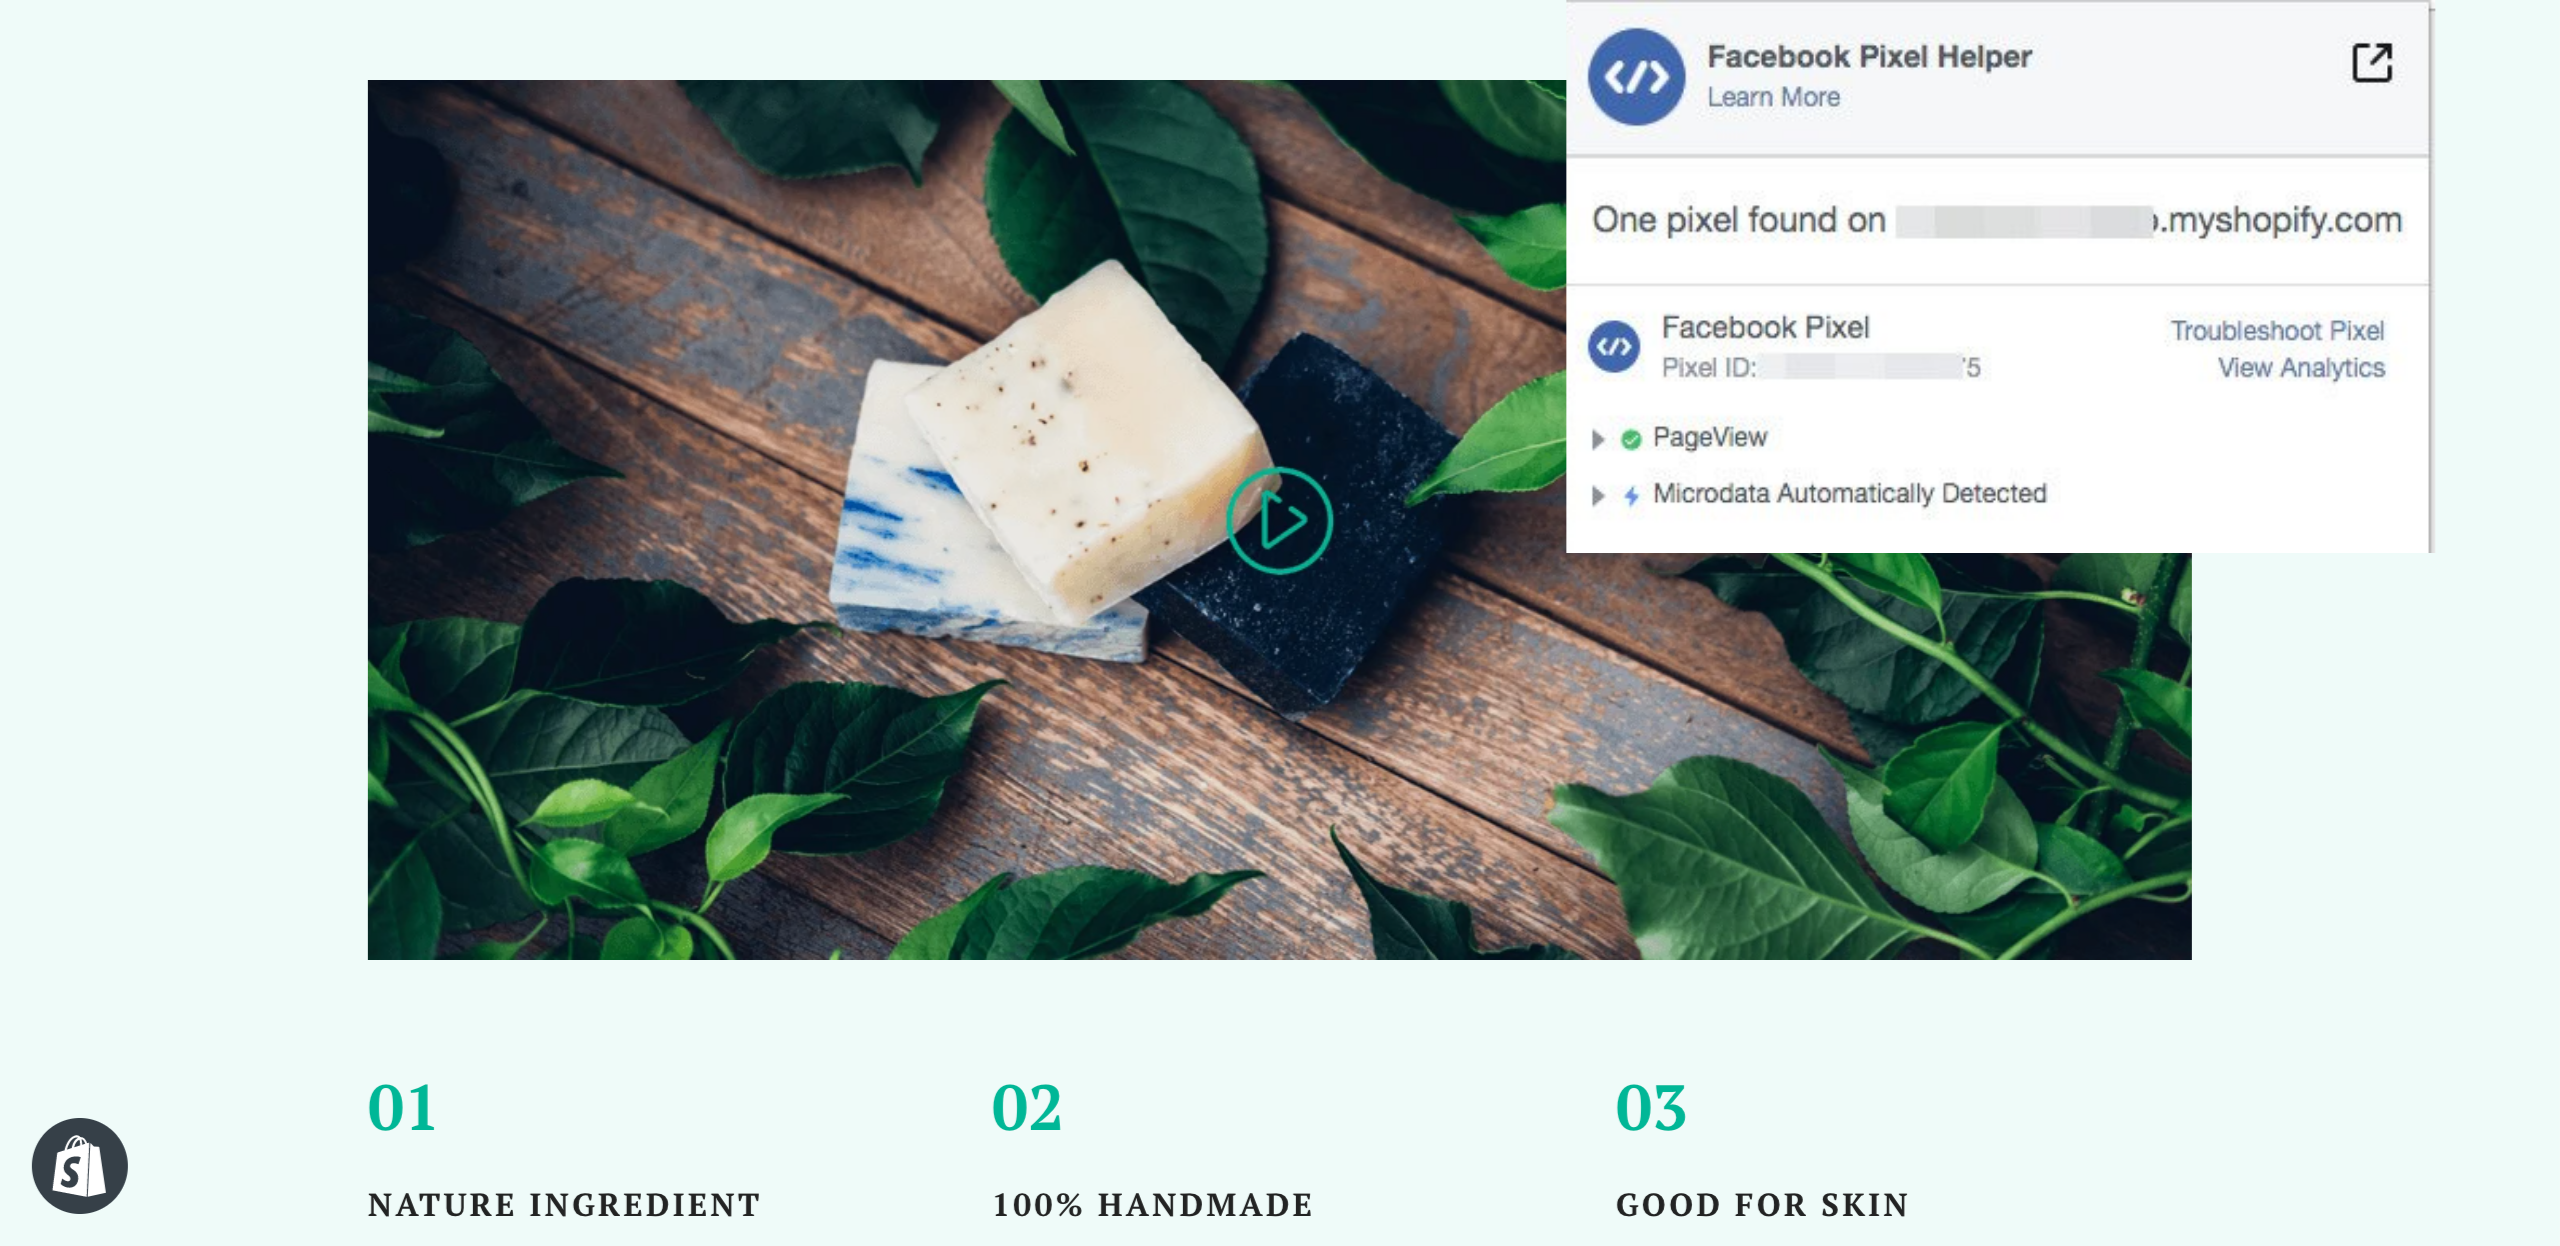
To validate your pixel implementation, install the Pixel Helper Google Chrome extension. When clicked, a panel will expand to show a detailed overview of the page’s pixels, including warnings, errors, and successes.
3.2. Check Facebook Pixel Event Tracking
In Business Manger, select All Tools on the left sidebar > Choose Ads Manager.
![]()
![]()
Go to Ad Group tab > Click on column icon > Select Customize Columns.
![]()
![]()
Switch your view to Conversions > Scroll down to select the type of pixel that you are using > Hit Apply.
![]()
![]()
Select the menu again > Choose Events Manager. You will see the result of your pixel.
You can watch this video for more details:
How to Set up Facebook Pixel in Shopify store using PageFly #1 Shopify Page Builder
4. Special Notes
Below you’ll find the most frequently asked questions related to setting up the Facebook Pixel on your pages.
4.1. How to fire a specific Facebook event when PageFly page is loaded?
Step 1: Head to the Editor
Step 2: Insert the code below into the Custom Javascript option
window.trekkie.load = function(){
fbq(‘track’, ‘ViewContent’);
}
window.addEventListener(‘load’, function() {
fbq(‘track’, ‘ViewContent’);
});
![]()
![]()
Step 3: Click Save change and Publish the page
Step 4: Check the result with the Facebook Pixel Helper
![]()
![]()
4.1.1. Tips
If you want to send additional objectives to the Facebook event, for example, “content_name” and “content_type” please use the following code:
window.trekkie.load = function(){
fbq(‘track’, ‘ViewContent’,{content_name: ‘Bearie Backpack’,content_type: ‘product’});
}
window.addEventListener(‘load’, function() {
fbq(‘track’, ‘ViewContent’,{content_name: ‘Bearie Backpack’,content_type: ‘product’});
});
For example, Facebook ViewContent supports the following objectives: content_ids, content_category, content_name, content_type, contents, currency, value.
Check the result with Facebook Pixel Helper. As you can see there are custom parameters sent including content_type and content_name.
![]()
![]()
4.2. How to fire the Facebook Pixel when the user scrolls a specific section?
Step 1: Name your section.
In our example, it’s “countdown”.
![]()
![]()
Step 2: Add custom Javascript code.
Two things you need to pay attention to.
Firstly, the jQuery function trigger the section ID with the name “countdown”.
Secondly, for our example, we send Facebook Pixel “ViewContent” without any objects.
Step 3: Check the result
As you can see the section that we assigned a unique ID is called “countdown”, and after scrolling that part the Facebook pixel has been fired.
![]()
![]()
4.3. How to fire multiple Facebook Pixels on the same page?
Inside the Customer Javascript settings please include code below:
Please keep in mind to replace “YOUR PIXEL ID” with your unique ID number. You can copy the code here.
![]()
![]()
As a result you should see two pixels fired on the page load.
![]()
![]()
5. Common Issues with Facebook Pixel
5.1. Error Messages
Error message: “AddToCart Event missing some deduplication parameters” or “Purchase Event missing some deduplication parameters”
Reason: You have not successfully set up Facebook Pixel for your store.
Solution: Please refer to the 3 setup steps above to check again if you missed anything.
5.2. Facebook can not track purchases through ‘Shopify Thank you Page’
Solution:
- Step 1: Check if Facebook Pixel is completely set up in Online Store > Preferences. Refer to the steps above. Next, check to make sure your Facebook Pixel tracking app is working properly.
- Step 2: Check if Facebook Pixel is set up with Product Add to Cart, not the Button element.
- Step 3: Check if the Header and Footer are turned on.
5.3. Facebook is double tracking one event
Reason: You manually added an event for your PageFly page, while your Theme automatically fired the event before.
Check to see if it’s a product page built with PageFly or not.
Then, if you get the Theme from Themes Marketplace (themes.shopify.com), the reason may be that Facebook Pixel is already fired with Add to Cart. It leads to double tracking when you manually fired Facebook Pixel again with PageFly.Solution: Assign to None for your element you fired manually with PageFly
![]()
![]()
5.4. Sudden Disabled Facebook Tracking
Reason: Set up Facebook Pixel NOT in Online Store, but with manual code injection or within theme.liquid file.
Solution: Check the manual code or theme again.liquid file. Try to delete the manual code or restore Older versions of theme.liquid file > set up Facebook Pixel in Online Store > Preferences instead.
You may want to know how to Restore Older Versions of theme.liquid file:
![]()
![]()
For other problems that are not listed above, the suggested solution is that please ensure you are ONLY firing Facebook Pixel properly by Online Store > Preferences, NOT by any other ways. Make sure the Facebook Pixel tracking app is working.
For more details about Facebook Pixel Advanced, check this article.
If you have any questions feel free to submit a ticket and our Customer Support team will get back to you ASAP.
6. Frequently Asked Questions
6.1. What is Facebook Pixel?
Facebook pixel is a piece of code, that should be embedded into your website (In this case, your Shopify Store), to measure, optimize and build audiences, with data collected from advertising campaigns.
6.2. Where to find Facebook Pixel?
It’s under ‘Business Settings’ > ‘Data Sources’ > ‘Pixel’, in MetaSuites. Check out this article.
6.3. What are the different types of Facebook pixels?
Three main types include standard events, custom conversions, and custom events.